ラズパイPico でNeoPixelのLEDを光らせよう
NeoPixelの説明
NeoPixel は WS2811 と言うマイコンで制御された、フルカラーのLEDです。
電源のプラス、マイナスと信号線の3本で、制御します。
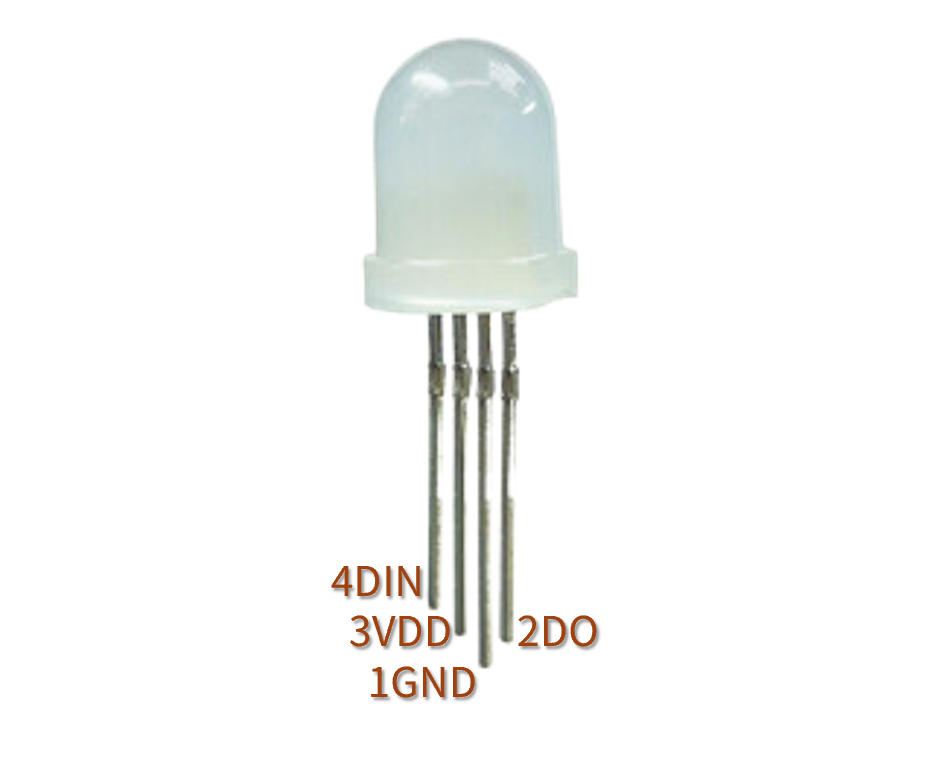
さらに、複数個 NeoPixelを接続できるように、信号線の出力があり、合計4本の足が出ています。

4本の足はそれぞれ、左から3番目が1番長い足となるようにして、左から「4 DIN:入力」、「3 VDD:+(プラス)」、「1 GND:-(マイナス)」、「2 DO:出力」です。
NeoPixel が1個の場合は、「2 DO:出力」は使いません。複数個 NeoPixel をつないだときは、「2 DO:出力」を、次の NeoPixelの「4 DIN:入力」につなぎます。
こちらも参考にしてください:
マイコン内蔵RGBLED 5mm PL9823-F5:
https://akizukidenshi.com/catalog/g/g108411/
マイコン内蔵RGBLED 8mm PL9823-F8:
https://akizukidenshi.com/catalog/g/g108412/
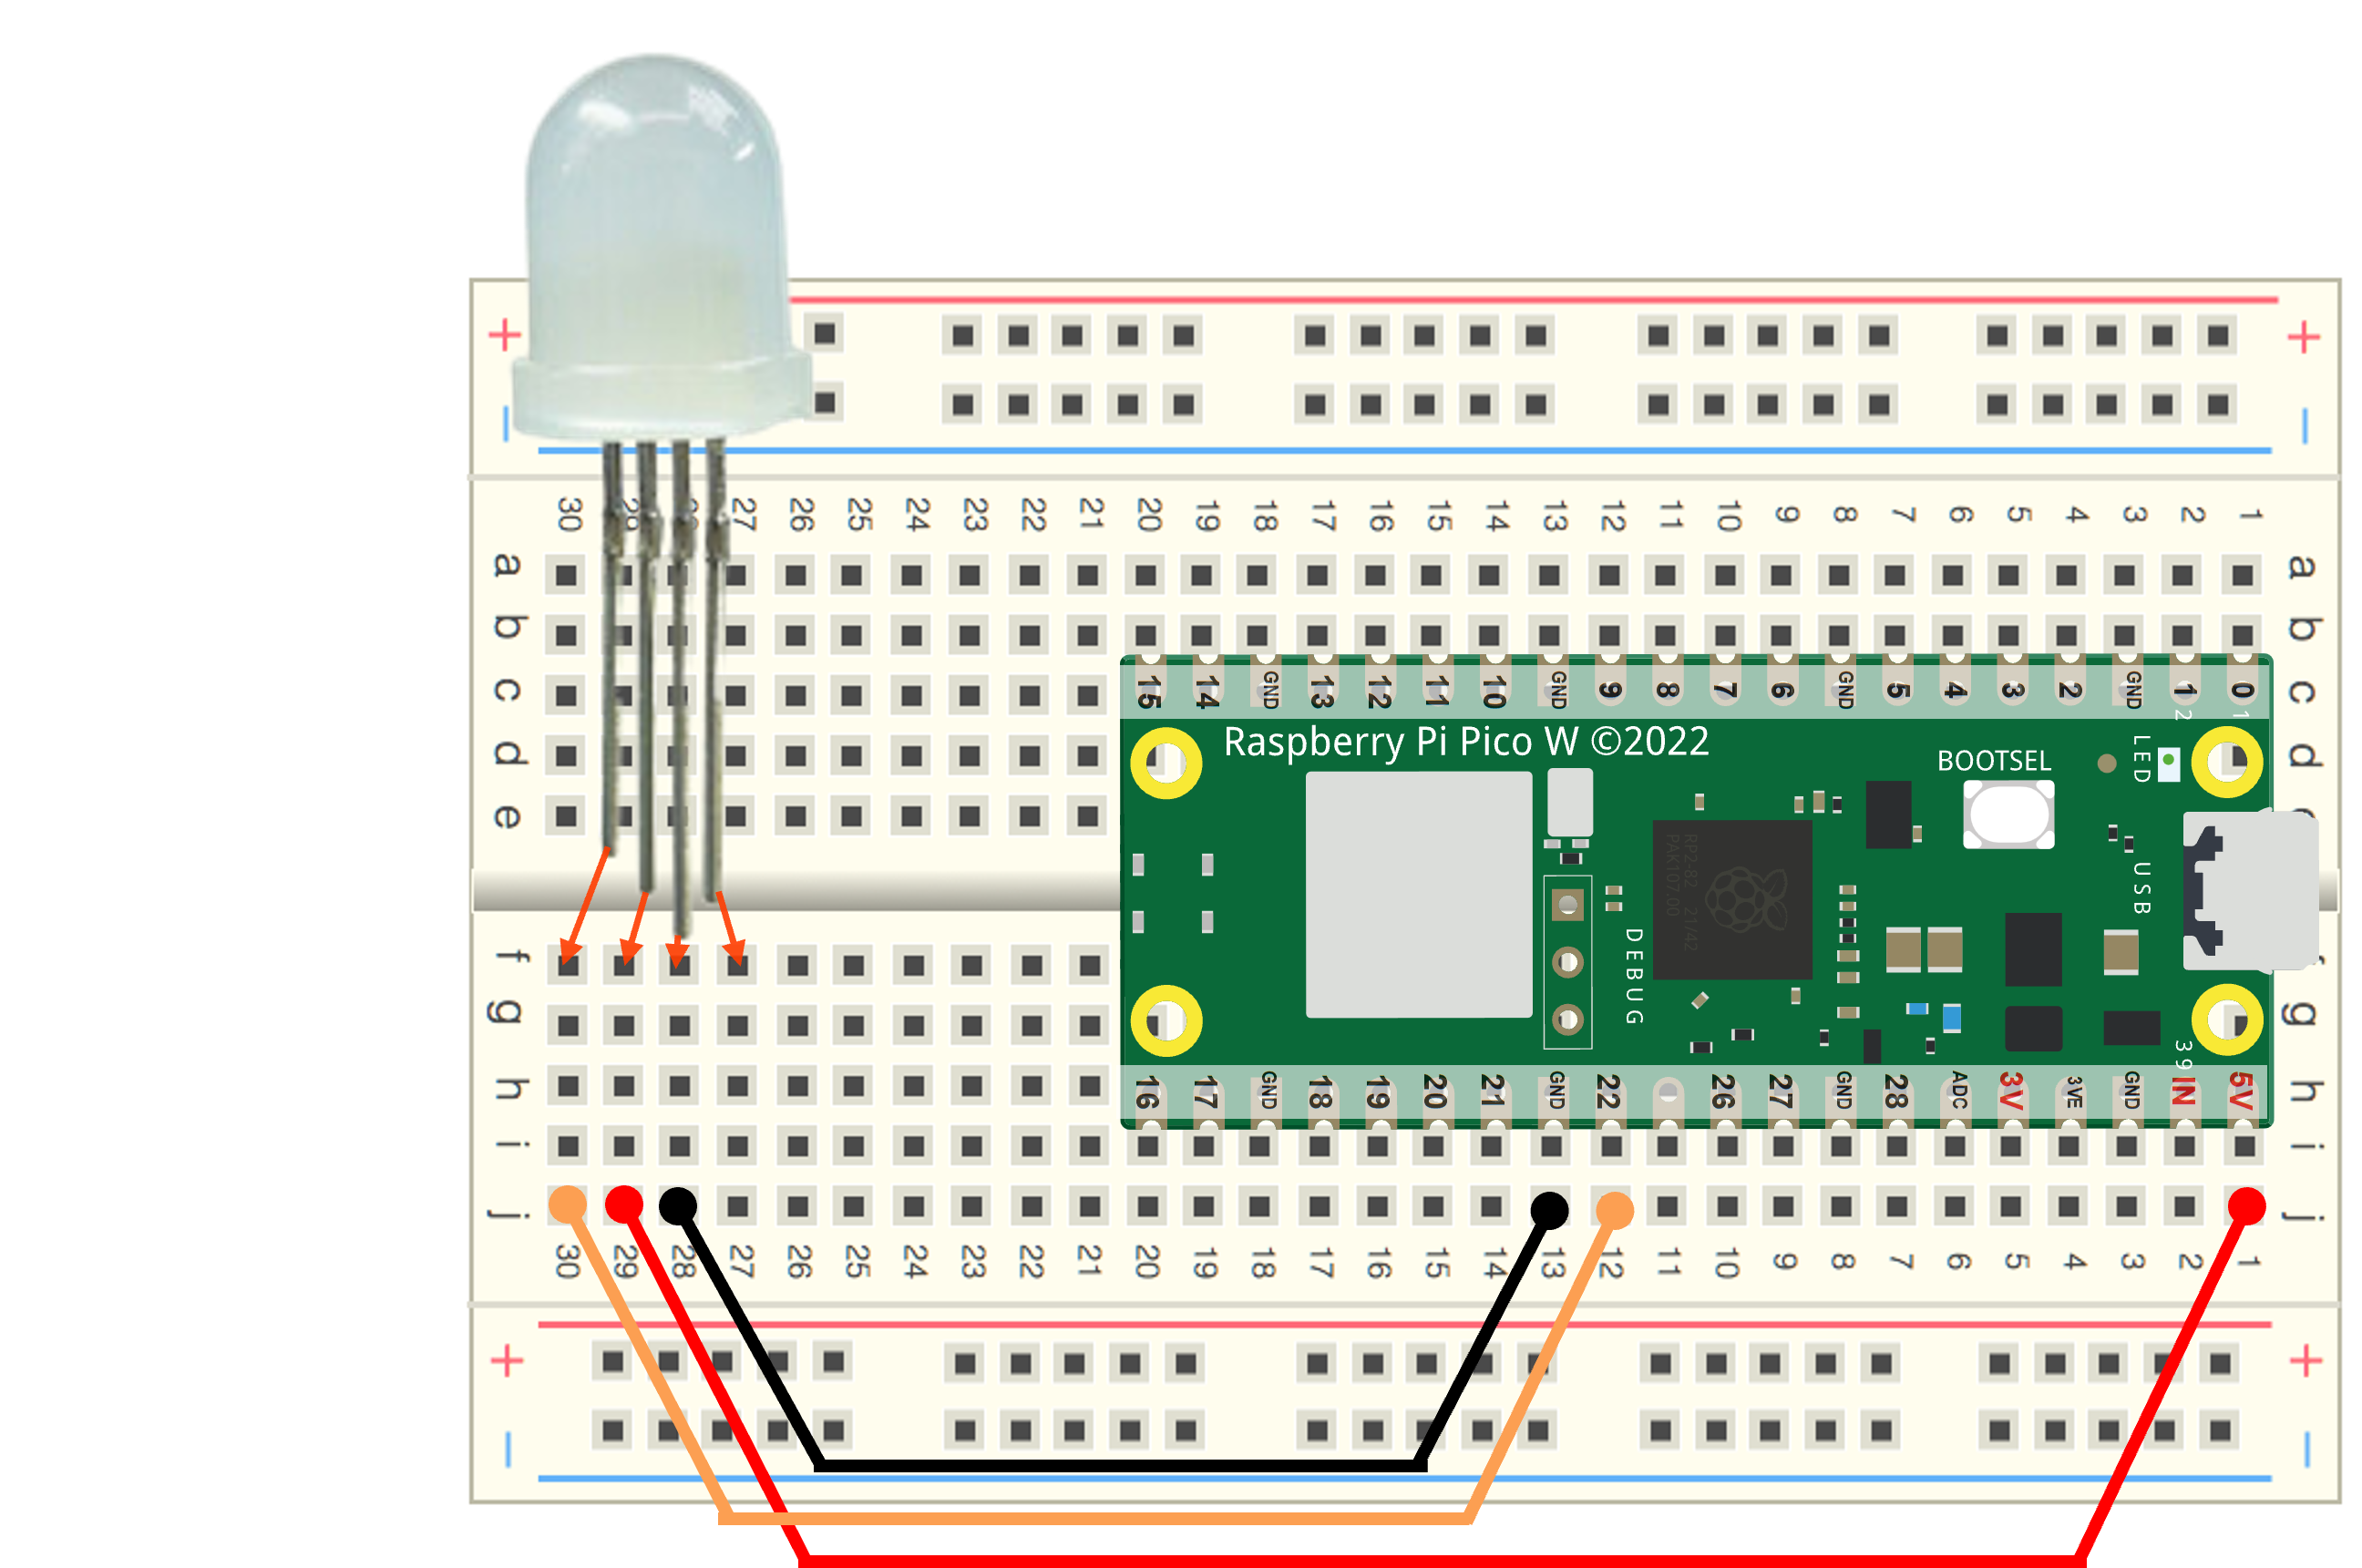
準備:NeoPixel を GND、GPIO22、5V に接続
「1 GND:-(マイナス)」をGNDに、
「4 DIN:入力」をGPIO 22番に、
「3 VDD:+(プラス)」を5Vに接続します。
プログラム
Raspberry Pi Pico W で動作を確認しました。
W 無しの Raspberry Pi Pico では、「色化け」が起きて、点灯はするものの、変な色で点灯してしまいました。
from machine import Pin
from neopixel import NeoPixel
import time

# GRB を RGB に変換する関数
#   Red:赤、Green:緑、Blue:青
#   各色の明るさを 0 ~ 255 で指定
def rgb(r, g, b):
    return (g, r, b)

# ここからはじまり
pin = Pin(22, Pin.OUT)      # GPIO 22 番に NeoPixel の信号を出力する
np = NeoPixel(pin, 1)       # pinの先には、NeoPixelが 1 個接続されている
for i in range(4):          # 4回くりかえす
    np[0] = rgb(255, 0, 0)  # 0番の NeoPixel を「赤」にする
    np.write()              # NeoPixel にデータを書き込む
    time.sleep(1)           # 1秒待つ
    np[0] = rgb(0, 255, 0)  # 0番の NeoPixel を「緑」にする
    np.write()
    time.sleep(1)
    np[0] = rgb(0, 0, 255)  # 0番の NeoPixel を「青」にする
    np.write()
    time.sleep(1)
np[0] = rgb(0, 0, 0)        # 0番の NeoPixel を消す
np.write()
