Actions使ってなにかするworkflowをつくるんじゃなくてAction自体をつくる話。
なにか簡単にGitHubActionsをつくってみたいと思い、GitHub公式のactions/labelerを参考にPRにラベルじゃなくてマイルストーンをつけるActionをつくろうと考えた。
Marketplaceで検索した結果、labelの方はちょいちょいあったがmilestoneの方はそんなにはまだなかった。マイルストーンの作成や更新がしたいのではなくてPRに既存のマイルストーンを結びつけたいってなると1,2件ぐらいしか無さそう。それらもこちらのやりたいこととは違った。
最終的につくったのはiyu/actions-milestone。
GitHub公式のテンプレートからリポジトリを作成する
GitHubのテンプレート機能は実は使ったことがなかったが、用意してくれているのだから使わない理由はない。javascript版(actions/javascript-action)とtypescript版(actions/typescript-action)が用意されている。あとはテンプレートと呼べるのか謎のミニマムなコンテナ版(actions/container-action)もあった。今回は無難にtypescriptを選択する。
 `[Use this template]`って書いてある緑色のボタンからリポジトリを作成する。
 こんな画面が出てくるがあとはいつものリポジトリ作成と同じ手順。
 作成し終わるとforkしたリポジトリみたいにリポジトリ名の下にテンプレートに使ったリポジトリが表示されていた。ただコミットとかは引き継がれずすべてコピペして`Initial commit`だけしたような感じの状態だった。別の世界線というより別世界だからテンプレートの今後のコミットをcherry-pickするのは難しいかもしれない。そんな心配する必要もないが。
テンプレートでできたリポジトリからconfig情報を書き換える
すぐにプログラミングに取り掛かりたいところだけどまずはconfigだけを書き換える。完全に好みの問題だがプログラムの修正も全部同じコミットにすると次回テンプレートから作成したときに何が必要になるのかわかりにくいなと思ったので。
やることは、
-
README.mdの書き換え- Actionの開発方法とかが書いてあるので全部消して書き換えでいい
-
package.json,package-lock.jsonの書き換え- リポジトリ名だったり説明文だったりurlだったり書き換える
- package-lock.jsonの方はpackage.json書き換えた後に
npm installでもしとけば自動で書き換わるので手動で書き換える必要はない
-
action.ymlの書き換え- action名だったり説明文だったり
- この段階である程度input,output決まってるなら書き換えてもいいような、まだなような?
こちら書き換えたときのコミットなので参考に
https://github.com/iyu/actions-milestone/commit/4101ca509ee0fc10f84542abd65e416a3feca566
プログラムを書く
ここからやっとプログラミング
ESLintの設定
汚いコードをあとから修正するのは面倒なので最初に入れる。
tslintは2019年内に開発終了するらしいのでtypescriptのlintにはESLintを使う。
$ npm install --save-dev eslint
初期セットアップ (対話型のCLIでなんか色々聞かれるけど詳細は割愛)
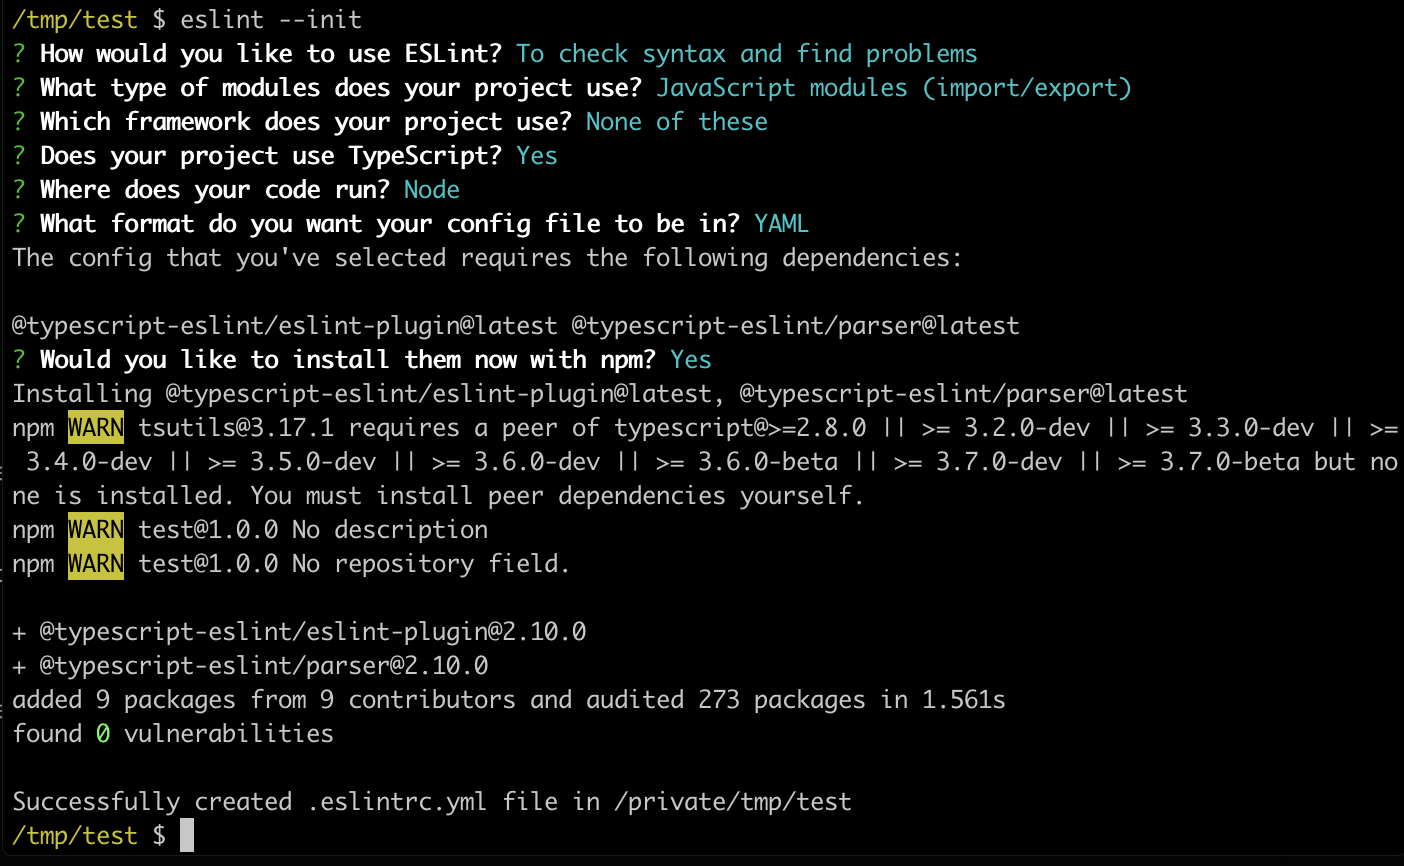
ものすごくただの好みの問題だが自分はeslint-config-airbnb-baseを長らく使っている。
$ npm install --save-dev eslint-config-airbnb-base
このテンプレートではtestにjestを使っているみたいなのでjestのプラグインも入れる。
$ npm install --save-dev eslint-plugin-jest
最終的な.eslintrc.ymlはこんな感じ。好みで変えていく。
env:
  es6: true
  node: true
  jest/globals: true
extends:
  - airbnb-base
globals:
  Atomics: readonly
  SharedArrayBuffer: readonly
parser: '@typescript-eslint/parser'
parserOptions:
  ecmaVersion: 2018
  sourceType: module
plugins:
  - '@typescript-eslint'
  - jest
rules:
  no-console: off
  no-unused-vars: off
  '@typescript-eslint/no-unused-vars': error
settings:
  import/resolver:
    node:
      extensions:
        - .ts
実行時にtypescriptの拡張子を教えてあげる必要がある。早く省略できるようにして欲しい。
$ eslint --ext .ts,.js .
今回作るもの
大まかに区分するとこんな感じ。
- inputデータを取得
- PRの情報を取得
- configファイルの中身を取得
- ブランチ名からマイルストーンを割り出す
- PRにマイルストーンをつける
inputデータを取得する
action.ymlに欲しいinputデータを記述しておく。
name: 'Pull Request Milestone'
description: 'Add milestone to PRs'
author: 'iyu'
inputs:
  repo-token:
    description: 'The GITHUB_TOKEN secret'
  configuration-path:
    description: 'The path for the milestone configurations'
    default: '.github/milestone.yml'
outputs:
  milestone:
    description: 'The Added Milestone'
runs:
  using: 'node12'
  main: 'lib/main.js'
上記の場合だとrepo-tokenとconfiguration-path
これをAction利用者が入力してくれるはずなのでそれをtypescript側で取得する。
こういう基本的なものはすべて公式のライブラリが取得方法を用意してくれているので簡単に取得できる。
import * as core from '@actions/core';

const token = core.getInput('repo-token', { required: true });
const configPath = core.getInput('configuration-path', { required: true });
requiredつけておけば値が存在しなかった時のエラー処理もいい感じにやってくれるのでエラー文考えなくても良い。便利。
(action.ymlでdefault付いてるくせにrequiredにしているのはただの嘘つき)
PRの情報を取得する
どのイベントから発火されたのかも公式のライブラリで簡単に取得できる。
import * as github from '@actions/github';

const pullRequest = github.context.payload.pull_request;
if (!pullRequest) {
  console.log('Could not get pull_request from context, exiting');
  return;
}
ブランチ名を利用してマイルストーンをつけるActionなのでPR以外のイベントの場合は上記のようになんかメッセージ表示して終了させる。
後々にPRのBaseブランチやHeadブランチの名前や現在のマイルストーンを利用したいのだが、このライブラリのtypesがしっかり全部書いてないので必要なパラメータは自分で拡張する必要がある。かなしい。
import * as github from '@actions/github';
import { WebhookPayload } from '@actions/github/lib/interfaces';

interface PullRequestWebhookPayload extends WebhookPayload {
  pull_request?: {
    [key: string]: any;
    number: number;
    html_url?: string;
    body?: string;

    milestone?: string;
    base: {
      ref: string;
    },
    head: {
      ref: string;
    },
  },
}
const pullRequest = (github.context.payload as PullRequestWebhookPayload).pull_request;
configファイルの中身を取得
inputで指定されたconfigファイルパスを取得する。action利用者がcheckoutをしているとも限らないのでファイルはAPI経由で取得する。このへんはactions/labelerを参考にしている。
import * as github from '@actions/github';

(async () => {
  // さっきのやつ
  // const token = core.getInput('repo-token', { required: true });
  // const configPath = core.getInput('configuration-path', { required: true });

  const client = new github.GitHub(token);

  const response = await client.repos.getContents({
    owner: github.context.repo.owner,
    repo: github.context.repo.repo,
    path: configPath,
    ref: github.context.sha,
  });
  const text = Buffer.from((response.data as { content: string }).content, 'base64').toString();
})();
(APIクライアントはPromise対応しているのでasync関数で囲ってる)
これでAPI経由でファイル取得可能だ。レスポンスの中のファイル内容についてはbase64文字列なのでtext変換している。
configファイルはこんな形式のyamlファイルを想定している。
base-branch:
  - "(master)"
  - "releases\\/(v\\d+)"

head-branch:
  - "feature\\/(v\\d+)\\/.+"
yamlファイルの文字列持っててもtypescriptで扱いにくいので今回はこんな感じのパーサーを用意して変換した。
import * as yaml from 'js-yaml';

interface ConfigObject {
  baseBranchList: RegExp[];
  headBranchList: RegExp[];
}

const parse = (text: string) => {
  const config: {
    'base-branch'?: string[],
    'head-branch'?: string[],
  } = yaml.safeLoad(text) || {};

  const result: ConfigObject = {
    baseBranchList: [],
    headBranchList: [],
  };
  result.baseBranchList = (config['base-branch'] || []).map((item) => new RegExp(item));
  result.headBranchList = (config['head-branch'] || []).map((item) => new RegExp(item));

  return result;
};
ブランチ名からマイルストーンを割り出す
このへんはもうこのAction固有の処理なのでそんなに詳しく書きません。baseブランチ、headブランチはWebhookのpayloadの中に入っているのでそれを使う。
const pullRequest = (github.context.payload as PullRequestWebhookPayload).pull_request;
const {
  milestone,
  number: prNumber,
  base: { ref: baseBranch },
  head: { ref: headBranch },
} = pullRequest;
先程のconfigで取ってきた正規表現とmatchするものを見つけてくる。milestoneは1つしかつけることはないので1件ヒットしたら即返却で良い。
export const match = (
  baseBranch: string,
  headBranch: string,
  configObject: ConfigObject,
): string|undefined => {
  let hit: string|undefined;
  configObject.baseBranchList.some((regexp) => {
    const m = baseBranch.match(regexp);
    if (m && m[1]) {
      ([, hit] = m);
    }
    return !!hit;
  });
  if (hit) {
    return hit;
  }

  configObject.headBranchList.some((regexp) => {
    const m = headBranch.match(regexp);
    if (m && m[1]) {
      ([, hit] = m);
    }
    return !!hit;
  });
  return hit;
};
PRにマイルストーンをつける
実はちょっとハマった。30分ぐらい悩んだ。
actions/labelerを参考にしていたので、最後にaddLabelのmilestone版のgithubのAPIを叩けば終わると思っていたがSDKにそんな関数は見当たらない。最初はpayloadが不完全だったこともあってSDKが対応していないだけだろうと思っていたのだがAPIリファレンスにもaddMilestoneだったりsetMilestoneなるものは見当たらなかった。悩んだ。
結論、milestoneはissueUpdate(PRもissueの一種なので同一API)やissueCreate時につけてやるものらしい。labelだけaddLabelなんてAPIがあるから騙された。issueのtitleを変える感覚でmilestoneも変更するみたい。
さらにいうとlabelと違ってmilestoneはmilestone用のID(下記コードのnumberの部分)を使ってissueを更新する。先程の項目で割り出したのはmilestoneのタイトルなのでそれと一致するmilestoneのIDを既存のmilestone一覧から探してこなくてはならない。
const addMilestone = 'v1.0';
const milestones = await client.issues.listMilestonesForRepo({
  owner: github.context.repo.owner,
  repo: github.context.repo.repo,
});
const { number: milestoneNumber } = milestones.data.find(({ title }) => title === addMilestone) || {};
既存のmilestoneが見つからなかった場合はmilestoneCreateとかで作成しても良かったわけだが、今回はメッセージ出すだけにした。やるならオプションで作成も一緒にするかみたいなフラグを追加しようかな。
if (milestoneNumber) {
  await client.issues.update({
    owner: github.context.repo.owner,
    repo: github.context.repo.repo,
    issue_number: prNumber,
    milestone: milestoneNumber,
  });
  core.setOutput('milestone', addMilestone);
} else {
  console.log(`Milestone not found, Please create it first "${addMilestone}".`);
}
今回は紐付けたmilestoneをoutputとして出力するactionなのでcore.setOutput('milestone', addMilestone);という一文も忘れずに。
Marketplaceに公開する
公式のドキュメントに画像つきで丁寧に書いてあるのでそこまで説明いらないとは思う。
https://help.github.com/ja/actions/automating-your-workflow-with-github-actions/publishing-actions-in-github-marketplace
公開する成果物にはnode_modulesも含めビルド済みのjsファイルがないといけないので、masterブランチではgitignoreにnode_modulesが入っていてそれとは別にnode_modulesを除外しないreleaseブランチを作ろう、とテンプレートでは書かれている。
https://github.com/actions/typescript-action#publish-to-a-distribution-branch
他の手段としては@zeit/nccを使ってそもそもnode_modulesも含めすべて1ファイルにしてしまうという方法もある。
https://help.github.com/en/actions/automating-your-workflow-with-github-actions/creating-a-javascript-action
今回は前者の方法でやろうと思うが毎回そんな作業をするのも面倒なのでnpm preversionにビルド作業とnode_modules,ビルド成果物の追加を仕込んでおくことにした。package.jsonのscriptsの部分を書き換える
"scripts": {
 "preversion": "npm ci && npm run build && npm ci --production && git add node_modules lib -f"
}
該当する作業コミットはこれ。
https://github.com/iyu/actions-milestone/commit/a95202bc14122a66a01dc5aad55a6ebfed5279bd
これは何なのかというと、npm versionというpackage.jsonのversion部分をアップデートしつつgit-tagをつけてくれるコマンドの前にhookされるスクリプト。npmにライブラリを公開している人ならおなじみだと思う。
詳しくはここ https://docs.npmjs.com/cli/version
$ npm version major

> actions-milestone@1.0.0 preversion iyu/actions-milestone
> npm ci && npm run build && npm ci --production && git add node_modules lib -f

npm WARN prepare removing existing node_modules/ before installation
added 651 packages in 7.098s

> actions-milestone@0.0.0 build git/iyu/actions-milestone
> tsc

npm WARN prepare removing existing node_modules/ before installation
added 50 packages in 2.174s
v1.0.0
やってることはシンプルで、
-
npm cinode_modulesを消してからinstall (clean installの略だった気がする) -
npm run buildscriptsのbuildを実行 (typescriptのビルドが書かれてる) -
npm ci --productionビルドのときしか必要でないpackageを消すために実行してる -
git add node_modules lib -f.gitignoreにかかれているnode_modulesとビルド成果物をforce add
このあとに本来のnpm versionが動く。 (package.jsonのversionの更新とgit-commit, git-tag)
githubにpushしたらリリース物として[Draft a new release]のボタンを押してPublish this Action to the GitHub Marketplaceにチェックする。
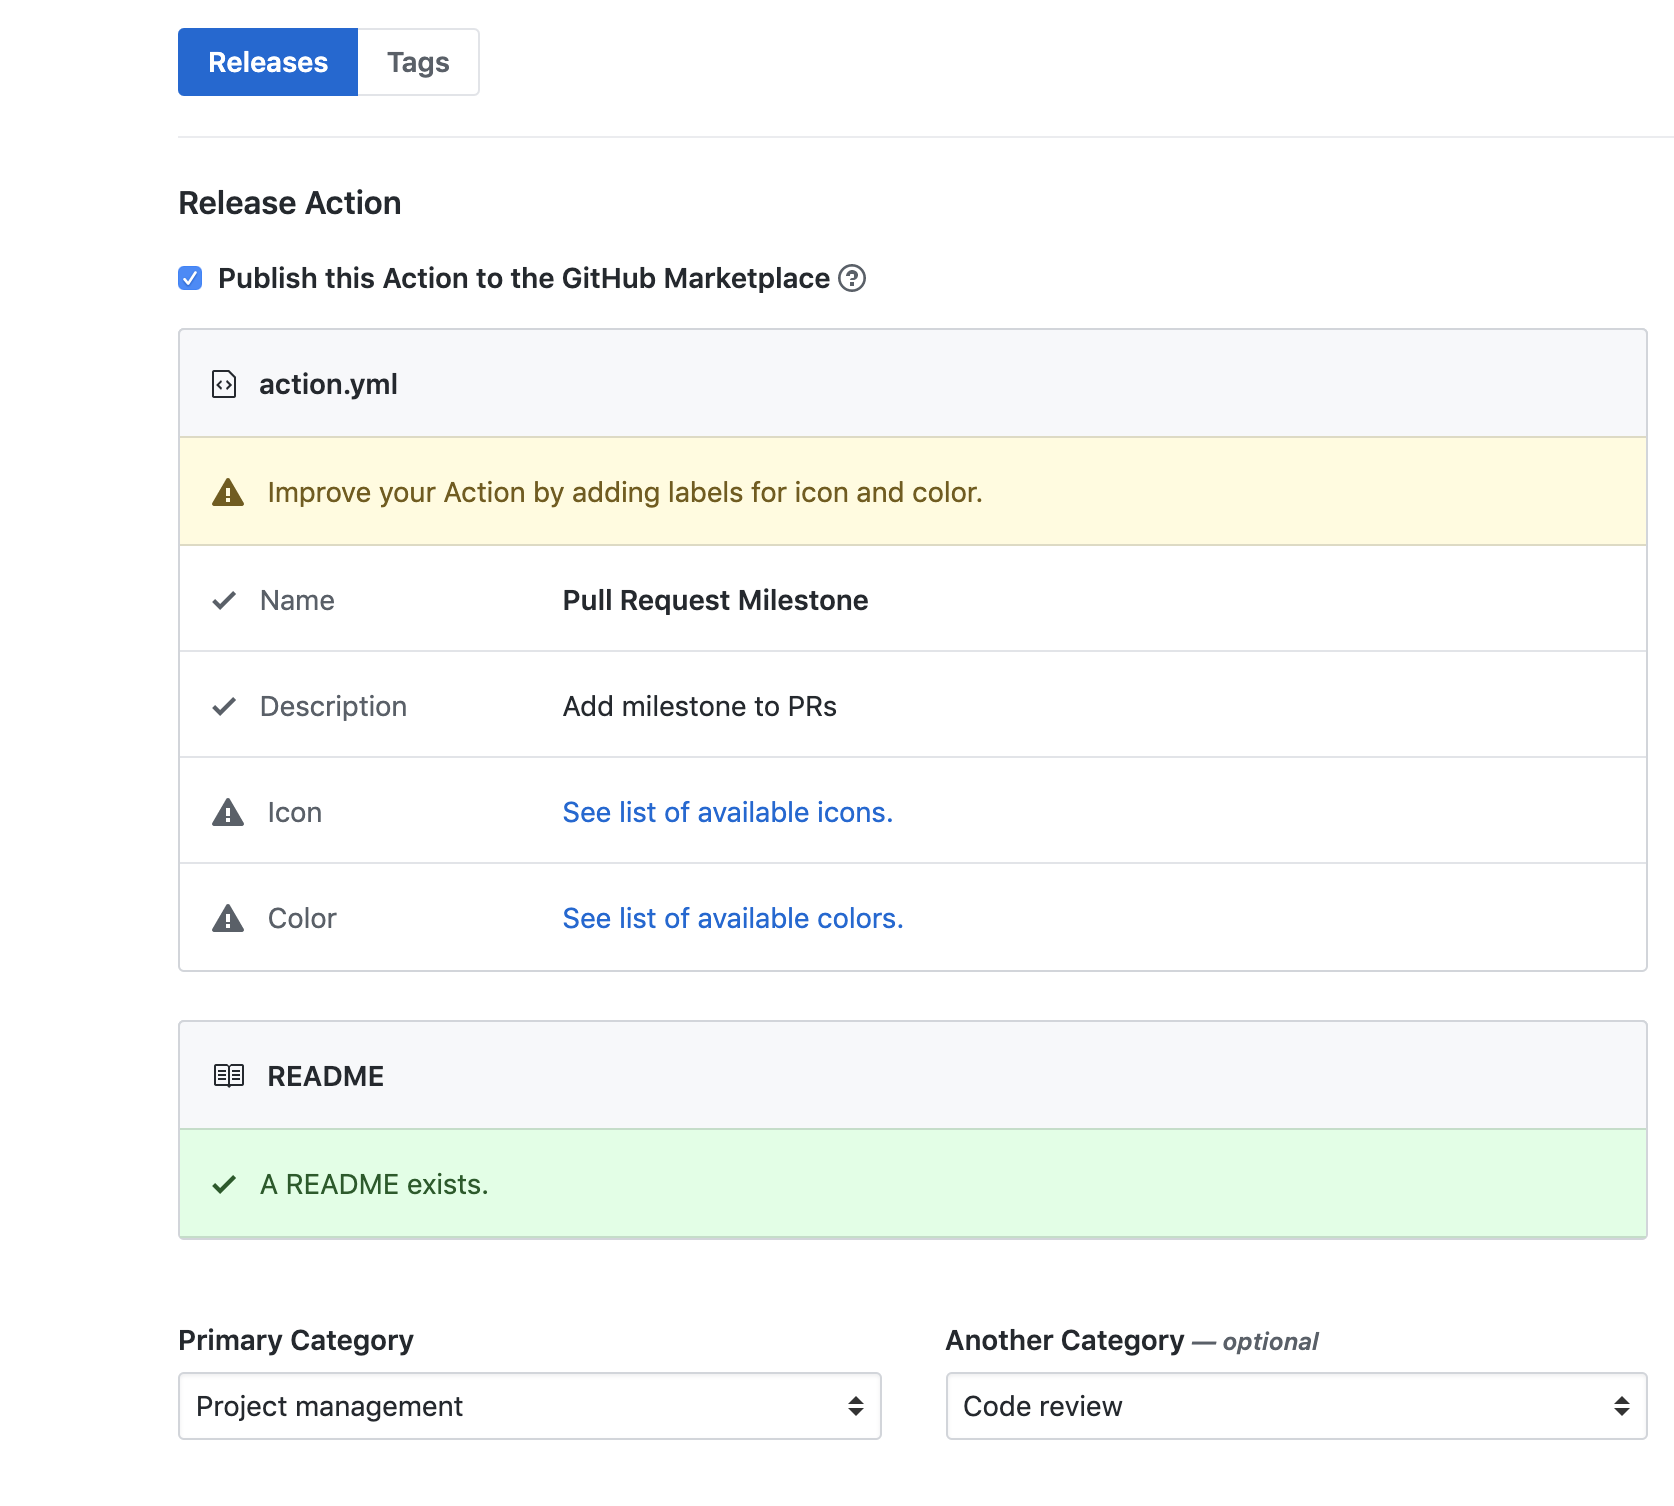
カテゴリとかiconとか必要なものを埋めていく。iconは別になくてもいいっぽい。
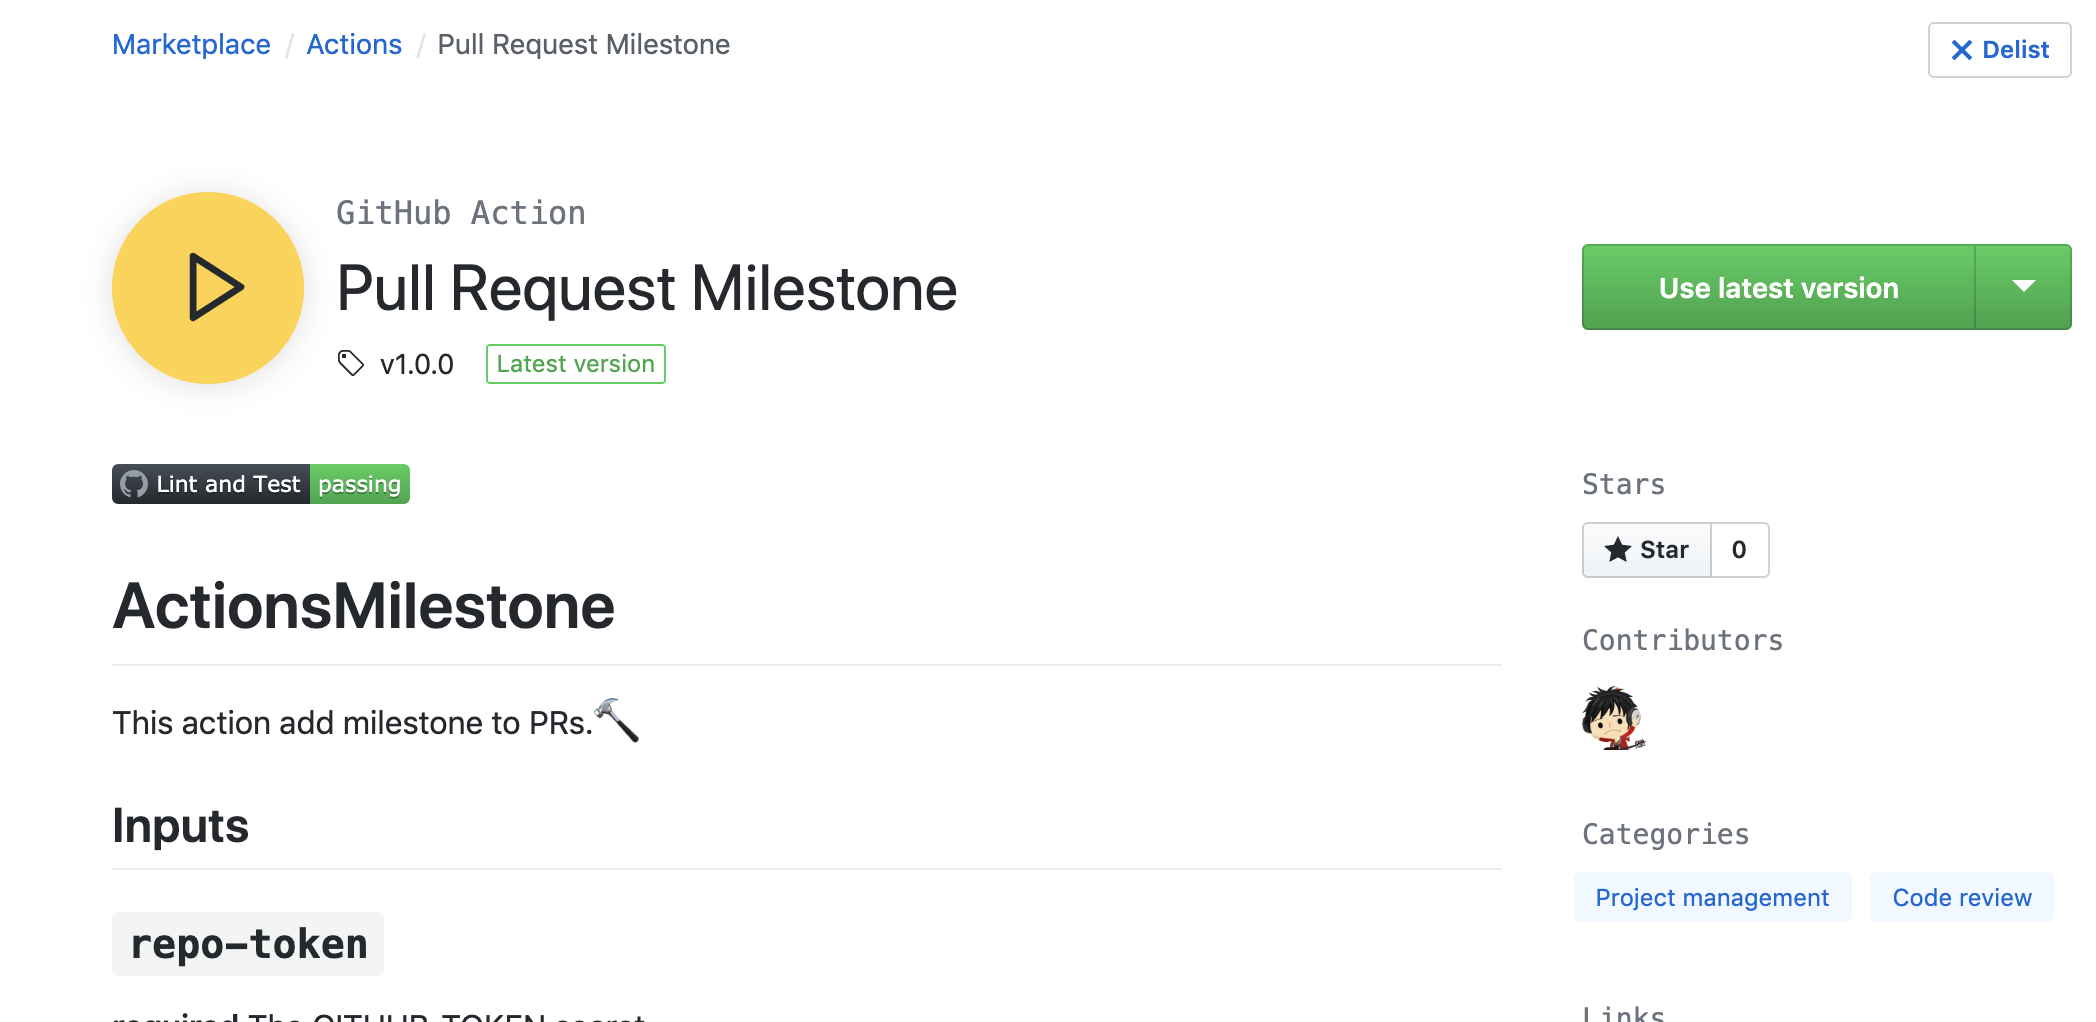
これで無事完成!検索すればちゃんとMarketplaceに出てくるようになった!
さいごに
今回は一発目だったので簡単なActionにしたがもっとちゃんと実用性のあるActionを作っていきたい。ただ仕事で使うやつとなるとたぶんMarketplaceには上げないと思うので今回はまぁ楽しめた。
近々、チーム開発でGitHubActionsを使うにあたって苦労した点を記事にして書きたいと思う。
(2019/12/09 追記) 書いた。業務でGitHubActionsを取り入れる上で苦労した点