準備が前編で終わったので、モリモリ本編でも進めていこうと思います。
前提条件
■ AWSのアカウントをつくった
■ AWS Cloud9の画面で環境を作った
 作り方はこちら!
ここでの大まかな流れ
- Amazon Linux AMIのデータベースサーバーと、 Apache ウェブサーバーの起動
- データベースでごにょごにょやる
- wordPress がパーマリンクを使用できるようにする
以上、3点。
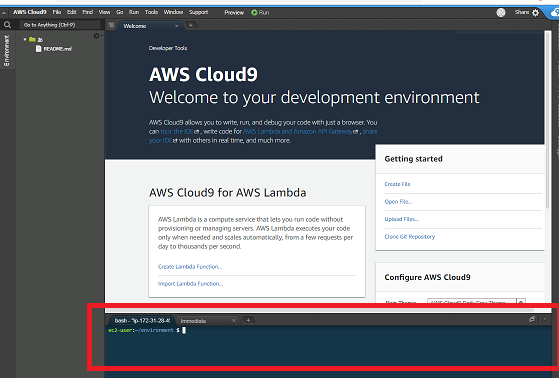
どこでやるの?
※ 操作はAWS Cloud9の下部にある**ターミナル(bash- “ip-XXX”)**でやていきます。
ここ↓
※ 操作を始める場所は、前回と同じく自分のいまつくってる環境の位置
(ec2-user:~/environment)のままで始めること
心配な人は$ pwdで位置を確認

/home/ec2-user/environmentってでればおk!
ではでは、ここから本編。
Amazon Linux AMIのデータベースサーバーと、 Apache ウェブサーバーの起動
$ sudo service mysqld start
データベースサーバーを起動してー。
$ sudo service mysqld status
起動したかの確認
(mysqld (pid 4203) is running...)みたいなのが結果でればOK
$ sudo service httpd start
Apache ウェブサーバーを起動ー。
起動したかの確認
$ sudo service httpd status
(httpd (pid 5782) is running...)みたいなのが結果でればOK!
データベースでごにょごにょやる
$ mysql -u root -p
rootユーザーに変身。
passwordを聞かれたら設定してない場合はEnterをおす
(mysql>がでたらok!
CREATE USER 'wordpress-user'@'localhost' IDENTIFIED BY 'your_strong_password';
your_strong_passwordは必ず自分の考えたものに、変えること。
CREATE DATABASE `wordpress-db`;
データベースの作成
(Query OK,~)ってでたらおk
GRANT ALL PRIVILEGES ON `wordpress-db`.* TO "wordpress-user"@"localhost";
権限を付与する
(Query OK,~)ってでたらおk
FLUSH PRIVILEGES;
データベースの変更を取りこんでもらうように、権限をフラッシュする
(Query OK,~)ってでたらおk
exit
mysqlのクライアントからでる。Byeてでます。
wordPress がパーマリンクを使用できるようにする
$ sudo vim /etc/httpd/conf/httpd.conf
設定が記入されてるファイルをVimで編集します。
※sudo付けないと保存してくれないので、注意!
# Further relax access to the default document root: で始まるセクション以下を見つけて2か所直す
直す2か所とは??
-
<Directory "/home/ec2-user/environment/wordpress/">(ドキュメントルートはここですよ)と -
AllowOverride ALL(上書きしていいよ)にすること
vim操作の仕方も一応・・・。
※必ず半角英数にしてから行うこと!!
- iを押す(インサートモードになる)
- 編集する
3.直し終わったらEscボタンを押す(インサートモード出る) -
:wqでvim閉じる
$ cat /etc/httpd/conf/httpd.conf
で、↓の記載になったか確認。
# Further relax access to the default document root:
<Directory "/home/ec2-user/environment/wordpress/">
    #
    # Possible values for the Options directive are "None", "All",
    # or any combination of:
    #   Indexes Includes FollowSymLinks SymLinksifOwnerMatch ExecCGI MultiViews
    #
    # Note that "MultiViews" must be named *explicitly* --- "Options All"
    # doesn't give it to you.
    #
    # The Options directive is both complicated and important.  Please see
    # http://httpd.apache.org/docs/2.4/mod/core.html#options
    # for more information.
    #
    Options Indexes FollowSymLinks

    #
    # AllowOverride controls what directives may be placed in .htaccess files.
    # It can be "All", "None", or any combination of the keywords:
    #   Options FileInfo AuthConfig Limit
    #
    AllowOverride ALL

    #
    # Controls who can get stuff from this server.
    #
    Require all granted
</Directory>
ここの内容は以上です、お疲れさまでした。
次はこれ
AWS Cloud9でWordpressを使ってみる~本編~ 4(日本語版Wordpressをインストールする)