
この記事では、まずdocker🐳で新しいubuntu コンテナを起動して、neovimで使用便利なプラグインをインストールしたあと、コンテナ内で最新のnodejsをインストールしてプラグインを活かしてexpressサーバーを起動するところまで解説します。
便利なプラグイン
" ファジーファインダー
Plug 'nvim-telescope/telescope.nvim', { 'tag': '0.1.2' }
Plug 'nvim-lua/plenary.nvim'

" コード補完
Plug 'neoclide/coc.nvim', {'branch': 'release'}

" ファイルツリー
Plug 'preservim/nerdtree'

" ステータスライン
Plug 'nvim-lualine/lualine.nvim'

" 色テーマ
Plug 'morhetz/gruvbox'

" NERDTree プラグイン
Plug 'preservim/nerdtree'

" 自動保存プラグイン
Plug 'Pocco81/auto-save.nvim'
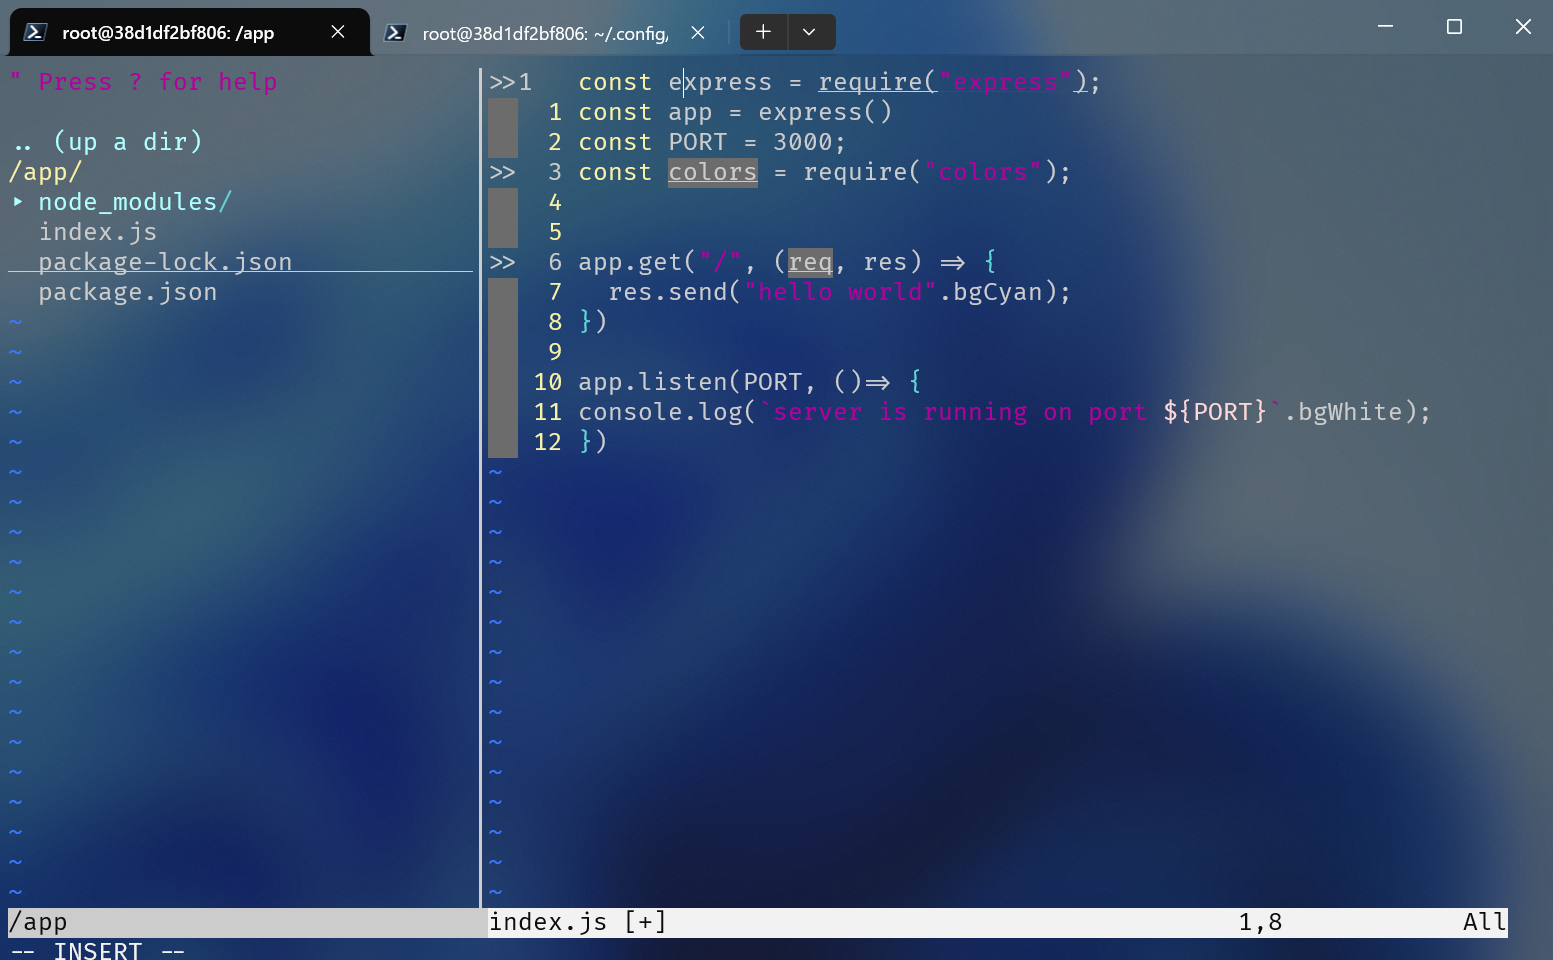
以上のプラグインをインストールすると次のような見た目になります。
1,Docker でubuntu container を起動
docker run -it --name nvim-in-ubuntu ubuntu
これで、新しいubuntuを起動することができます。
2,パッケージのアップデート&必要なツールをインストール
    apt update && apt upgrade -y
    apt install -y curl git wget unzip build-essential software-properties-common
apt コマンドの補足説明

インストールされたパッケージを確認
apt list --manual-installed
3,最新のNeovimのインストール
方法①: ppaを使う方法(簡単・安定)
    add-apt-repository ppa:neovim-ppa/stable
    apt update
    apt install -y neovim
方法②: AppImage(最新版が欲しい人向け)
    curl -LO https://github.com/neovim/neovim/releases/latest/download/nvim.appimage
chmod u+x nvim.appimage
./nvim.appimage
4,初期設定(init.vim)
Neovimの設定ファイルは以下に置かれます:
~/.config/nvim/init.vim
フォルダがなければ作成:
mkdir -p ~/.config/nvim
最小構成の init.vim 例:
    " 基本設定
    set number              " 行番号を表示
    set relativenumber      " 相対行番号
    set clipboard=unnamedplus " システムのクリップボードを使用
    syntax on
    filetype plugin indent on

    " プラグインマネージャの設定(例:vim-plug)
    call plug#begin('~/.vim/plugged')

    " ここにプラグインを書く

    call plug#end()
lua を使う場合の設定
5,プラグインマネージャーvim-plugをインストール
   curl -fLo ~/.local/share/nvim/site/autoload/plug.vim --create-dirs \
     https://raw.githubusercontent.com/junegunn/vim-plug/master/plug.vim
6,おすすめプラグイン
    call plug#begin('~/.vim/plugged')

    " ファジーファインダー
    Plug 'nvim-telescope/telescope.nvim', { 'tag': '0.1.2' }
    Plug 'nvim-lua/plenary.nvim'

    " コード補完
    Plug 'neoclide/coc.nvim', {'branch': 'release'}

    " ファイルツリー
    Plug 'preservim/nerdtree'

    " ステータスライン
    Plug 'nvim-lualine/lualine.nvim'

    " 色テーマ
    Plug 'morhetz/gruvbox'

    call plug#end()
7,プラグインのインストール(Neovim内で)
neovim を起動
nvim
以下を入力:
:PlugInstall

インストールが完了すると次の表示が出ます。

Ubuntuコンテナに最新のNodejsをインストール
DockerのUbuntuコンテナに最新の Node.js をインストールするには、Node.js公式が提供しているNodeSourceのリポジトリを使うのが簡単で確実です。
以下の手順でインストールできます👇
Ubuntu コンテナに Node.js 最新版 をインストールする手順
    # curlが入っていない場合はインストール
    apt update
    apt install -y curl

    # Node.js公式のスクリプトで、最新版を取得(LTSでも可)
    curl -fsSL https://deb.nodesource.com/setup_current.x | bash -

    # Node.jsとnpmをインストール
    apt install -y nodejs
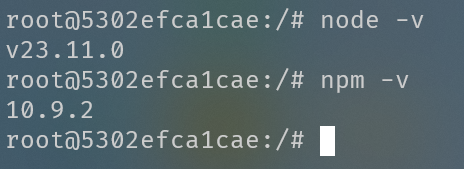
バージョン確認
オプション: build-essential のインストール(npmでビルドが必要な時に)
apt install -y build-essential
おすすめNode.js補完プラグイン

今回は初心者にも扱いやすい「coc.nvim + coc-tsserver」を使った方法を紹介します。
🚀 coc.nvim + coc-tsserver を使って Node.js 補完を導入する手順
1,coc.nvim をインストール(vim-plug)
init.vim に以下を追加:
    " coc.nvim 補完プラグイン
    Plug 'neoclide/coc.nvim', {'branch': 'release'}
その後、Neovimで:
:PlugInstall
2,coc-tsserver をインストール(TypeScript/JavaScript用)
Neovim内で以下を実行:
:CocInstall coc-tsserver

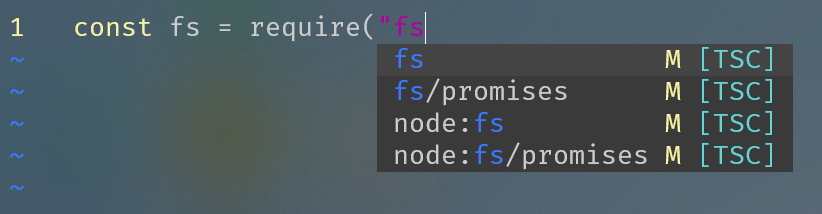
3,オートコンプリート動作確認
"/"ルートディレクトリに新しくフォルダを作成して、そこにnodejsのプロジェクトを作成します。
   mkdir add
   cd add
   touch index.js
   npm init -y
   npm install express
   npm install -D nodemon
app内の構造

4,オートコンプリート動作確認
5,便利な init.vim の設定例
    " 補完候補のナビゲーション
    inoremap <silent><expr> <TAB> pumvisible() ? "\<C-n>" : "\<TAB>"
    inoremap <silent><expr> <S-TAB> pumvisible() ? "\<C-p>" : "\<S-TAB>"

    " Enterキーで補完確定
    inoremap <silent><expr> <CR> pumvisible() ? coc#_select_confirm() : "\<CR>"

    " 明示的に補完メニューを表示(Ctrl + Space)
    inoremap <silent><expr> <C-Space> coc#refresh()

    nmap <silent> gd <Plug>(coc-definition)
    nmap <silent> gy <Plug>(coc-type-definition)
    nmap <silent> gi <Plug>(coc-implementation)
    nmap <silent> gr <Plug>(coc-references)
6,🎁 補足:他にも coc-eslint や coc-prettier も便利
:CocInstall coc-eslint coc-prettier

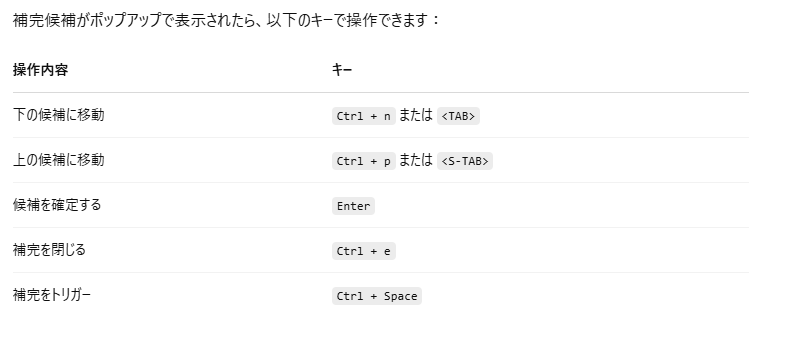
7,基本:補完が表示されたときの操作
NERDTree のインストール
im-plug を使っている場合、init.vim に以下を追加:
    " NERDTree プラグイン
    Plug 'preservim/nerdtree'
その後、Neovimを開いて:
:PlugInstall
これでインストール完了です!
1,便利なキーマッピング設定
よく使うキーを init.vim にマッピングしておくと便利です:
    " NERDTreeトグル(ツリー表示の開閉)
    nnoremap <C-n> :NERDTreeToggle<CR>

    " 現在のファイル位置をNERDTreeで表示
    nnoremap <leader>n :NERDTreeFind<CR>
補足:
→ Ctrl + n で NERDTree を開閉
→ 通常 \(またはカスタム設定してるキー)
自動保存プラグイン

1,インストール方法(vim-plugの場合)
    " init.vim または init.lua に以下を追加
    Plug 'Pocco81/auto-save.nvim'
その後、Neovimを開いて:
:PlugInstall
2,設定方法(init.lua or init.vim)
init.vim で Lua を呼び出す方法
    " init.vim の末尾に追記
    lua << EOF
    require("auto-save").setup({
      enabled = true,  -- デフォルトで自動保存を有効にする
      execution_message = {
        message = function() return "AutoSave: saved at " .. vim.fn.strftime("%H:%M:%S") end,
        dim = 0.18,
        cleaning_interval = 1250,
      },
      trigger_events = {"InsertLeave", "TextChanged"}, -- 自動保存をトリガーするイベント
      condition = function(buf)
        local fn = vim.fn
        local utils = require("auto-save.utils.data")
        return fn.getbufvar(buf, "&modifiable") == 1
      end,
      write_all_buffers = false, -- 全バッファ保存を無効に(trueにすると全ファイル保存)
      debounce_delay = 135,
    })
    EOF
これで、ノーマルモードに戻った時に、自動で保存されます。