はじめに
Reactアプリを、GitHub Pagesにデプロイする手順を簡単にまとめます!
開発環境は、下記の通りです。現時点での最新バーションです。(2022年3月21日)
また、今回はターミナルを使わずにGitHub Desktopを使ってcommit, pushを行います。
事前に、GitHub Desktopのインストールもお願いします。
$ node --version
v16.14.0

$ npm --version
v8.3.0

$ git --version
v2.34.0
1,ローカルにReactアプリケーションを作成
$ npx create-react-app my-project
$ cd my-project
$ code .
下記ディレクトリ構造となっています。
特に変更など加えていないのでこのまま進めていきます!
2,GitHubにRepositoryを作成
上記自動生成されたコマンドをターミナルにコピペして実行すると、
ローカルのReactアプリ が GitHubのRepository にpushされます。
git commit -m "first commit"
git branch -M main
git remote add origin https://github.com/iwasaki-hub/my-project.git
git push -u origin main
Repositoryにpushされましたね!
3,ローカルのReactアプリをGitHub Desktopに追加します
Add an Existing Repository from your hard drive... から、作成したフォルダを選択してください。
Current repository に作成したフォルダ名が記載されていれば大丈夫です。
これで、GitHub DesktopとGitHubアカウントが連携しました。
➪GitHub Desktopのインストール方法
➪GitHubとGitHub Desktopの連携
4,ローカルのReactアプリにgh-pagesパッケージをインストール
gh-pagesパッケージをインストールします。
$ npm install gh-pages --save-dev
インストールしたら、package.jsonに3行追記します。(//追加 部分)
"homepage": "http://(Githubのアカウント名).github.io/(GitHubのRepository名)", //追記
...
"predeploy": "npm run build", //追記
"deploy": "gh-pages -d build", //追記
...
{
  "homepage": "http://(Githubのアカウント名).github.io/(GitHubのRepository名)", //追記
  "name": "my-project",
  "version": "0.1.0",
  "private": true,
  "dependencies": {
    "@testing-library/jest-dom": "^5.16.2",
    "@testing-library/react": "^12.1.4",
    "@testing-library/user-event": "^13.5.0",
    "react": "^17.0.2",
    "react-dom": "^17.0.2",
    "react-scripts": "5.0.0",
    "web-vitals": "^2.1.4"
  },
  "scripts": {
    "start": "react-scripts start",
    "predeploy": "npm run build", //追記
    "deploy": "gh-pages -d build", //追記
    "build": "react-scripts build",
    "test": "react-scripts test",
    "eject": "react-scripts eject"
  },
  "eslintConfig": {
    "extends": [
      "react-app",
      "react-app/jest"
    ]
  },
  "browserslist": {
    "production": [
      ">0.2%",
      "not dead",
      "not op_mini all"
    ],
    "development": [
      "last 1 chrome version",
      "last 1 firefox version",
      "last 1 safari version"
    ]
  },
  "devDependencies": {
    "gh-pages": "^3.2.3"
  }
}
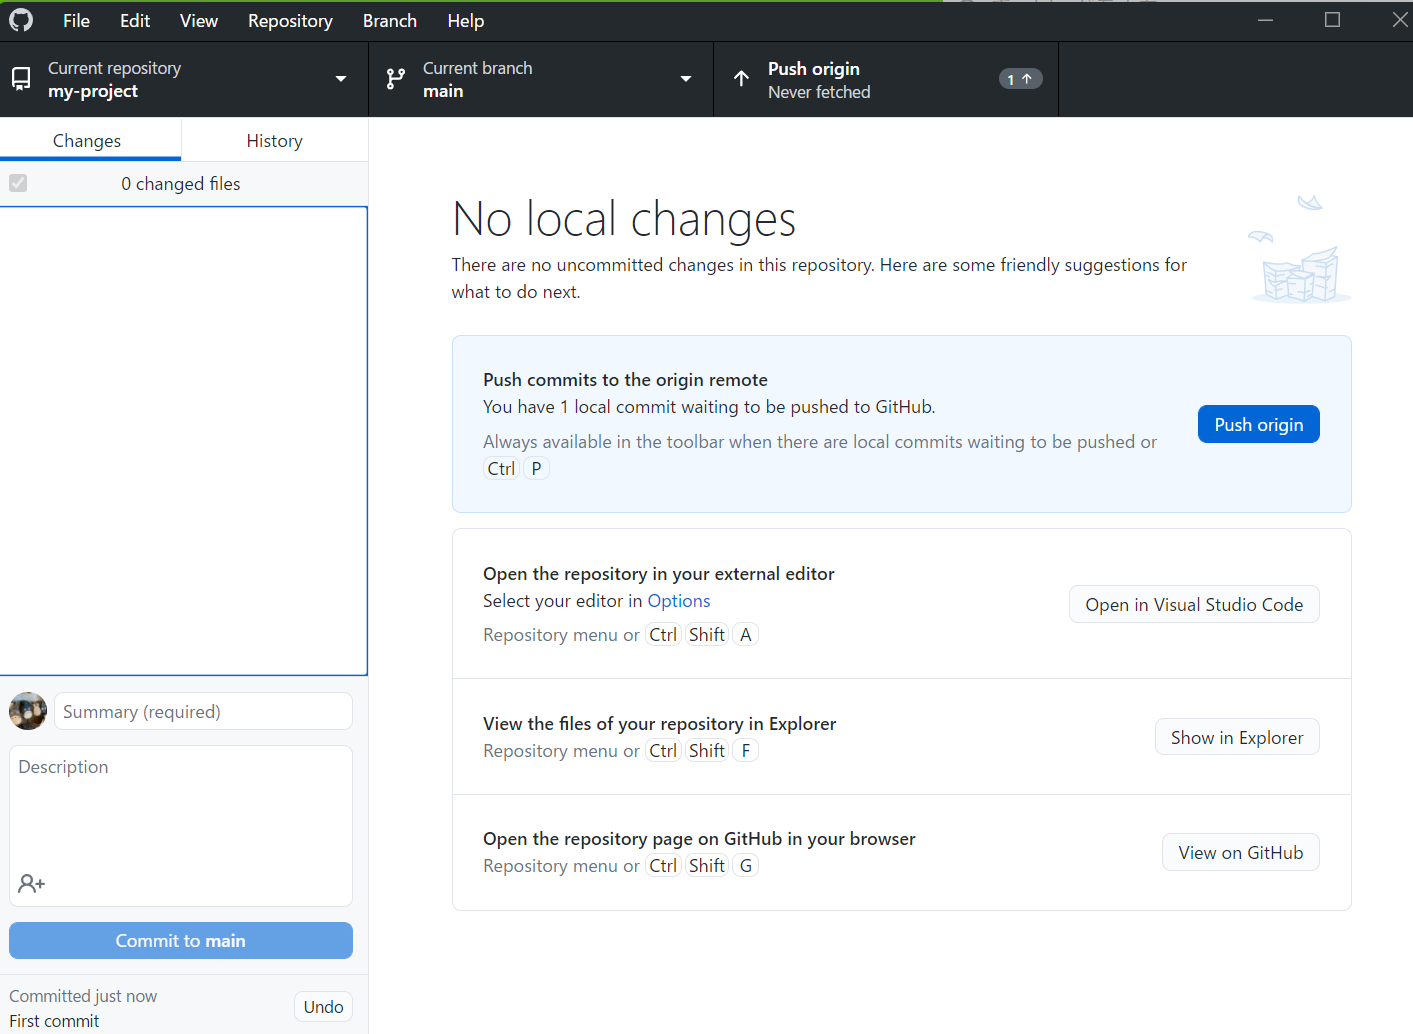
変更を加えたのでRepositoryに commit , pushします。
GitHub Desktopに移動して、コメントにFirst commitを記述して、Commit to mainボタンを押します。
すると、右上にPush originが表示されるのでそちらをクリックすると、簡単にpushできます。
ターミナルに戻って、下記のコマンドを入力しましょう。
npm run deploy
これで、Publishedしました。
5,最後に、Settingのみです。
RepositoryのSettingから、左下のPagesに移動します。
Branchをgh-pagesに選択して、Saveすると設定完了です。
みどりのエリアに表示されているURLをクリックしてください。
6,Deploy完了
まとめ
今回は、GitHub Desktopも使って、簡単にcommit, pushを行うことができました!
参考動画


