はじめに
本記事は、自分の行った作業の忘備録です。CoreDataのマイグレーションとデータ移行の設定の際に、色々とハマったため、忘れないように記録として残しておこうと思って執筆致しました。また、私と同じ境遇でつまづいている方の解決策になればよいとも思っております。
開発環境
- Xcode12
- Swift5
背景
iPhoneアプリのアップデートを開発しテストした。
↓
前バージョンからアップデートして実行した際にエラーが出た。
↓
データベースのエンティティの構造を変更していた為、どうやら、CoreData周りで何かしらの作業が必要であることが判明
概要
必要な手順
CoreDataはエンティティを変更した際に、以下の作業が必要になる。
- データ構造が変更されたことを、CoreDataに明示する作業。
- 変更前のデータを変更後にも使用する場合には、変更前のデータの値と変更後の値とのマッピング(値の引き継ぎ)を明示的に宣言する作業。
1.を行わなかった場合、アプリ起動時にエラーが発生する。
2.を行わなかった場合、アプリを起動して新しいデータ構造に更新された場合に、以前保存されていたデータは引き継がれない。
実施方法
この1.と2.を実施する方法を調べた結果、2つのやり方で実施できるらしい。
① 自動でデータ構造の更新とマッピングを行う方法
② 明示的に宣言してデータ構造更新とマッピングを行う方法。
①に関しては、見聞きしただけなので実際に実施できるのかは不明。もしかしたら、そもそも②の方法しか存在しない可能性がある。
今回自分が実施したのは②の方法のみであるため、ここから先は②の方法でCoreDataのマイグレーション、マッピングを行った具体的な内容を紹介する。
具体的な実施方法
具体的なマイグレーション、マッピング方法は主に3つの手順で実施する。
1. xcdatamodelファイルの作成
2. xcdatamodelのバージョンを設定
3. Data Mapping Modelファイルを作成
手順1 新たなxcdatamodelファイルを作成
手順の前に、サンプルプロジェクトを作成し、データモデルを下記の画像のように設定する。
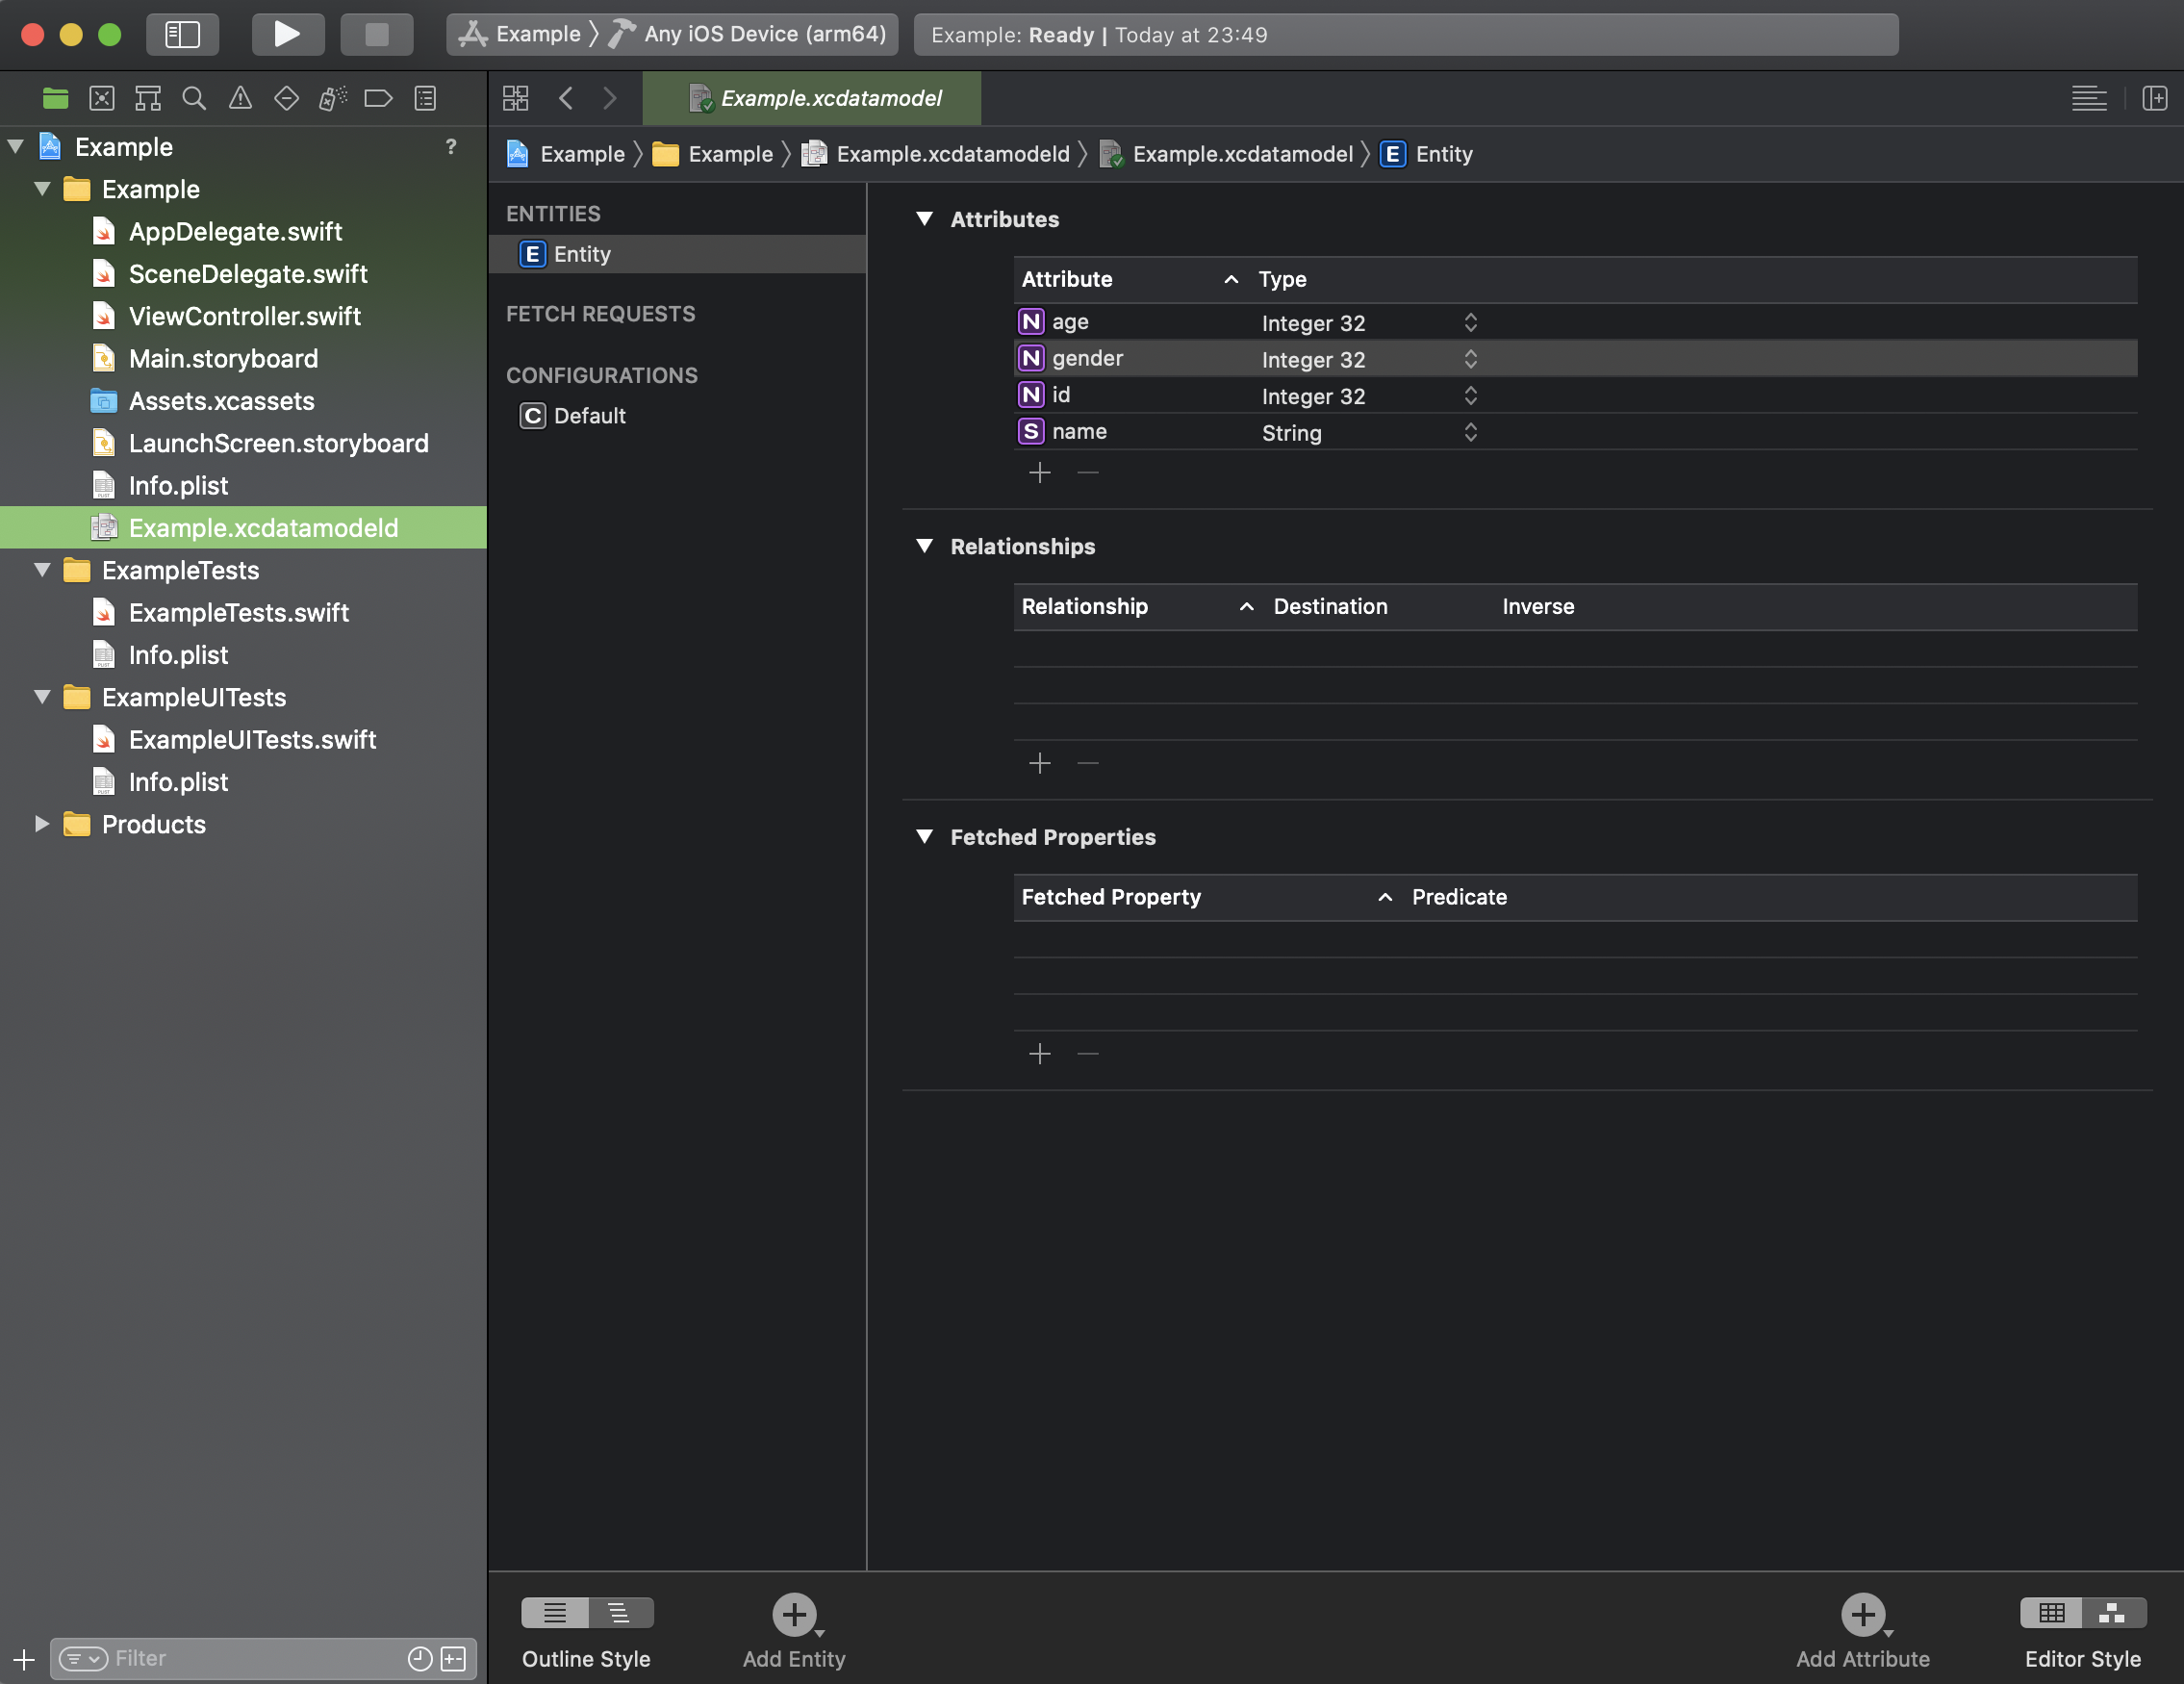
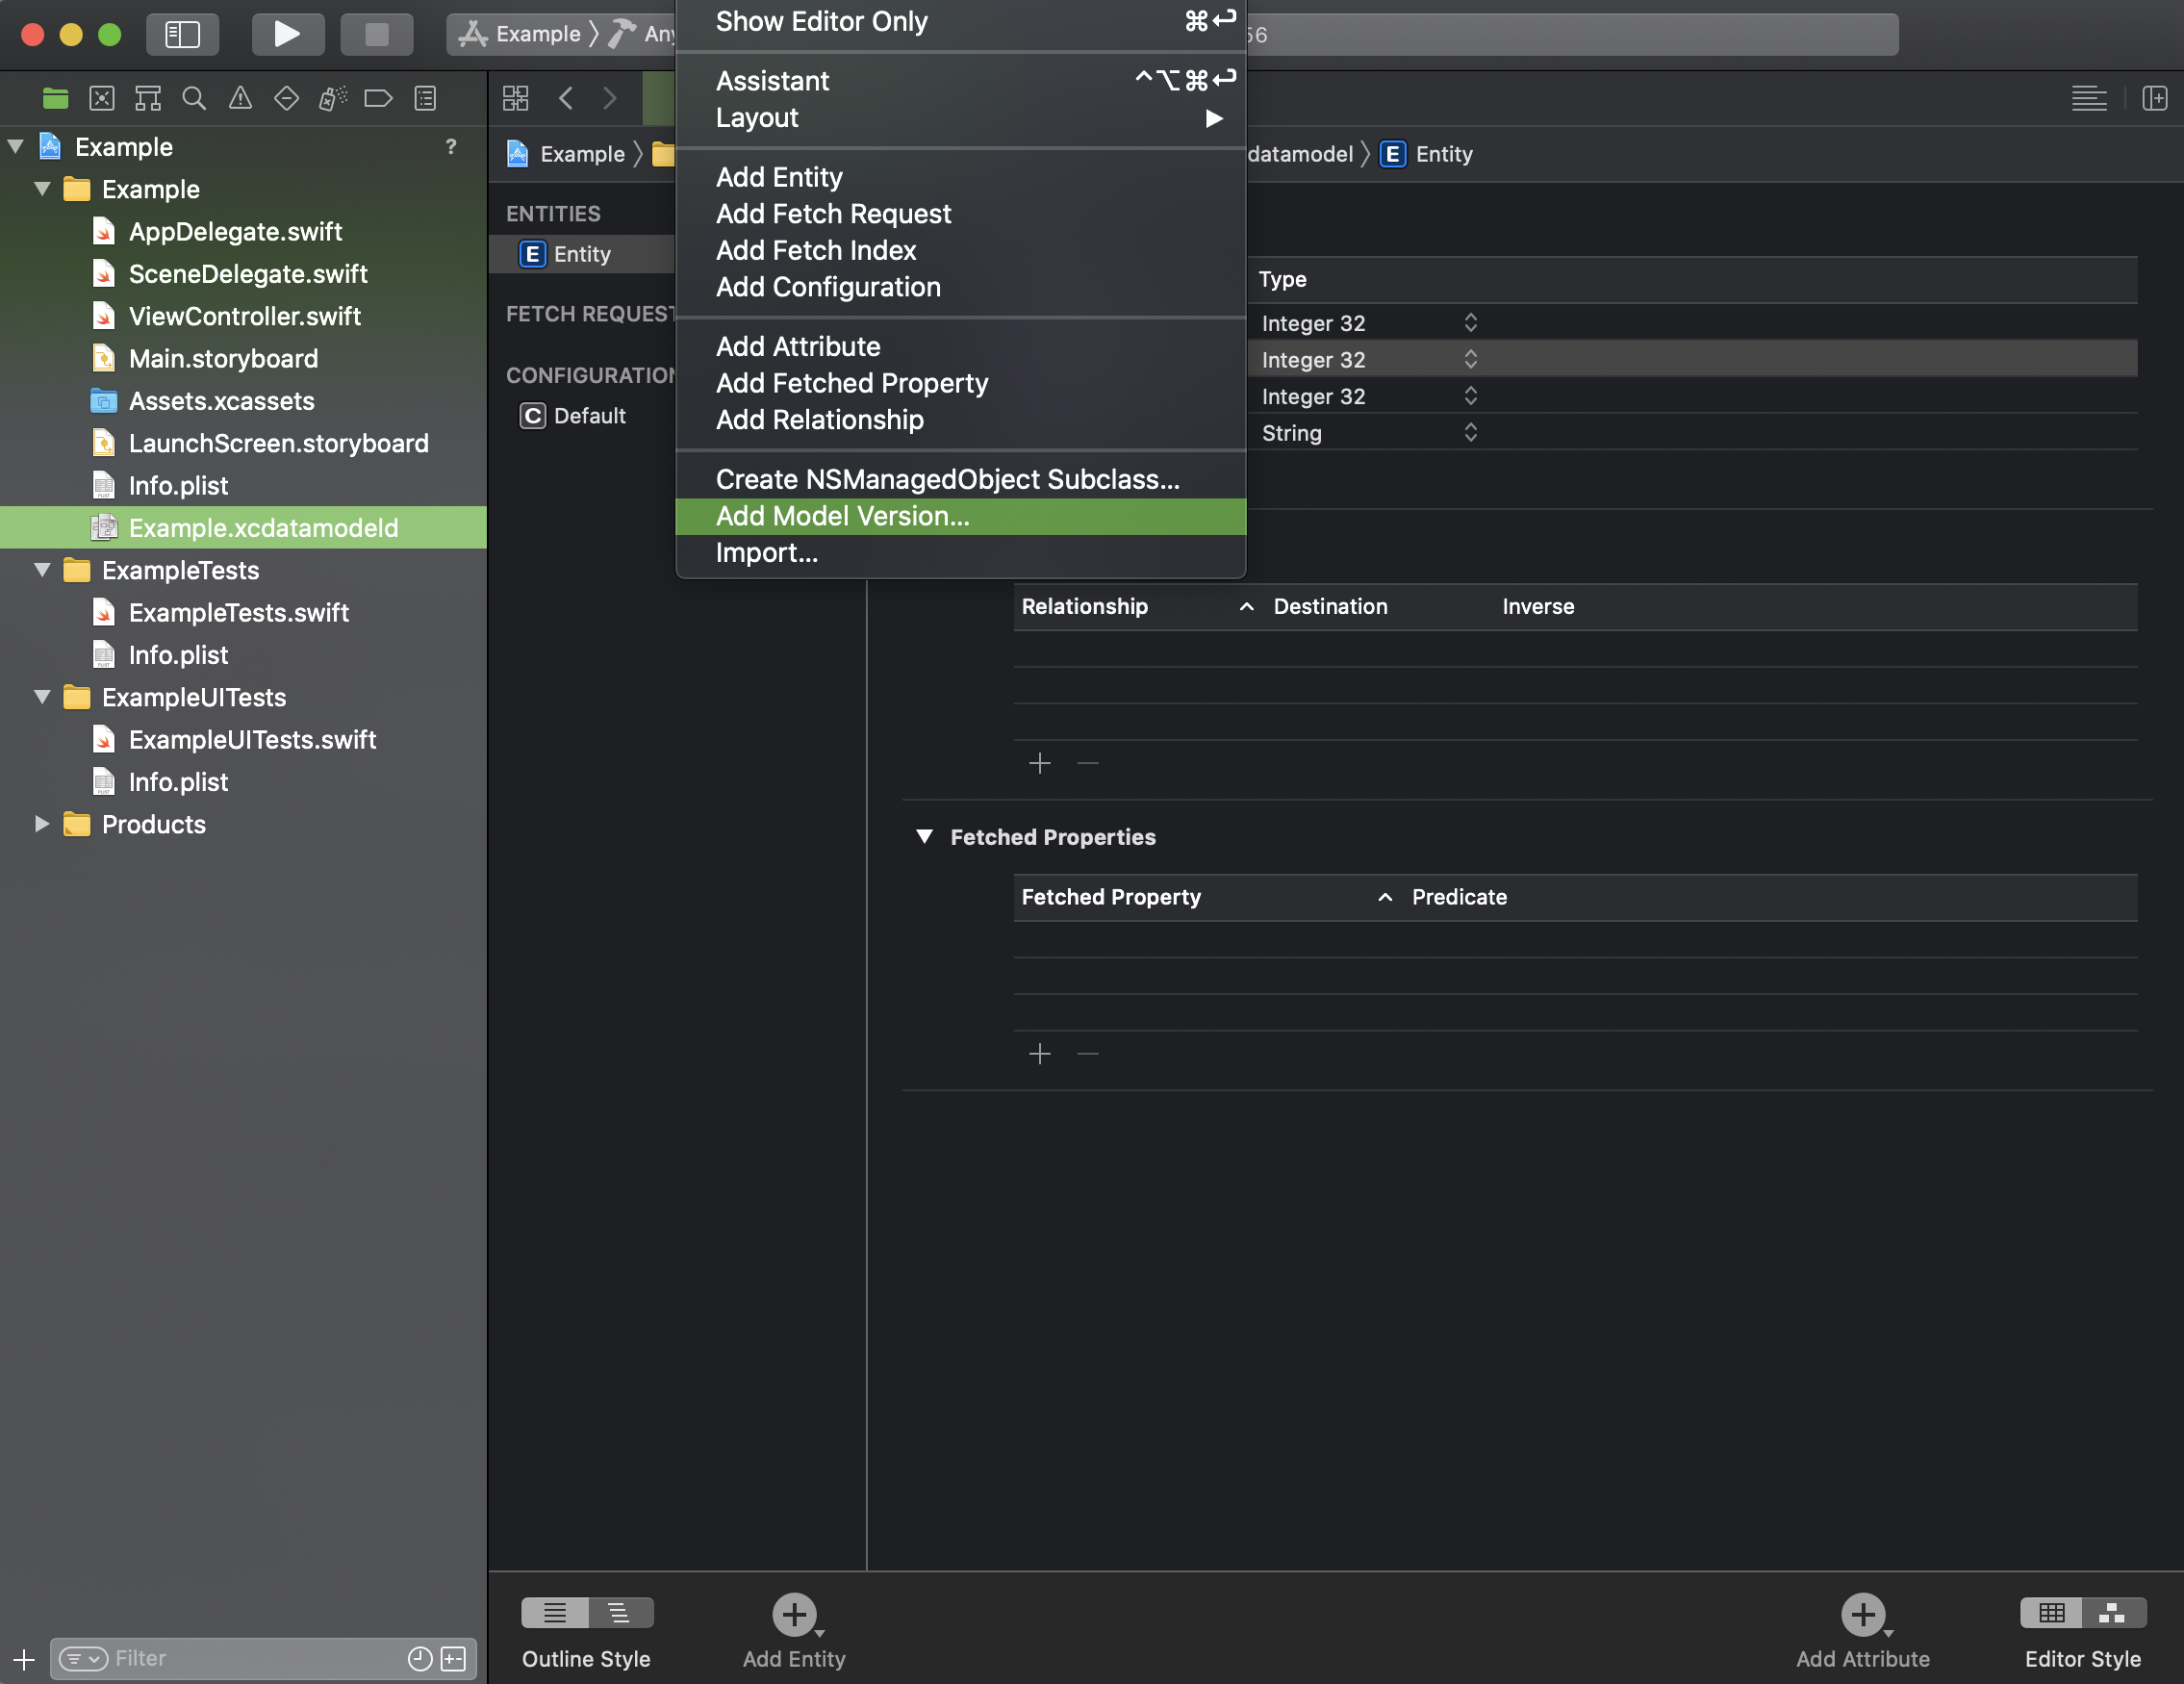
xcdatamodelを選択してから上のEditor -> Add Model Versionを押下する。
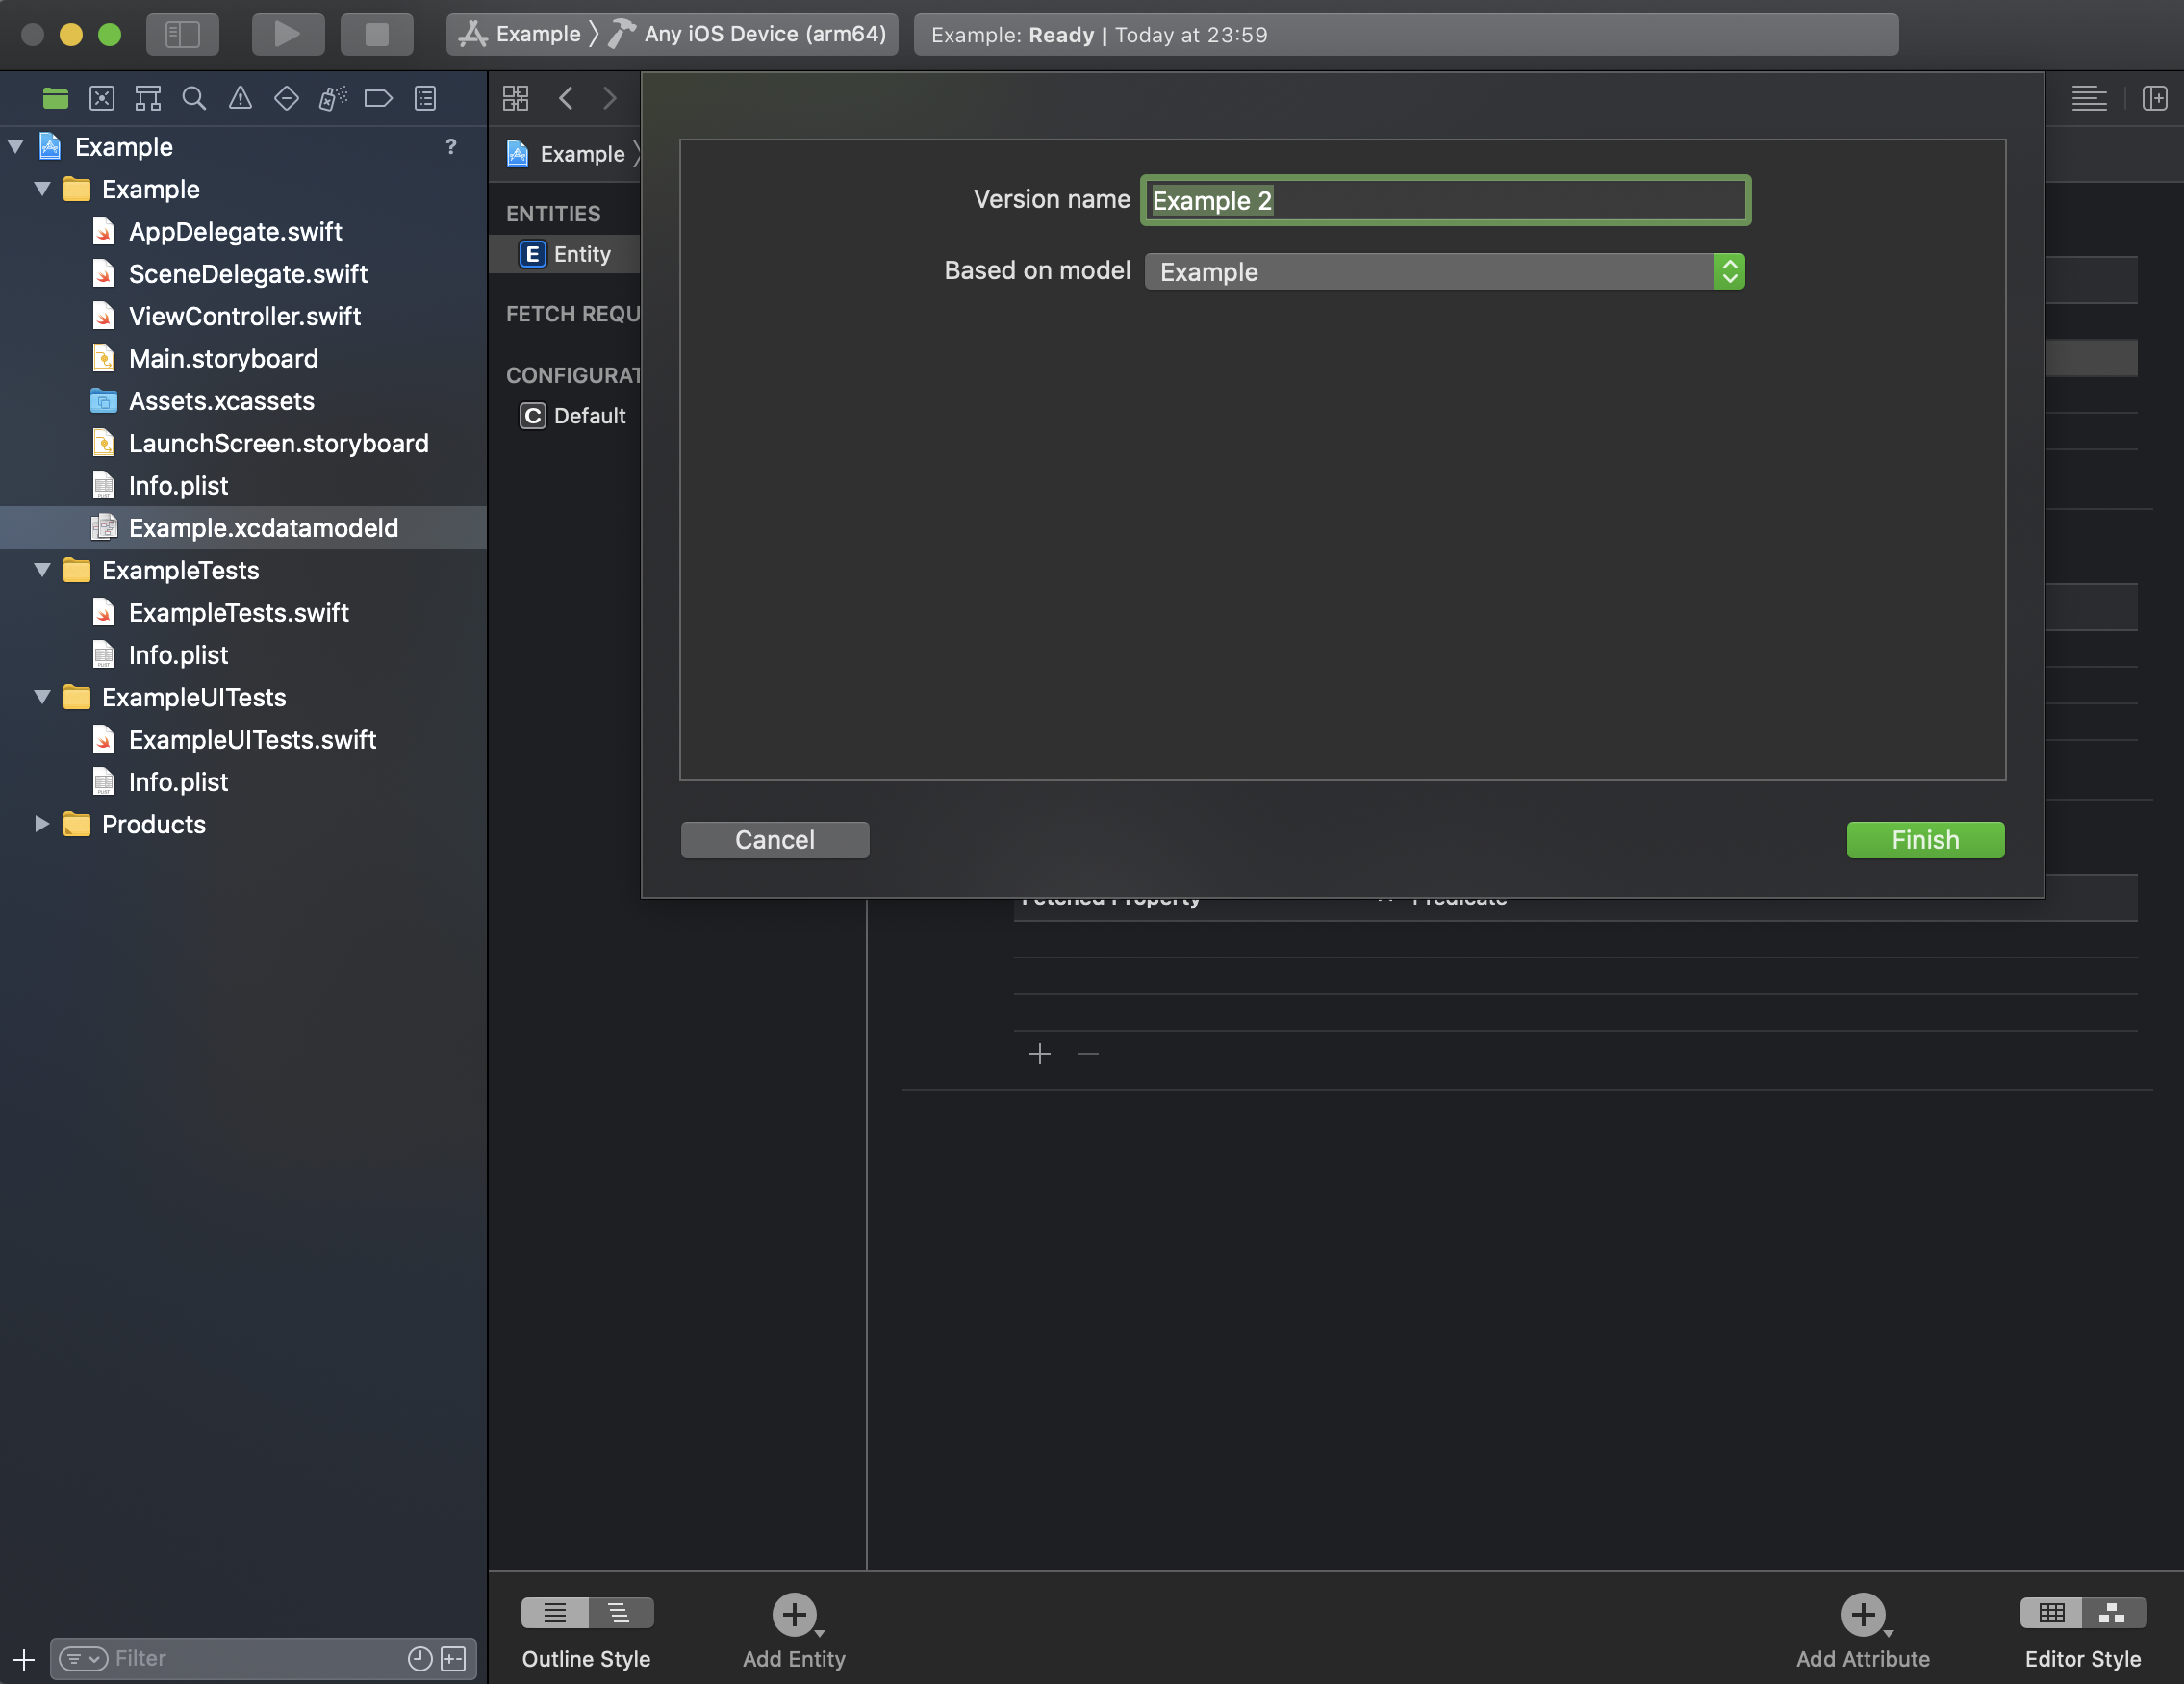
バージョンネームを指定されるので、適切なネームを入力。今回はExample2とする。
finishを押下すると、xcdatamodelのファイルにExpand Iconが出現するので開く。
すると、以前あるExample.xcdatamodelともう一つ、先ほど作成したExample2.xcdatamodelが作成されているのが確認できる。また、データ構造もExample.xcdatamodelと同じ構成で作成されている。
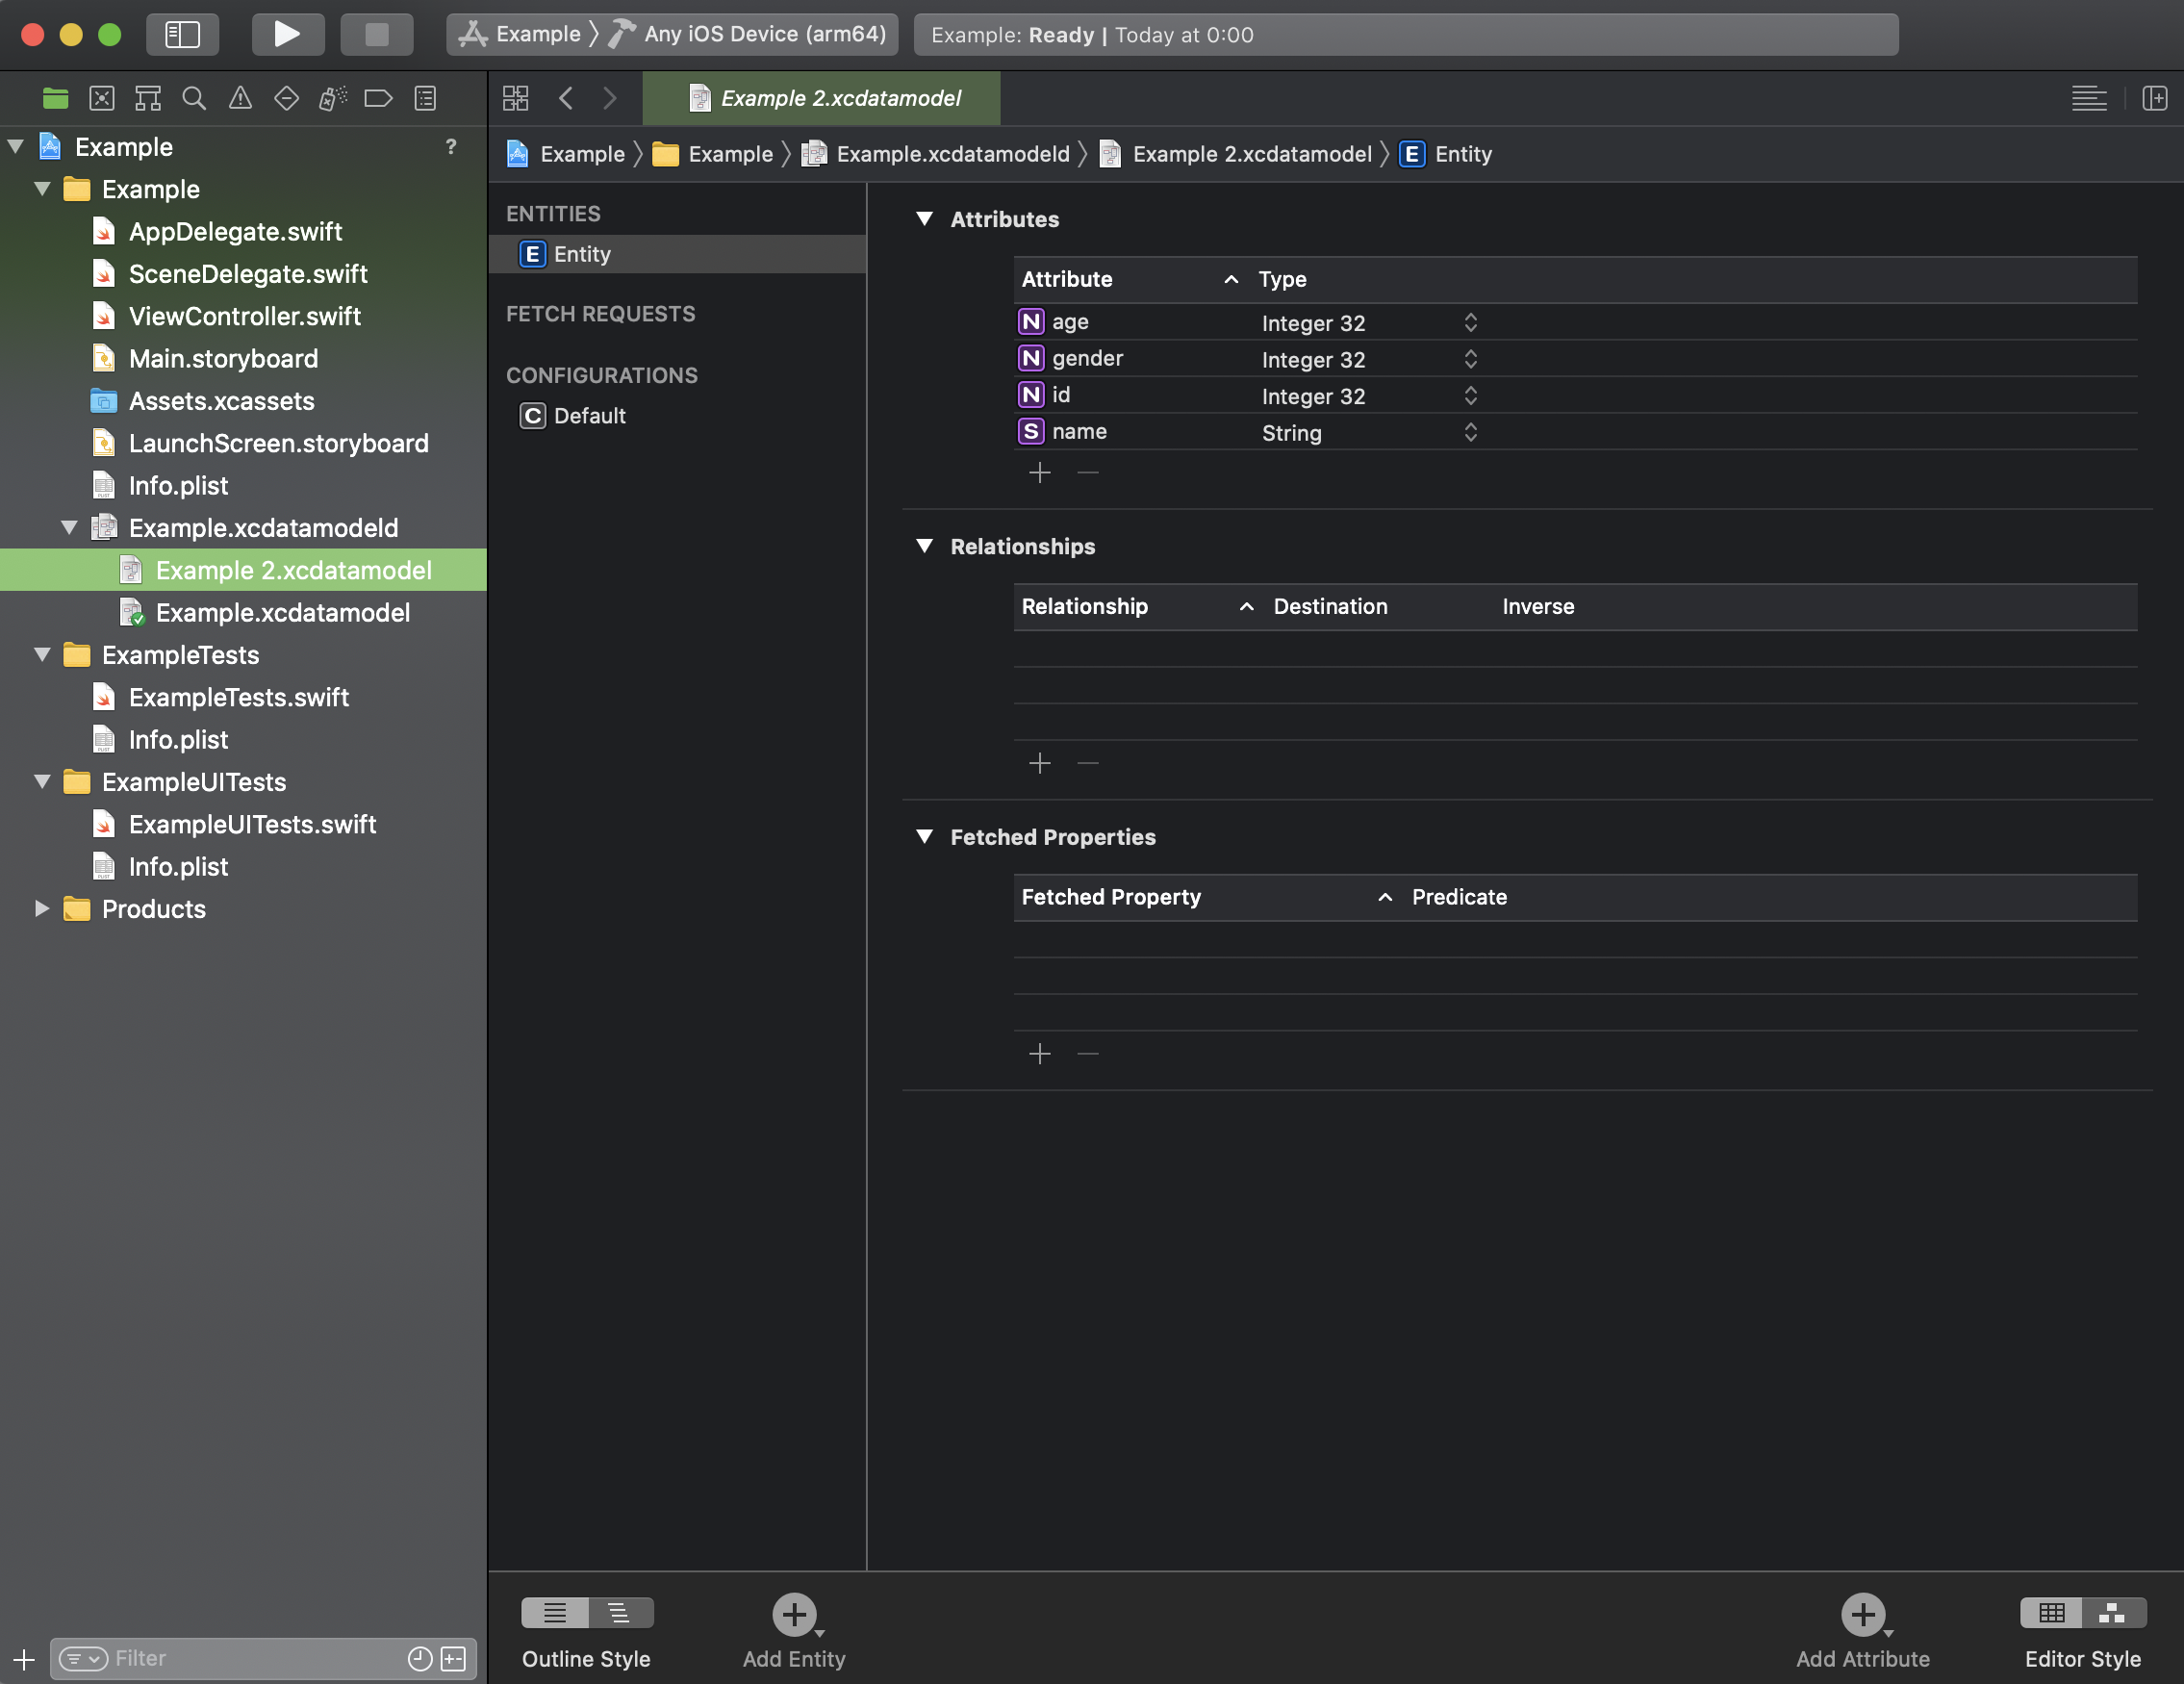
手順1の新たなxcdatamodelファイルを作成はこれで以上。
手順2に進む。
手順2 xcdatamodelのバージョンを変更
xcdatamodelを選択して、右側のウィンドウ内の資料マークを選択する。
Model Versionという欄があるのでそこをExampleからExample2へ変更する。
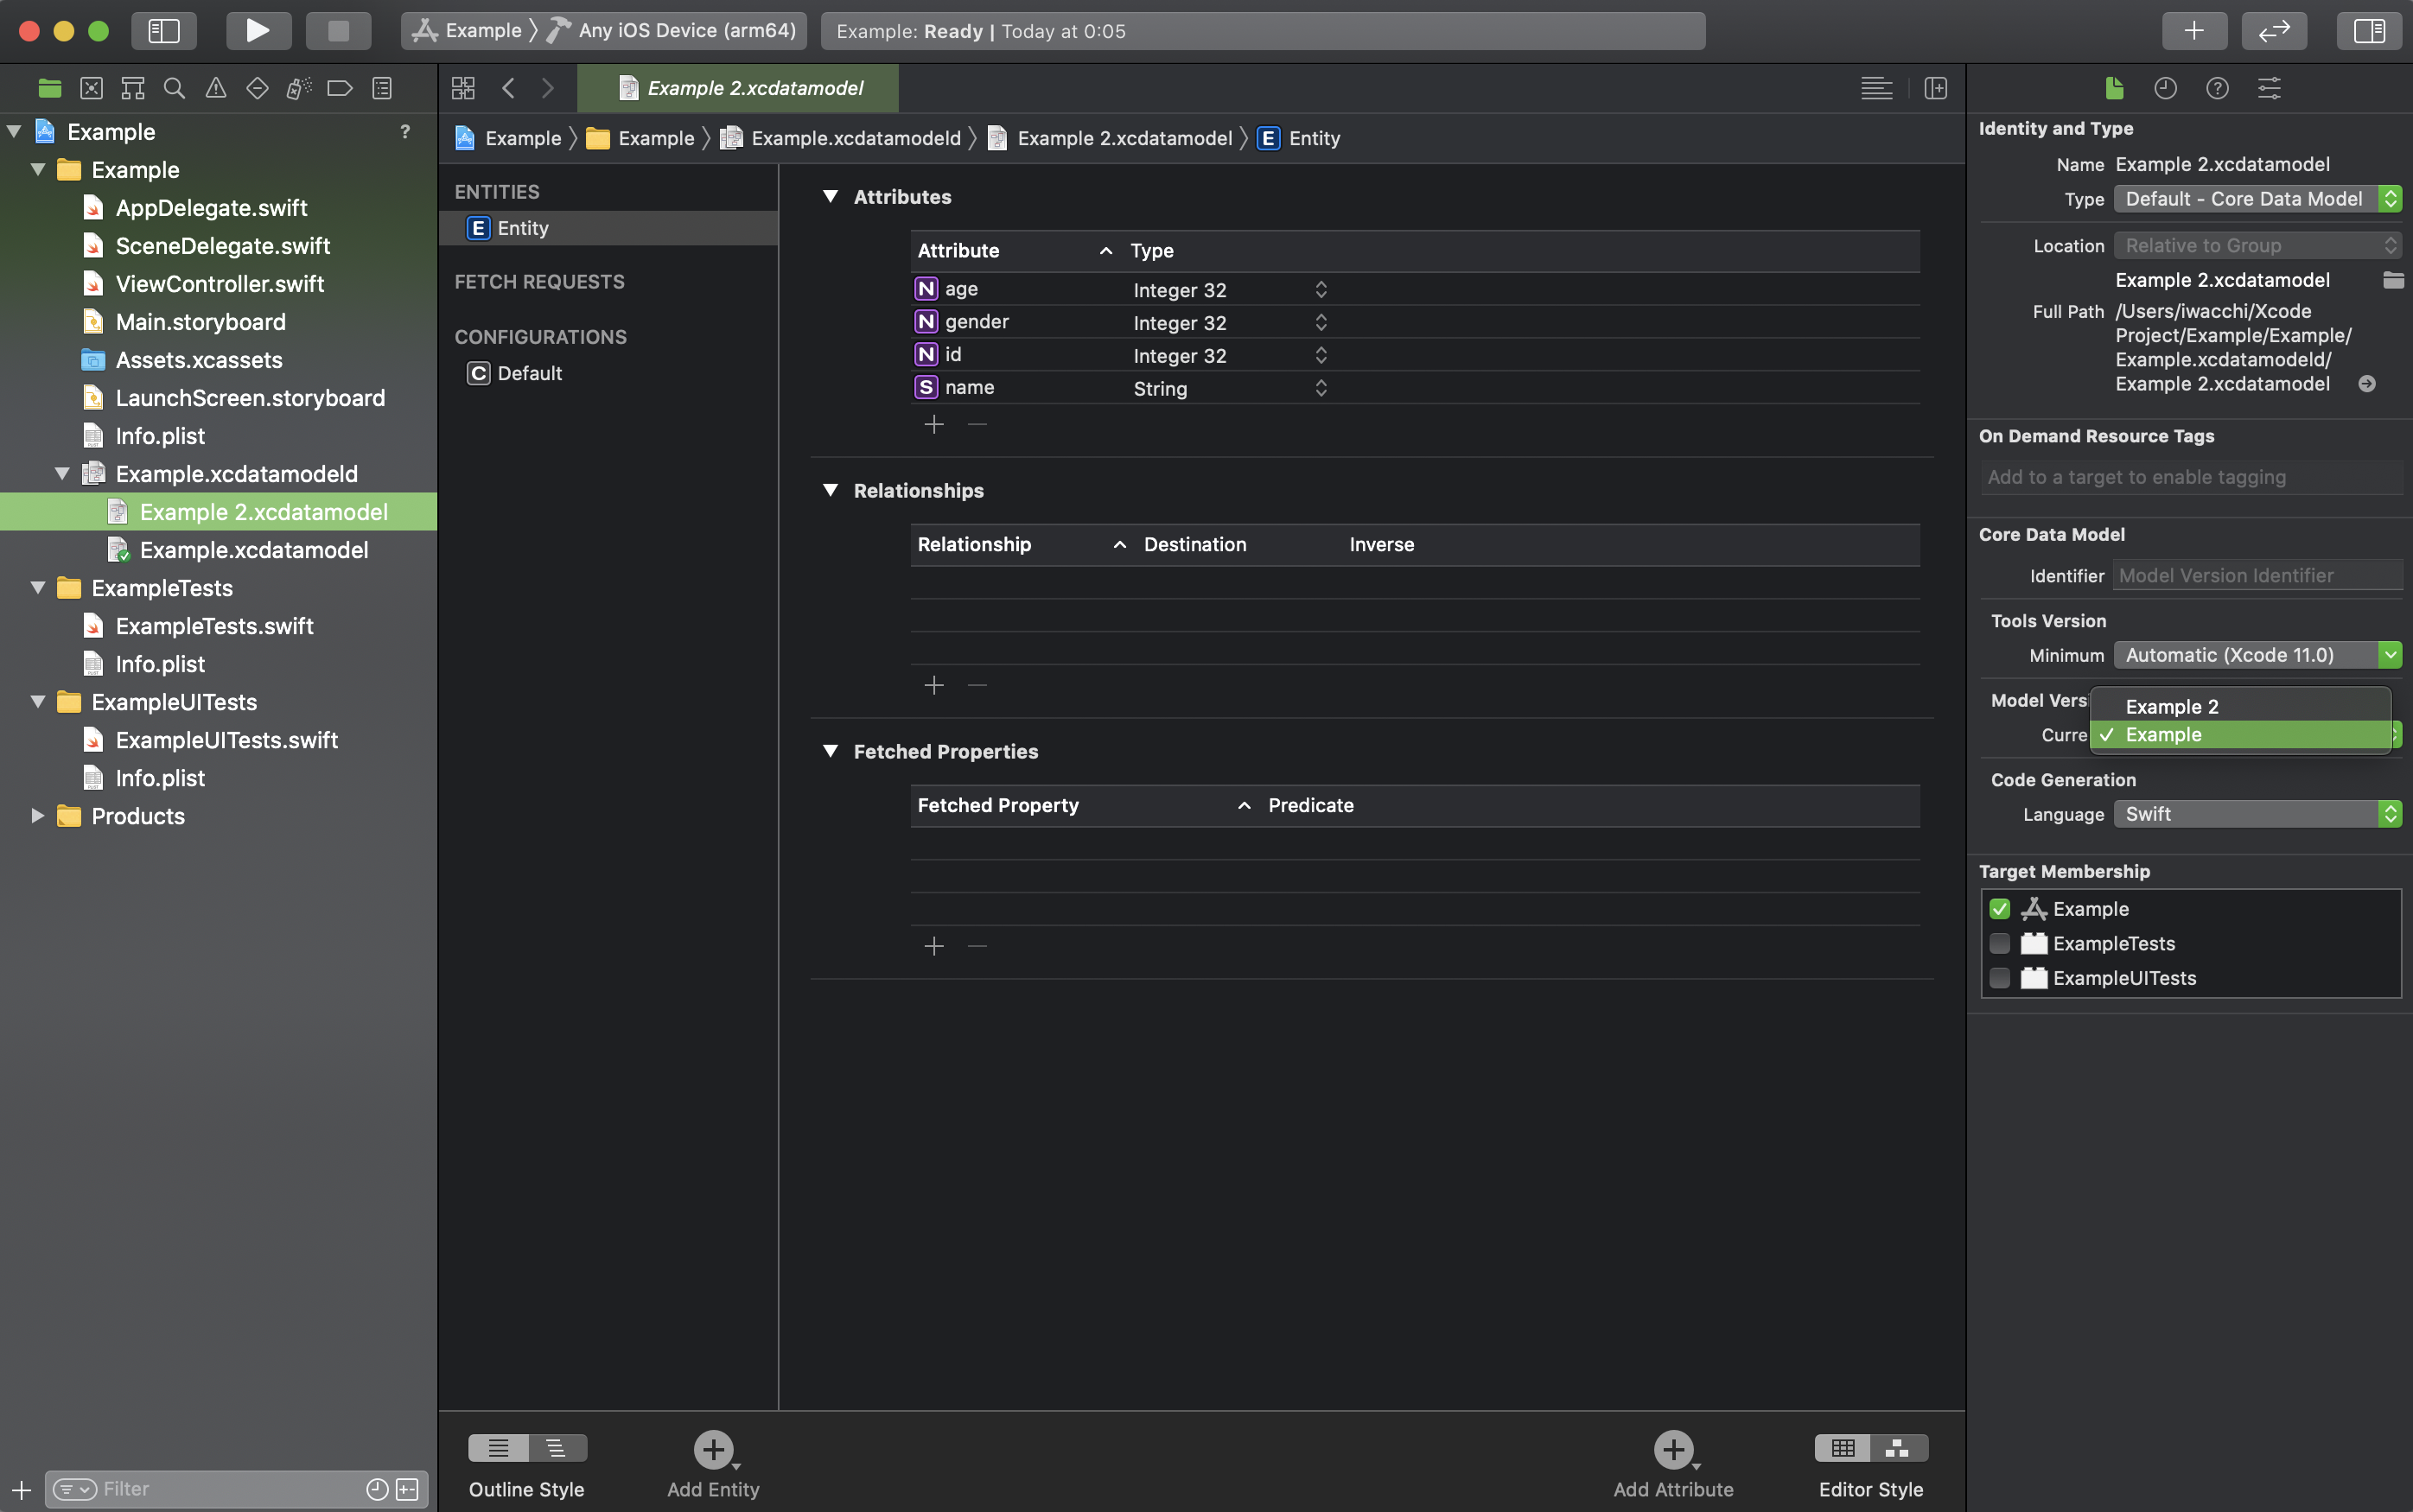
xcdatamodelId内のファイルの緑色のチェックマークがExampleからExample2へ変更されているのを確認する。
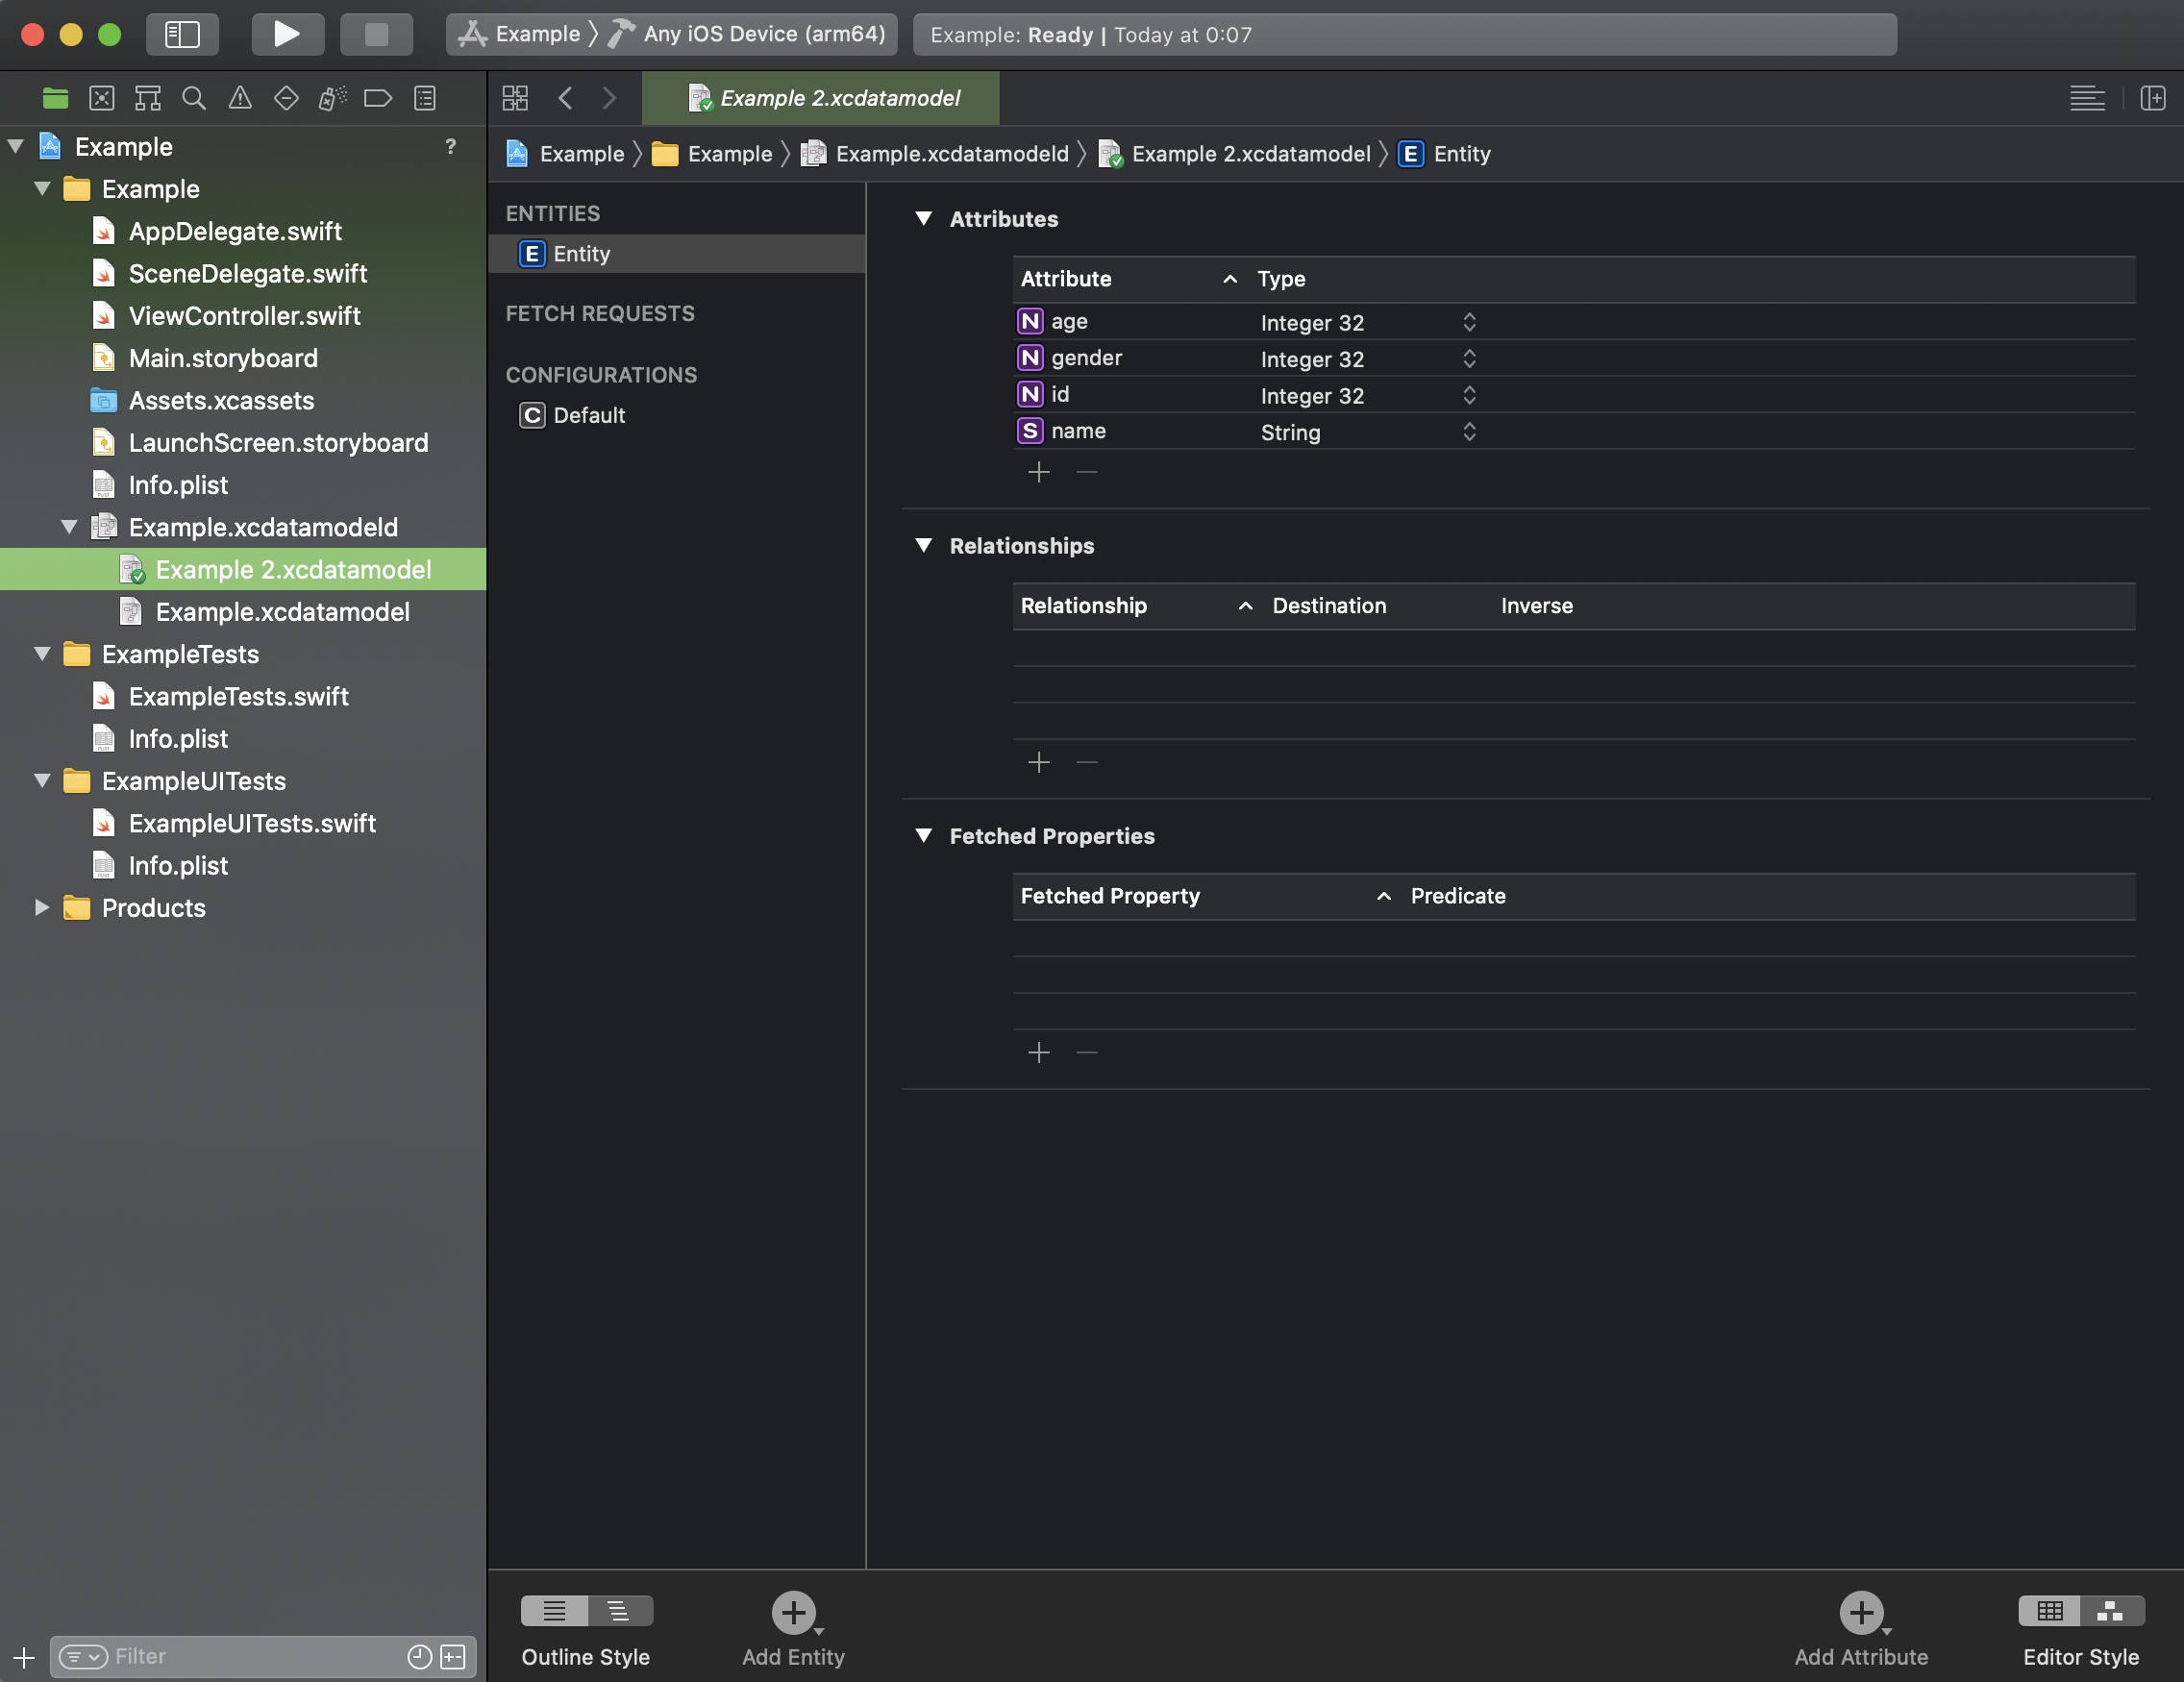
手順2のxcdatamodelのバージョン変更はこれで以上。
手順3へ進む。
手順3 Data Mapping Modelファイルを作成
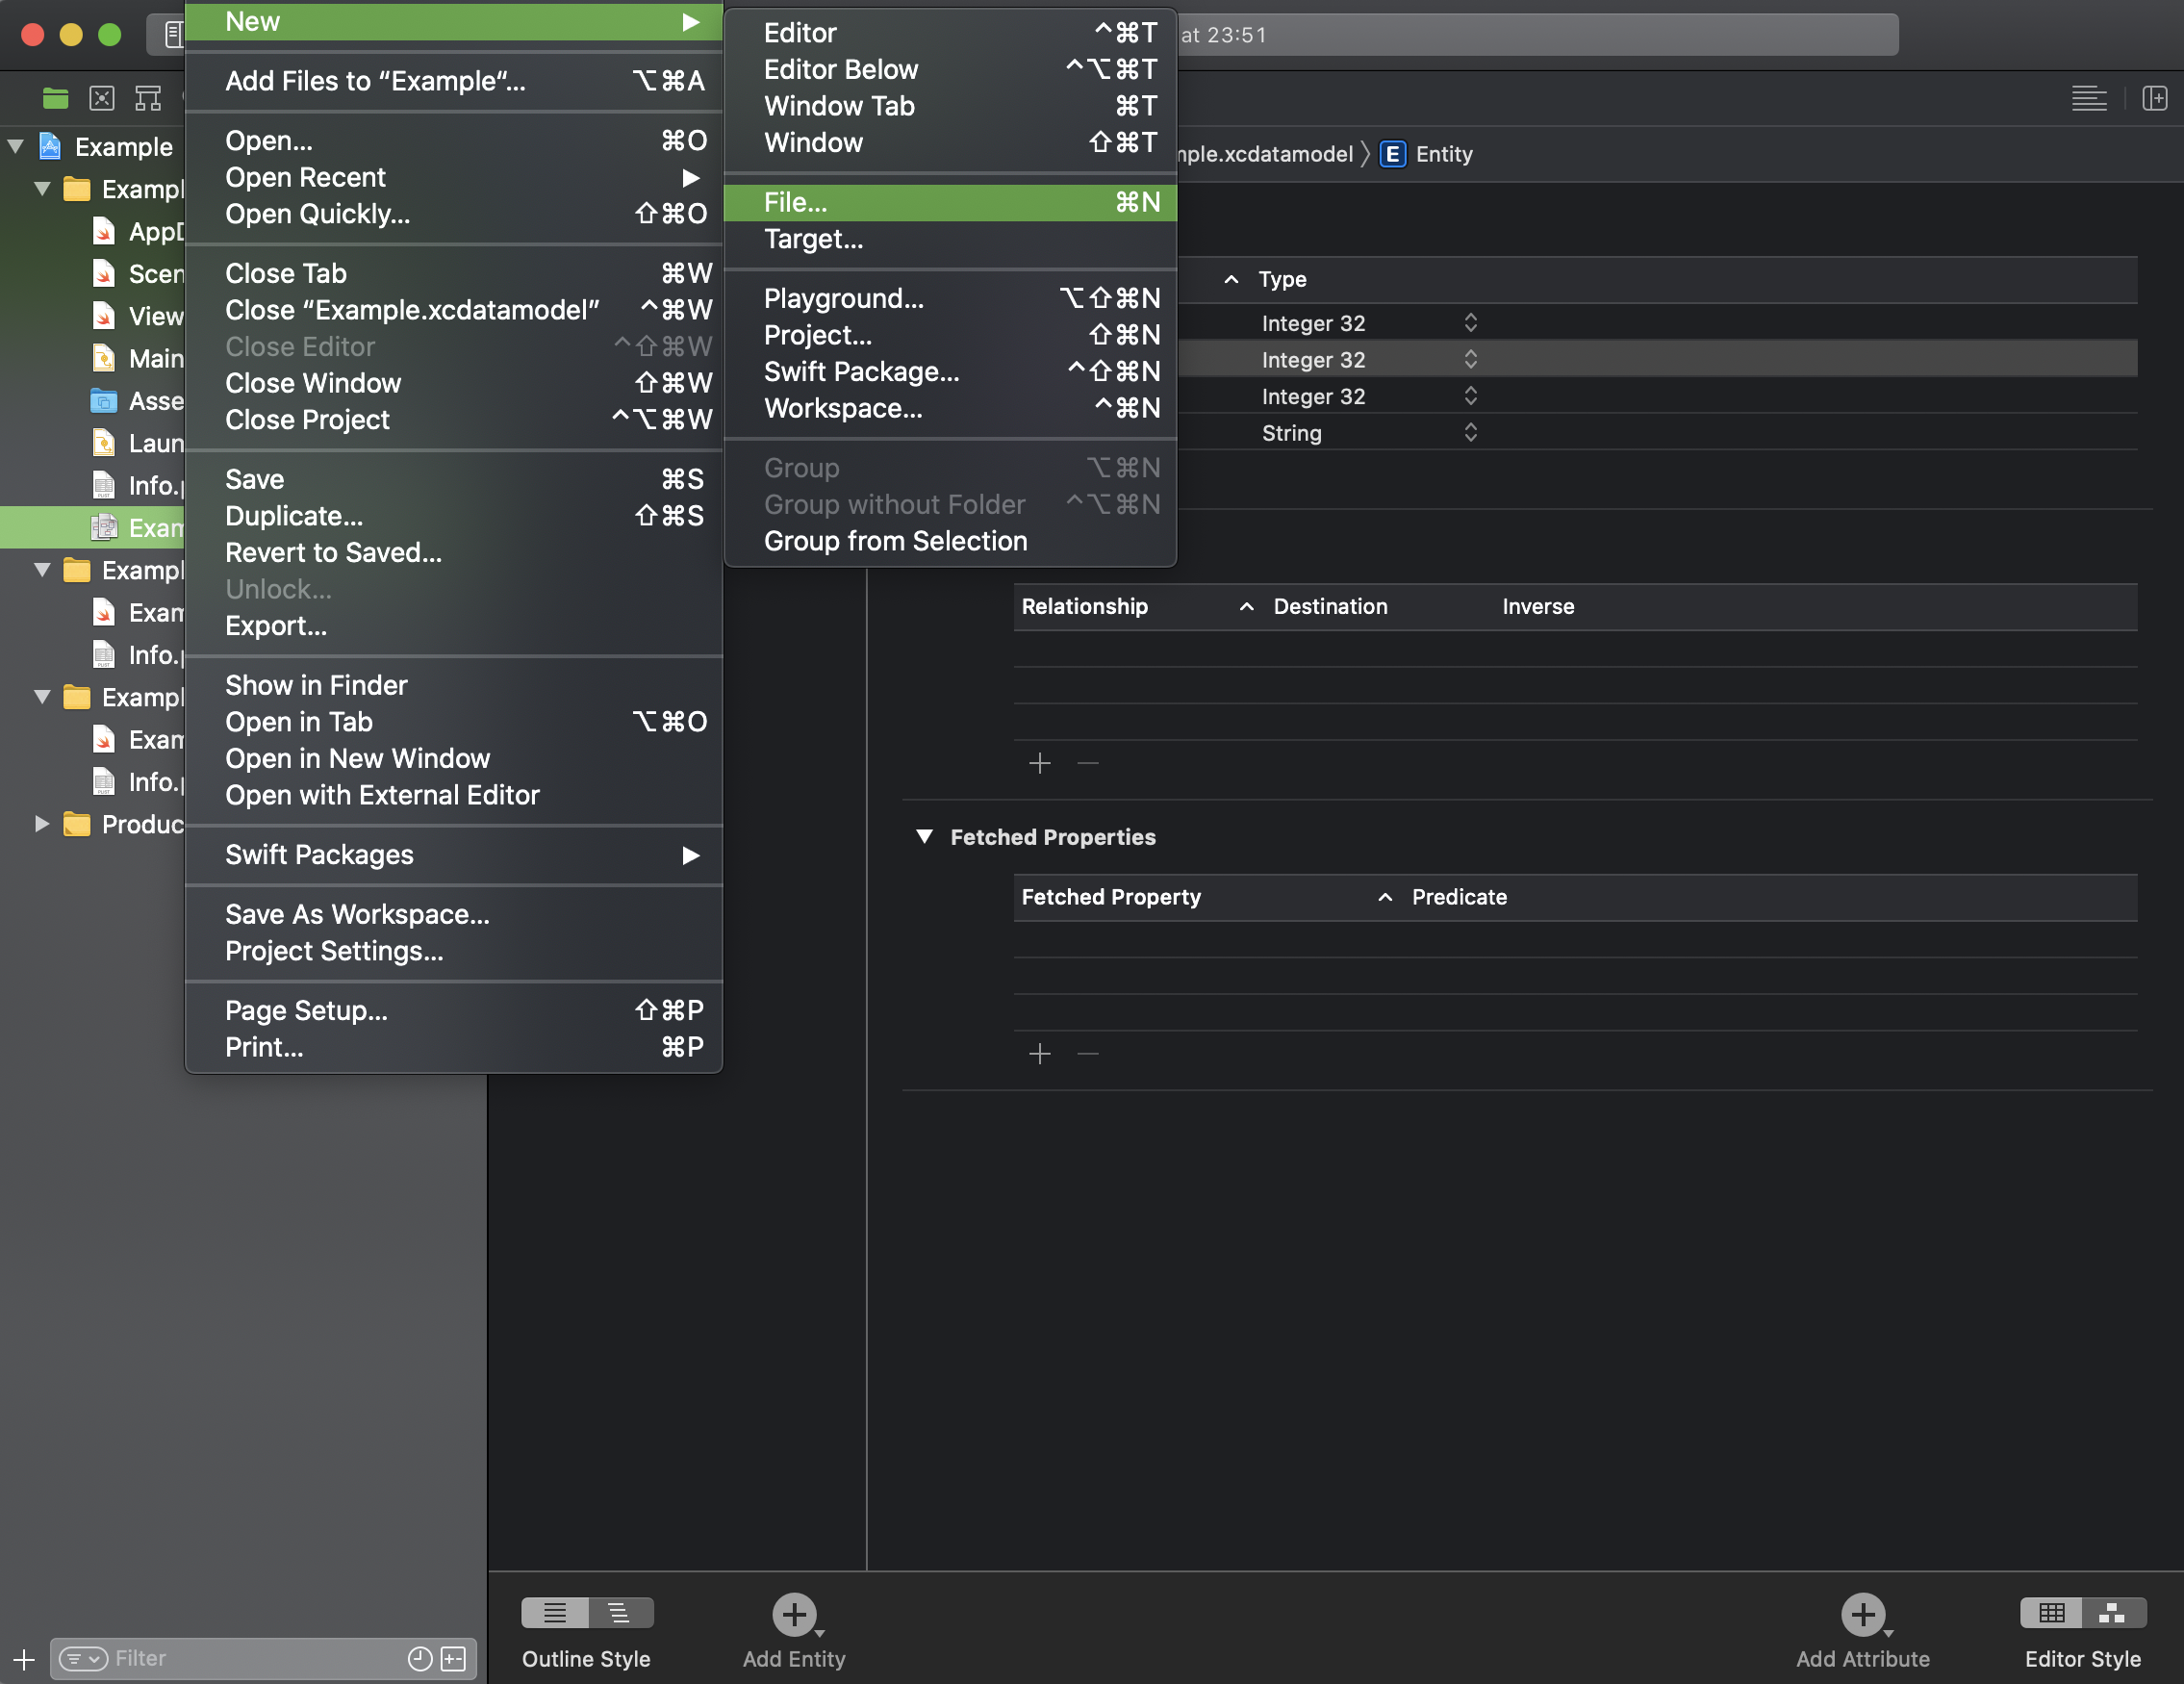
次に、xcdatamodelファイルを選択してから、File -> New -> File...を選択する。
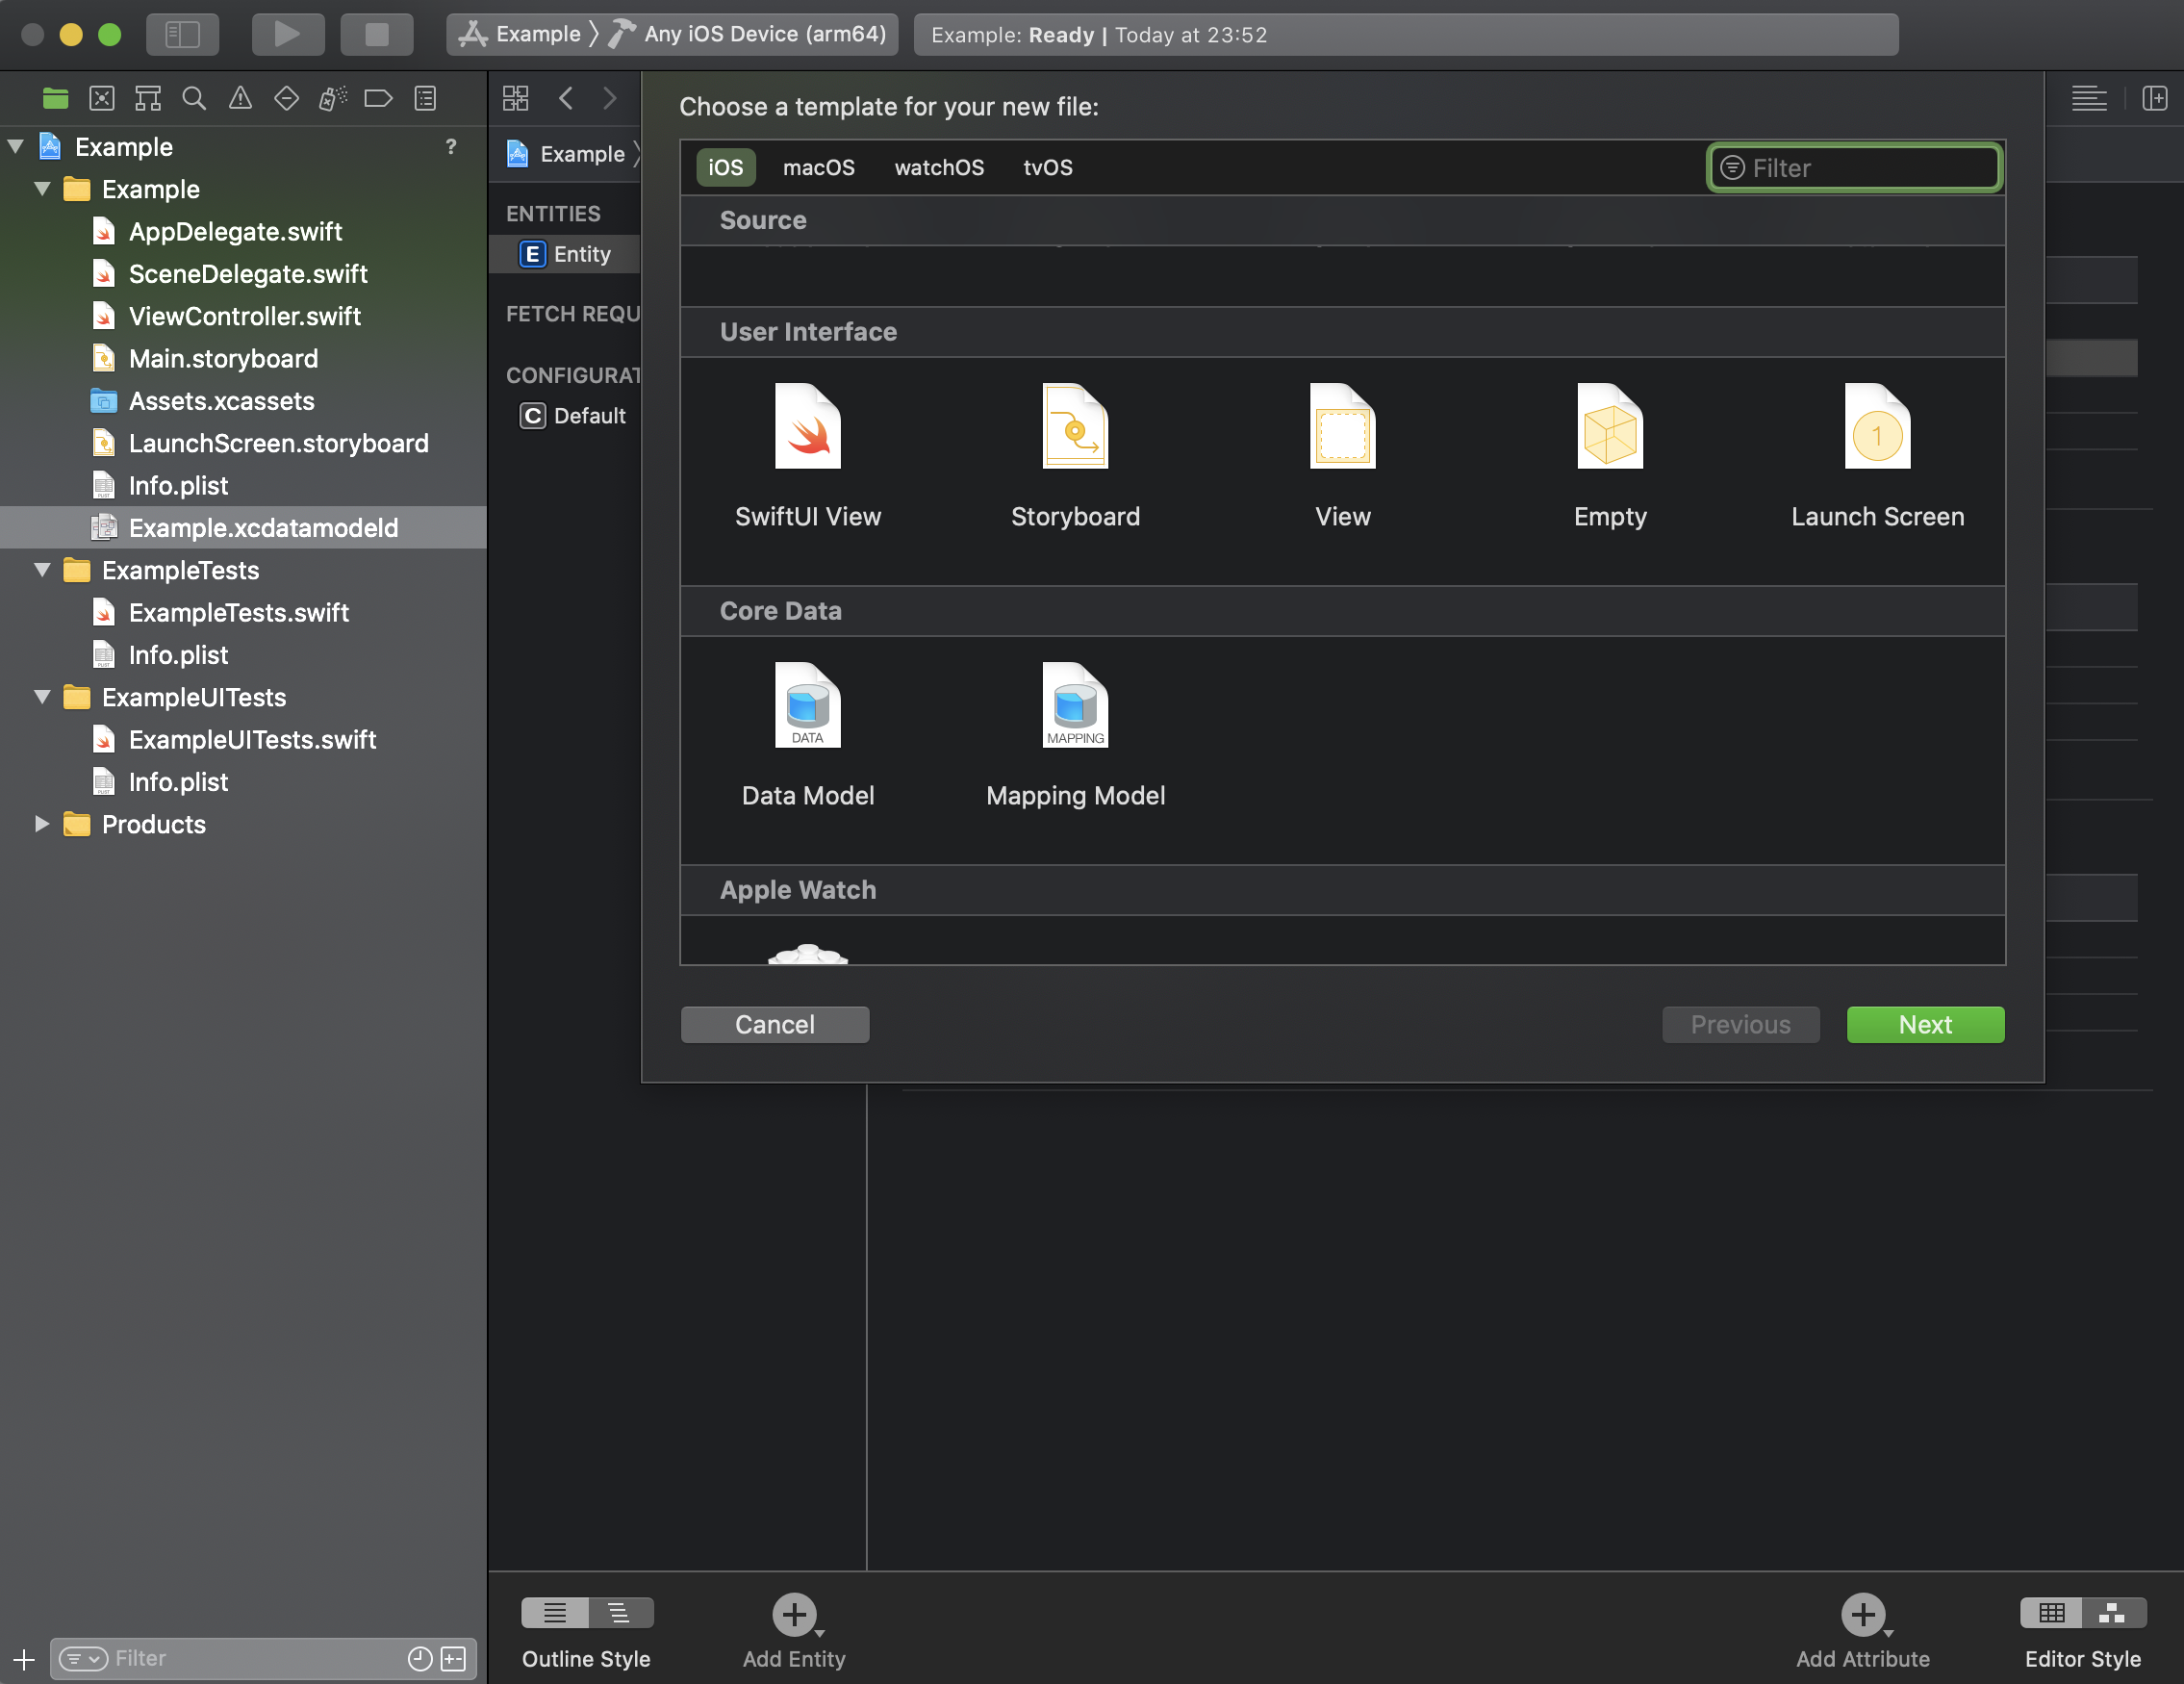
欄の真ん中あたりにあるMapping Modelを選択する。
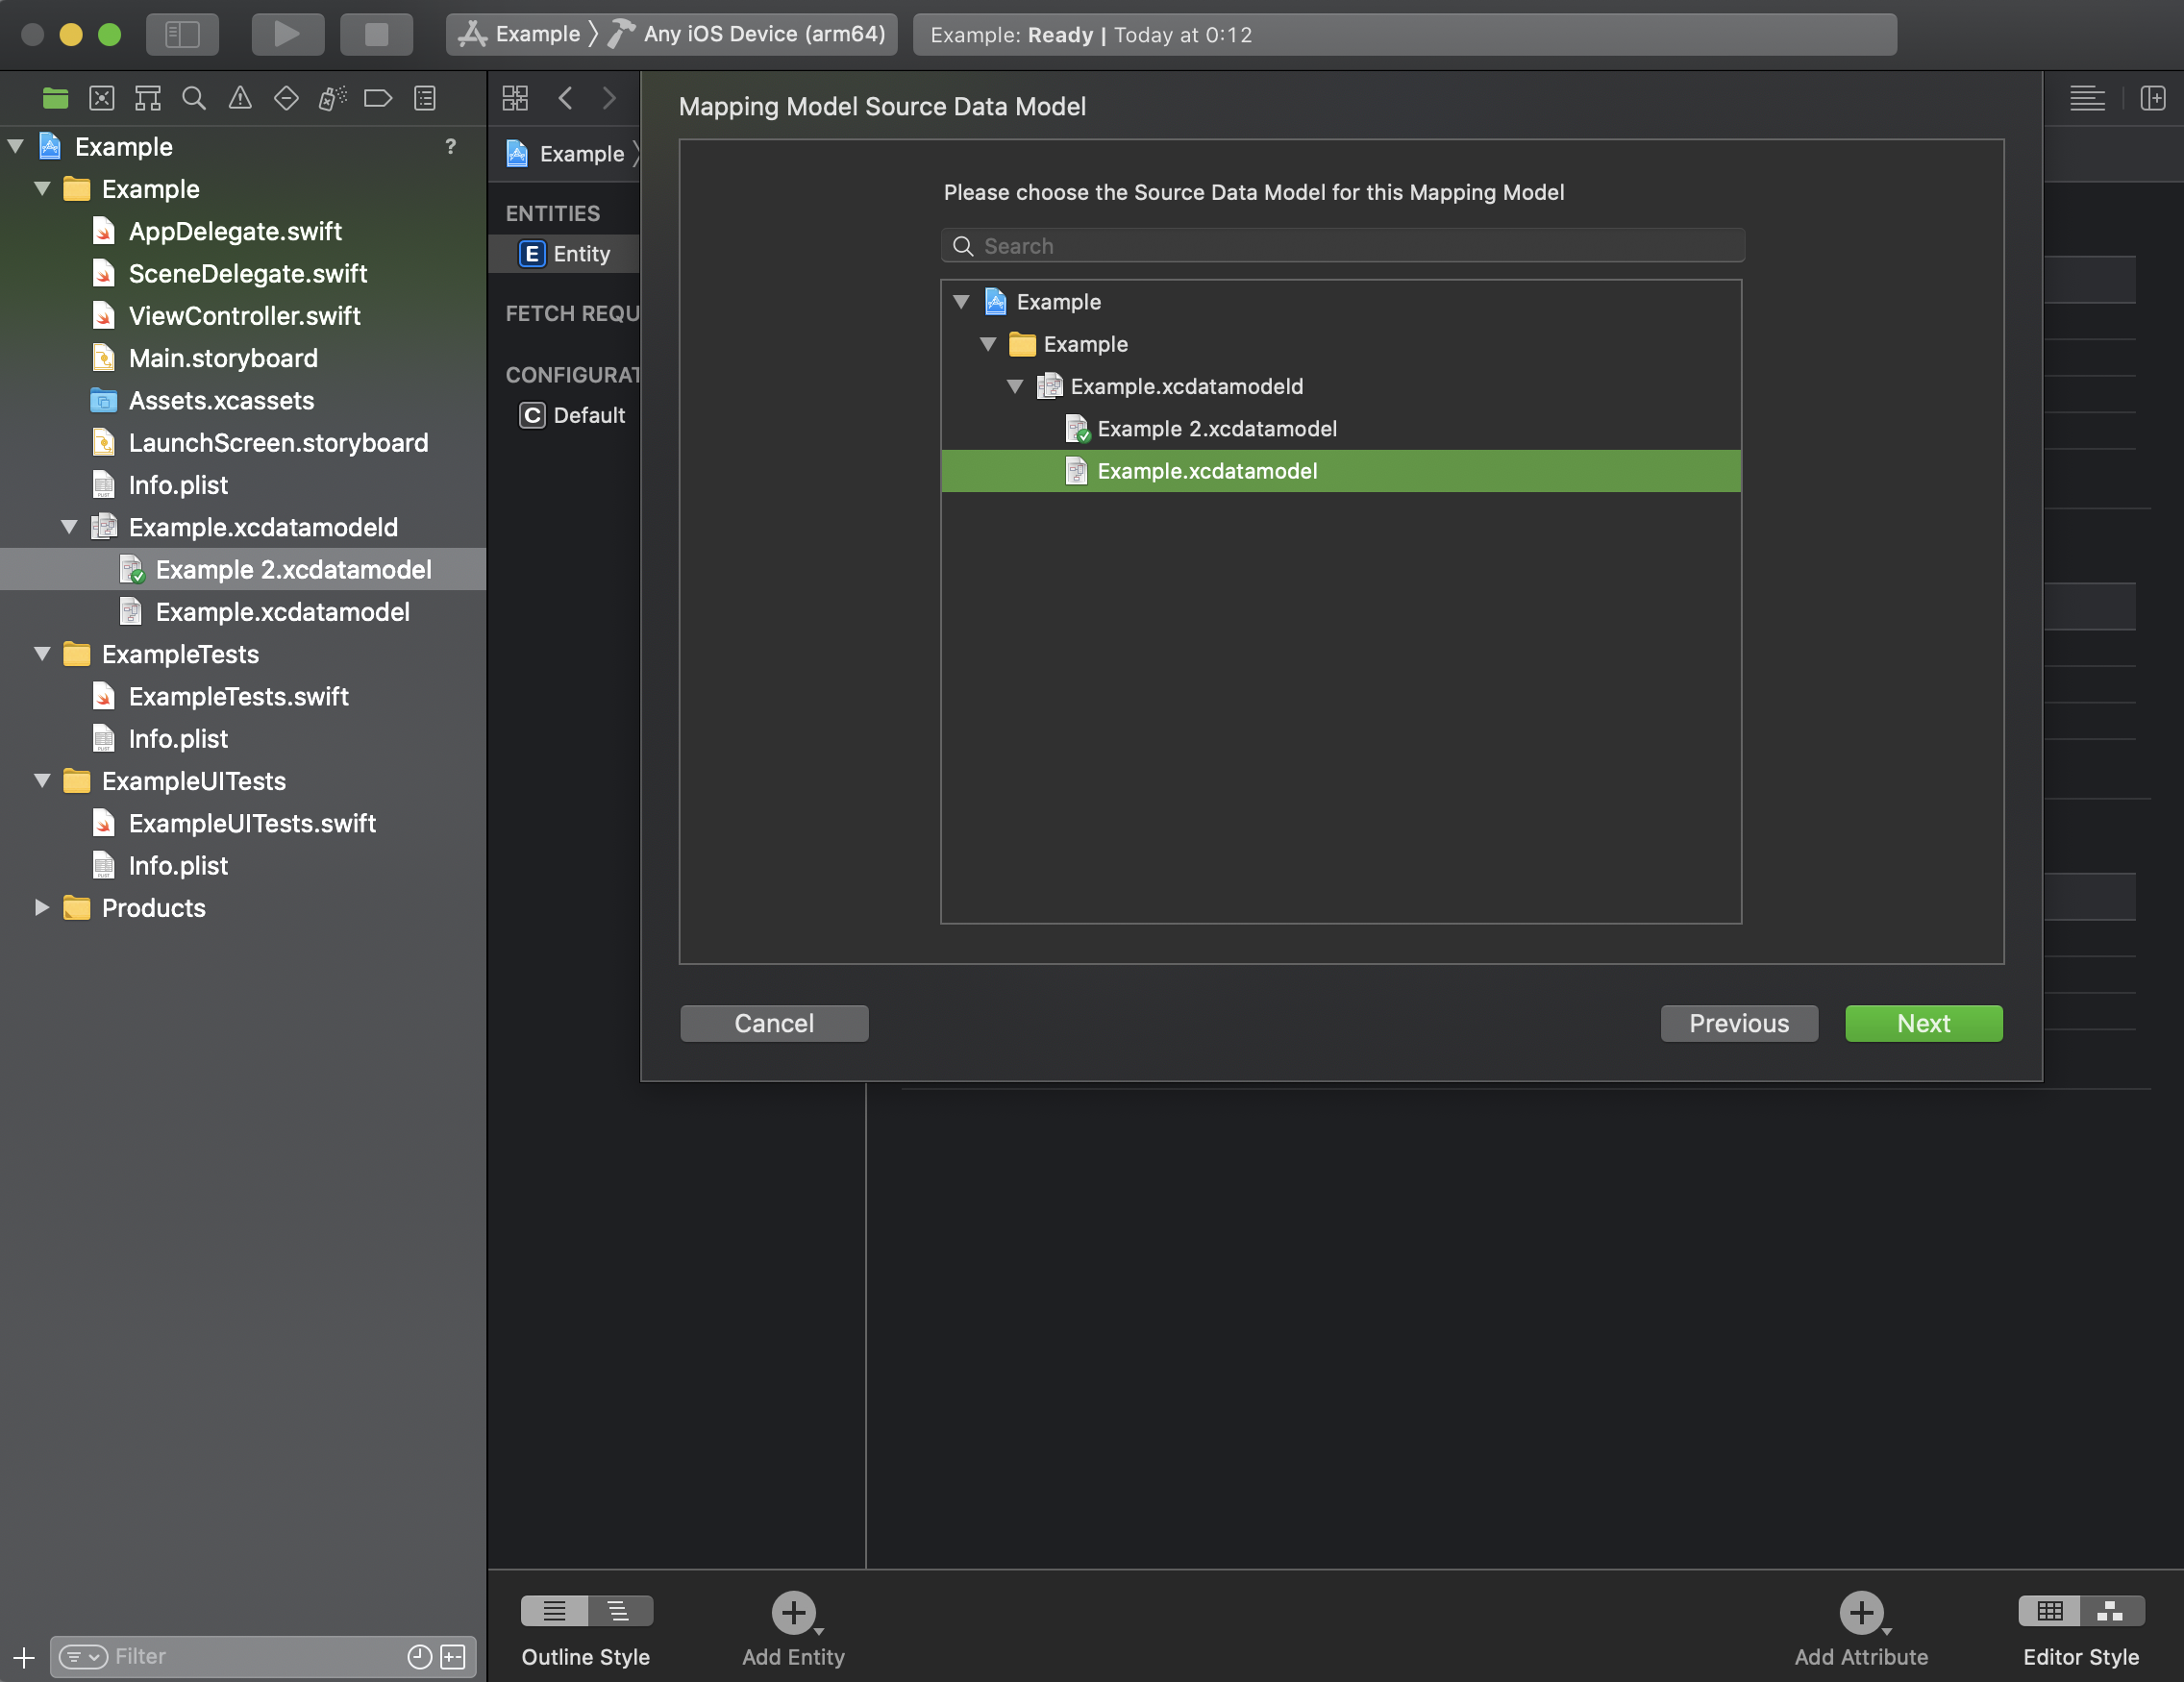
マッピングの元となるソースデータモデルを選択してくださいと出てくるので、表示されているxcdatamodelを選択して、Nextを押下する。選択するのはチェックマークがないExample.xcdatamodelである。
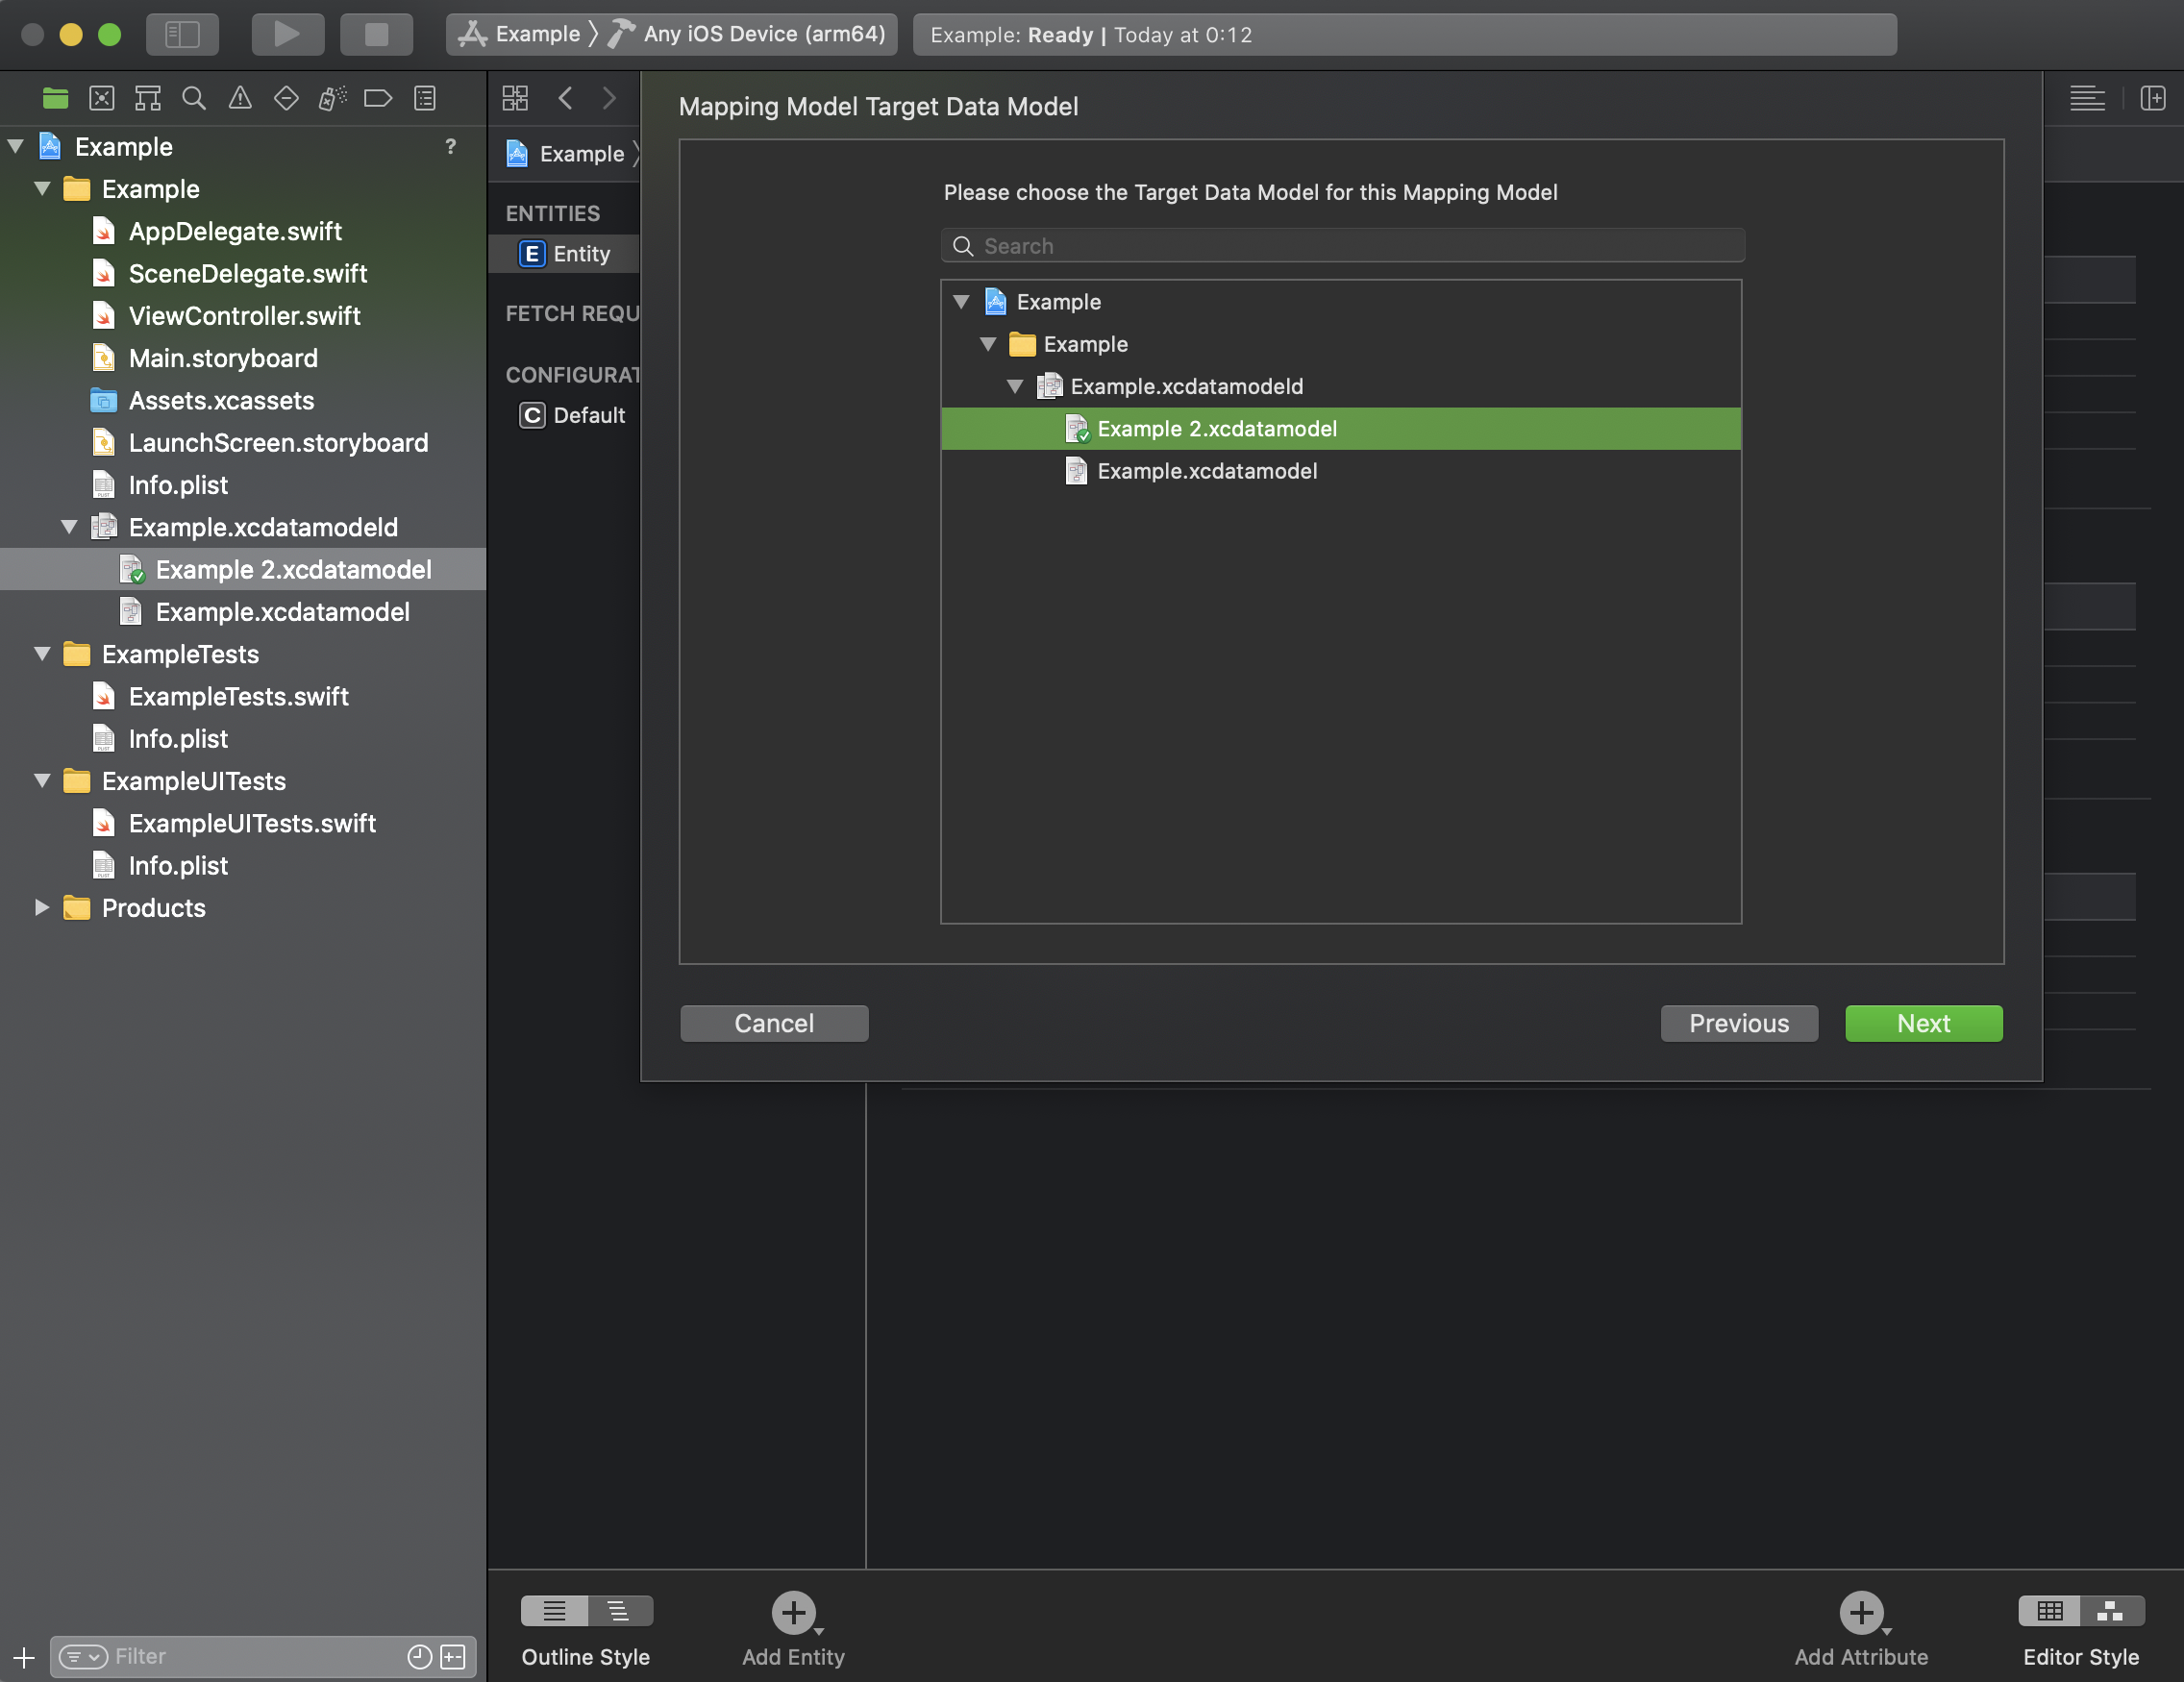
Nextを押下した後に、今度はマッピング先となるデータモデルの選択を問われるので、チェックマークがついているExample2.xcdatamodelを選択してNextを押下する。
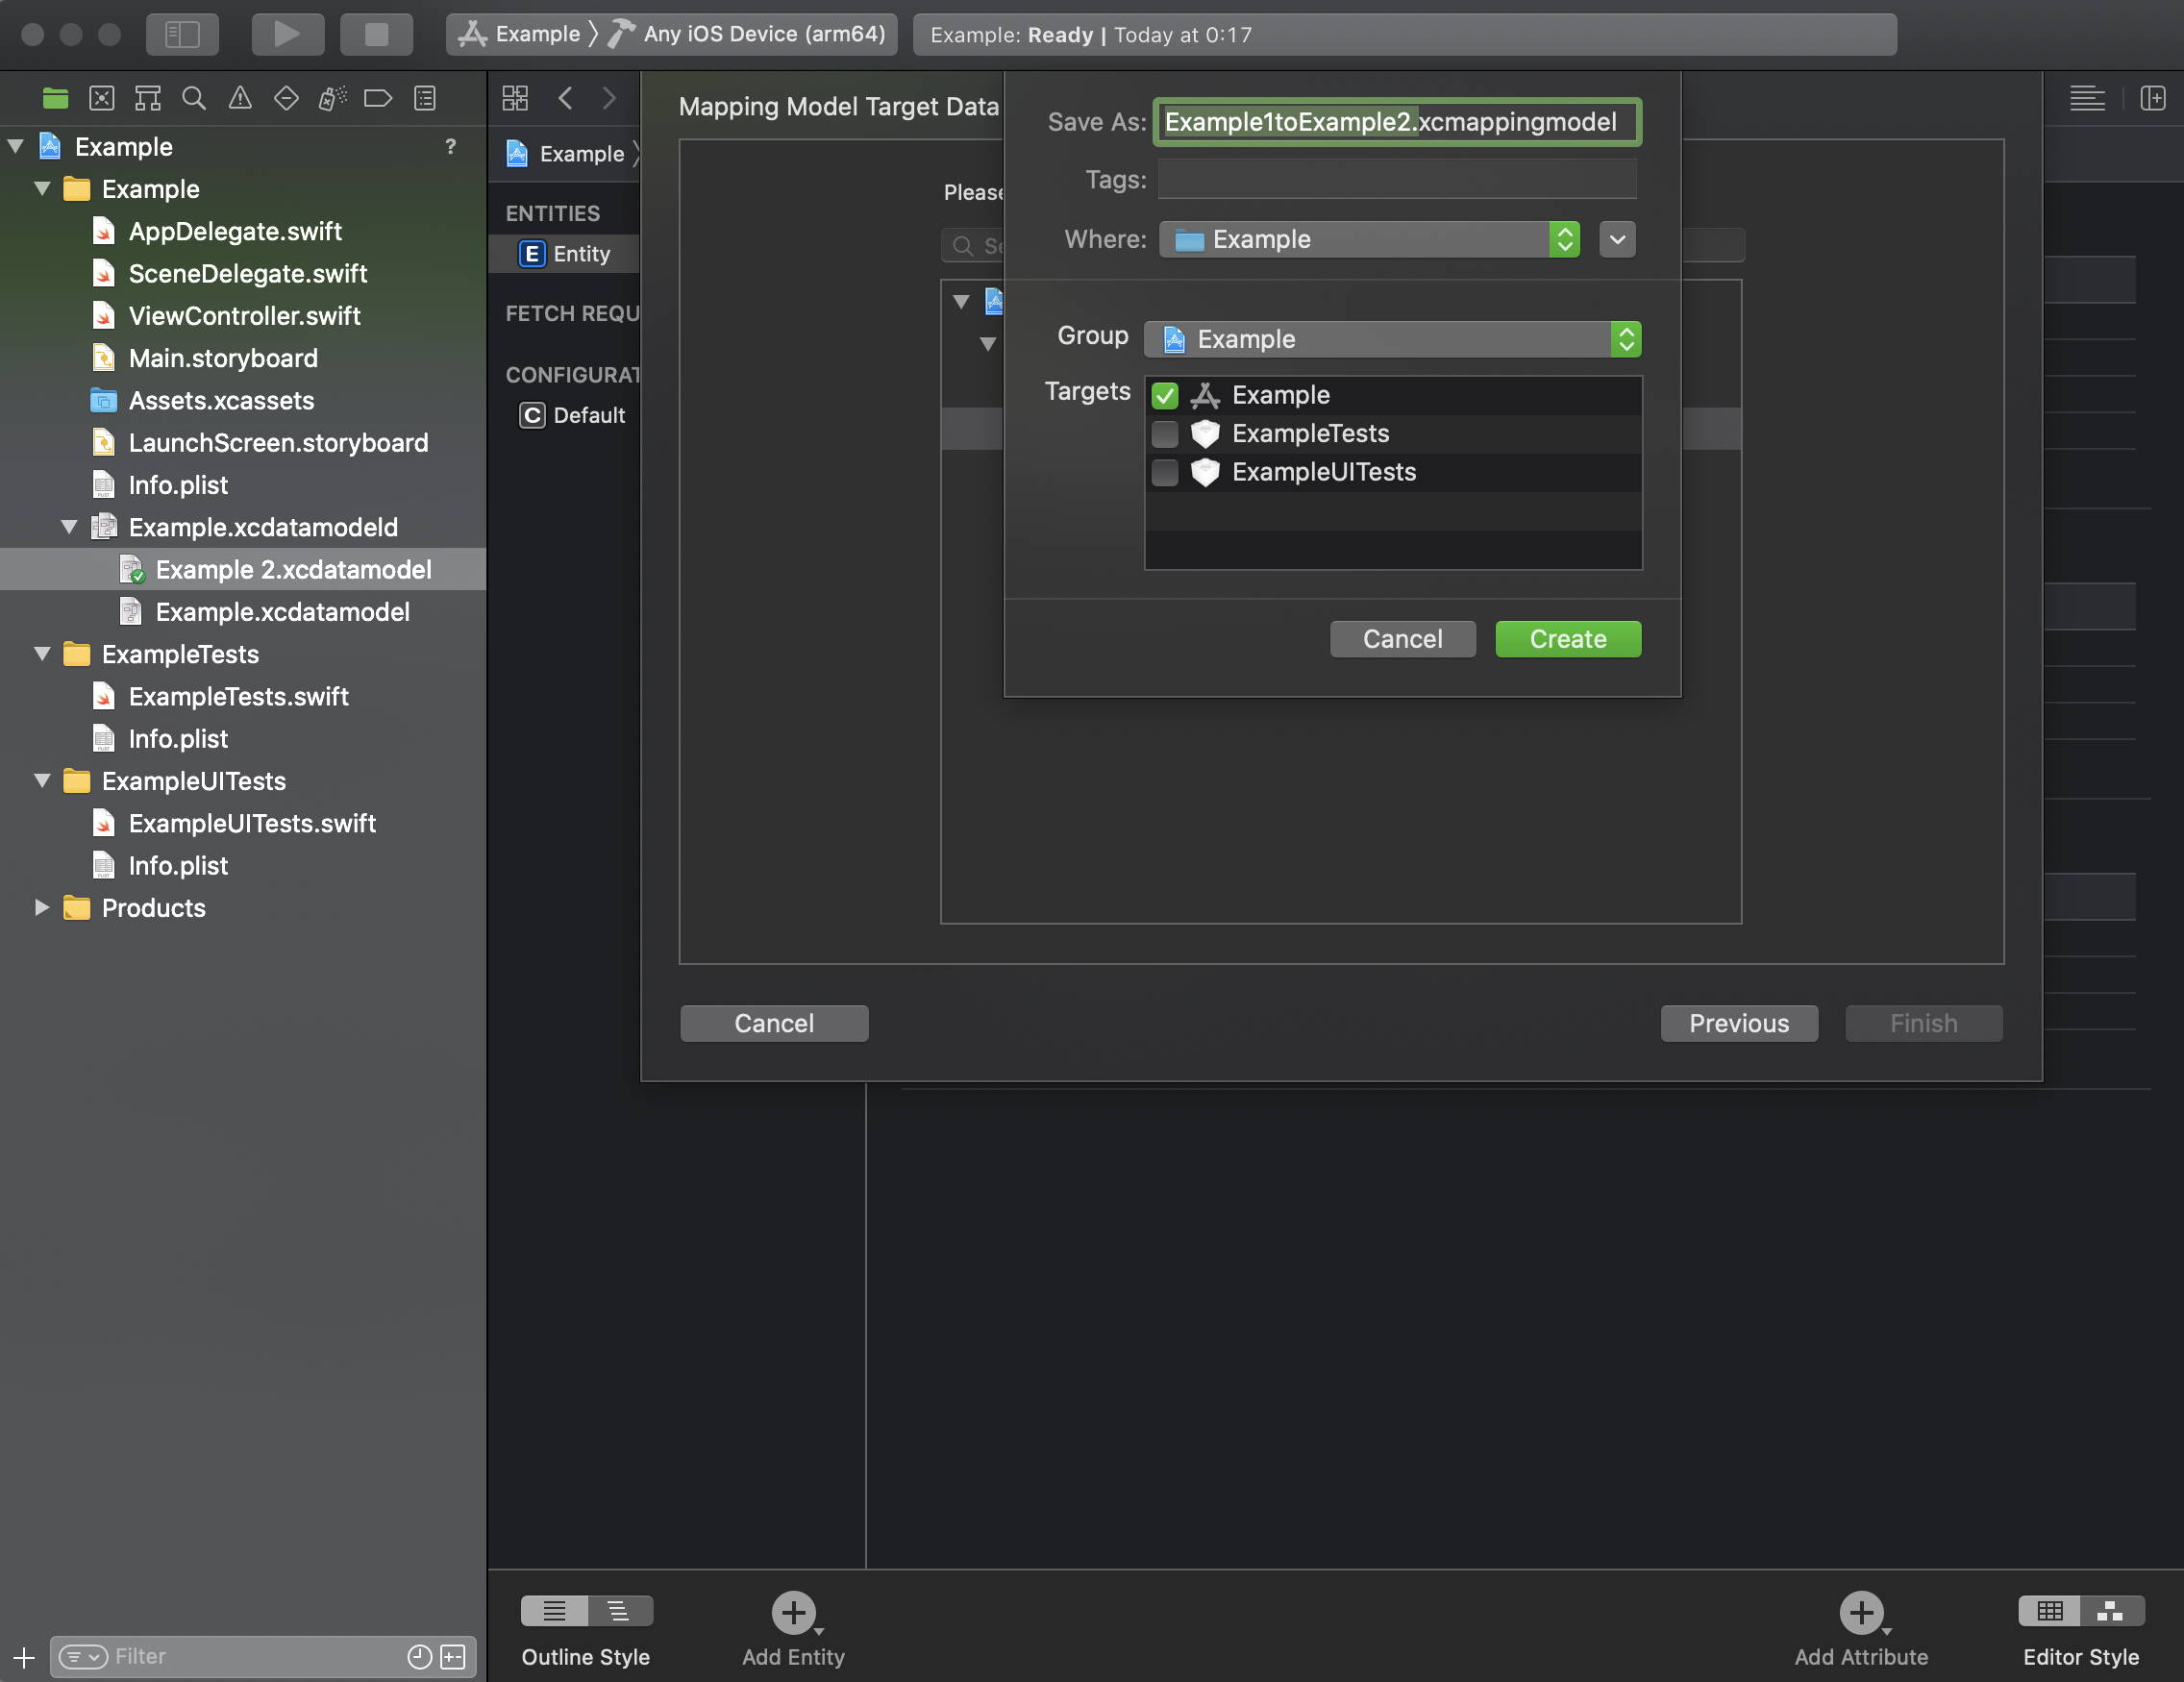
マッピングファイルのファイル名を問われるので、適切に入力する。
今回はExample1toExample2.xcmappingmodelと入力した。その他の入力欄はデフォルトのままで、最後にCreateを押下する。
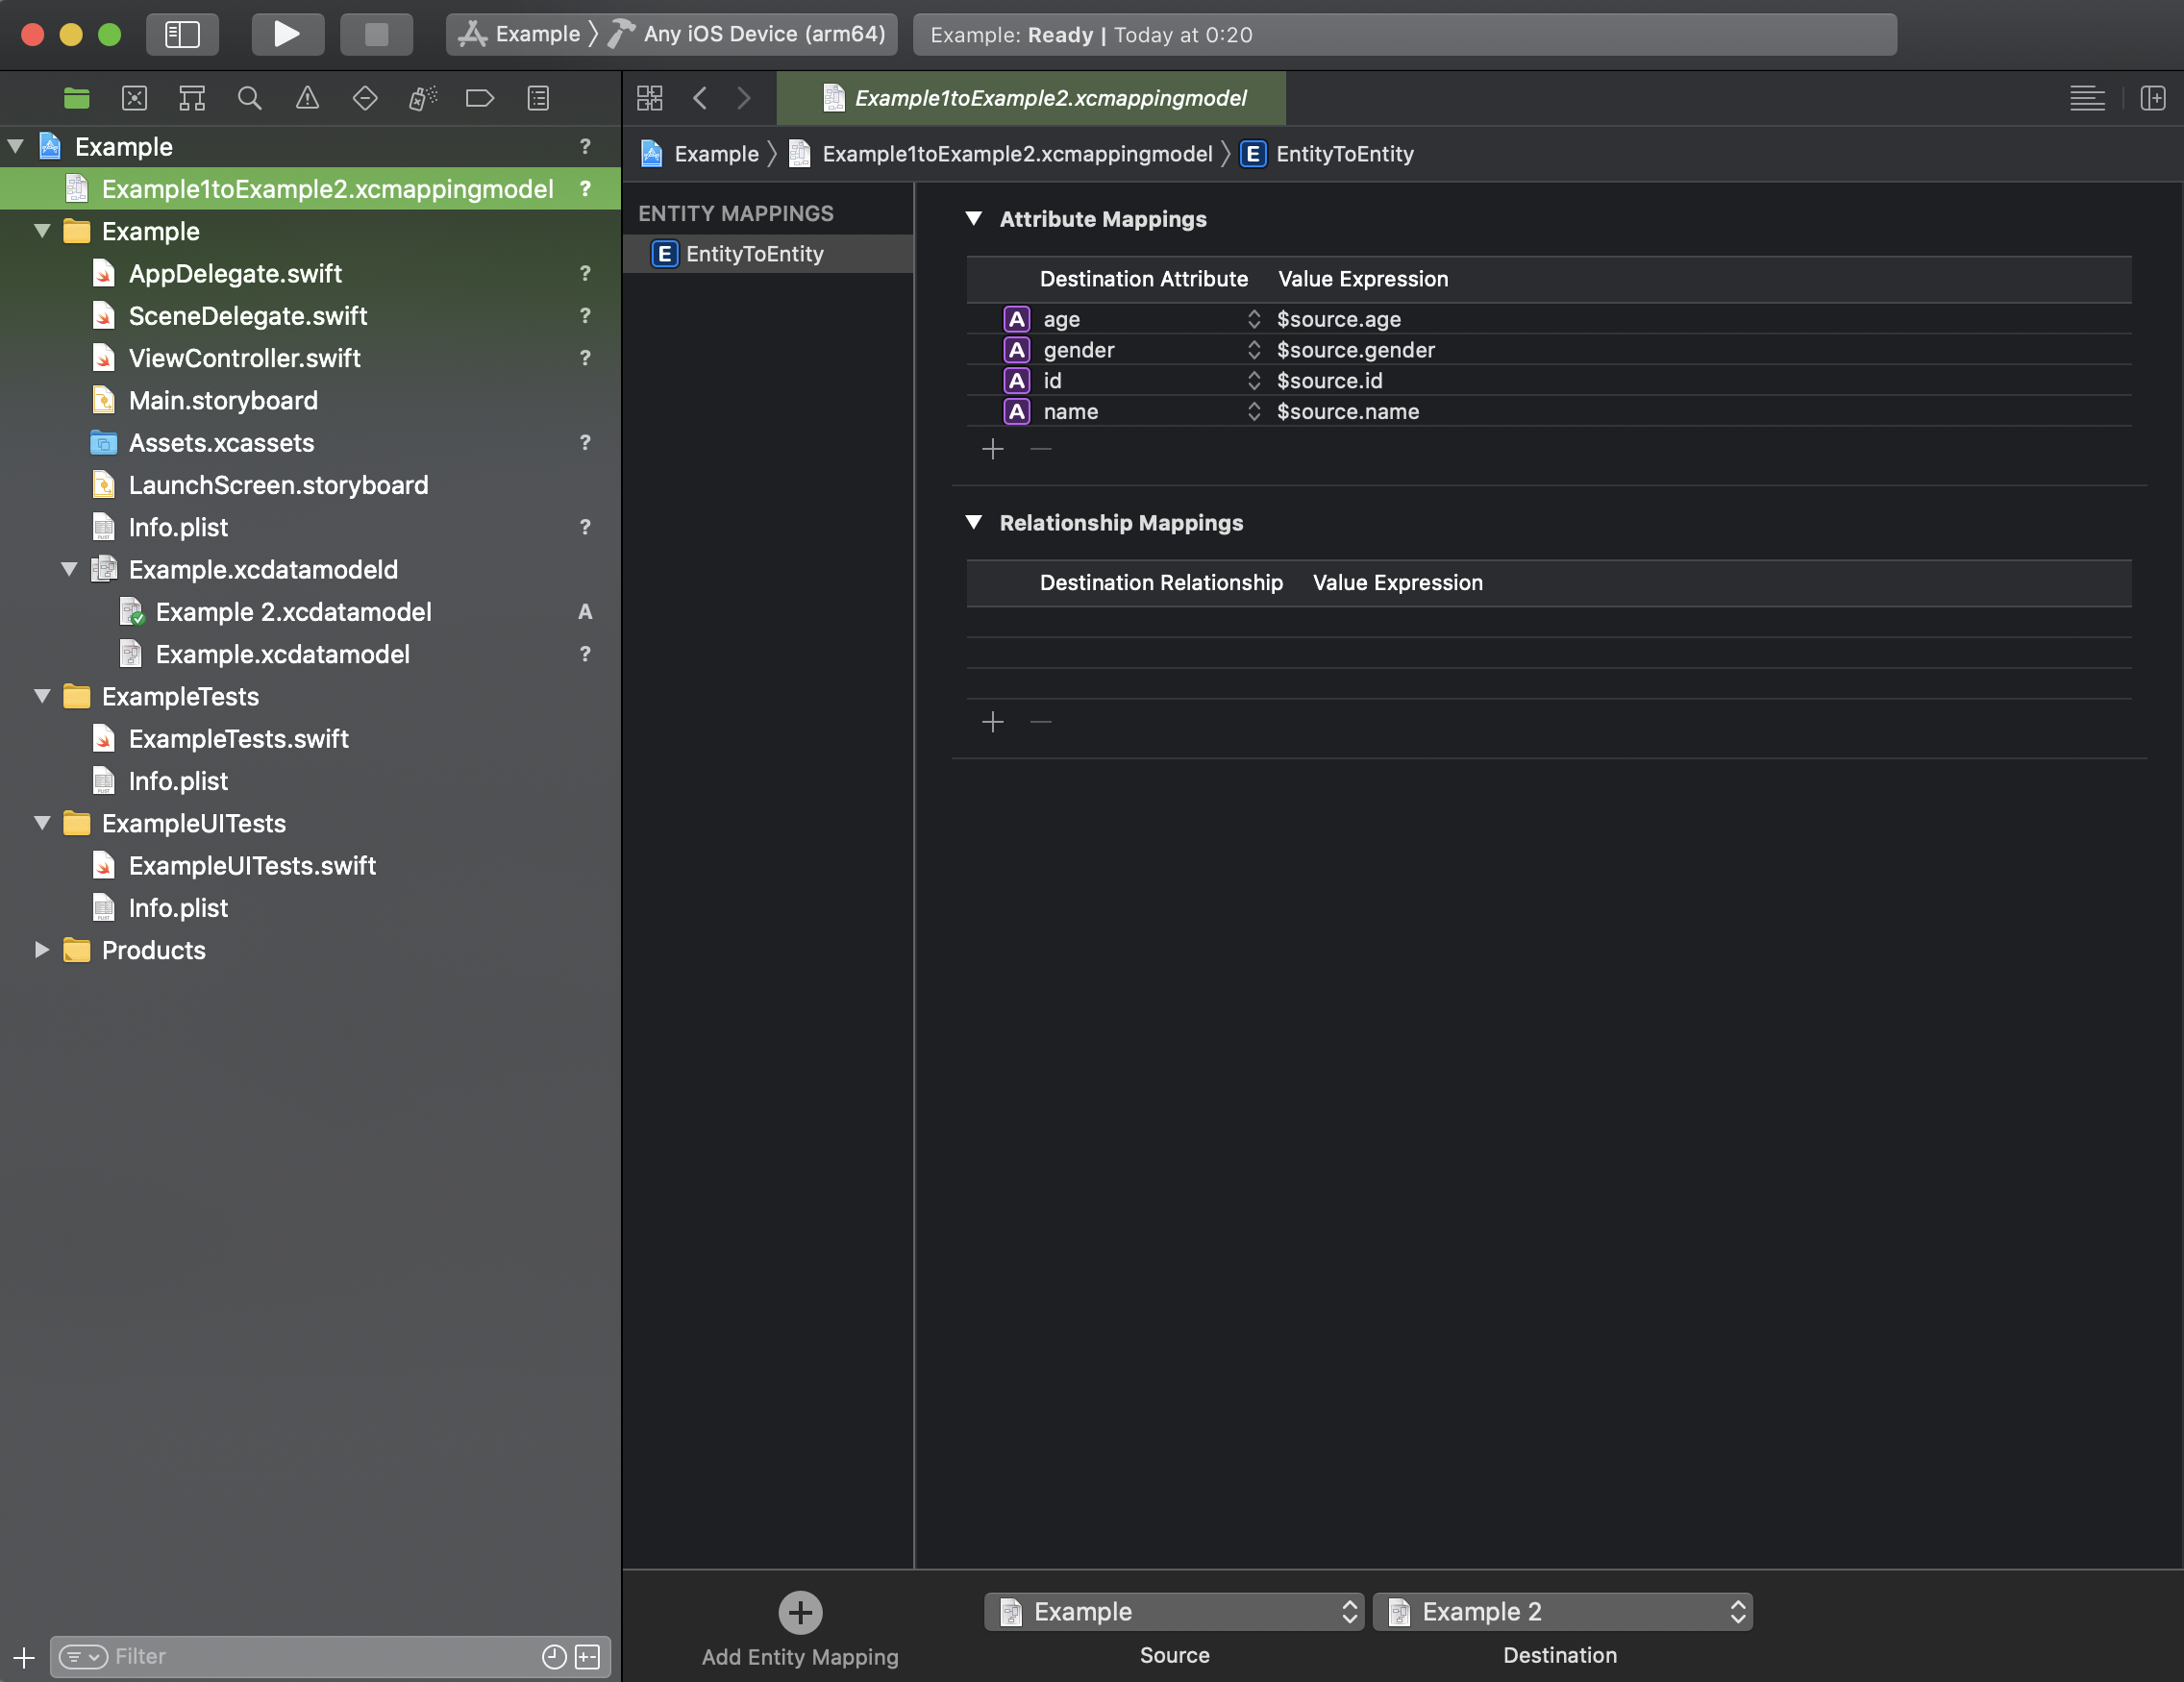
先ほど設定したファイルがプロジェクトフォルダ内に作成されていることを確認できる。ちなみに、このファイルの中身を補足する。
おそらく同じAttributeネームでデータのマッピングを行っていると思われる。つまりExample.xcdatamodelのidデータはAttributeネームが同じExample2.xcdatamodelとマッピングを行うように、自動的にXcodeが設定してくれているのであろう。
これで、手順3 Data Mapping Modelファイルを作成は以上。
手順はこれで以上になる。これで、プロジェクトを実行するとCoreDataが更新され、以前の構造で保存されていたデータも引き継きが行われる。
今回ご紹介した方法での実施による懸念点
この方法でデータモデルを更新した際に、考えられるのは
更新するたびに新しいxcdatamodelファイルとxcmappingmodelファイルの2つが作成されてしまう
ということ。
データモデルを頻繁に更新することがあるとプロジェクトフォルダ内がデータモデル関係のファイルで一杯になり、管理のしづらいというデメリットがある。
そのデメリットを解消できるやり方として、冒頭で明記させていただいた方法①が有用なのではないかと考えた。
もう一つのMigration方法
もう一つの方法①はプログラムを改修して、自動的にデータモデルの更新からマッピングまで行ってもらうようにCoreDataに指示をする方法である。
**注意** この方法は執筆者はまだ、試したことがないので確証はないです。
改修するプログラムは簡単である。
AppDelegate.swiftファイル内のCoreDataに関する記述に以下のAdditional Programを付け加えるだけである。
// MARK: - Core Data stack

    lazy var persistentContainer: NSPersistentContainer = {
        /*
         The persistent container for the application. This implementation
         creates and returns a container, having loaded the store for the
         application to it. This property is optional since there are legitimate
         error conditions that could cause the creation of the store to fail.
        */
        let container = NSPersistentContainer(name: "Example")

        // ------------- Additional Program ------------------
        let description = NSPersistentStoreDescription()
        description.shouldMigrateStoreAutomatically = true
        description.shouldInferMappingModelAutomatically = true
        container.persistentStoreDescriptions = [description]
        // ---------------------------------------------------

        container.loadPersistentStores(completionHandler: { (storeDescription, error) in
            if let error = error as NSError? {
                // Replace this implementation with code to handle the error appropriately.
                // fatalError() causes the application to generate a crash log and terminate. You should not use this function in a shipping application, although it may be useful during development.

                /*
                 Typical reasons for an error here include:
                 * The parent directory does not exist, cannot be created, or disallows writing.
                 * The persistent store is not accessible, due to permissions or data protection when the device is locked.
                 * The device is out of space.
                 * The store could not be migrated to the current model version.
                 Check the error message to determine what the actual problem was.
                 */
                fatalError("Unresolved error \(error), \(error.userInfo)")
            }
        })
        return container
    }()
記述もわかりやすいが、単純にプログラムで、自動的にマイグレーションを行うことと、自動でマッピングも行うということを命令するだけである。
これなら、データモデル更新によって、プロジェクト内のフォルダが膨大になってしまうことはないかと思われる。
まだ、この方法で実際にできるか執筆者は確認はしていないが、大きな変更がなければもう一つの方法が手っ取り早いのかなとも感じる。
以上。