要約
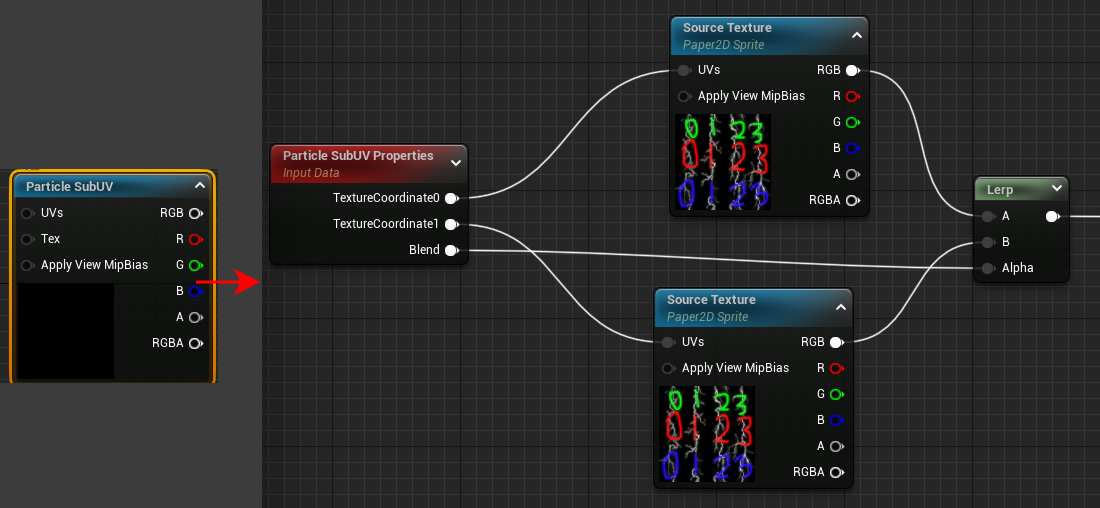
Material において、Particle SubUV ノードは使わずに下記画像の右を代わりに使う
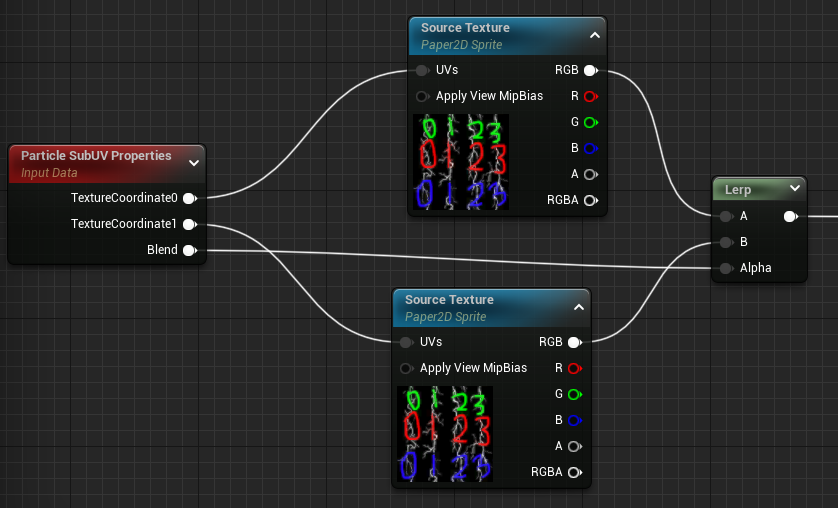
SubUV を適用した MeshRender の UV を編集するには下記マテリアルを適用し、Paricle SubUV Properties ノードの TextureCoordinate0,1を編集する
説明
UE/Niagara で 各Renderモジュールで SubUV を適用した場合、SpriteRenderモジュールでは、Texcoord[0],[1]ノードのUVが自動でSubUV用に変換される(上記画像のParticle SubUV PropertiesノードのTextureCoordinate0,1ピンと同じになる)が、MeshRenderモジュールでは変換されない
そのため、MeshRenderモジュールで SubUV を設定しただけでは SubUV は使えない
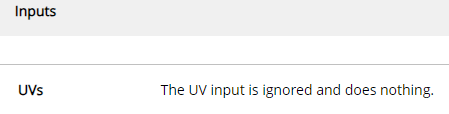
この場合、Texture Sampleノードの代わりに Particle SubUVノードを使えば SubUV を使えるが、この UVsインプットピンは機能していない
公式ドキュメント より引用
そこで、Particle SubUV ノードのHLSLコードを見て組んだのが下記画像のノード群
これはHLSLコードの内容とまったく同じ
Texture Sampleノードはそのままで、SubUV用に変換されたUVを持ってくる方法
UVを編集する場合は、Paricle SubUV Properties ノードの TextureCoordinate0,1を編集する
Niagara の 各Renderモジュール の SubUV の SubUVBlendingEnabled をオンにしなければ、TextureCoordinate1 と Blend は使わなくて良い(下記画像のLerpと下のSourceTexture を消す)
| Particle SubUV Properties ノード | Niagara の Renderモジュール の SubUV で設定した値を受ける |
|---|---|
| TextureCoordinate0 ピン | Niagaraで指定したSubUVに基づいて変換されたUV |
| TextureCoordinate1 ピン | TextureCoordinate0 の一つ先の連番フレームのUV |
| Blend ピン | Niagara の Blend が ON の時、連番フレーム間で動的に0~1が出力される。OFFの時は常に0 |
Particle SubUV ノードのHLSLコード
