はじめに
クラウドなど遠隔地にあるLinux環境でCADやCAEからレンダリング、ゲームなど高速にOpenGL描画を行いたい場合にはVirtualGLを利用することで実現できます。
ここではOCI上でのVirtualGLの構築方法について解説します。
もちろんオンプレミスのGPU環境や他社のクラウドでもRHEL系のLinuxにおいては手順はほとんと変わらないはずなので流用可能です。
前提条件
- OCIのテナント、アカウントがあること
- OCIのVCNやComputeに関する基本的な操作ができること
- VCNやComputeを作成できる権限がアカウントに割り当てられていること
- GPUリソースのサービスリミットがあること
- Linuxの操作ができること
- 手元のPCにVNC Viewerがインストールされていること
構築手順
事前
本手順を実施するにあたり、事前に以下のリソースが作成してください
- VCNの作成
GPUインスタンスの作成
通常の手順で作成となりますが、以下の2点をご注意ください。
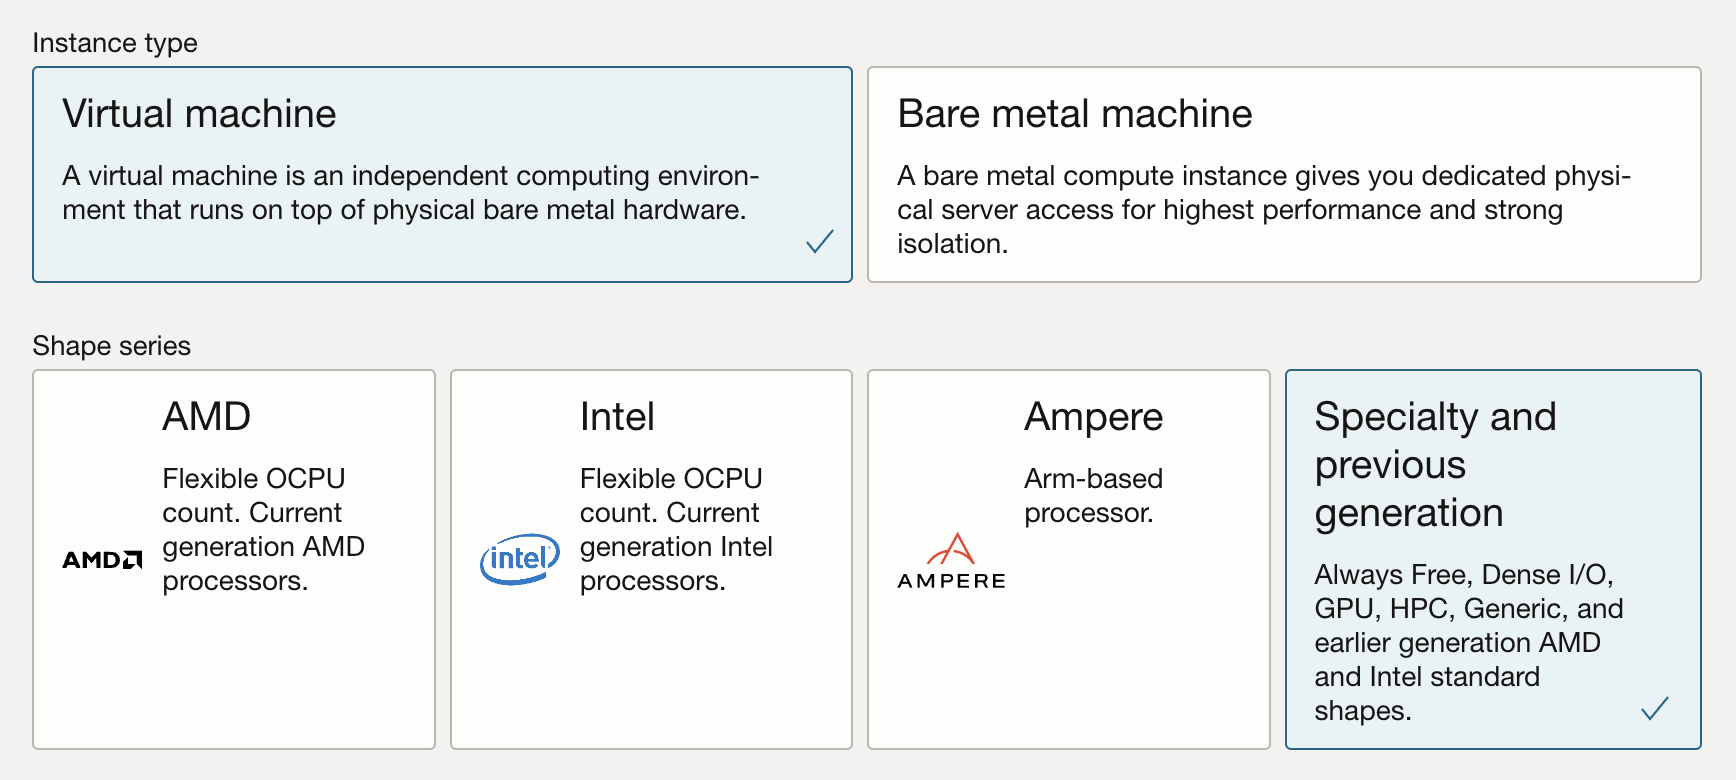
Shapeの選択
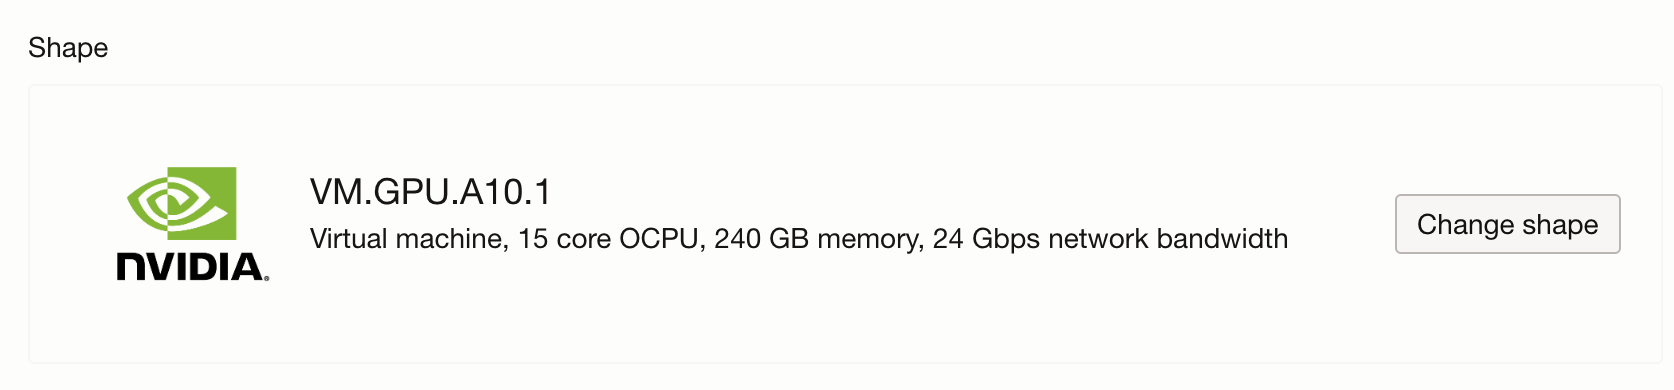
まずはShapeの選択です。今回のような用途に最適なのはVM.GPU.A10.1なので、以下にチェックを入れてVM.GPU.A10.1を選択してください。
サービスリミットがあれば以下のように表示されます。
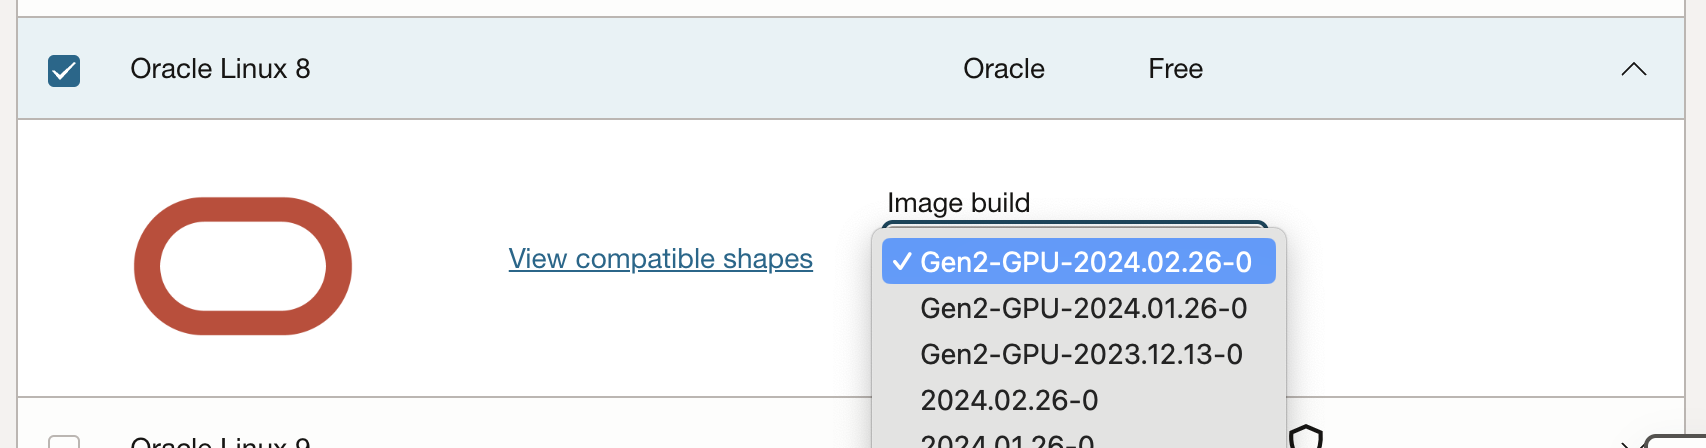
Imageの選択
続いて、OS Imageを選択します。Oracle Linux 8を選択し、Image buildからGen2-GPU-YYYY.MM.DD-xというナンバリングで最新なものを選択します。こちらのImageは名前の通りGPUに対応したもので、NVIDIA DriverがPre-Installされています。
その他項目はご利用の環境に合わせて選択して、インスタンスを作成します。
インスタンスが作成されたらopcユーザーでSSH接続します。
必要なパッケージのインストール
OCIのOracleLinuxイメージにはデフォルトではGUI環境が入っていないのでインストールします。
sudo yum groupinstall --exclude=kernel* -y "Server with GUI"
VirtualGLとVNC Serverのインストール
今回のメインとなるVirtualGLとリモート接続する際のVNCをインストールします。
2024年4月16日の今日現在の最新verを利用します。
VirtualGLのインストール
sudo yum install -y https://github.com/VirtualGL/virtualgl/releases/download/3.1.1/VirtualGL-3.1.1.x86_64.rpm
Turbo VNCのインストール
sudo yum install -y https://github.com/TurboVNC/turbovnc/releases/download/3.1.1/turbovnc-3.1.1.x86_64.rpm
xorg.confを生成する
nvidia-xconfigコマンドにてxorg.confを生成します。
sudo nvidia-xconfig -a --allow-empty-initial-configuration
実行結果
$ sudo nvidia-xconfig -a --allow-empty-initial-configuration

WARNING: Unable to locate/open X configuration file.

Option "AllowEmptyInitialConfiguration" "True" added to Screen "Screen0".
New X configuration file written to '/etc/X11/xorg.conf'
DPMSへの処置
NVIDIA Driver ver.440.36 以降はDPMS(省電力設定)設定がデフォルトで有効になっているため、一定時間(10分など)後にタイムアウトが発生し、フレームレートが1FPSに低下してしまう。
https://forums.developer.nvidia.com/t/440-36-with-bumblebee-drops-to-1-fps-after-running-for-10-minutes/108431
その処置としてxorg.confのDeviceセクションにOption "HardDPMS" "false"を追加します。
念の為、xorg.confのバックアップを取得します。
sudo cp -a /etc/X11/xorg.conf /etc/X11/xorg.conf.org
viなどのエディタでxorg.confを編集する。
sudo vi /etc/X11/xorg.conf
変更前:
Section "Device"
    Identifier     "Device0"
    Driver         "nvidia"
    VendorName     "NVIDIA Corporation"
    BoardName      "NVIDIA A10"
    BusID          "PCI:0:4:0"
EndSection
変更後(Option "HardDPMS" "false"を追加する):
Section "Device"
    Identifier     "Device0"
    Driver         "nvidia"
    VendorName     "NVIDIA Corporation"
    BoardName      "NVIDIA A10"
    BusID          "PCI:0:4:0"
    Option         "HardDPMS" "false"
EndSection
VirtualGLの設定
sudo vglserver_config -config +s +f -t
実行結果
$ sudo vglserver_config -config +s +f -t

WARNING: Configuring this server for use with VirtualGL will disable the
ability to log in locally with a Wayland session.

... Modifying /etc/security/console.perms to disable automatic permissions
    for DRI devices ...
... Creating /etc/modprobe.d/virtualgl.conf to set requested permissions for
    /dev/nvidia* ...
... Attempting to remove nvidia module from memory so device permissions
    will be reloaded ...
... Granting write permission to /dev/nvidia-modeset /dev/nvidia-nvswitchctl /dev/nvidia-uvm /dev/nvidia-uvm-tools /dev/nvidia0 /dev/nvidiactl for all users ...
... Granting write permission to /dev/dri/card0 /dev/dri/card1 for all users ...
... Granting write permission to /dev/dri/renderD128 for all users ...
... Modifying /etc/X11/xorg.conf.d/99-virtualgl-dri.conf to enable DRI
    permissions for all users ...
... /etc/X11/xorg.conf has been saved as /etc/X11/xorg.conf.orig.vgl ...
... Modifying /etc/X11/xorg.conf to enable DRI
    permissions for all users ...
... /etc/gdm/Init/Default has been saved as /etc/gdm/Init/Default.orig.vgl ...
... Adding xhost +LOCAL: to /etc/gdm/Init/Default script ...
... Creating /usr/share/gdm/greeter/autostart/virtualgl.desktop ...
... /etc/gdm/custom.conf has been saved as /etc/gdm/custom.conf.orig.vgl ...
... Disabling Wayland in /etc/gdm/custom.conf ...
... Disabling XTEST extension in /etc/gdm/custom.conf ...
... Setting default run level to 5 (enabling graphical login prompt) ...
... Commenting out DisallowTCP line (if it exists) in /etc/gdm/custom.conf ...

Done. You must restart the display manager for the changes to take effect.
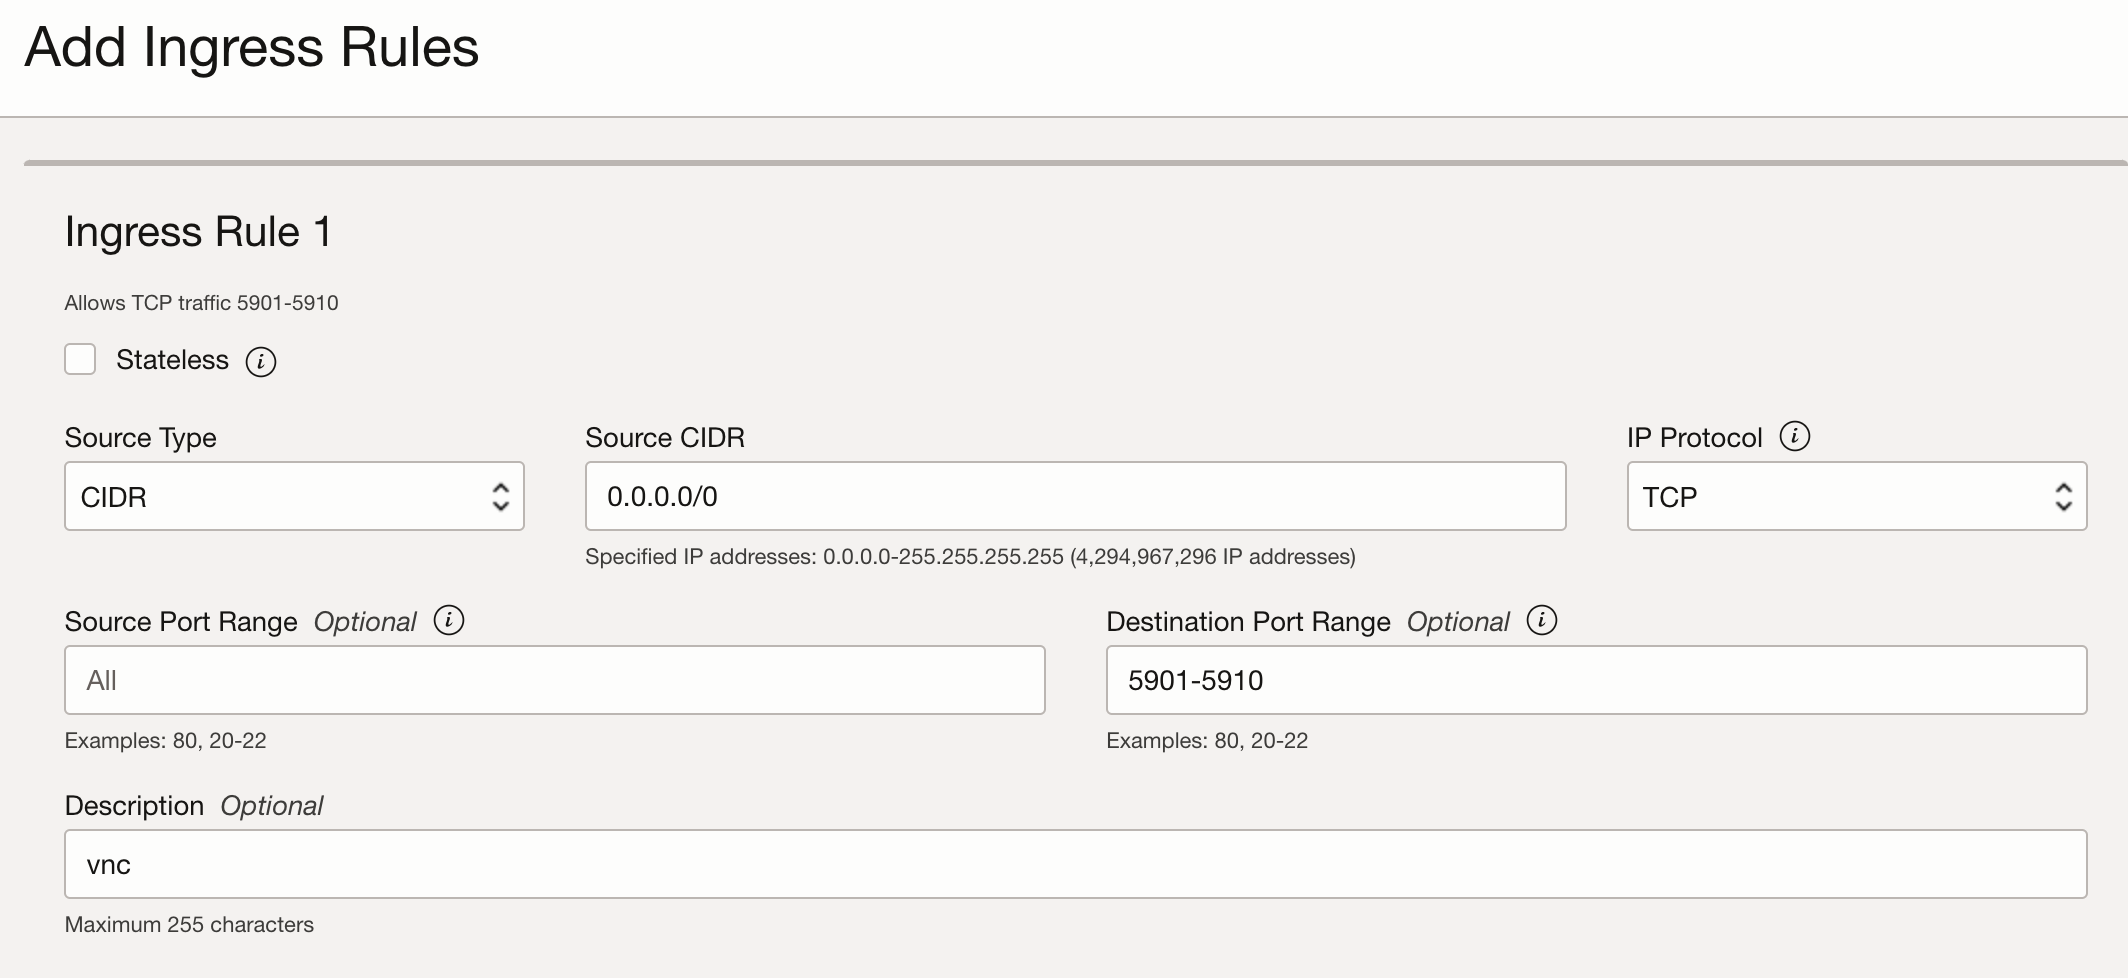
VNCポートの解放
VNCへリモート接続する際のポートをクラウドのFirewall(Security List)とOSで解放します。
ポートの範囲は接続するセッション数により変わりますので、ここでは5901-5910の9個分のポートを解放します。
OS側: Firewalld
sudo firewall-cmd --permanent --zone=public --add-port=5901-5910/tcp
sudo firewall-cmd --reload
OCI側: VCNのセキュリティリスト
該当のインスタンスが所属しているVCNのSubnetのSecurity ListのIngressルールに以下のように追加します。
この例ではインスタンスをPublic Subnetに配置していたため、Soruce CIDRは0.0.0.0/0(インターネットの全てのアドレスからの接続を許可)を指定しています。
※実運用ではセキュリティ上重要な設定なので適切な設定を行います。
graphical targetへの変更
OSをGUIモードで起動するように変更します。
sudo systemctl set-default graphical.target
reboot
ここまでの設定を反映させるため一度rebootを実施します。
sudo reboot
起動したらSSHをしてnvidia-smiを実行し、ProcessesにXorgとgnome-shellが動いていることを確認します。
$ nvidia-smi
Mon Apr 15 14:11:24 2024
+---------------------------------------------------------------------------------------+
| NVIDIA-SMI 535.154.05             Driver Version: 535.154.05   CUDA Version: 12.2     |
|-----------------------------------------+----------------------+----------------------+
| GPU  Name                 Persistence-M | Bus-Id        Disp.A | Volatile Uncorr. ECC |
| Fan  Temp   Perf          Pwr:Usage/Cap |         Memory-Usage | GPU-Util  Compute M. |
|                                         |                      |               MIG M. |
|=========================================+======================+======================|
|   0  NVIDIA A10                     Off | 00000000:00:04.0 Off |                    0 |
|  0%   33C    P8              56W / 150W |    118MiB / 23028MiB |      0%      Default |
|                                         |                      |                  N/A |
+-----------------------------------------+----------------------+----------------------+

+---------------------------------------------------------------------------------------+
| Processes:                                                                            |
|  GPU   GI   CI        PID   Type   Process name                            GPU Memory |
|        ID   ID                                                             Usage      |
|=======================================================================================|
|    0   N/A  N/A      3612      G   /usr/libexec/Xorg                            63MiB |
|    0   N/A  N/A      4786      G   /usr/bin/gnome-shell                         31MiB |
+---------------------------------------------------------------------------------------+
動作確認
以上で全ての設定が完了したので、手元のPCから接続を行います。
VNCパスワードの設定
VNCに接続するユーザーにて接続に必要なパスワードの設定をします。
vncpasswd
VNCセッションの作成
以下のコマンドでセッションを作成します。
/opt/TurboVNC/bin/vncserver -wm gnome-session -vgl
実行結果:
$ /opt/TurboVNC/bin/vncserver -wm gnome-session -vgl
xauth:  file /home/opc/.Xauthority does not exist

Desktop 'TurboVNC: <hostname>:1 (opc)' started on display <hostname>:1

Starting applications specified in /opt/TurboVNC/bin/xstartup.turbovnc
(Enabling VirtualGL)
Log file is /home/opc/.vnc/virtual-gl-node:1.log
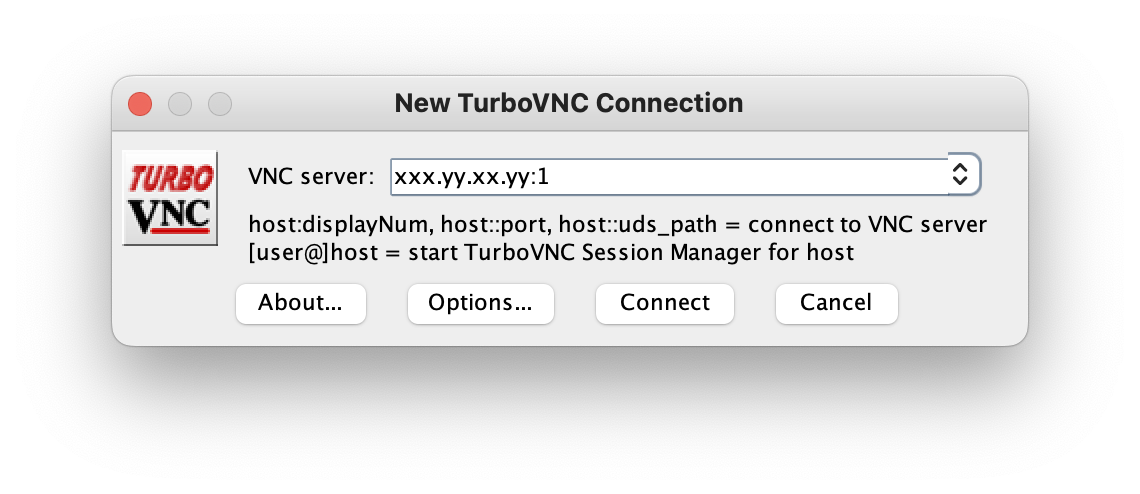
実行結果の<hostname>:1の部分(<>内にはホスト名が表示されます)から、1番ポートに接続します。
VNC Viewerを起動し、インスタンスのIPアドレス:1を指定し接続します。うまく接続できた場合はパスワードの確認ウィンドウが開きます。
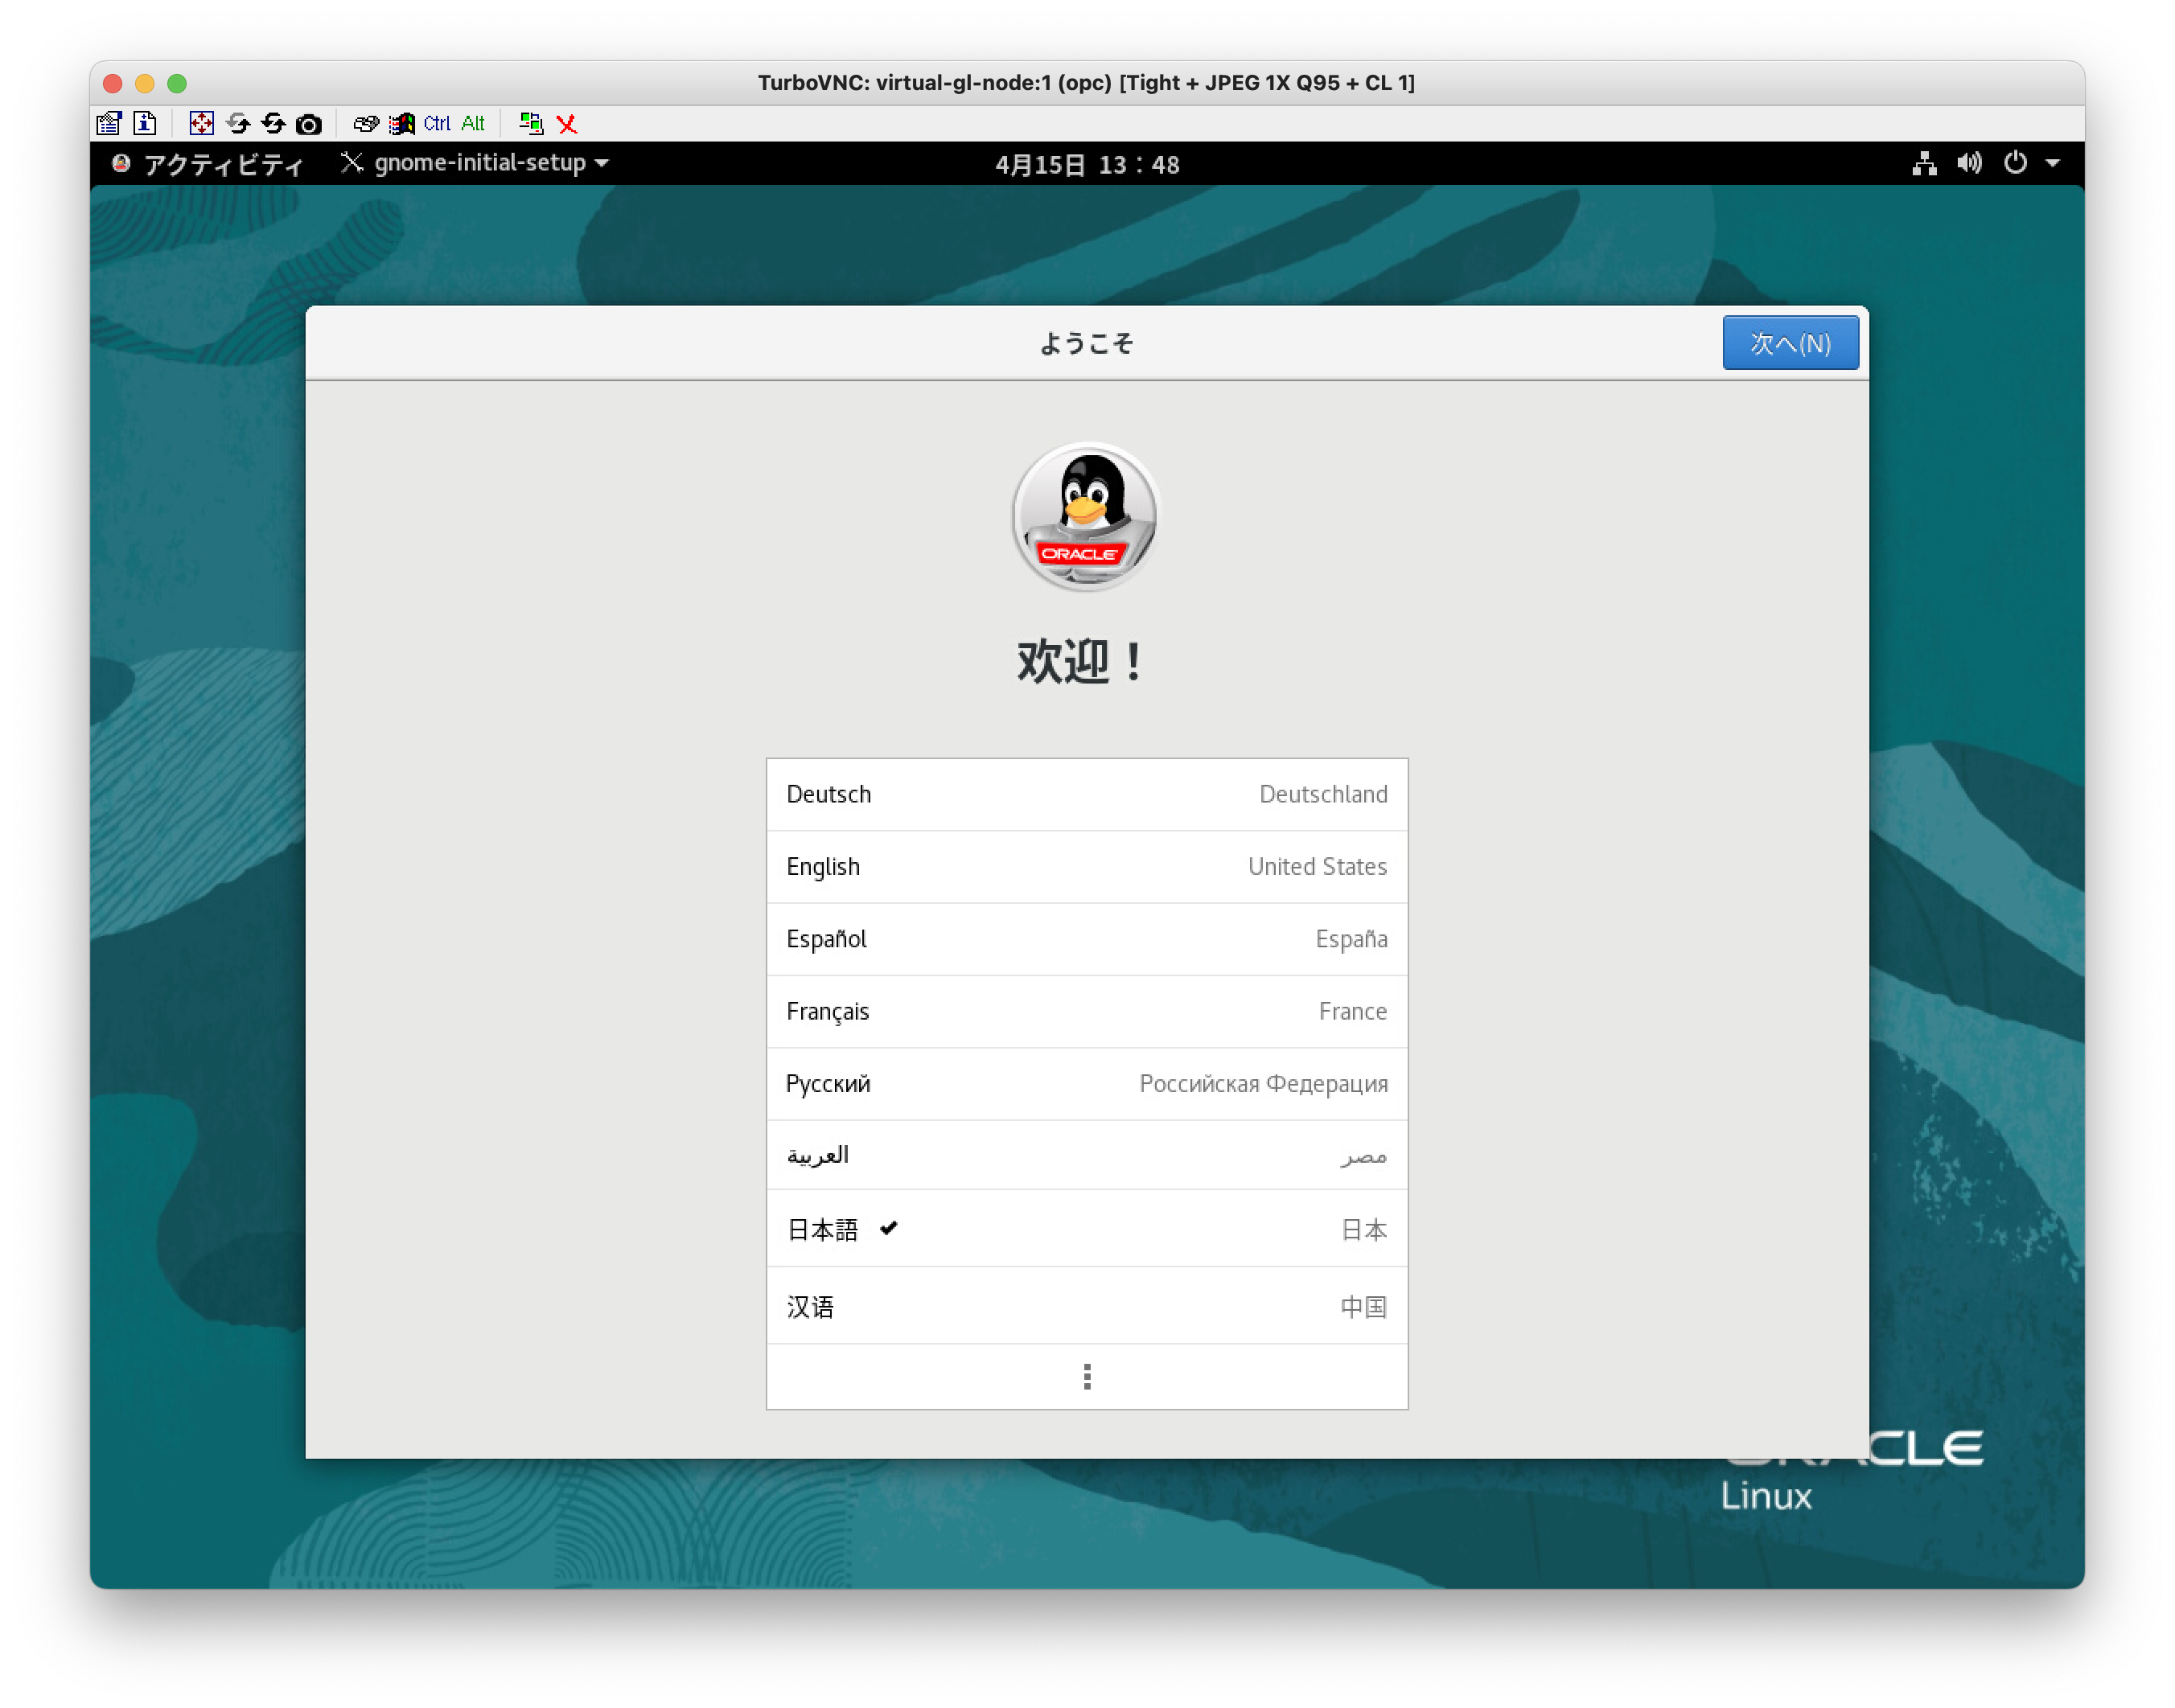
接続
以下、無事に接続ができた状態です。
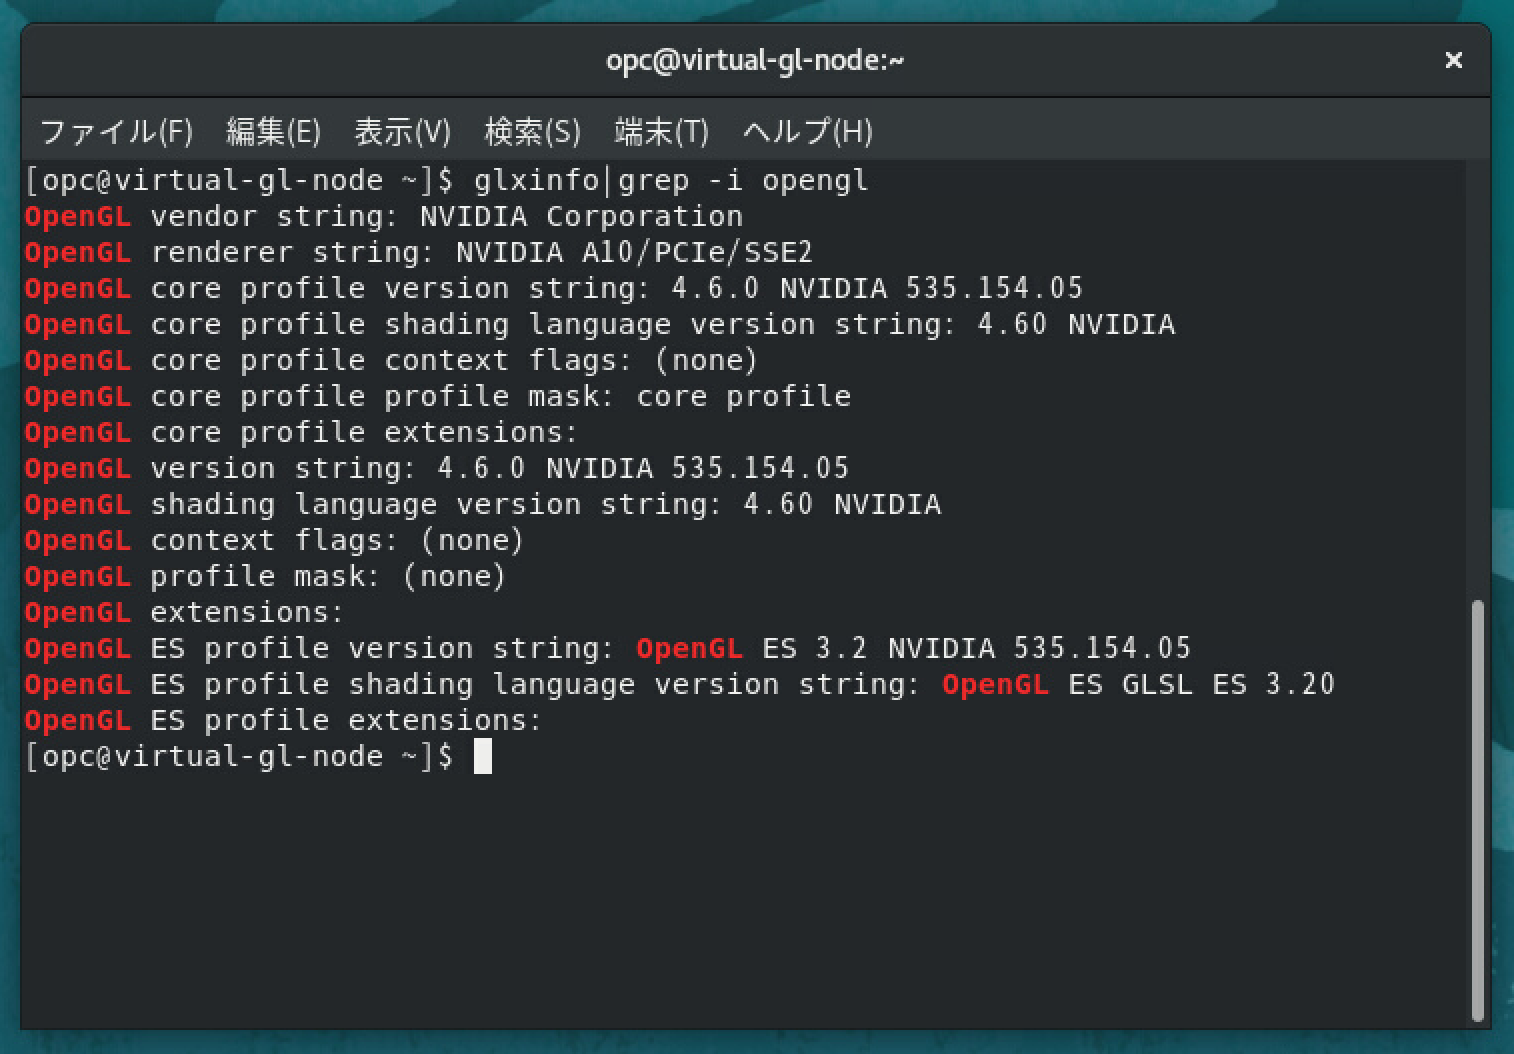
glxinfo| grep -i openglコマンドにてNVIDIAドライバが読み込まれていることを確認します。
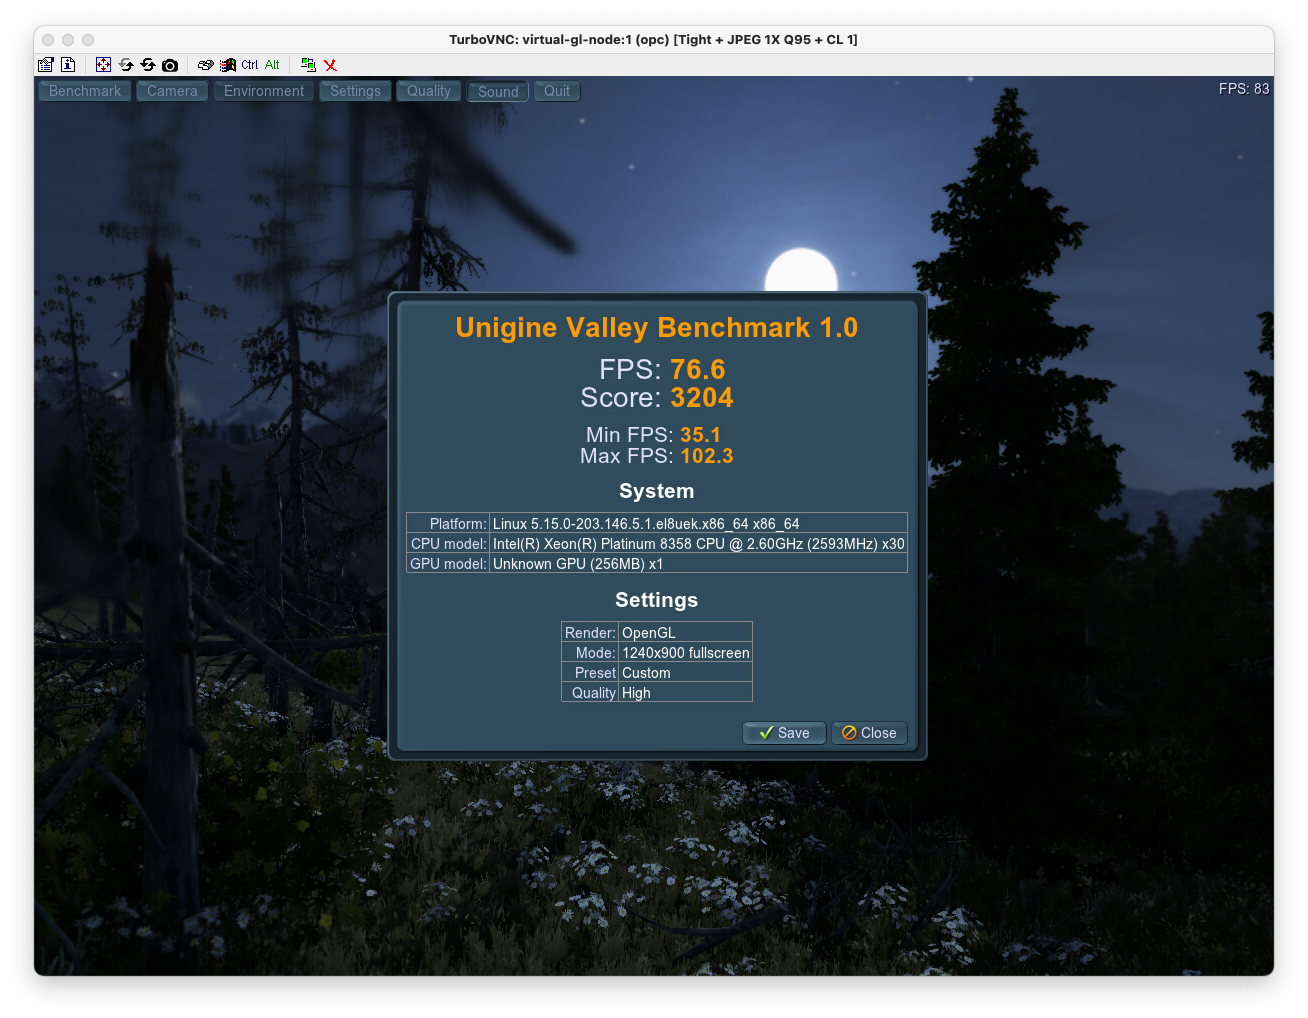
OpenGLアプリの実行
最後にVirtualGLの効果を確認します。
OpenGLを利用するレンダリングベンチマークである Unigine Valley Benchmarkをダウンロード、インストールして実行してみます。
https://benchmark.unigine.com/valley
ベンチマークの結果、PFS: 76.6が出ているのでリモート接続において良いパフォーマンスが得られたことを確認できました。
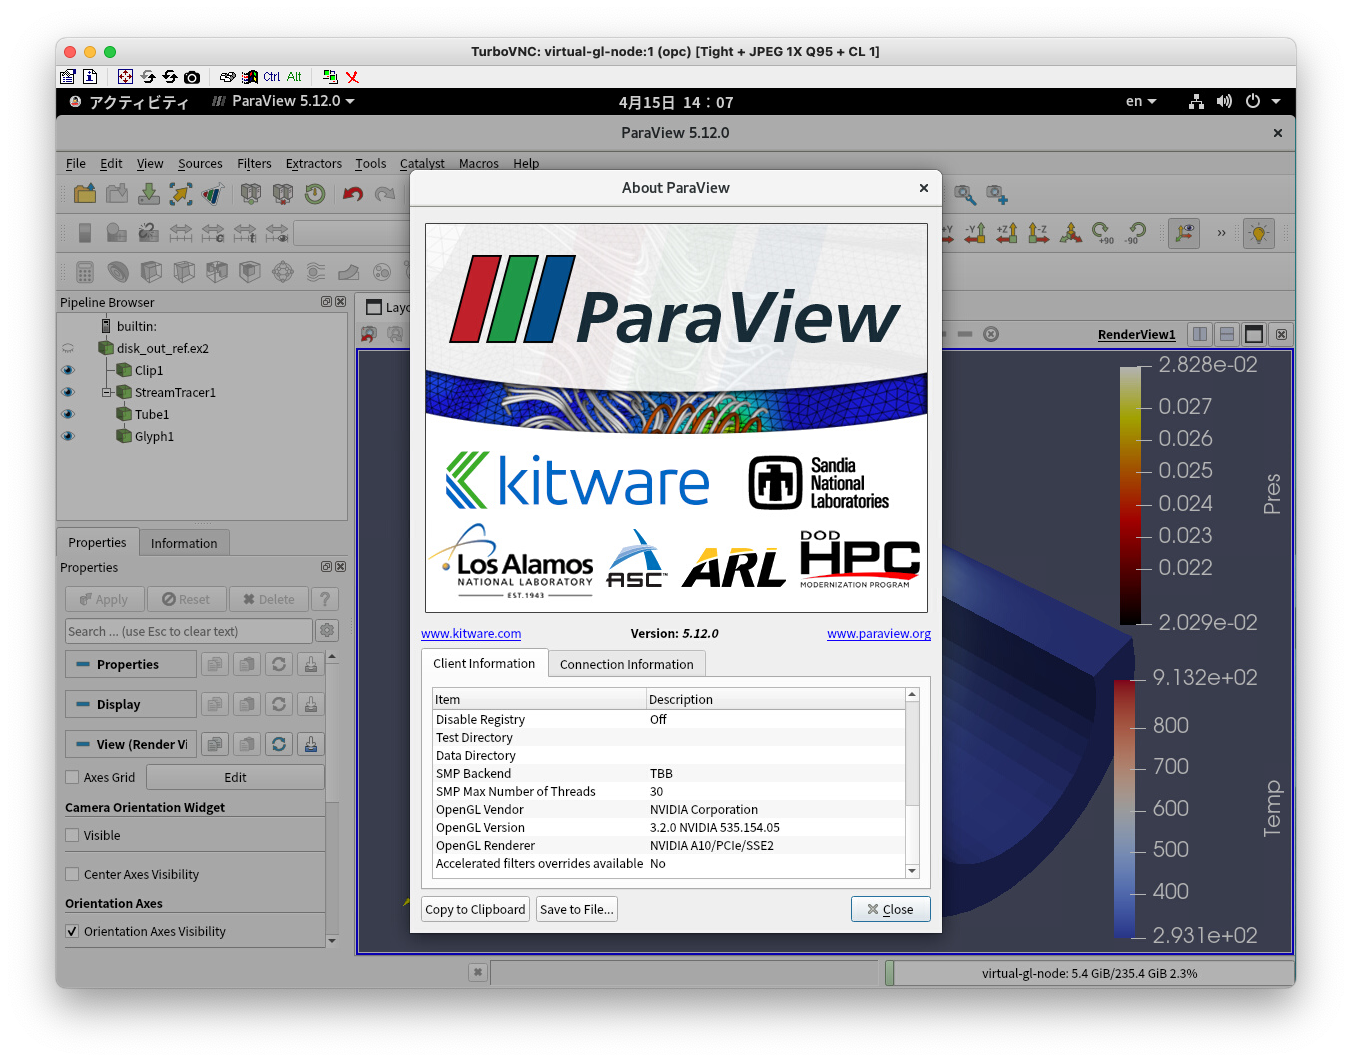
さらに、CAEの結果の可視化としてよく利用されるParaviewもインストールして動かしてみます。
以下のサンプルモデルがスムーズに回転、拡大、縮小できました。
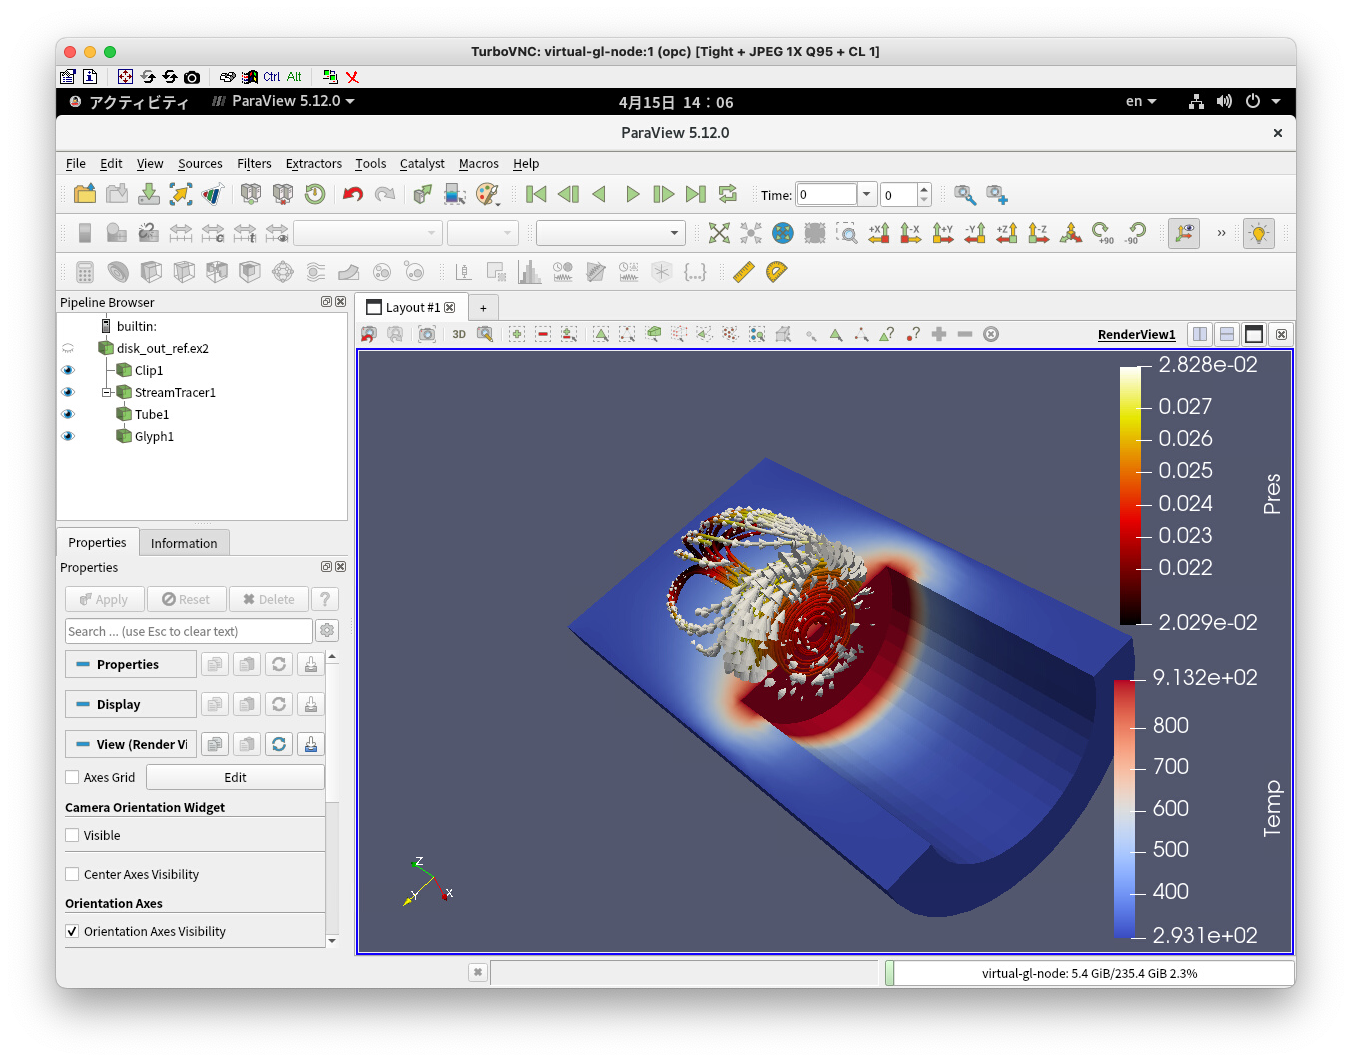
また、Paraview上でもOpenGLがNVIDIAであることも確認できました。
最後に
VirtualGLは商用のVDIソフトウェアには及ばないものの、GPUを活用したリモートデスクトップ環境が構築できることがわかりました。