はじめに
OCI にはインスタンスのメトリックとして CPU, Memory, Disk, Network など様々な Statistics をクラウド側で管理することができます。
それと同じようにカスタムのメトリックを作成することができる Custom Metrics という機能があります。
Custom Metric である値を OCI にあげて、その値に Alarm 設定することで様々な監視ができそうです。
本投稿でやりたいこととゴール
本投稿では NFS の監視をしたいと思います。
NFS は共有ストレージとしての機能を提供していわけで、アクセスができることを NFS クライアントからチェックし、その結果を Custom Metric として OCI にあげて Alarm で結果を判断してメールで通知させたいと思います。
前提条件
- OCI のユーザは Custom Metric を作成できる権限を持っていること
- OCI 上に NFS Server/Client は作成済みであること
注意
- 本手順は OCI の言語設定を英語で作業しています。メニューからサービスの指定を英語でしていますが、日本語の場合は英語で入力しても出てこないのでご注意ください
手順
OCI CLI のインストール
メトリックを OCI へアップロードするのに oci-cli を利用するのでインストールする。
sudo yum install -y python36-oci-cli
oci-cli のコンフィグファイル生成
アクセスするテナントやアカウント、キーなどの設定を作成する。
oci setup config
以下実行結果。
$ oci setup config
    This command provides a walkthrough of creating a valid CLI config file.

    The following links explain where to find the information required by this
    script:

    User API Signing Key, OCID and Tenancy OCID:

        https://docs.cloud.oracle.com/Content/API/Concepts/apisigningkey.htm#Other

    Region:

        https://docs.cloud.oracle.com/Content/General/Concepts/regions.htm

    General config documentation:

        https://docs.cloud.oracle.com/Content/API/Concepts/sdkconfig.htm


Enter a location for your config [/home/opc/.oci/config]:
Enter a user OCID: ocid1.user.oc1..xxxxxxxxxxxxxxxxxxxxxxxxxxxxxxx
Enter a tenancy OCID: ocid1.tenancy.oc1..xxxxxxxxxxxxxxxxxxxxxxxxxxxxxxx
Enter a region by index or name(e.g.
1: ap-chiyoda-1, 2: ap-chuncheon-1, 3: ap-hyderabad-1, 4: ap-ibaraki-1, 5: ap-melbourne-1,
6: ap-mumbai-1, 7: ap-osaka-1, 8: ap-seoul-1, 9: ap-singapore-1, 10: ap-sydney-1,
11: ap-tokyo-1, 12: ca-montreal-1, 13: ca-toronto-1, 14: eu-amsterdam-1, 15: eu-frankfurt-1,
16: eu-marseille-1, 17: eu-milan-1, 18: eu-zurich-1, 19: il-jerusalem-1, 20: me-abudhabi-1,
21: me-dubai-1, 22: me-jeddah-1, 23: sa-santiago-1, 24: sa-saopaulo-1, 25: sa-vinhedo-1,
26: uk-cardiff-1, 27: uk-gov-cardiff-1, 28: uk-gov-london-1, 29: uk-london-1, 30: us-ashburn-1,
31: us-gov-ashburn-1, 32: us-gov-chicago-1, 33: us-gov-phoenix-1, 34: us-langley-1, 35: us-luke-1,
36: us-phoenix-1, 37: us-sanjose-1): 11
Do you want to generate a new API Signing RSA key pair? (If you decline you will be asked to supply the path to an existing key.) [Y/n]: y
Enter a directory for your keys to be created [/home/opc/.oci]:
Enter a name for your key [oci_api_key]:
Public key written to: /home/opc/.oci/oci_api_key_public.pem
Enter a passphrase for your private key (empty for no passphrase):
Private key written to: /home/opc/.oci/oci_api_key.pem
Fingerprint: 4c:71:dc:22:22:7b:1b:5a:91:04:c7:xx:xx:xx:xx:xx
Config written to /home/opc/.oci/config


    If you haven't already uploaded your API Signing public key through the
    console, follow the instructions on the page linked below in the section
    'How to upload the public key':

        https://docs.cloud.oracle.com/Content/API/Concepts/apisigningkey.htm#How2
キーを登録
上記で作成したキーを OCI の自分のアカウントに登録する。
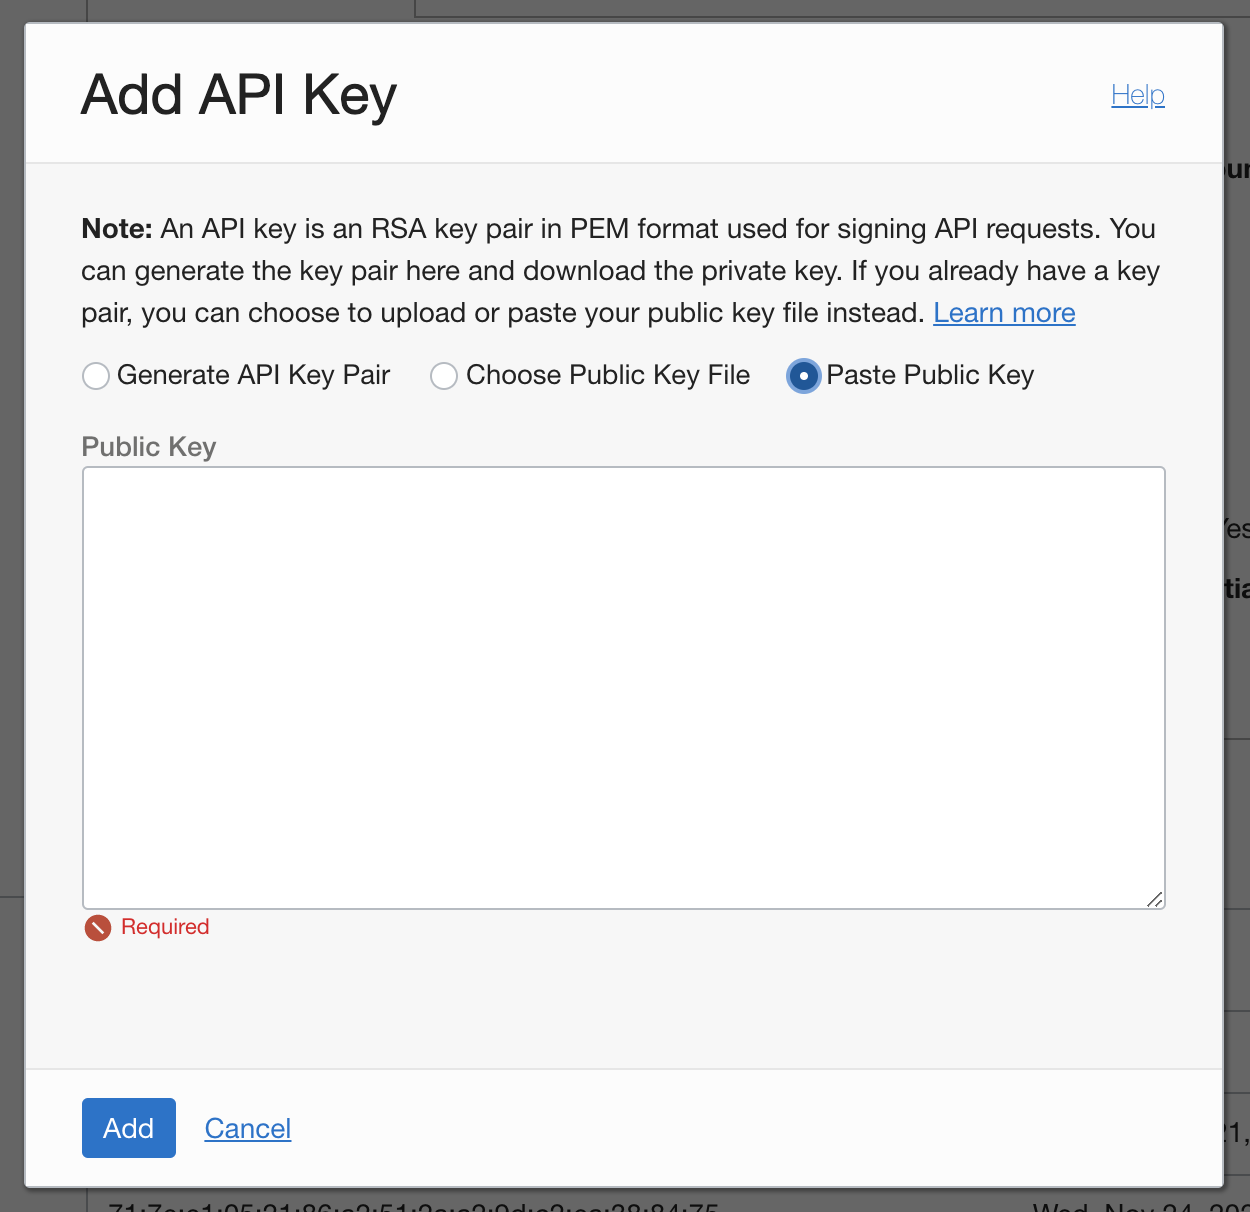
API Keys で Add API Key をクリックする。

先程生成された public key(/home/opc/.oci/oci_api_key_public.pem) をコピペします。
NFS Client にスクリプトを設置
NFS Client から NFS Server を監視するためのスクリプトを作成する。
動作概要としては、
- Custom Metric のアップロードや管理に必要な値の取得
- NFS 領域に対して touch でファイルアクセスをする
- touch の戻り値が正常であれば $res に 0 を、それ以外であれば 1 を入れる
-
/tmp配下に結果を出力して oci-cli を利用して OCI へアップロード
となります。
vi <path>/check_nfsserver.sh
以下の値については適宜書き換えてください
- mount_point
- timeout_sec
# !/bin/sh

cliLocation="/usr/bin/oci"
mount_point="/mnt/nfs"
timeout_sec=10

compartmentId=$(curl -s -L http://169.254.169.254/opc/v1/instance/ | jq -r '.compartmentId')
metricNamespace="check_nfs_server"
metricResourceGroup="check_nfs_server_rg"
instanceName=$(curl -s -L http://169.254.169.254/opc/v1/instance/ | jq -r '.displayName')
instanceId=$(curl -s -L http://169.254.169.254/opc/v1/instance/ | jq -r '.id')
endpointRegion=$(curl -s -L http://169.254.169.254/opc/v1/instance/ | jq -r '.canonicalRegionName')

timeout ${timeout_sec} touch ${mount_point}/monitoring.txt

if [ $? -eq 0 ]
 then
  res=0
 else
  res=1
fi

Timestamp=$(date -u '+%Y-%m-%dT%H:%M:%SZ')

metricsJson=$(cat << EOF > /tmp/metrics.json
[
   {
      "namespace":"$metricNamespace",
      "compartmentId":"$compartmentId",
      "resourceGroup":"$metricResourceGroup",
      "name":"Check-NFS-Write",
      "dimensions":{
         "resourceId":"$instanceId",
         "instanceName":"$instanceName"
      },
      "metadata":{
         "unit":"write return value",
         "displayName":"NFS Server Write State"
      },
      "datapoints":[
         {
            "timestamp":"$Timestamp",
            "value":"$res"
         }
      ]
   }
]
EOF
)

$cliLocation monitoring metric-data post --metric-data file:///tmp/metrics.json --endpoint https://telemetry-ingestion.$endpointRegion.oraclecloud.com
実行権限を付与する。
chmod +x <path>/check_nfsserver.sh
NFS Server が正常時のスクリプトの単体動作確認
NFS サーバが正常に動作している状態でスクリプトを実行します。問題がなければ以下のような結果になります。
[opc@client-1 ~]$ <path>/check_nfsserver.sh
{
  "data": {
    "failed-metrics": [],
    "failed-metrics-count": 0
  }
}
メトリックがアップロードされたか確認
スクリプトを実行した結果として、OCI に Metric が上がっているか確認します。
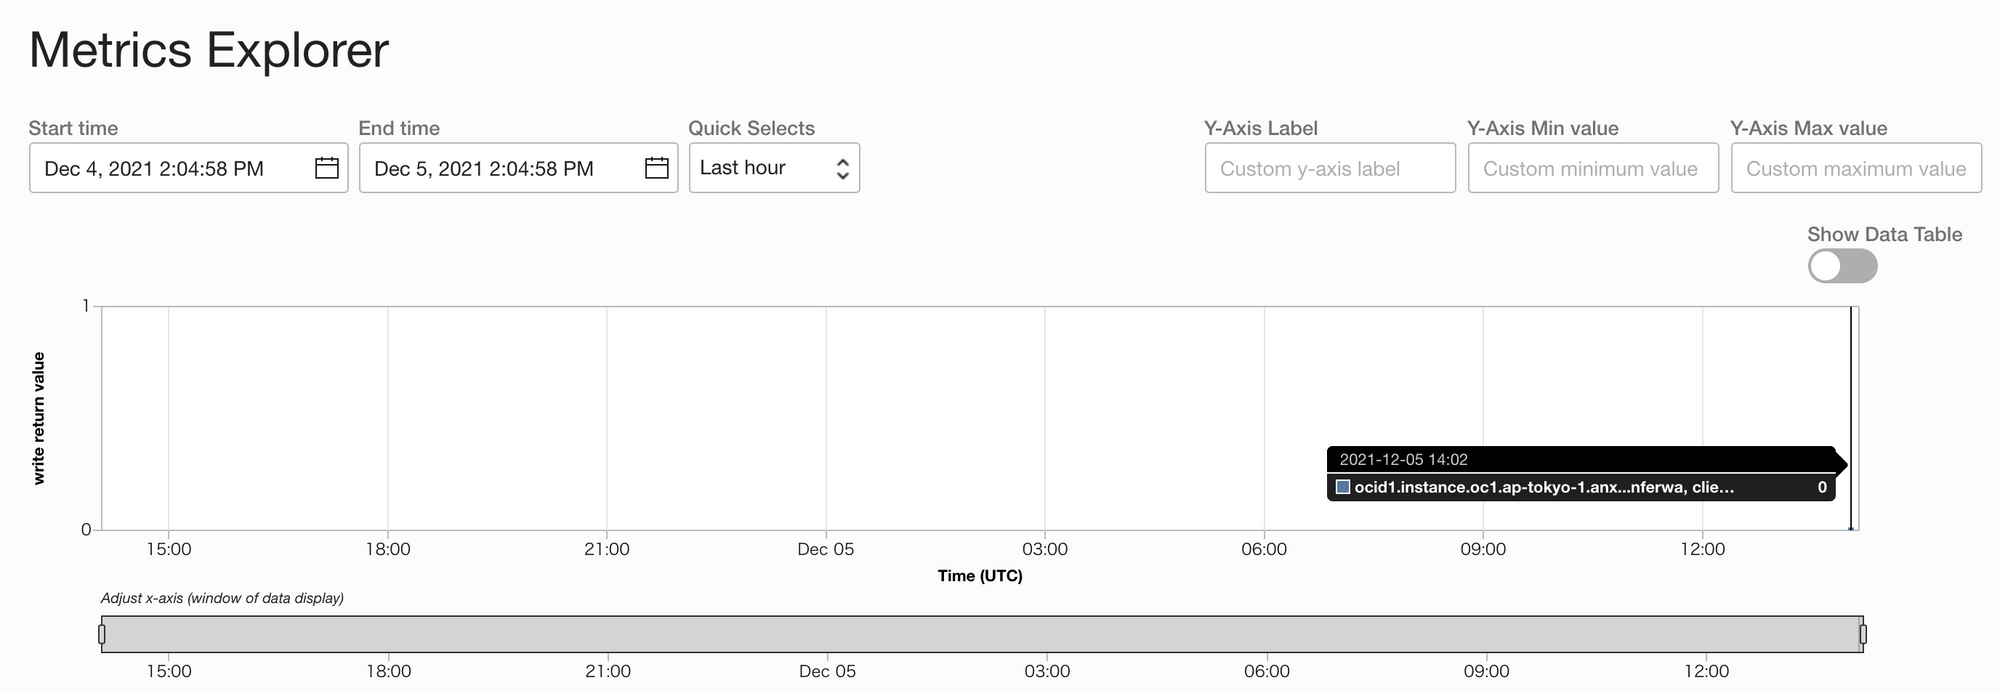
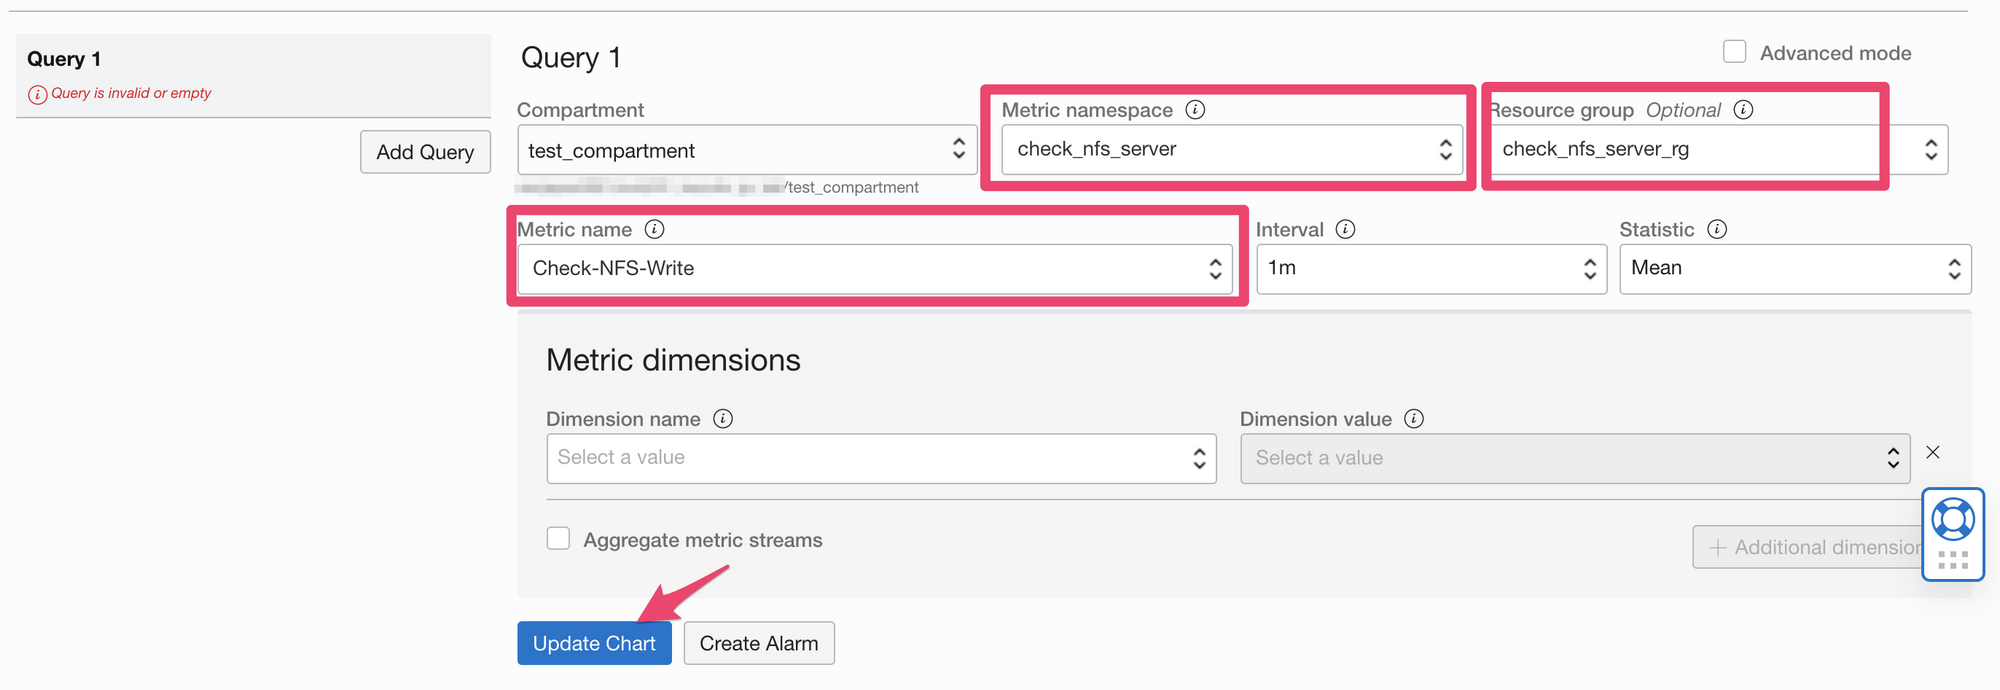
メニューから metrics を検索して、Metrics Explorer を選択する。

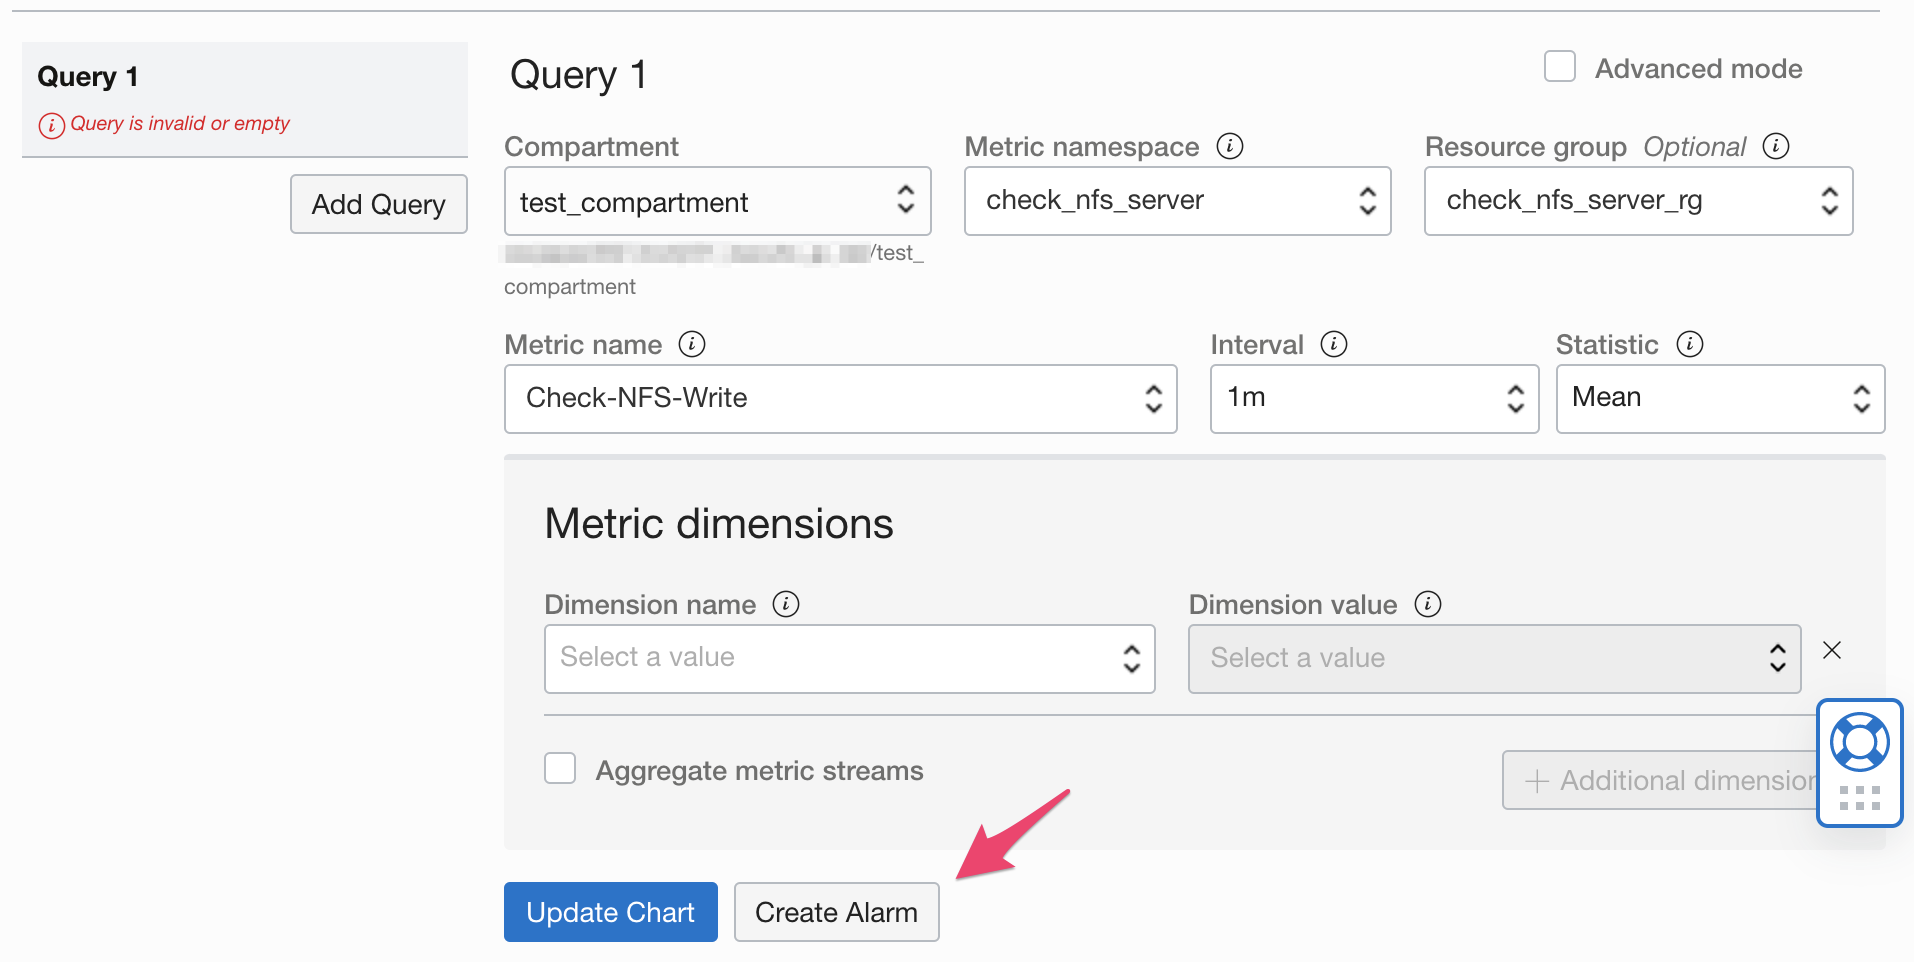
Query でスクリプトで指定した Metric namespace や Resource group、Metric name を指定して、Update Chart をクリックする。
NFS サーバを停止させて再度スクリプト実行
続いて、NFS サーバを停止させた状態で、再度スクリプトを実行してみます。
[opc@client-1 ~]$ <path>/check_nfsserver.sh
{
  "data": {
    "failed-metrics": [],
    "failed-metrics-count": 0
  }
}
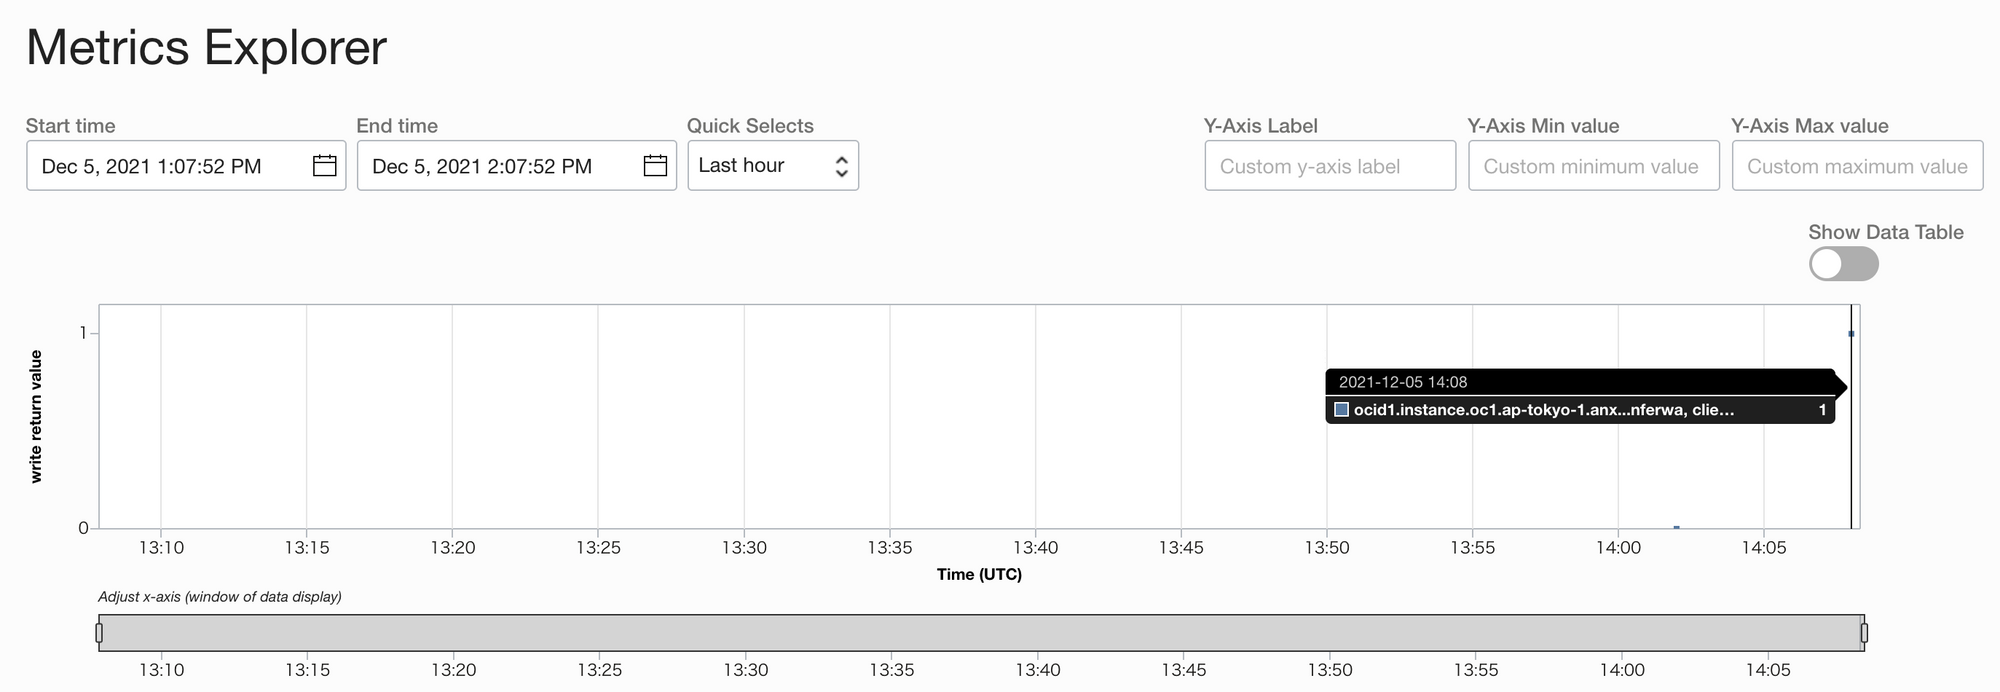
再度メトリックエクスプローラの確認
先ほどと同様に Metric Explorer で再度結果を確認します。
失敗した結果として 1 で記録されています。
アラートの設定
Metric に上がられた値である 0 or 1 をもとにアラームを設定します。
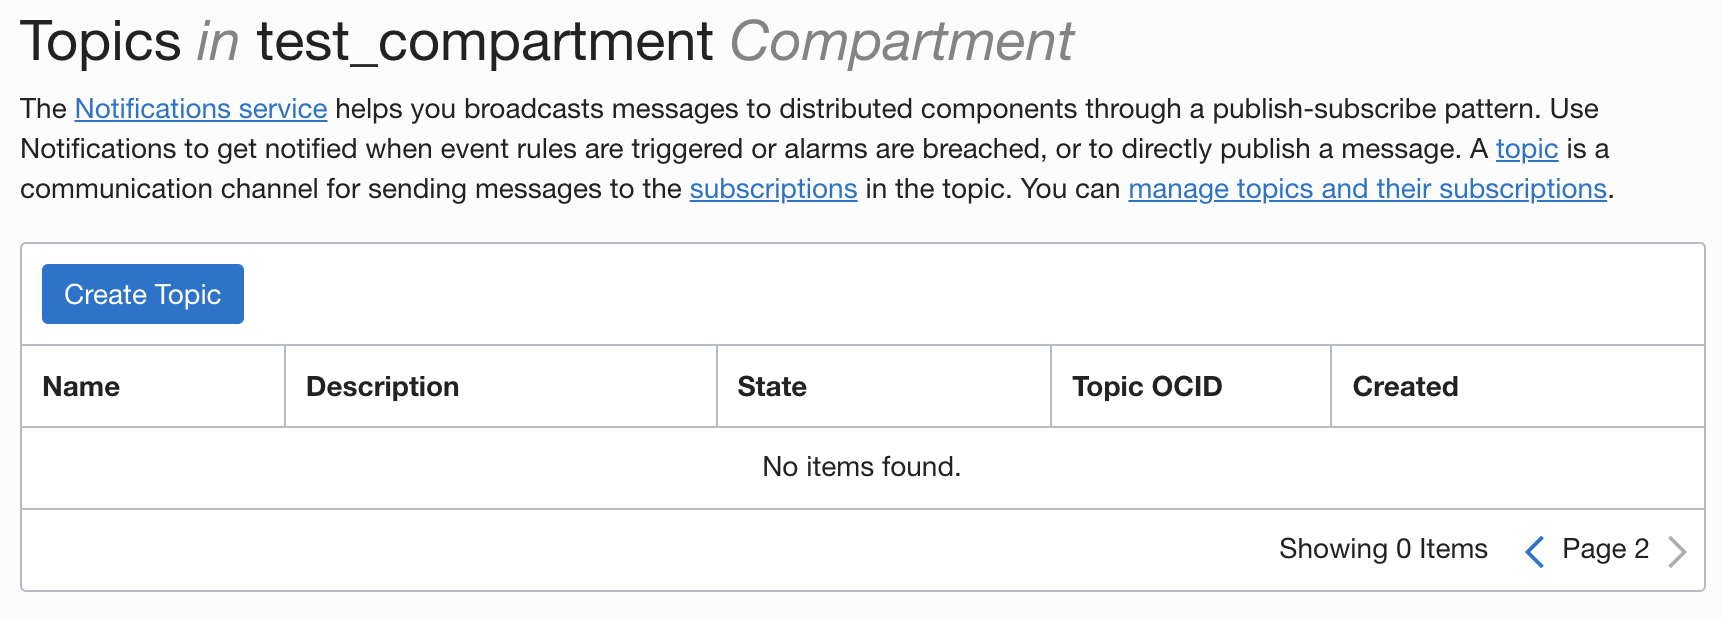
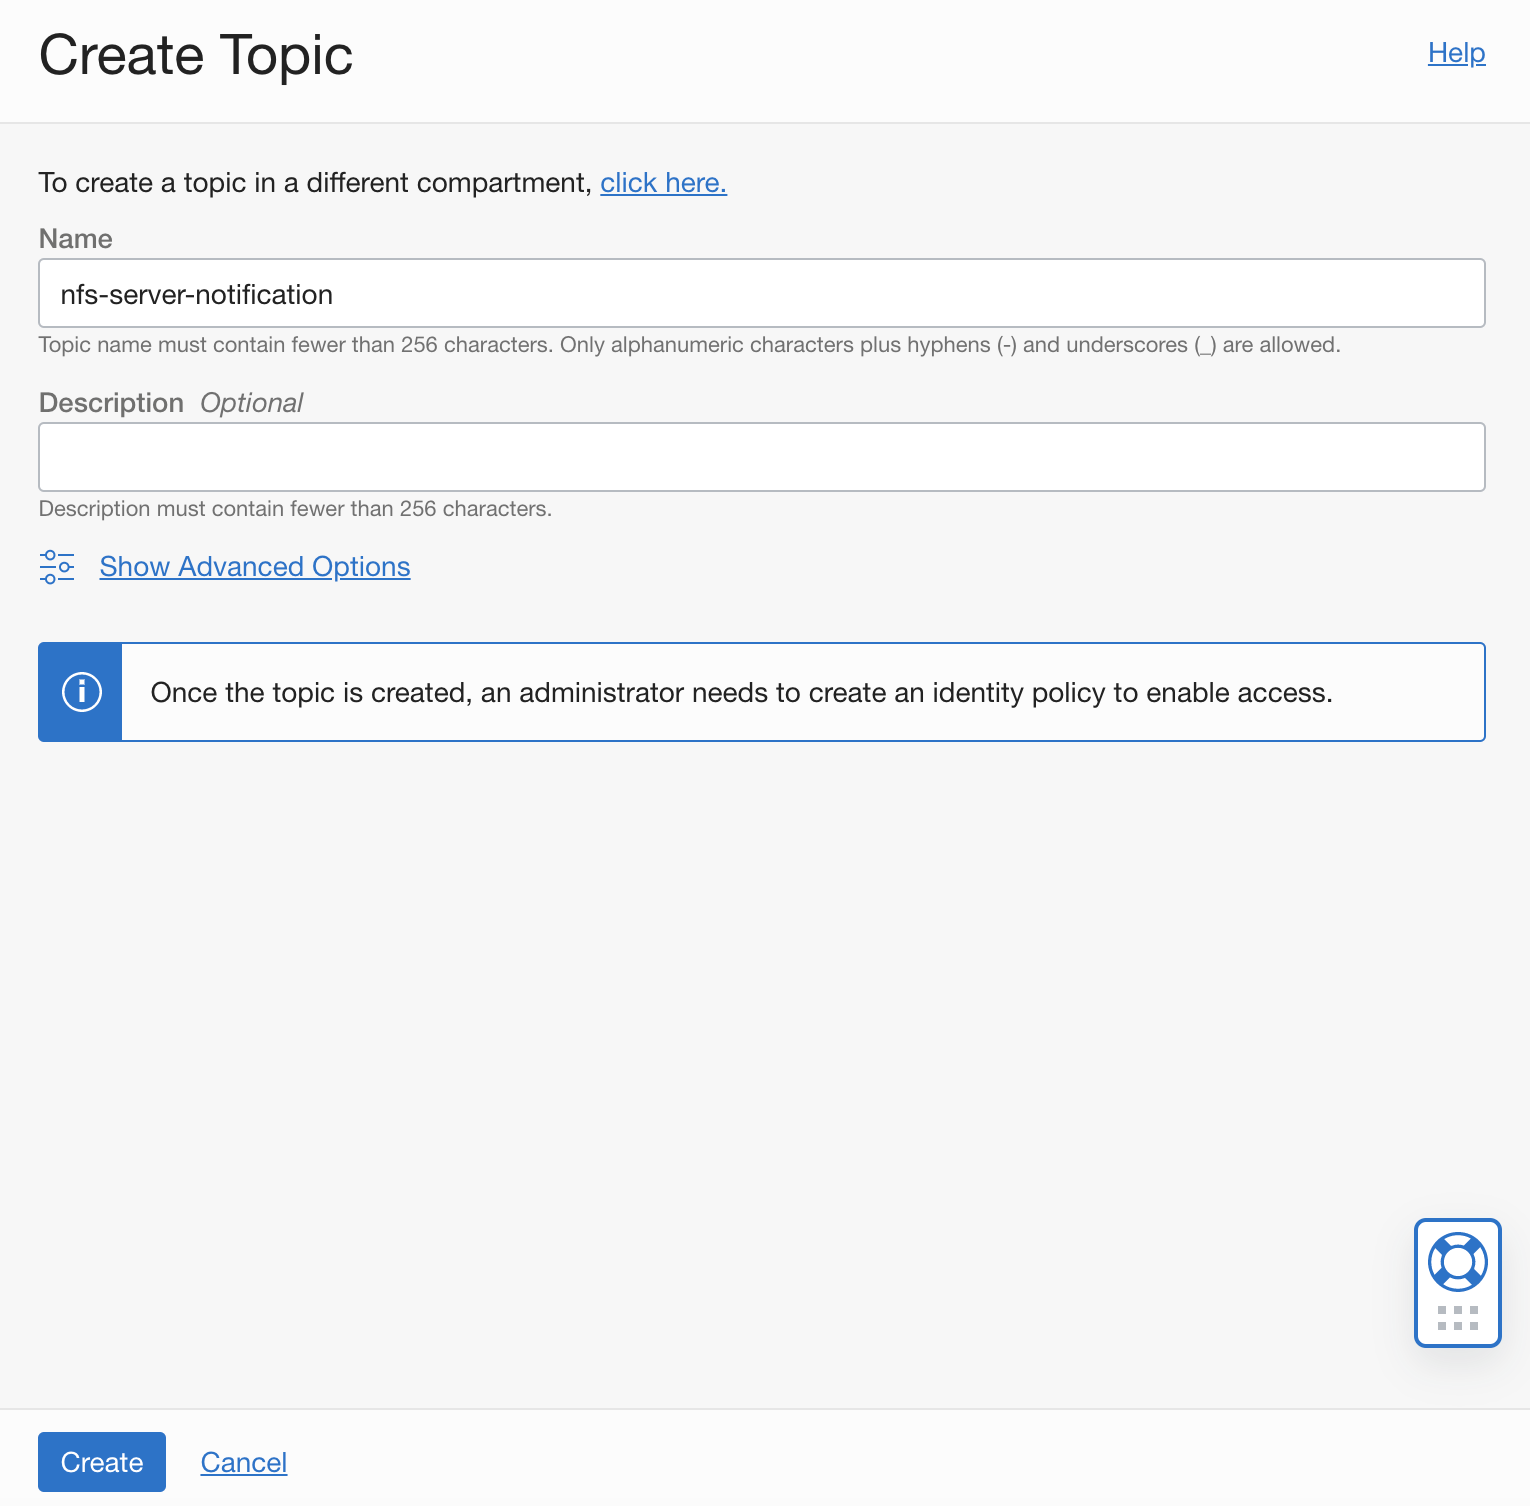
送信先のメールを設定
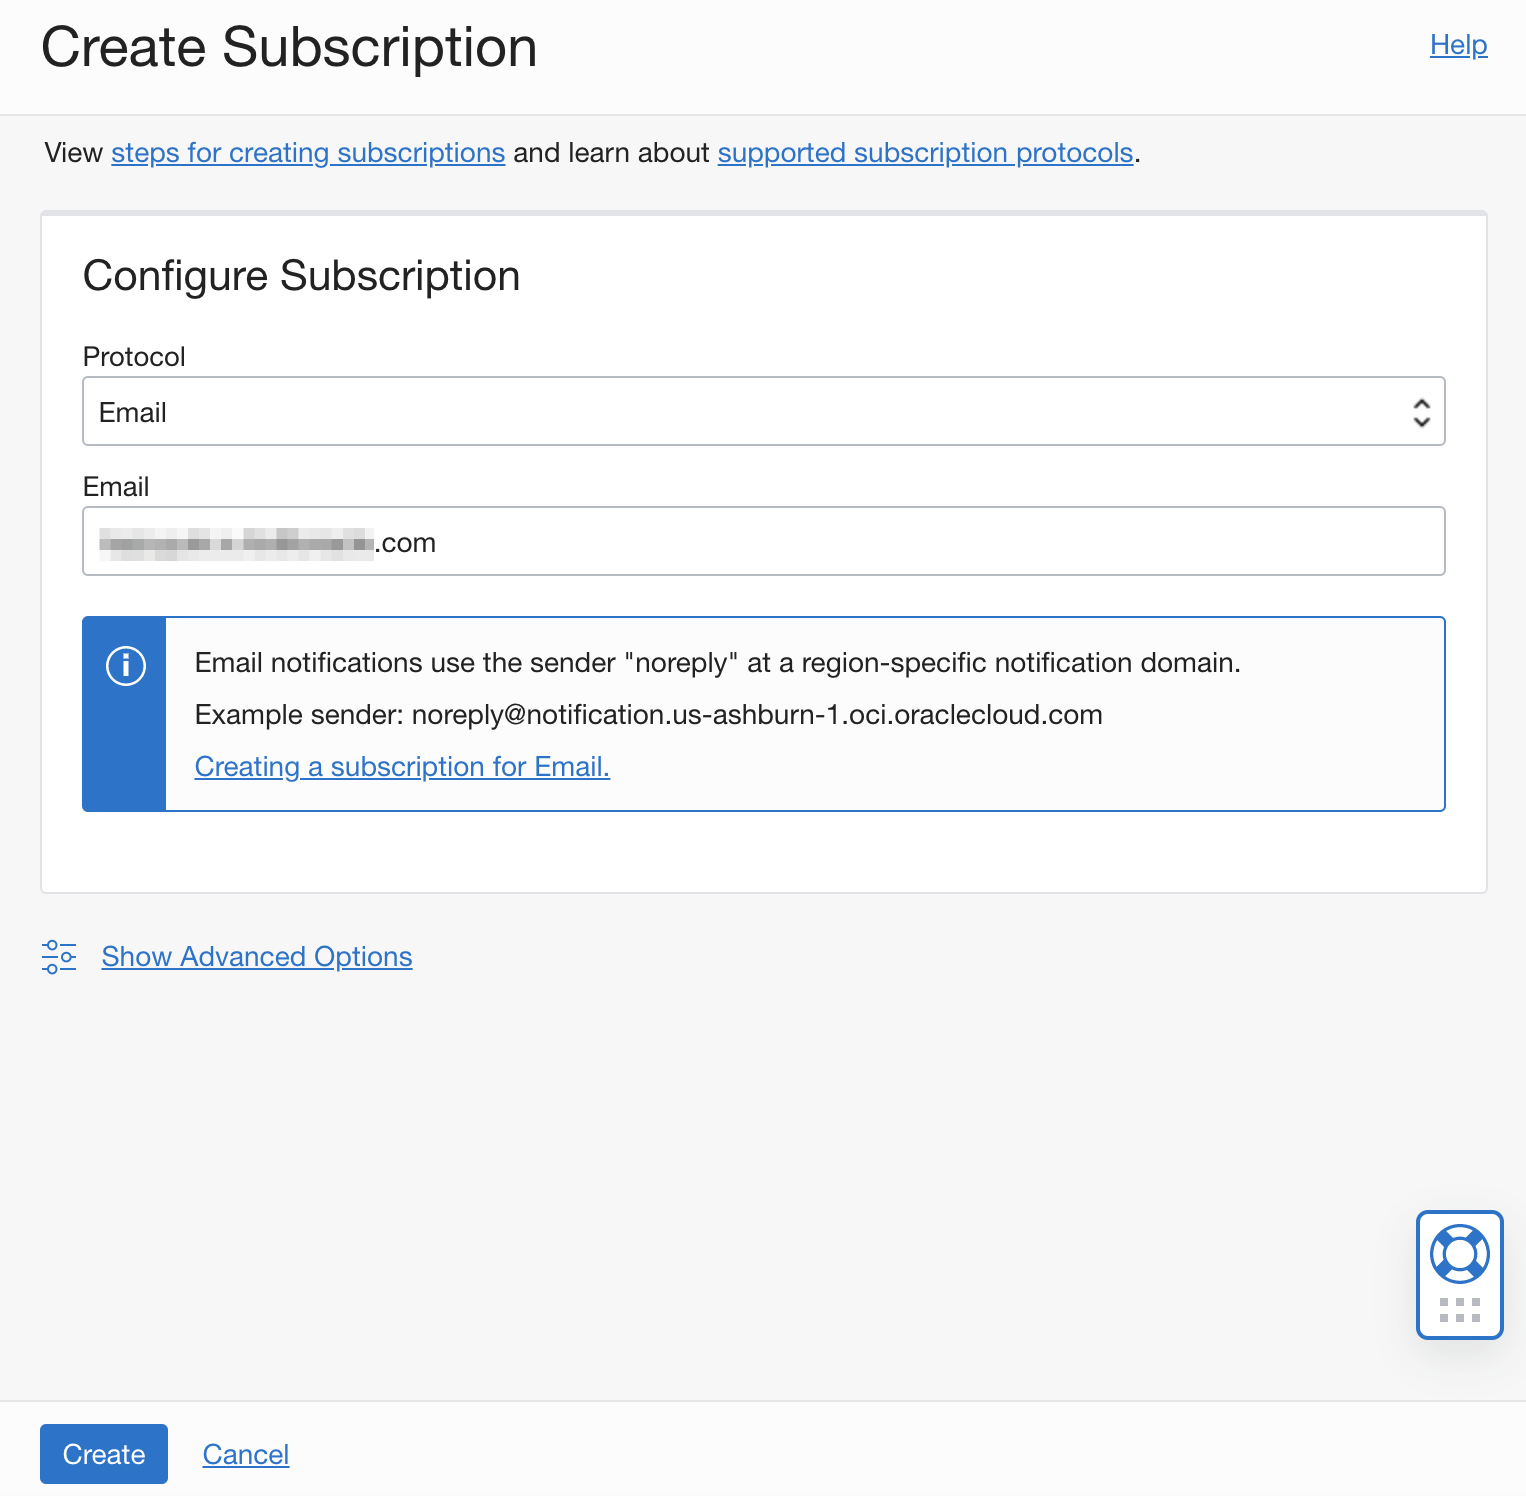
アラームに必要な設定として送信先のメールアドレスを追加します。
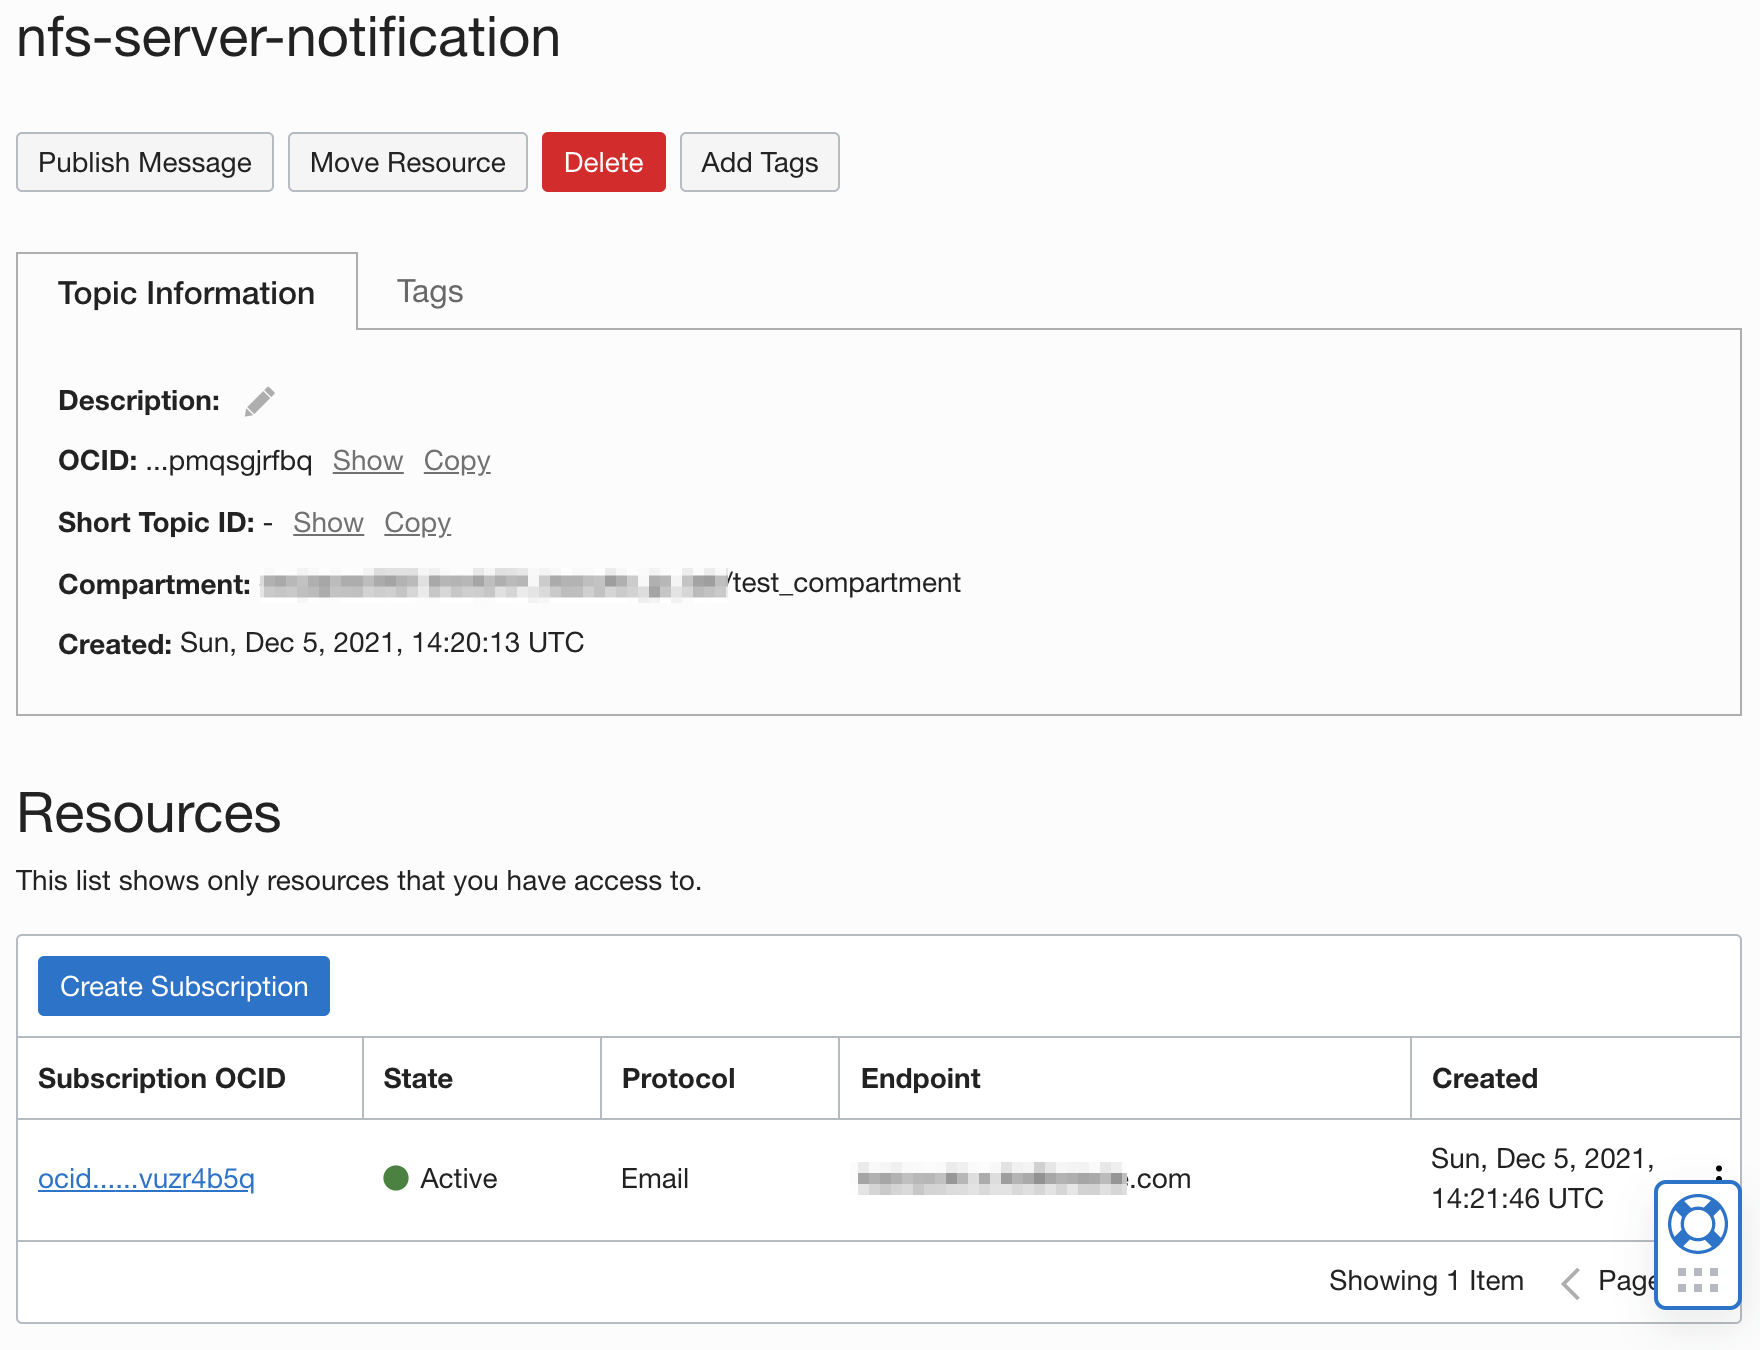
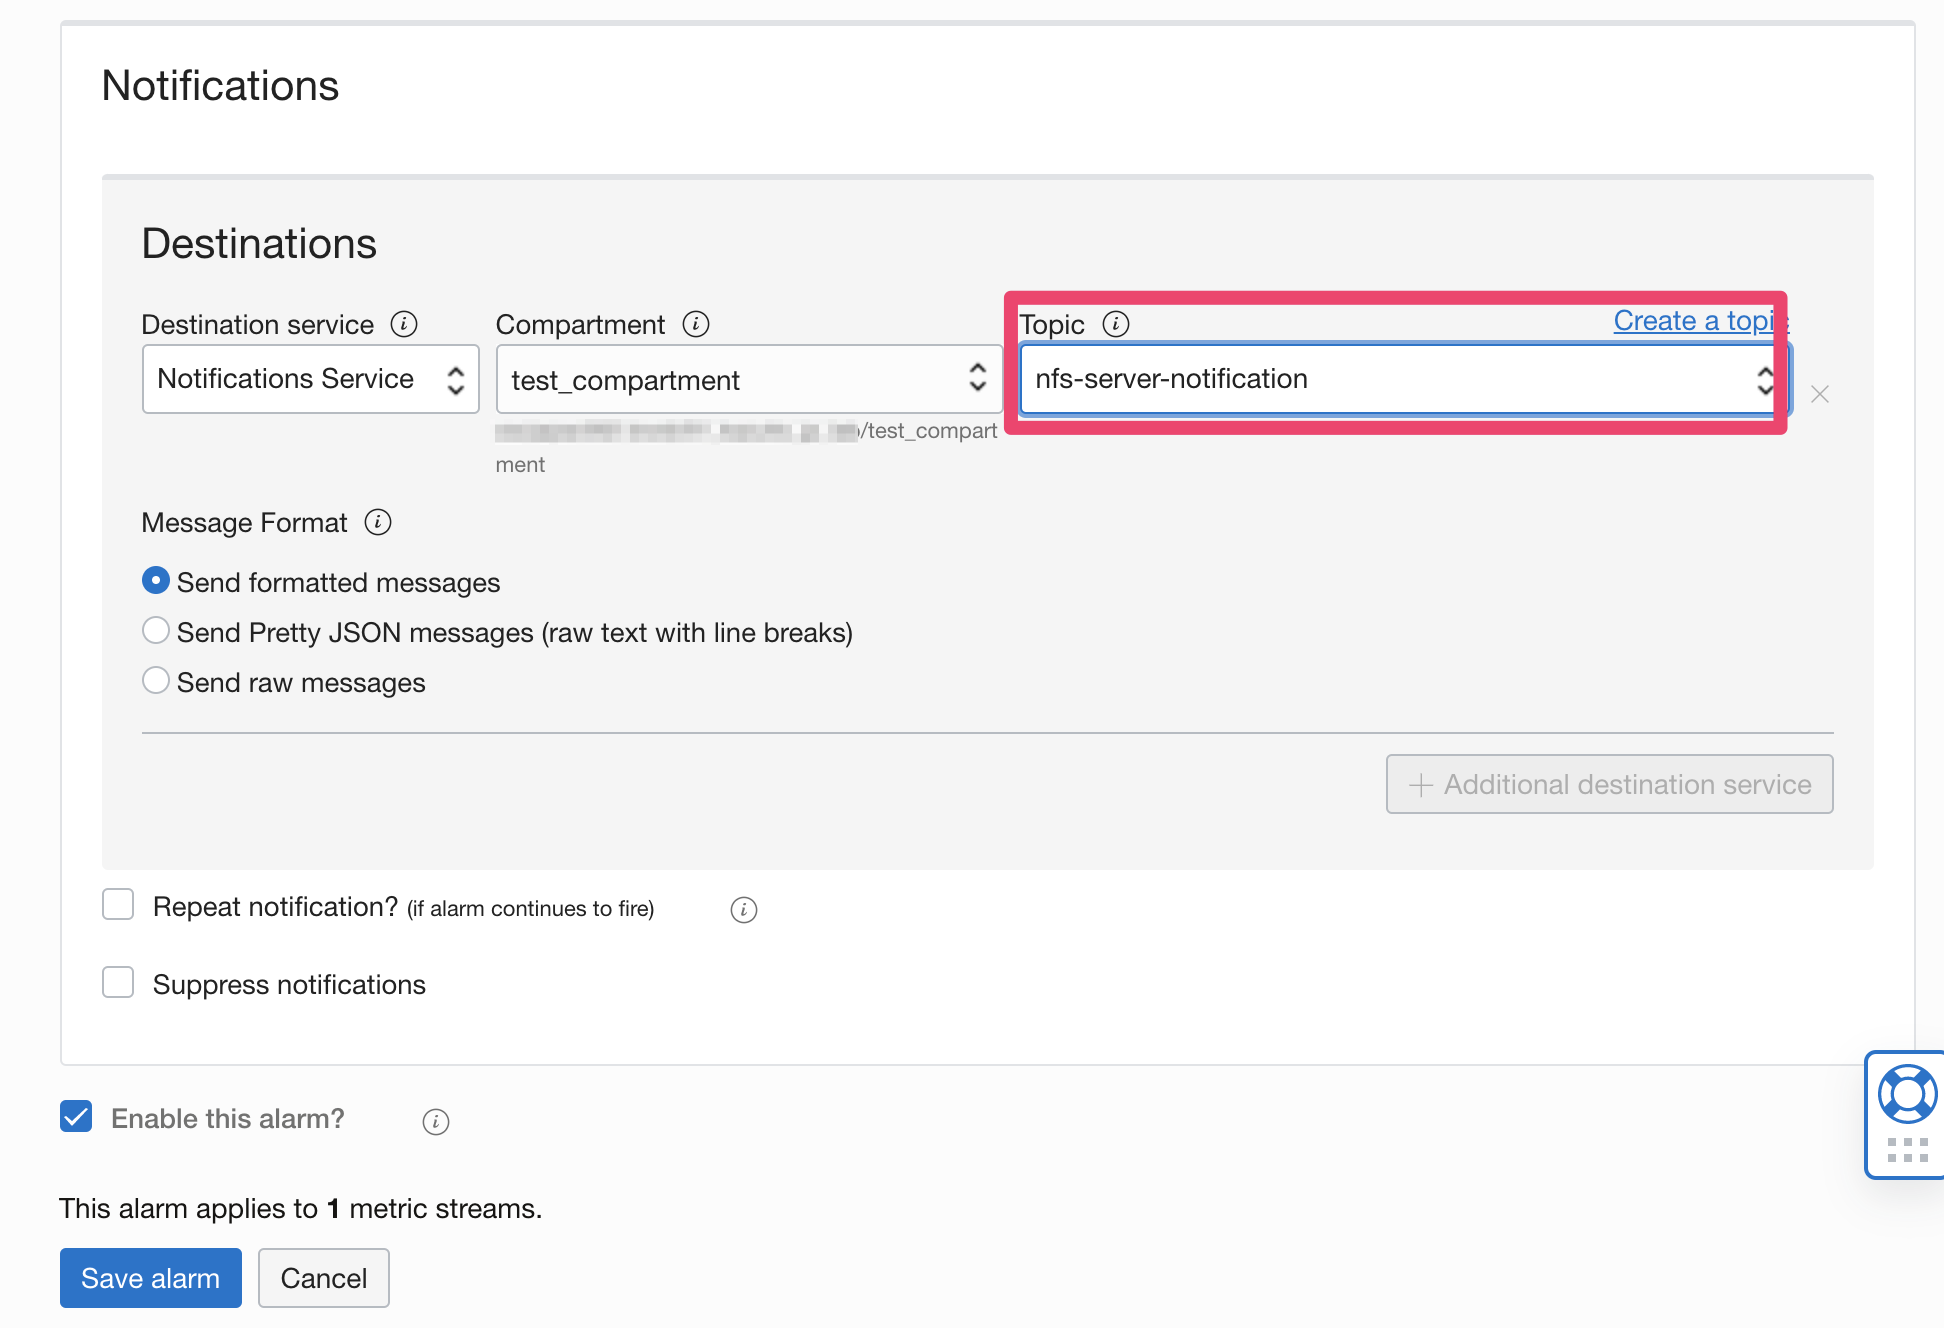
ここでは nfs-server-notification という名前で作成します。
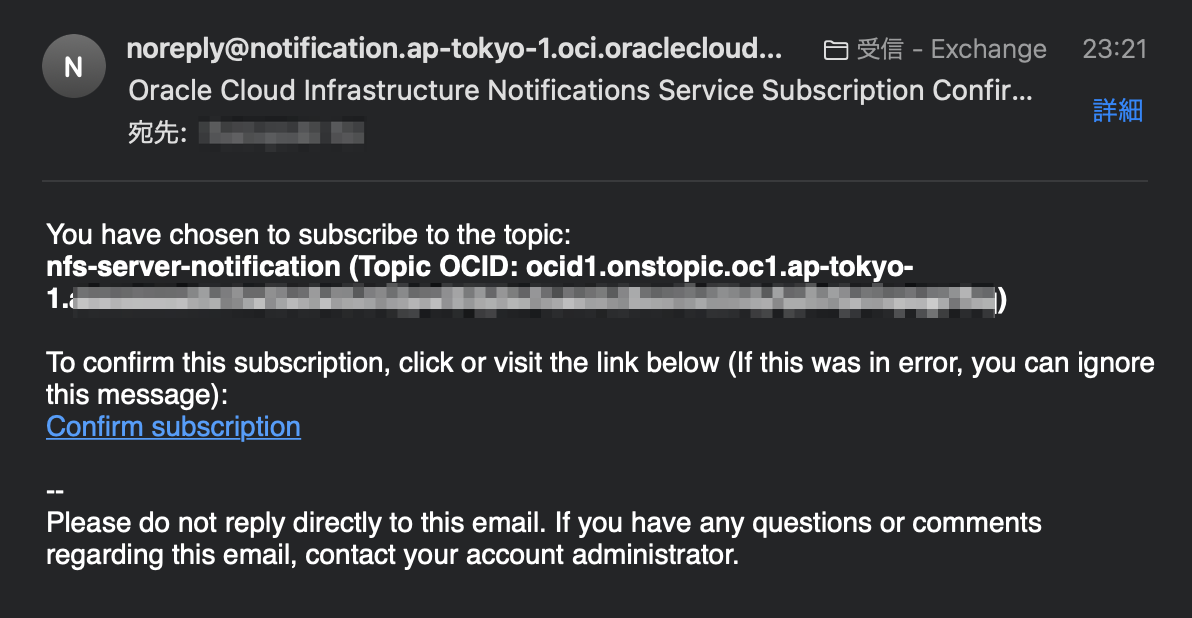
登録したメールアドレスに以下のメールが届くので、リンクをクリックして登録を完了させます。
アラートの作成
取得した Metric の監視設定をしていきます。
Metric Explorer よりこれまでと同じように値を設定して、今度は Create Alarm をクリックする。
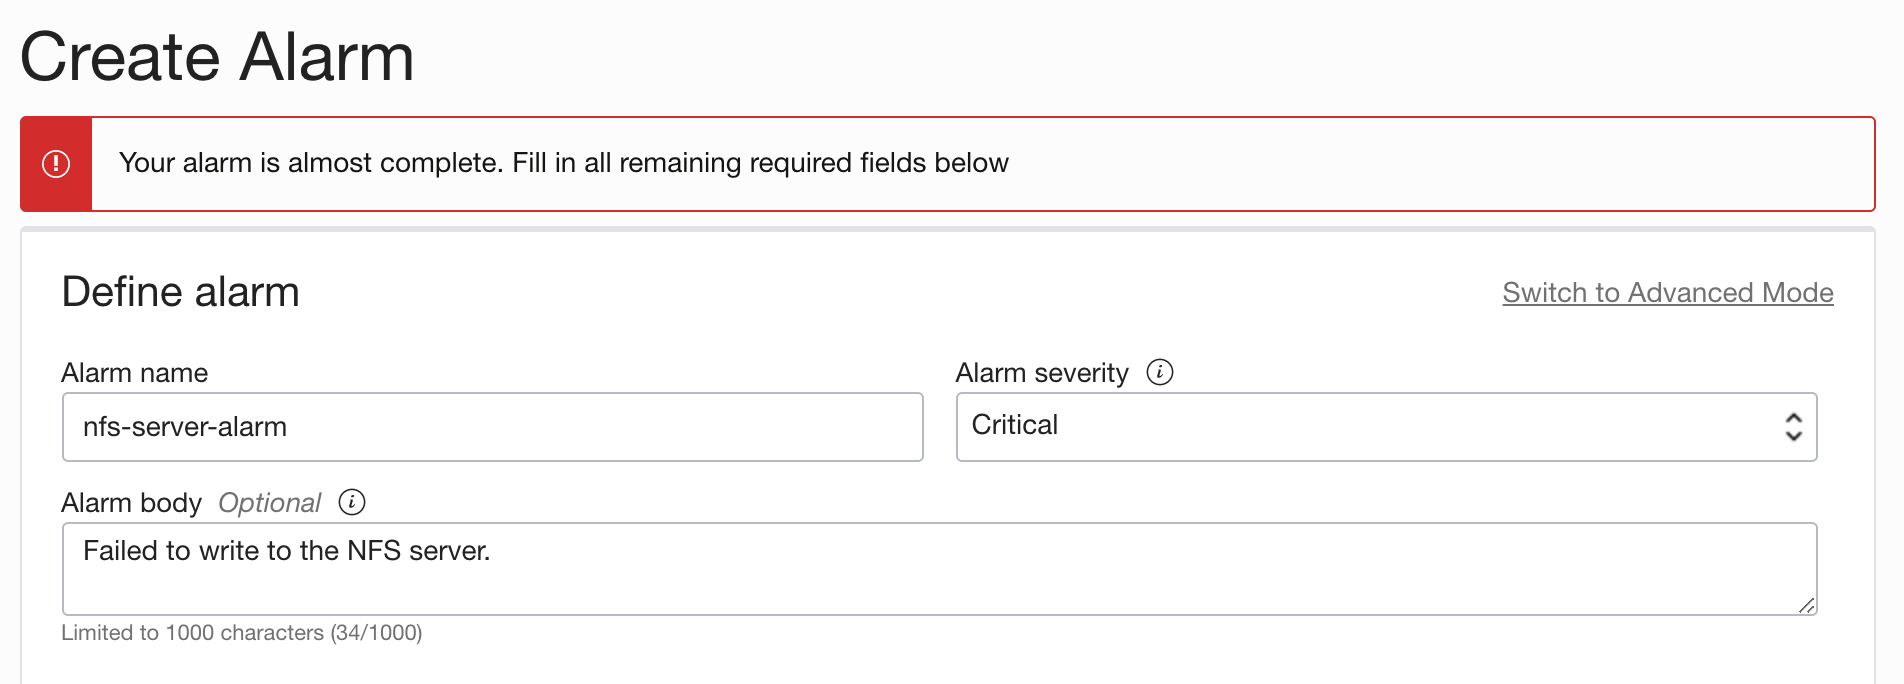
Define セクションではこのアラームの名前や重要度、メール本文に含ませる文字列を指定します。
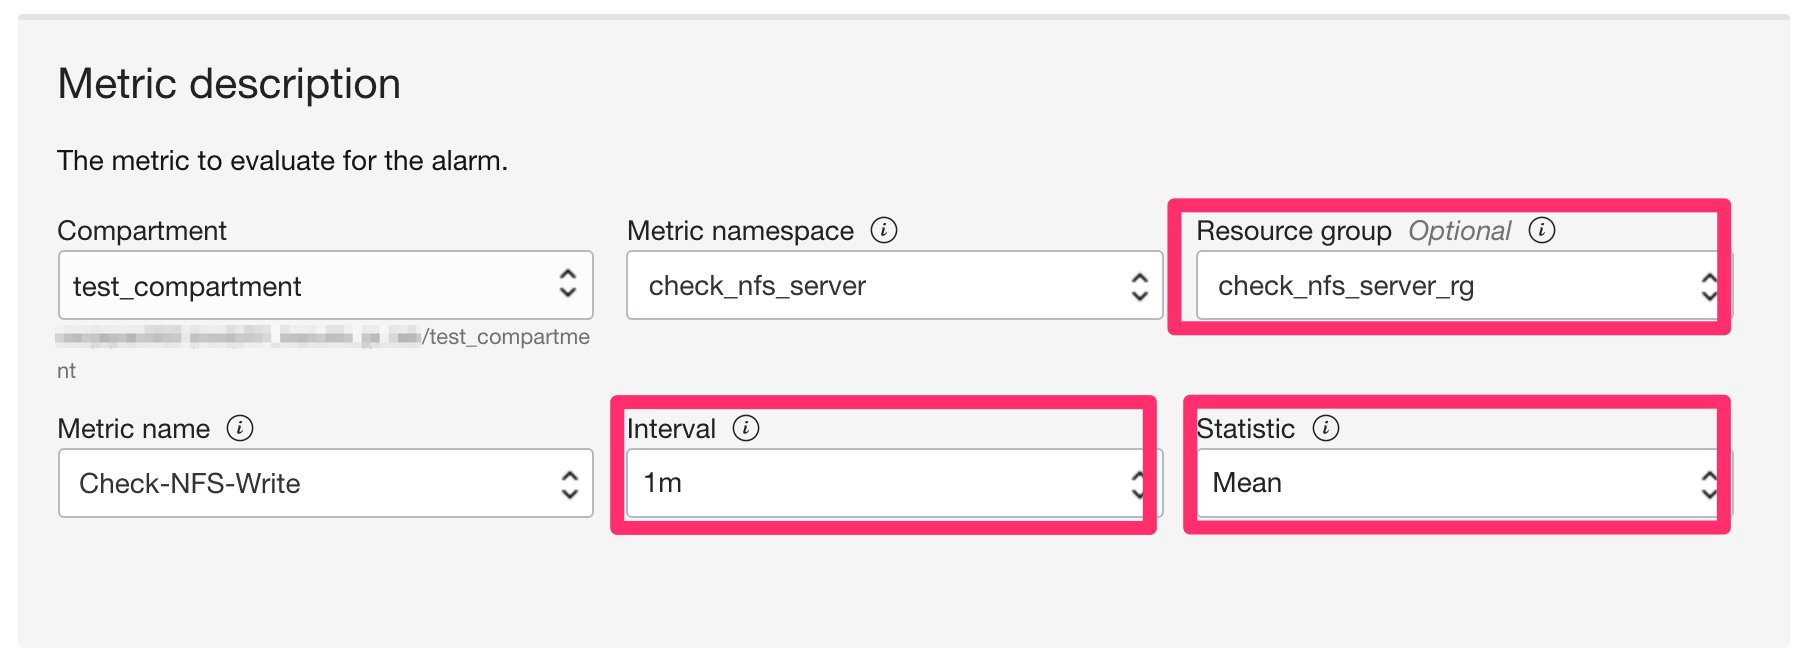
Metric セクションでは Resource group や Interval、Statistic を指定します。
今回は1分間隔でチェックを行います。
Trigger rule ではしきい値として、値が 0 以上の場合とします。

最後に、Notifications セクションで通知先の Topic を設定して Save alarm をクリックします。
スクリプトの定期実行
監視をする NFS Client にて作成したスクリプトを cron に登録します。
crontab -e
* * * * * /home/opc/check_nfsserver.sh
アラームの動作確認
以上ですべての設定が完了したので動作を確認します。
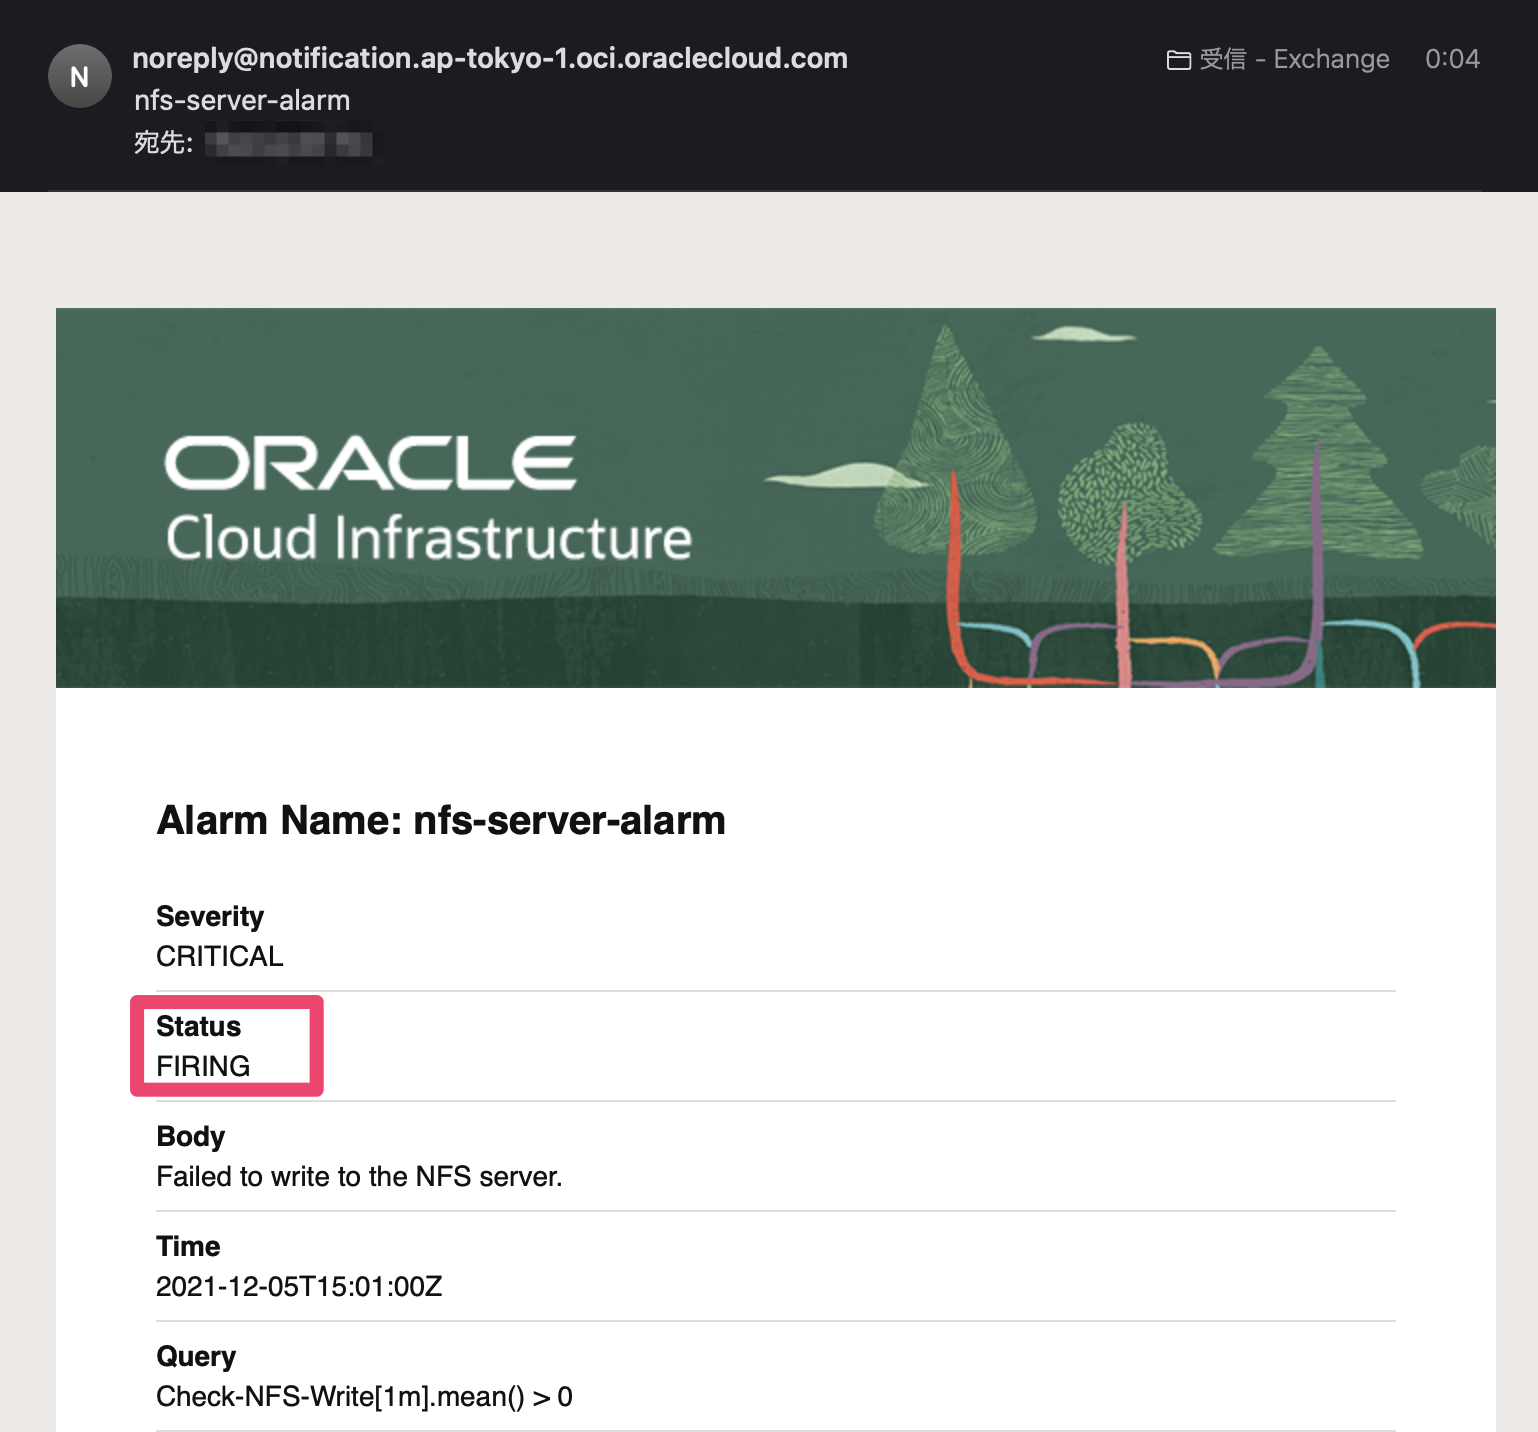
NFS サーバを停止させて以下のようなメールが飛んでくることを確認します。
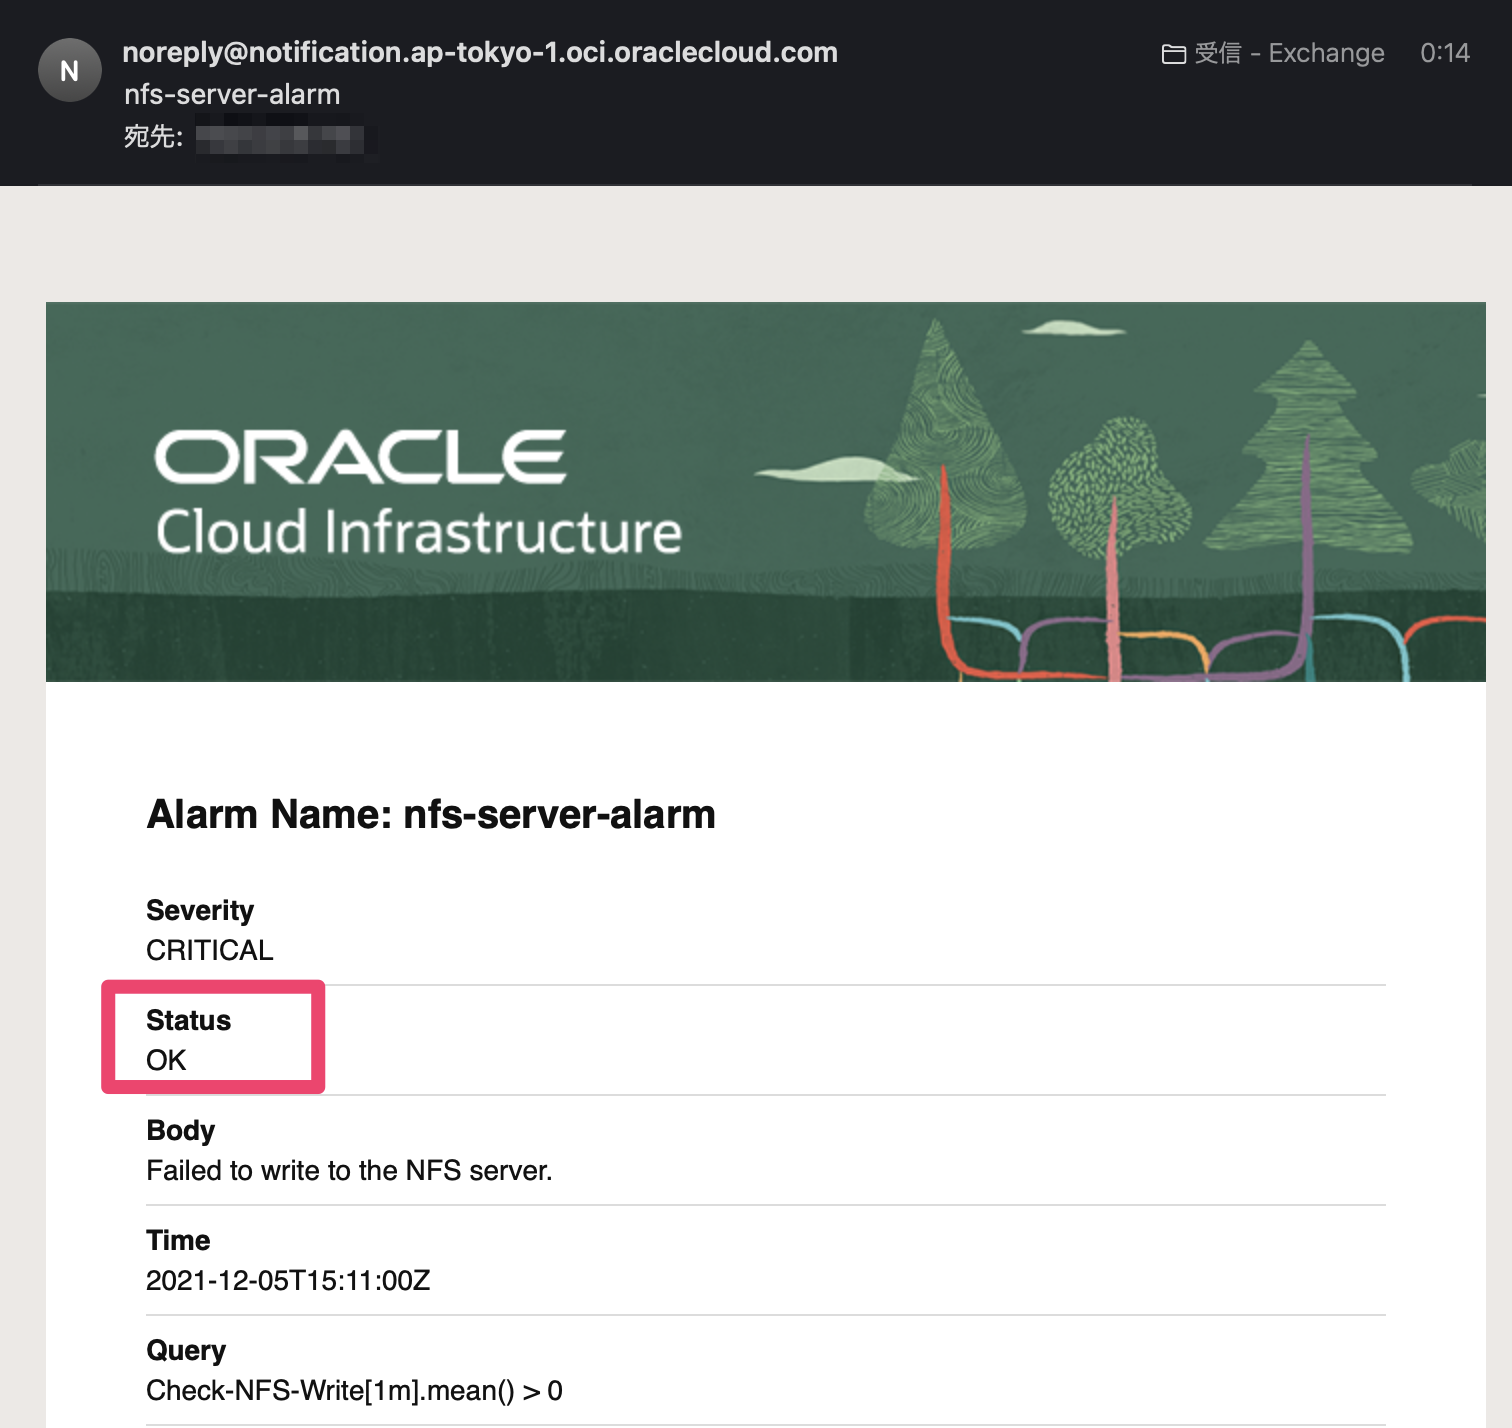
今度は nfs-server を復旧させてメールが飛んでくることを確認します。
最後に
試してみてかなり簡単に監視ができることがわかりました。
今回は NFS の監視でしたが同じ要領で様々な監視ができそうです。
