2023年4月ぐらいからカスタムログを Service Connector Hub で Noticication 連携ができなくなっており、現状この手順では実装できないのでご注意ください。
手順の修正については追々確認いたします。
はじめに
OCI を利用頂く際に運用監視の観点でログ監視をお願いすることがあります。これまで実績のある方法で実装頂くことが多かったのですが、OCI のサービスでできないだろうか、っと思ったので調べて実装してみました。
ゴール
- インスタンス(Linux) の特定のファイル(/var/log/messages)で特定の文字列を監視する
- 特定の文字列を検出した際にはメールで通知する
- OCI のサービスを利用して実装する
事前に検討すべきこと
- 適用範囲(インスタンス単位 or コンパートメント単位)
- 監視対象ファイル
- 監視対象ファイルのサイズ
- 監視対象文字列
利用するサービス
- Instance (監視対象として利用)
- Logging (対象ログをクラウドへ保管)
- Notifications (メール通知)
- Service Connector Hub (Loggin と Notifications の連携と監視対象文字列のチェック)
大まかな構成イメージ
 ┌──────────────┐  ┌──────────────────────────────────────────────────┐
 │              │  │                                                  │
 │              │  │ ┌───────────┐  ┌────────────┐  ┌───────────────┐ │  ┌────────┐
 │ ┌─────────┐  │  │ │           │  │ Service    │  │               │ │  │        │
 │ │  Agent  ├──┼──┼─►  Logging  ├──┤► Connector ├──► Notifications ├─┼──┤  Mail  │
 │ └────┬────┘  │  │ │           │  │   Hub      │  │               │ │  │        │
 │      │       │  │ └───────────┘  └────────────┘  └───────────────┘ │  └────────┘
 │      │       │  │                                                  │
 │      │       │  │                                                  │
 │      │       │  │                                                  │
 │ ┌────▼─────┐ │  │                       OCI                        │
 │ │ Log File │ │  └──────────────────────────────────────────────────┘
 │ └──────────┘ │
 │              │
 │              │
 │   Instance   │
 │              │
 └──────────────┘
前提条件
- VCN やインスタンスは作成済み
- admin 権限またはそれ相応の権限
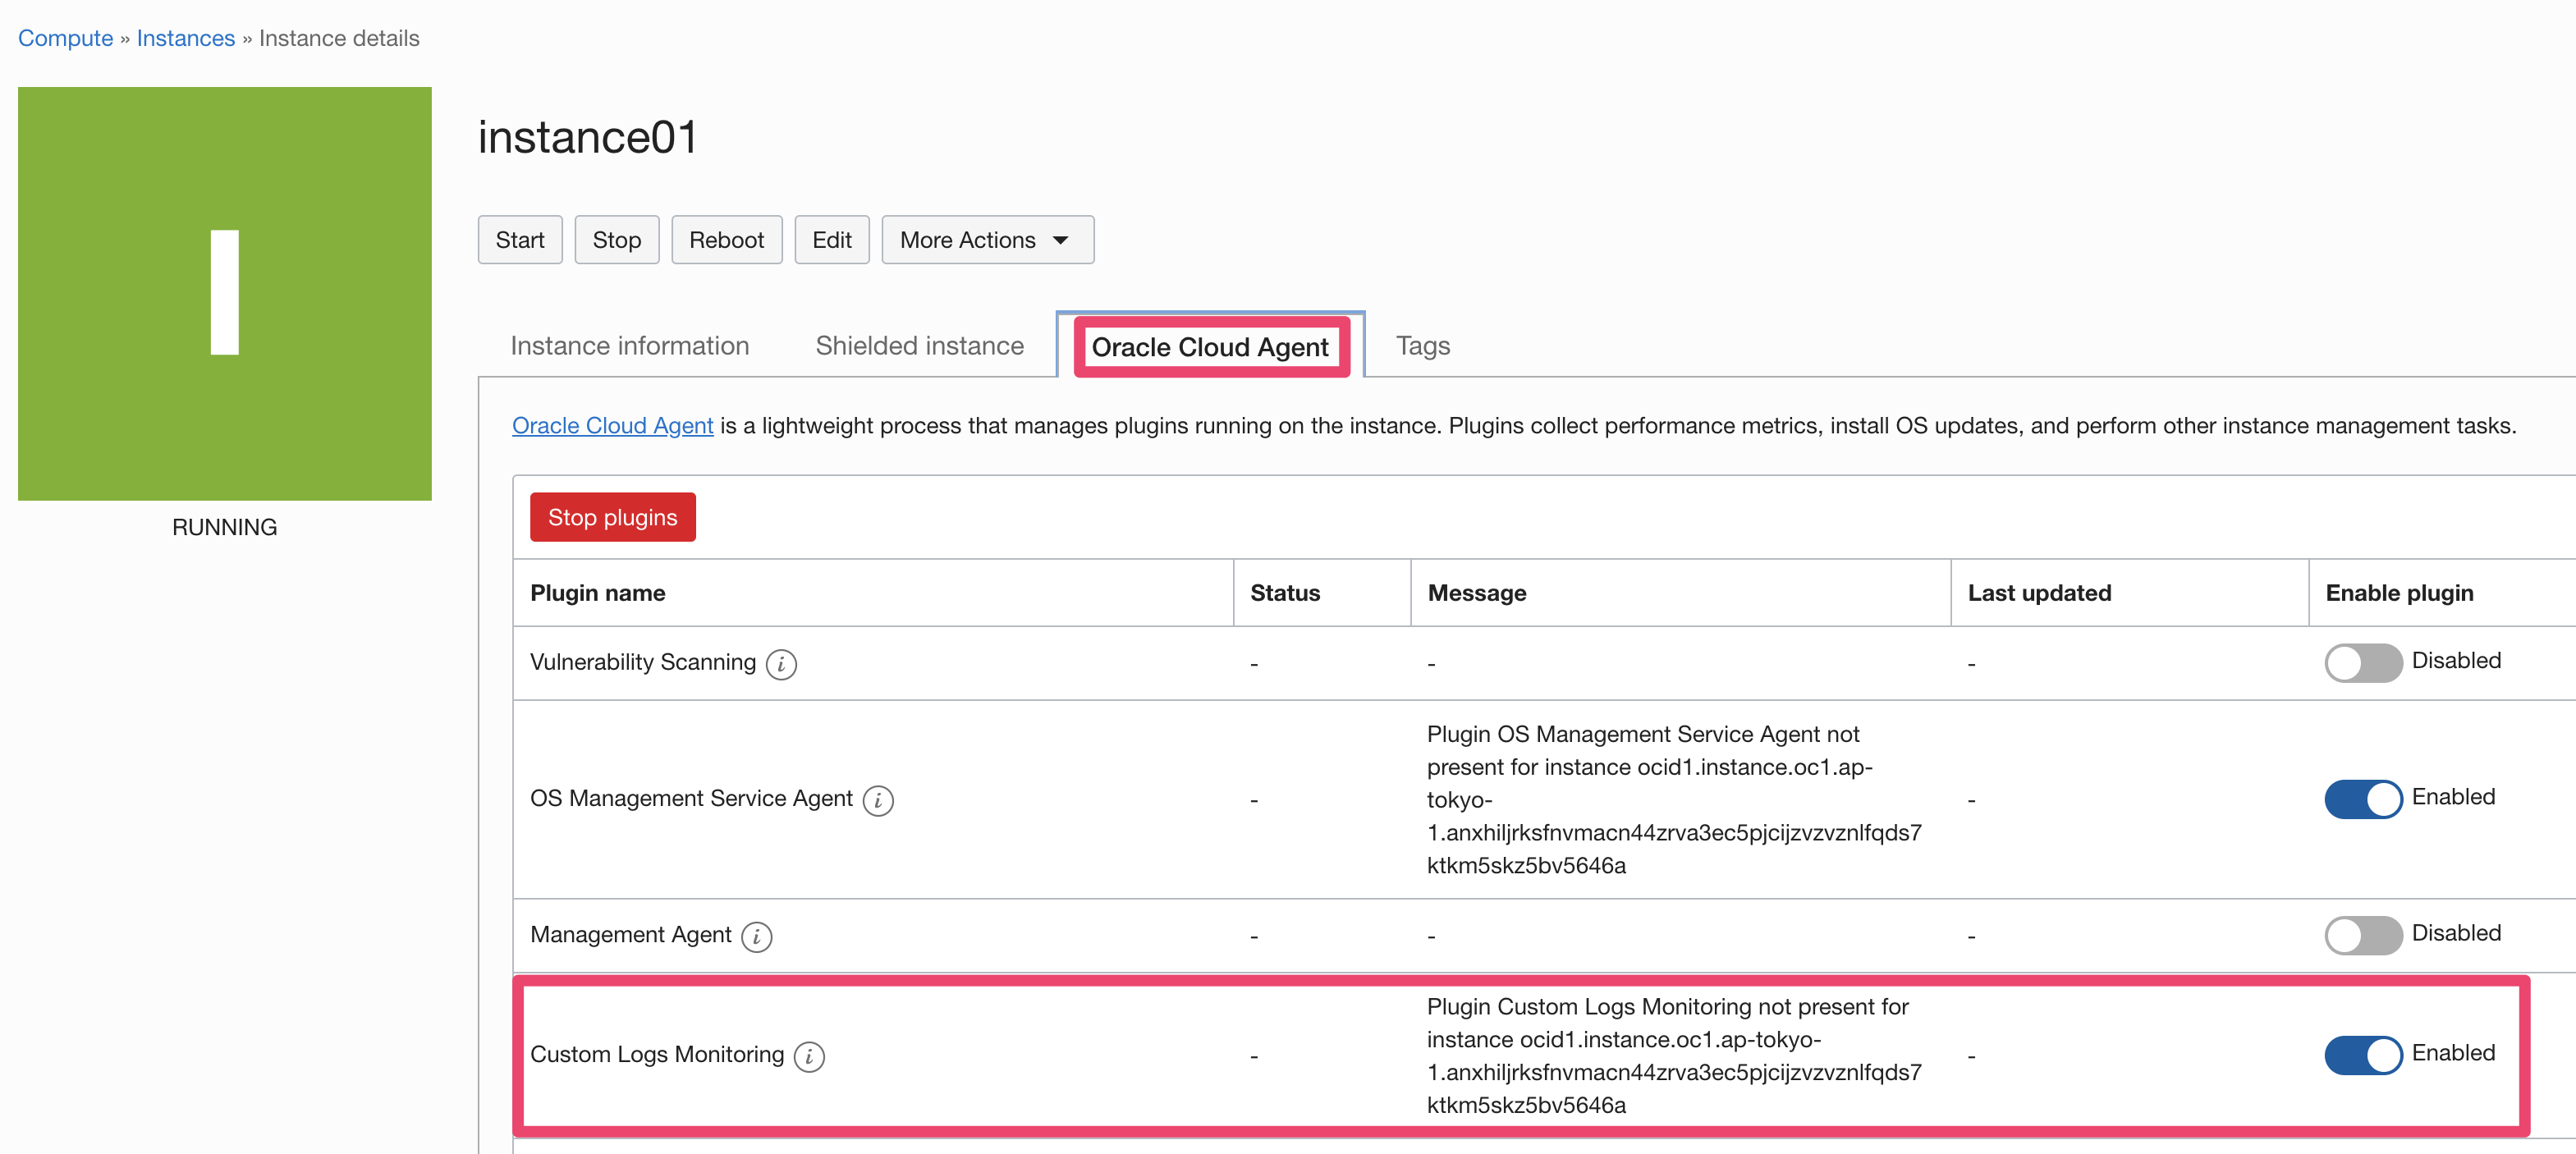
- インスタンスは Custom Logs Monitoring Agent が有効であること
手順
Dynamic Group の作成
OCI のロギングサービスがインスタンスの Custom Log Monitoring と連携しログの収集をできるようにするために Dynamic Group に該当のインスタンスまたはコンパートメントを登録する。
今回はテスト用に作成したインスタンスのみを対象とします。
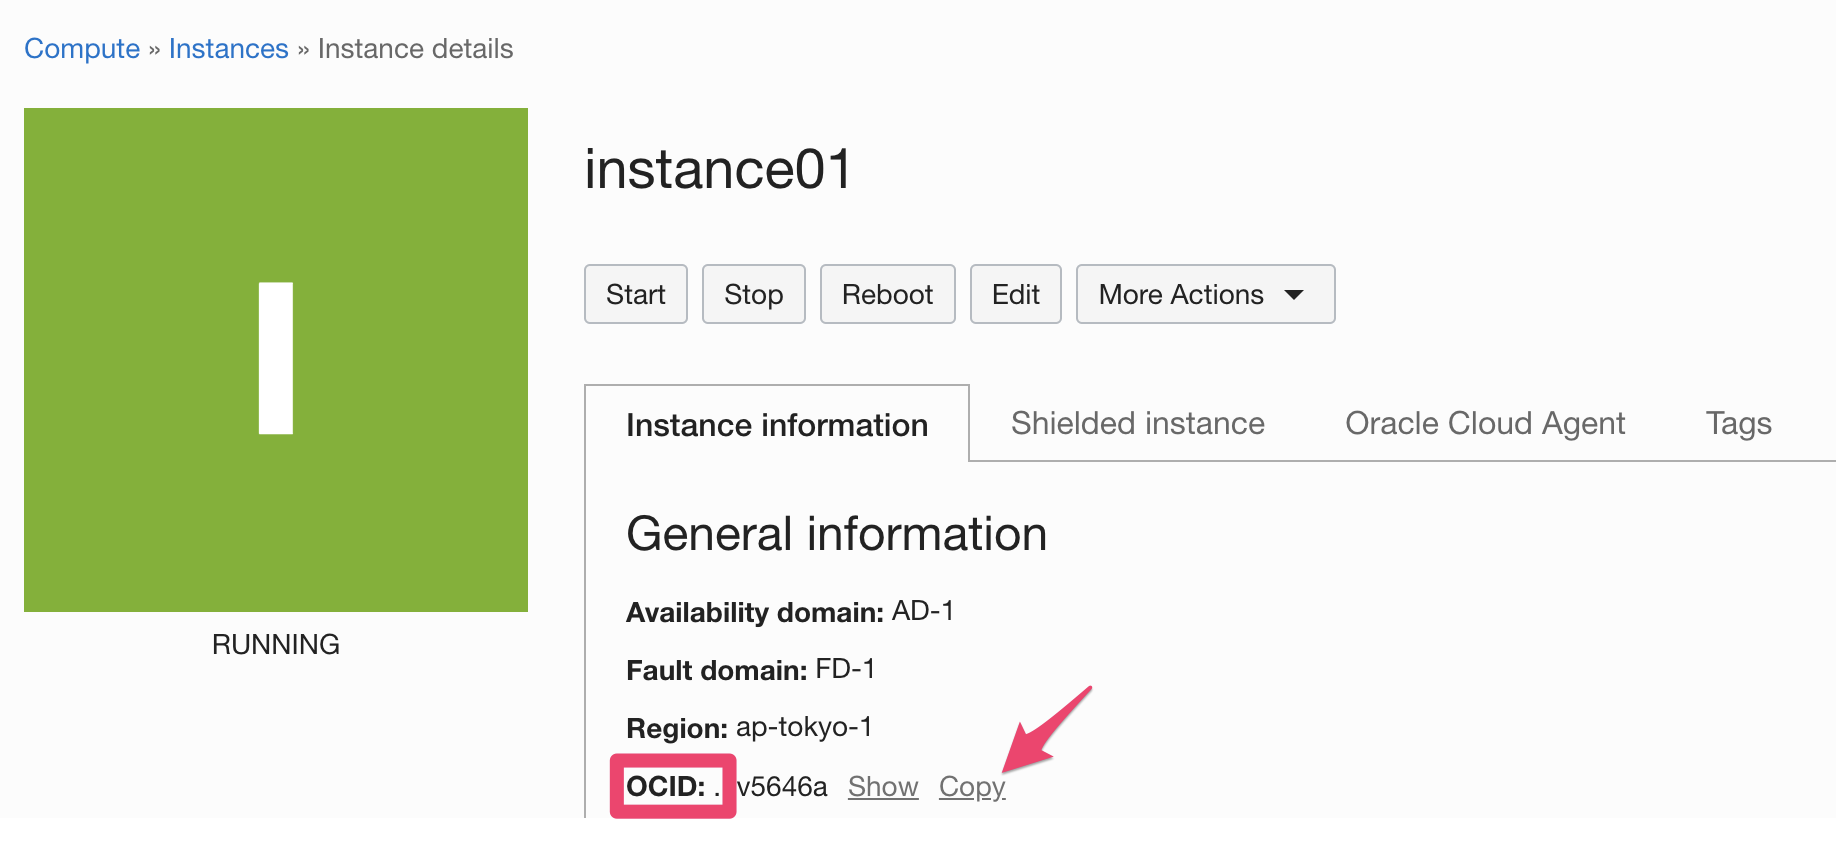
インスタンスの OCID をコピーします。
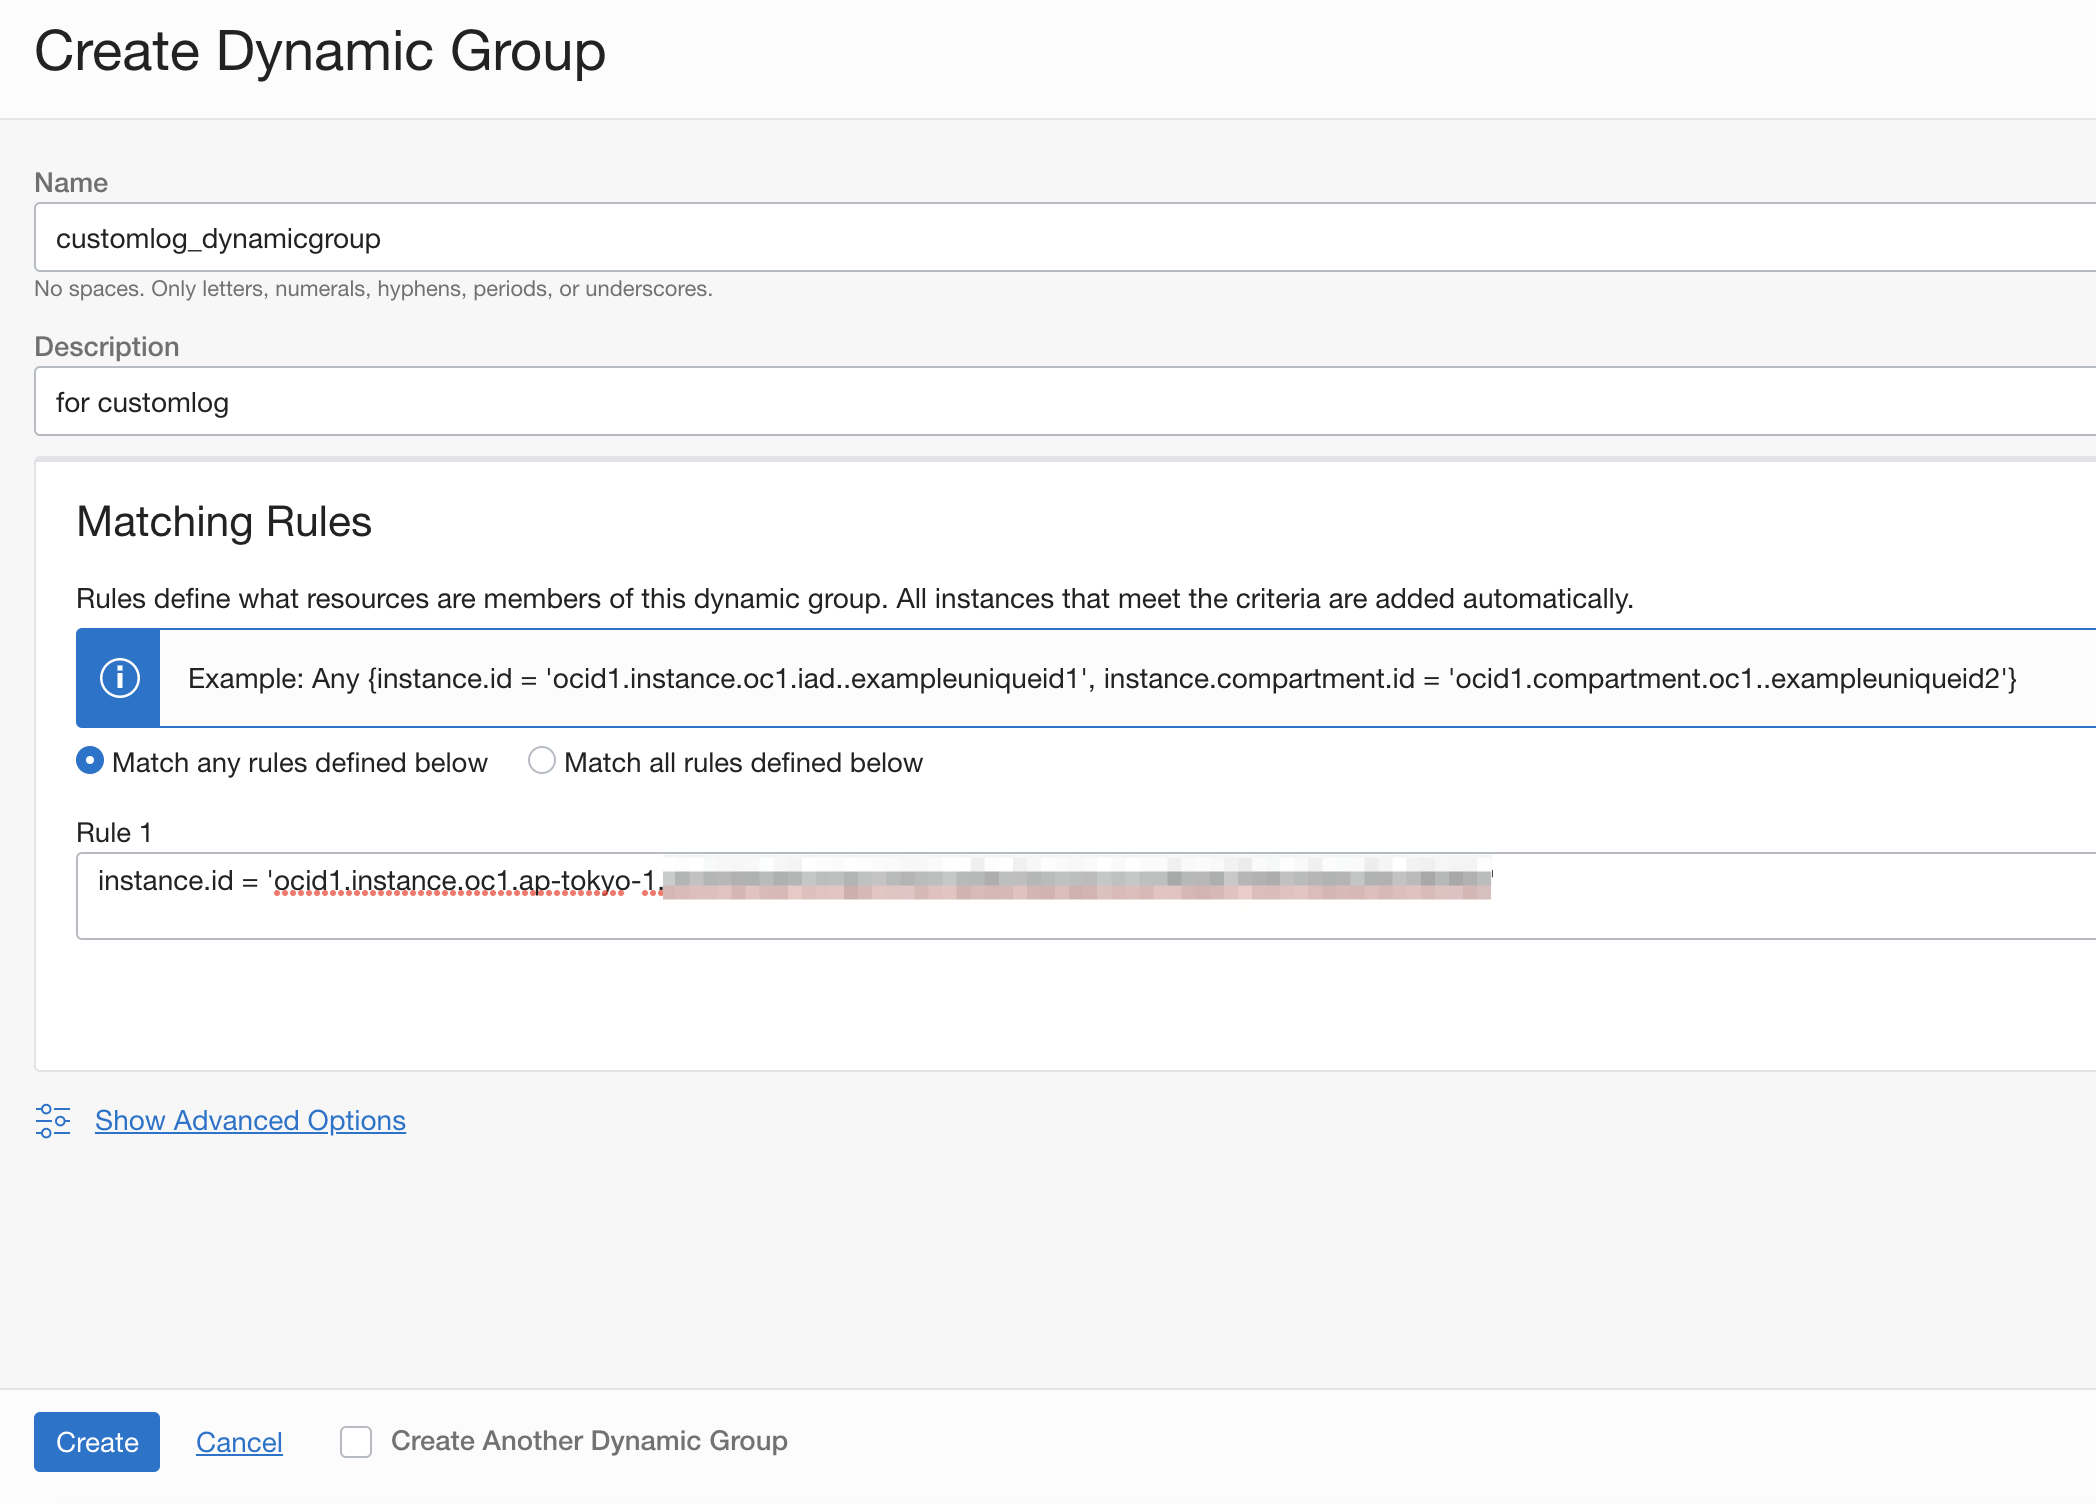
customlog_dynamicgroup という名前で、以下のルールで作成します。
Logging サービスでログ収集の設定をする
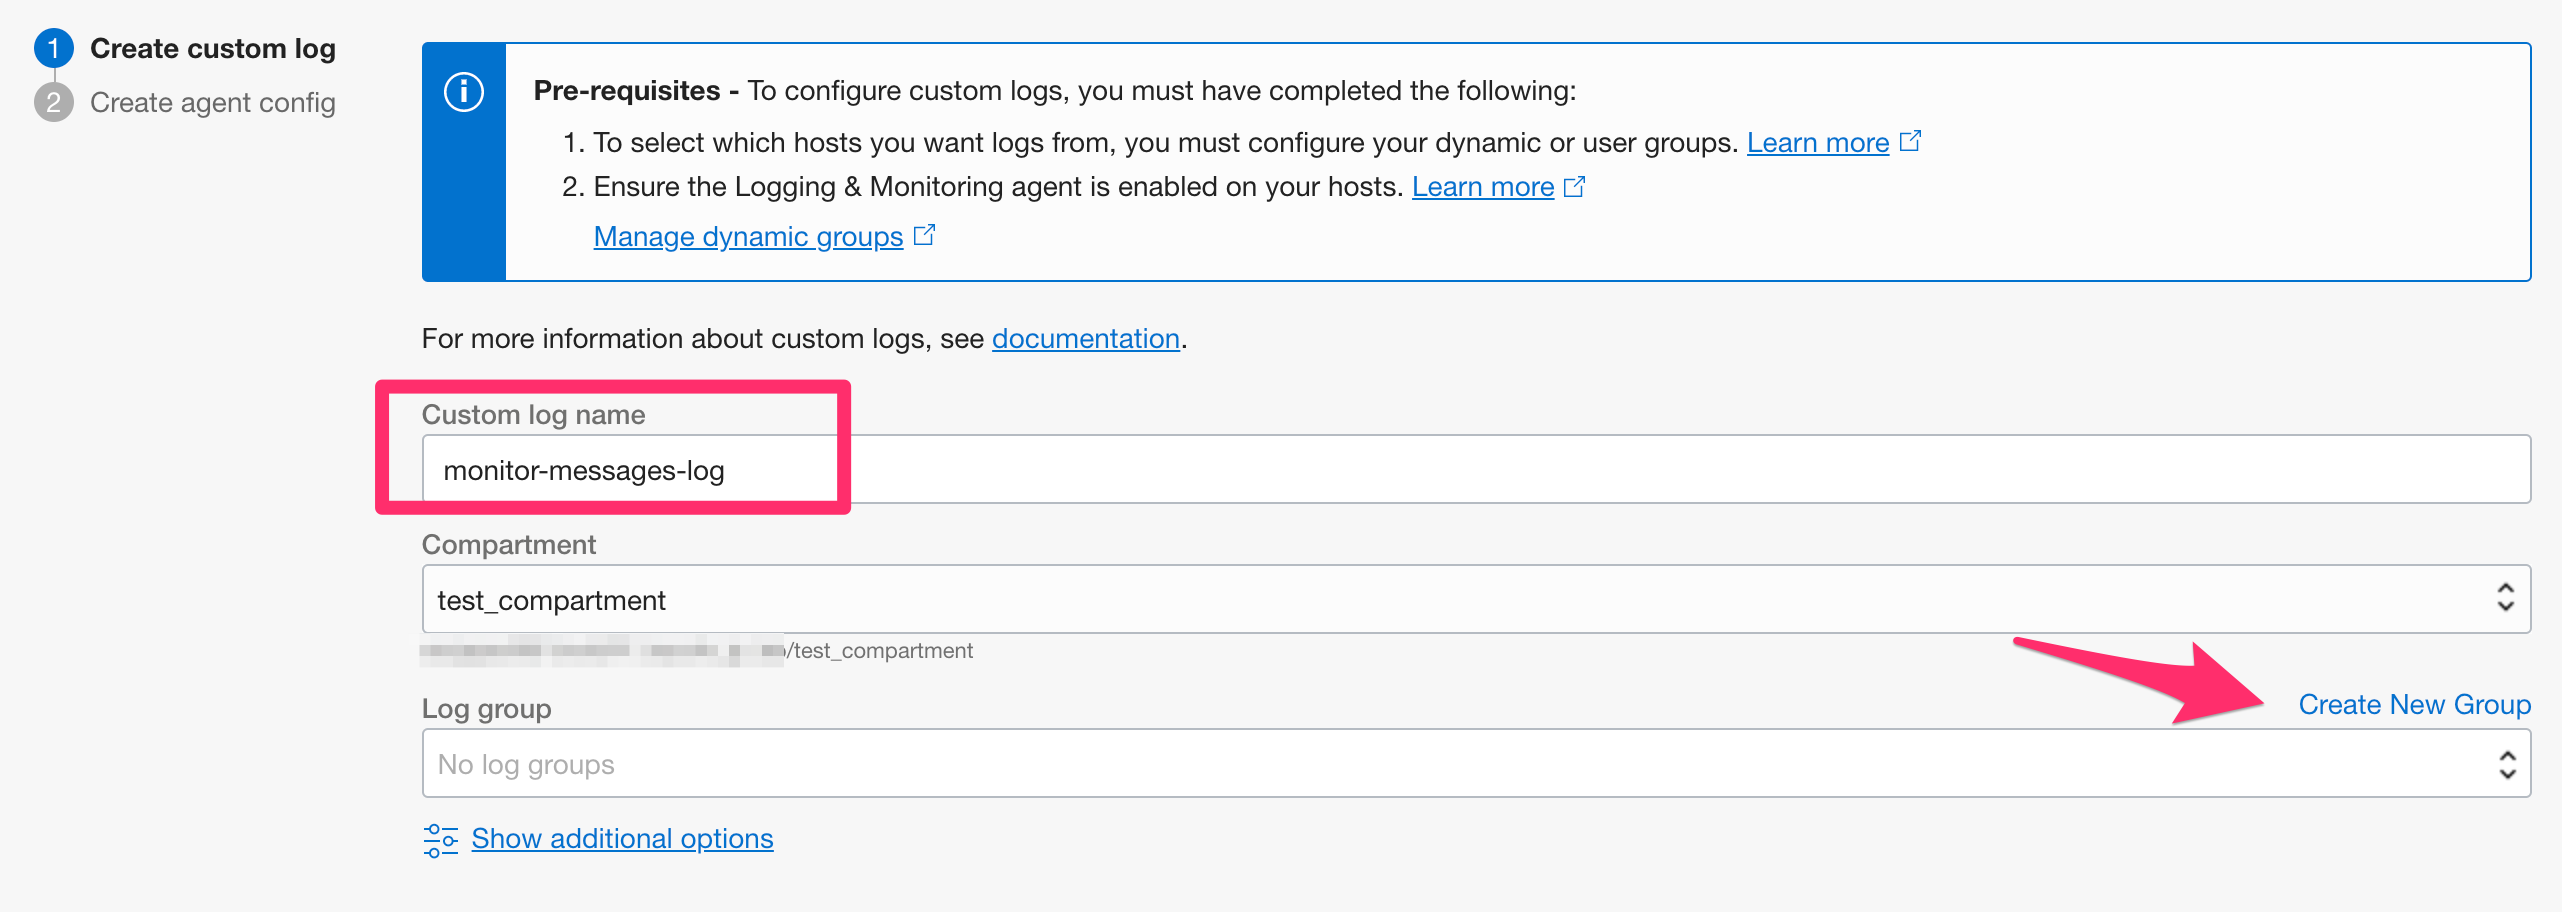
Custom log name を入力し、Log group のところにある Create New Group をクリック
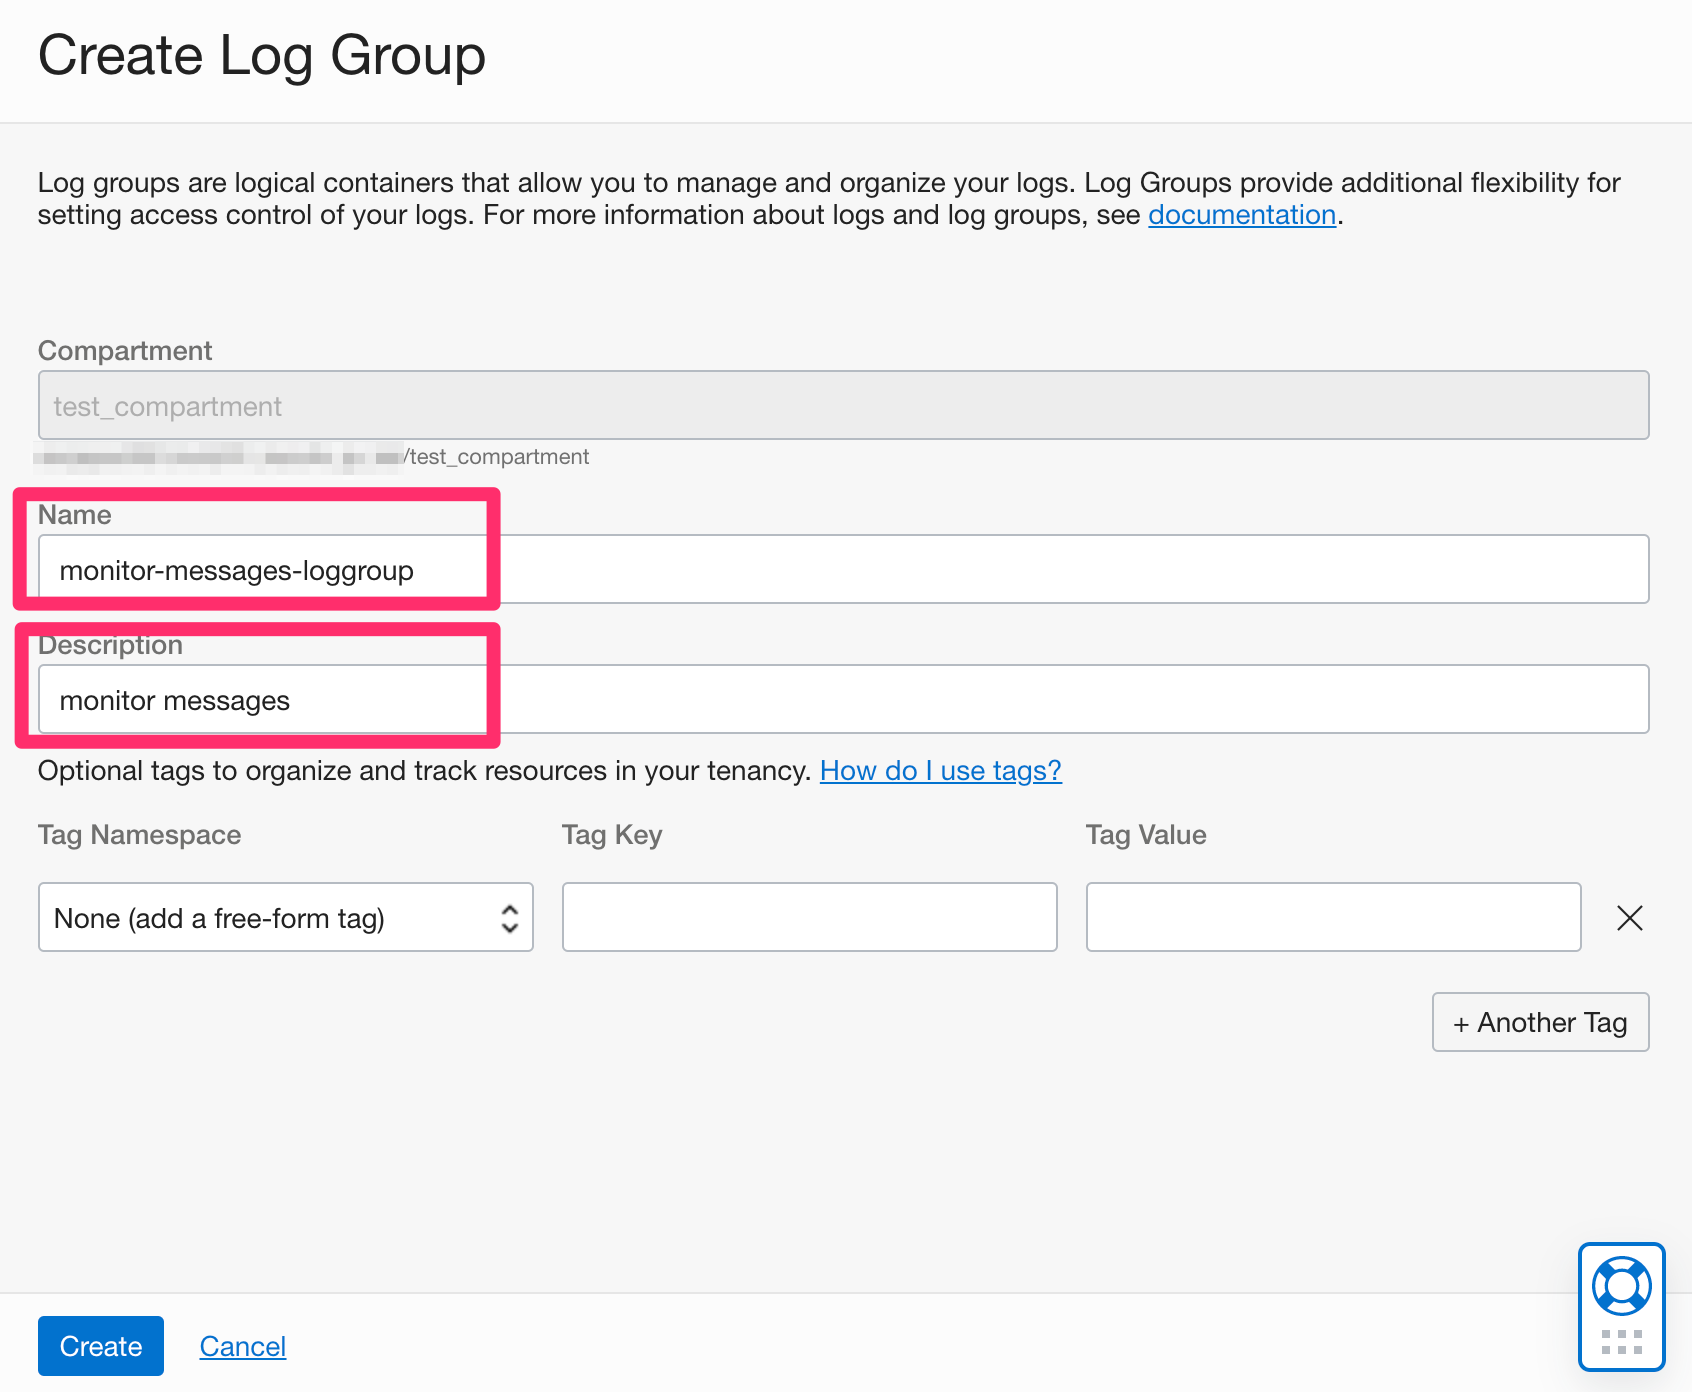
以下のように Name と Description を入力する
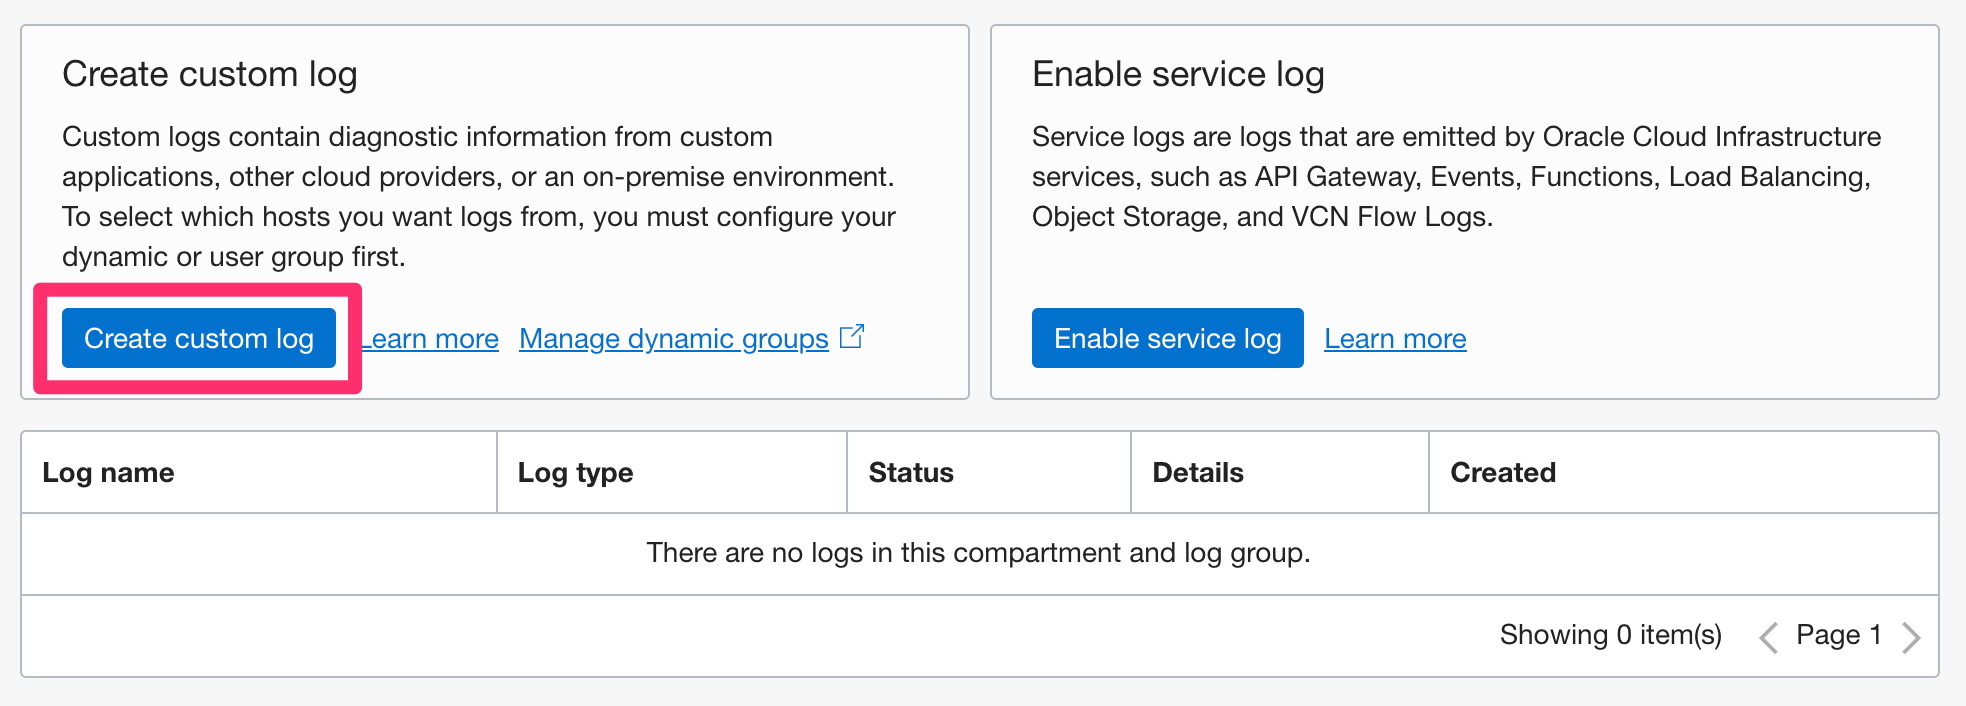
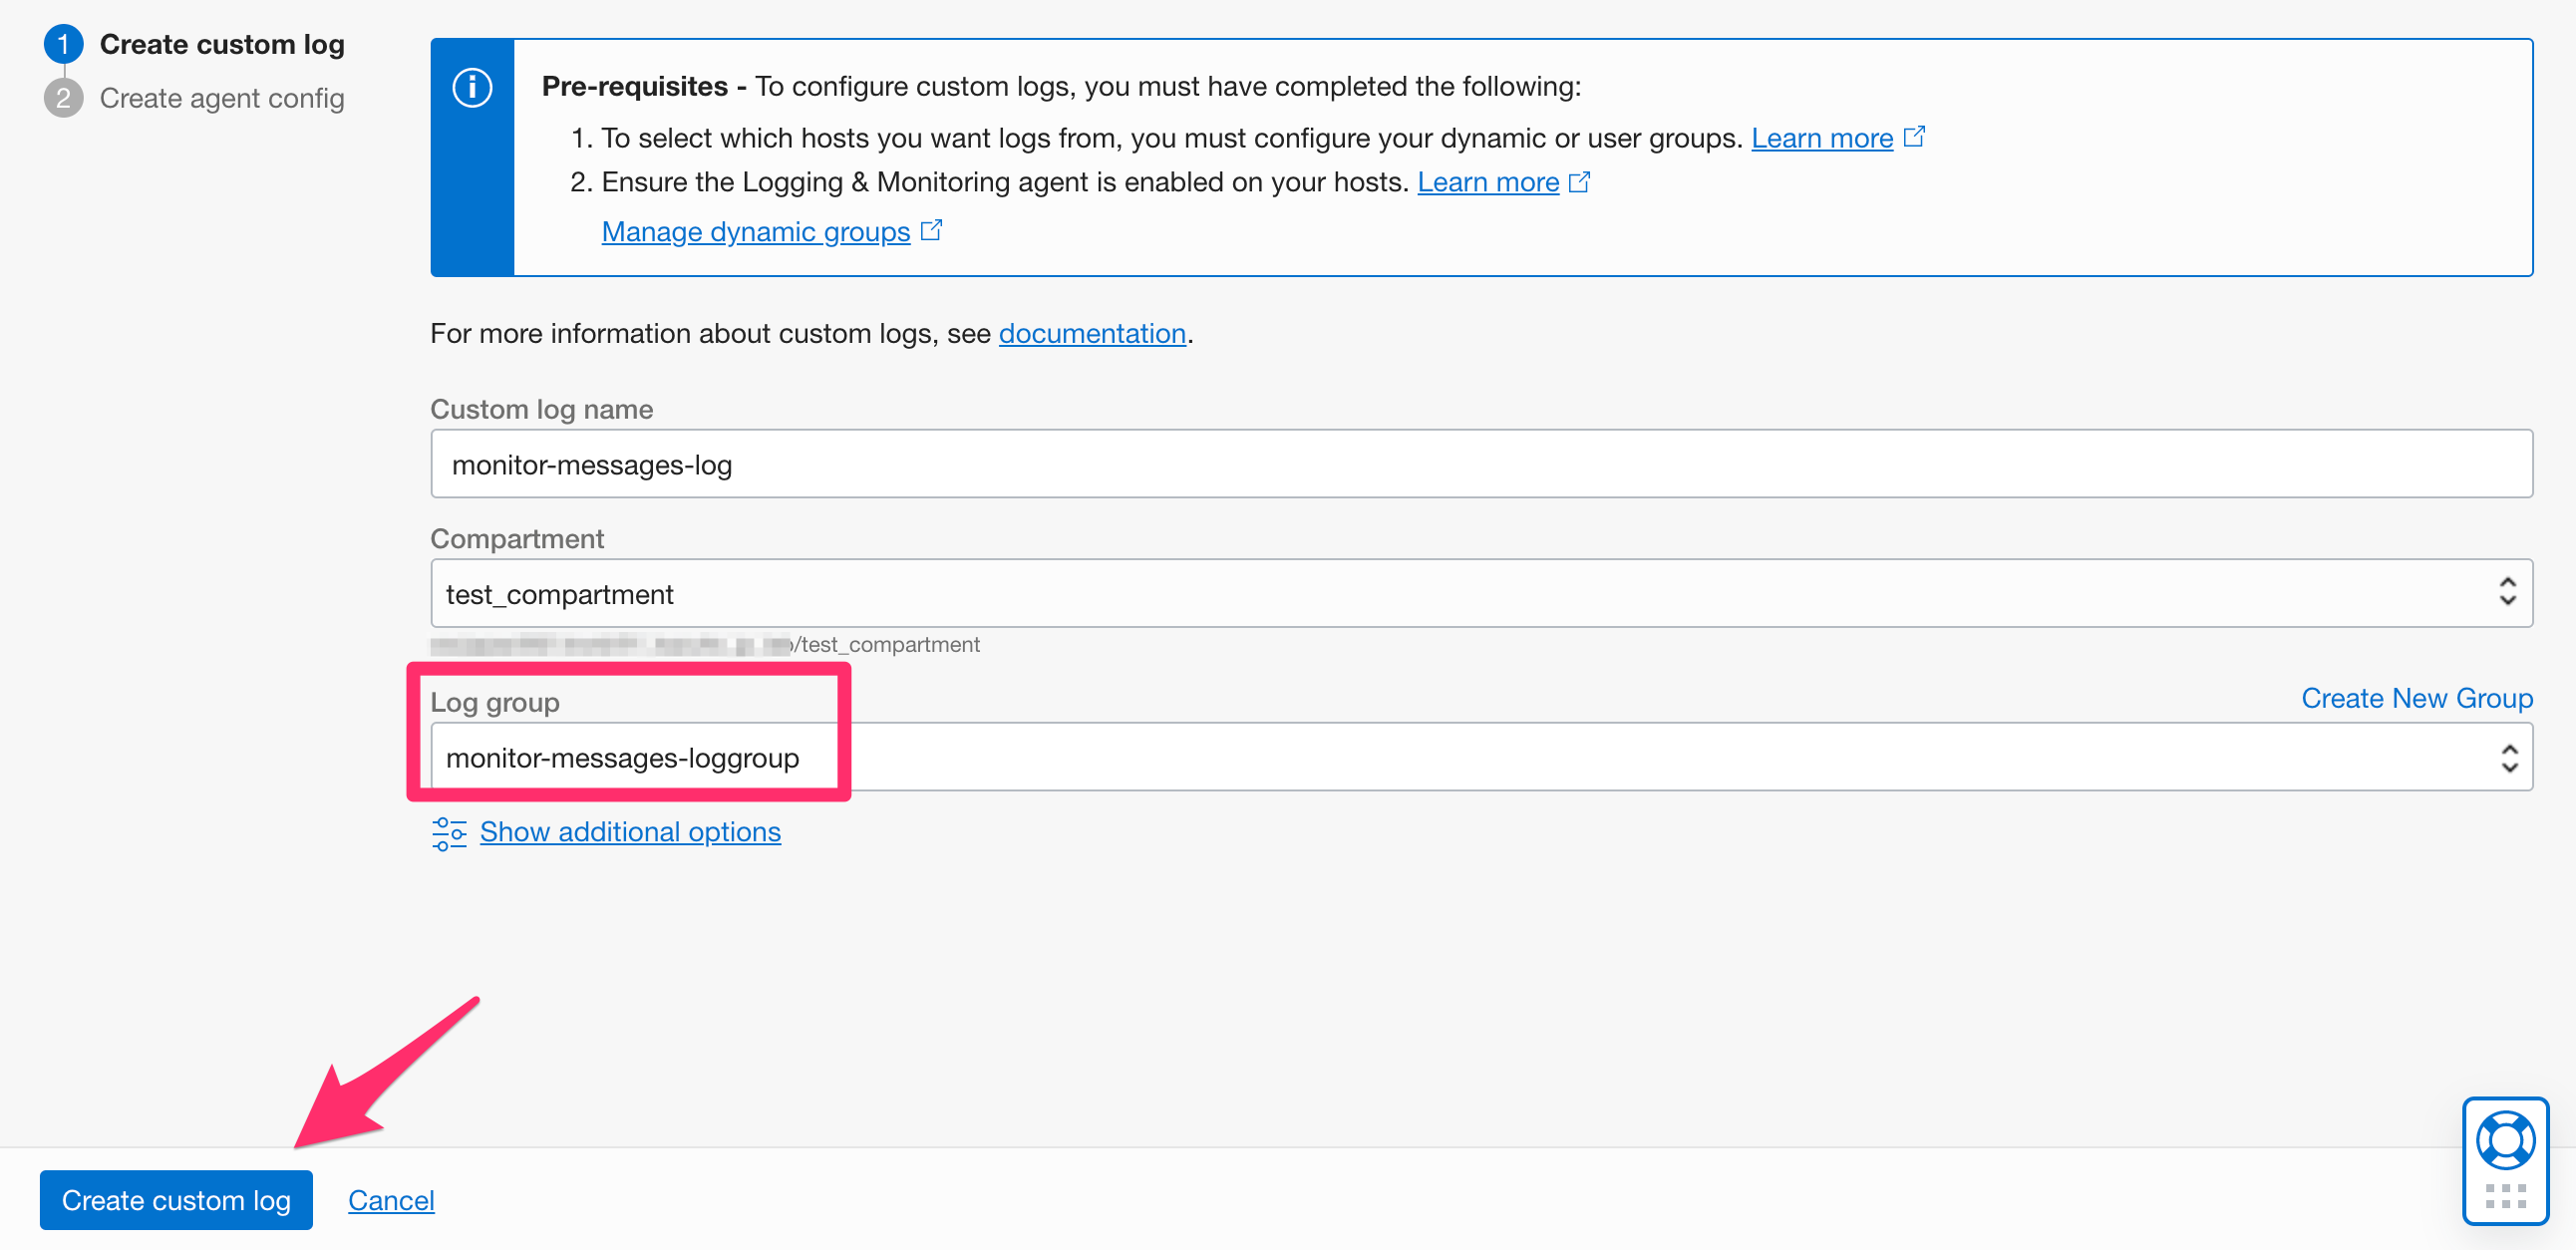
作成したロググループが選択されるので、Create custom log をクリック
Create new configuration が選択されていることを確認し、Configuration name と Description を入力する
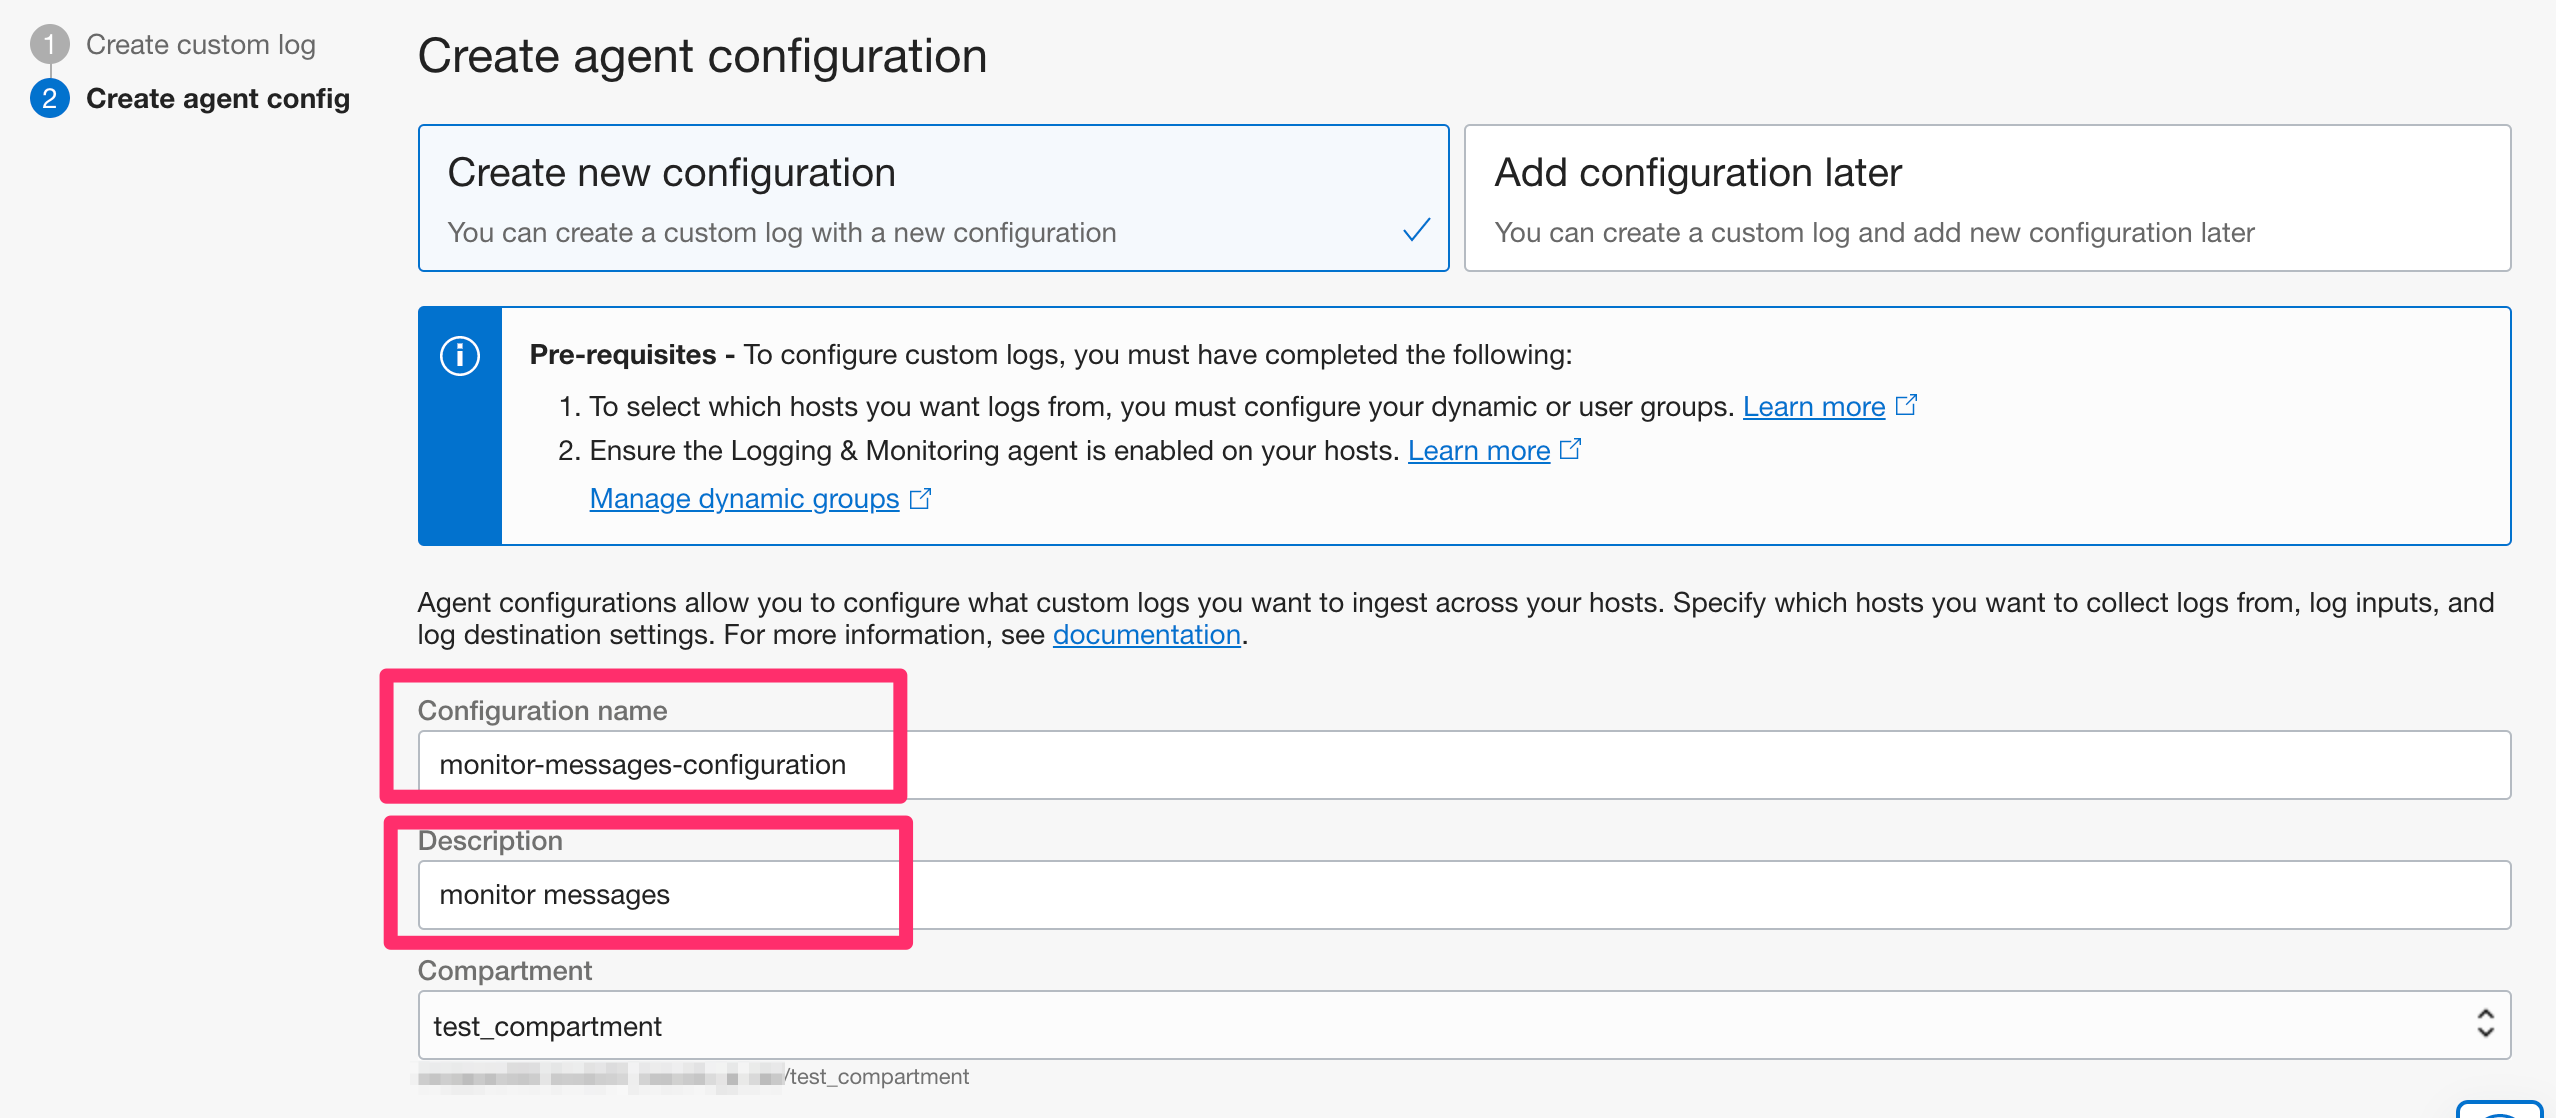
先程作成した Dynamic Group を選択する。
Create policy to っという警告文が表示されるので、そこの create をクリックし、必要な policy を追加します。

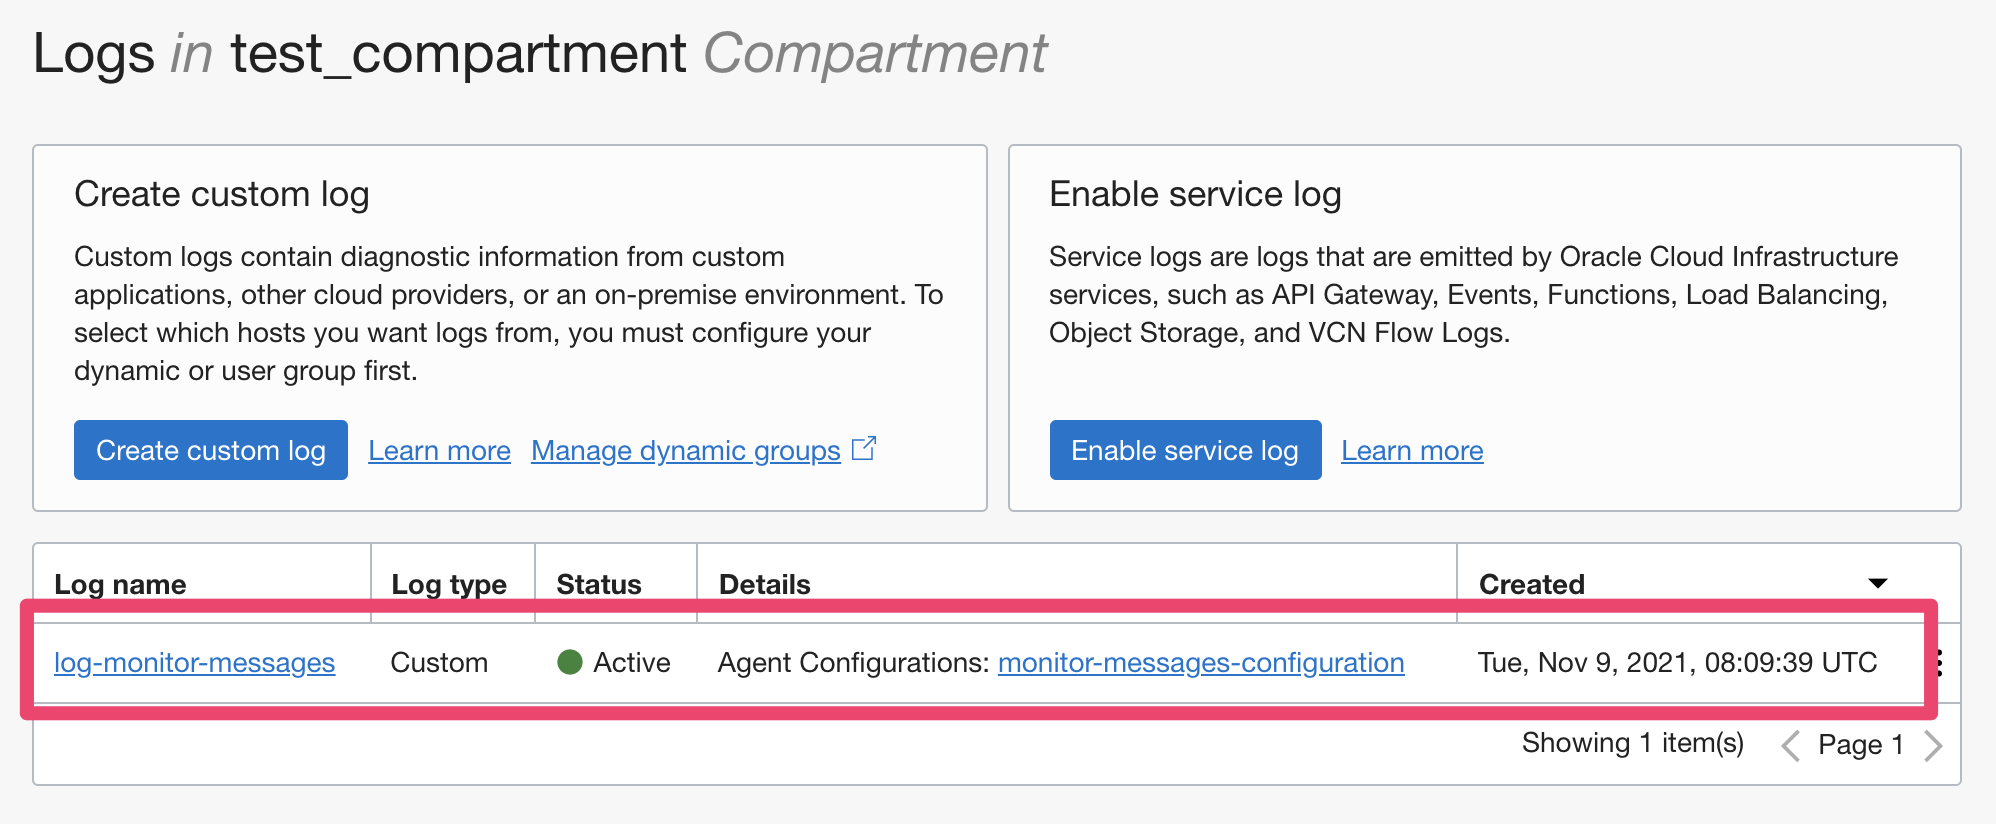
Input Type、 Input name, File Paths を以下のように設定し、Create custom log をクリックする
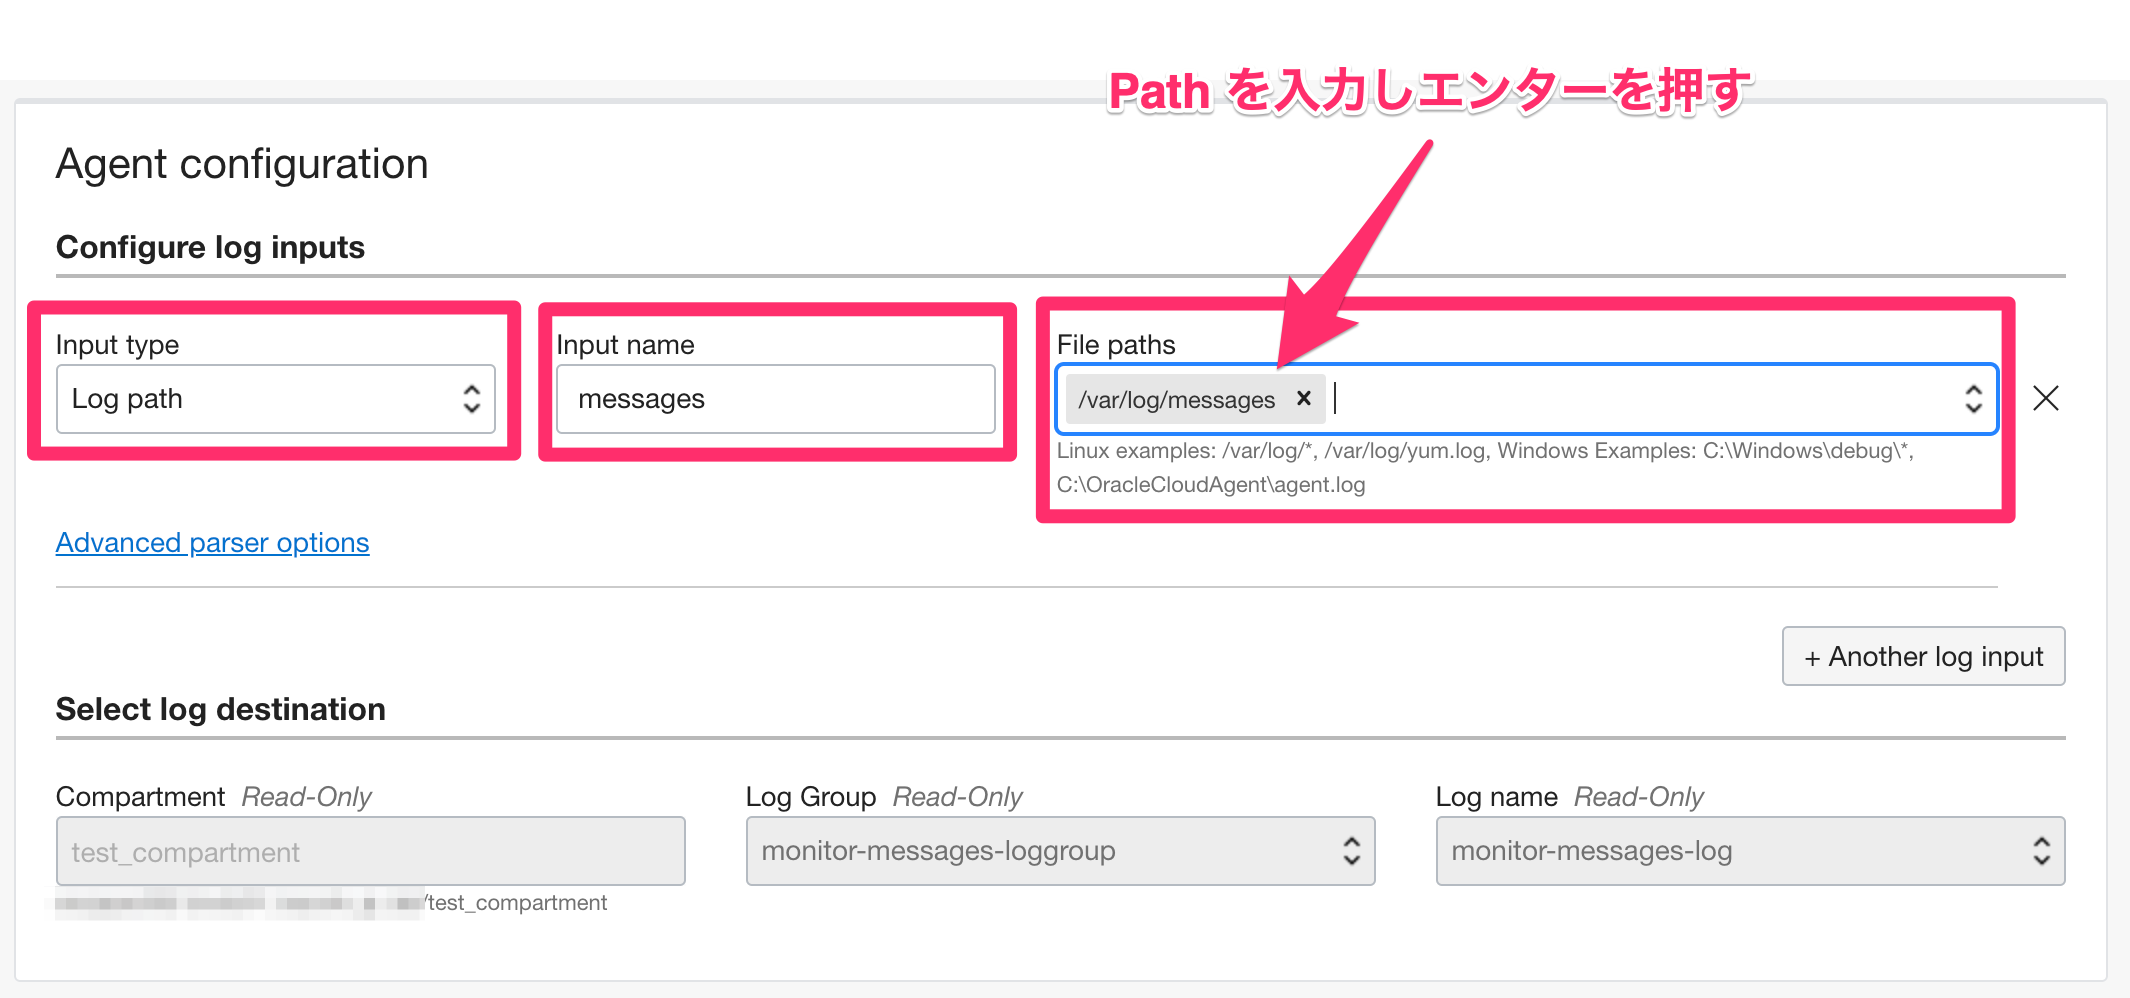
Notificaton の作成
以下のように Name と Description を入力し、Create をクリック
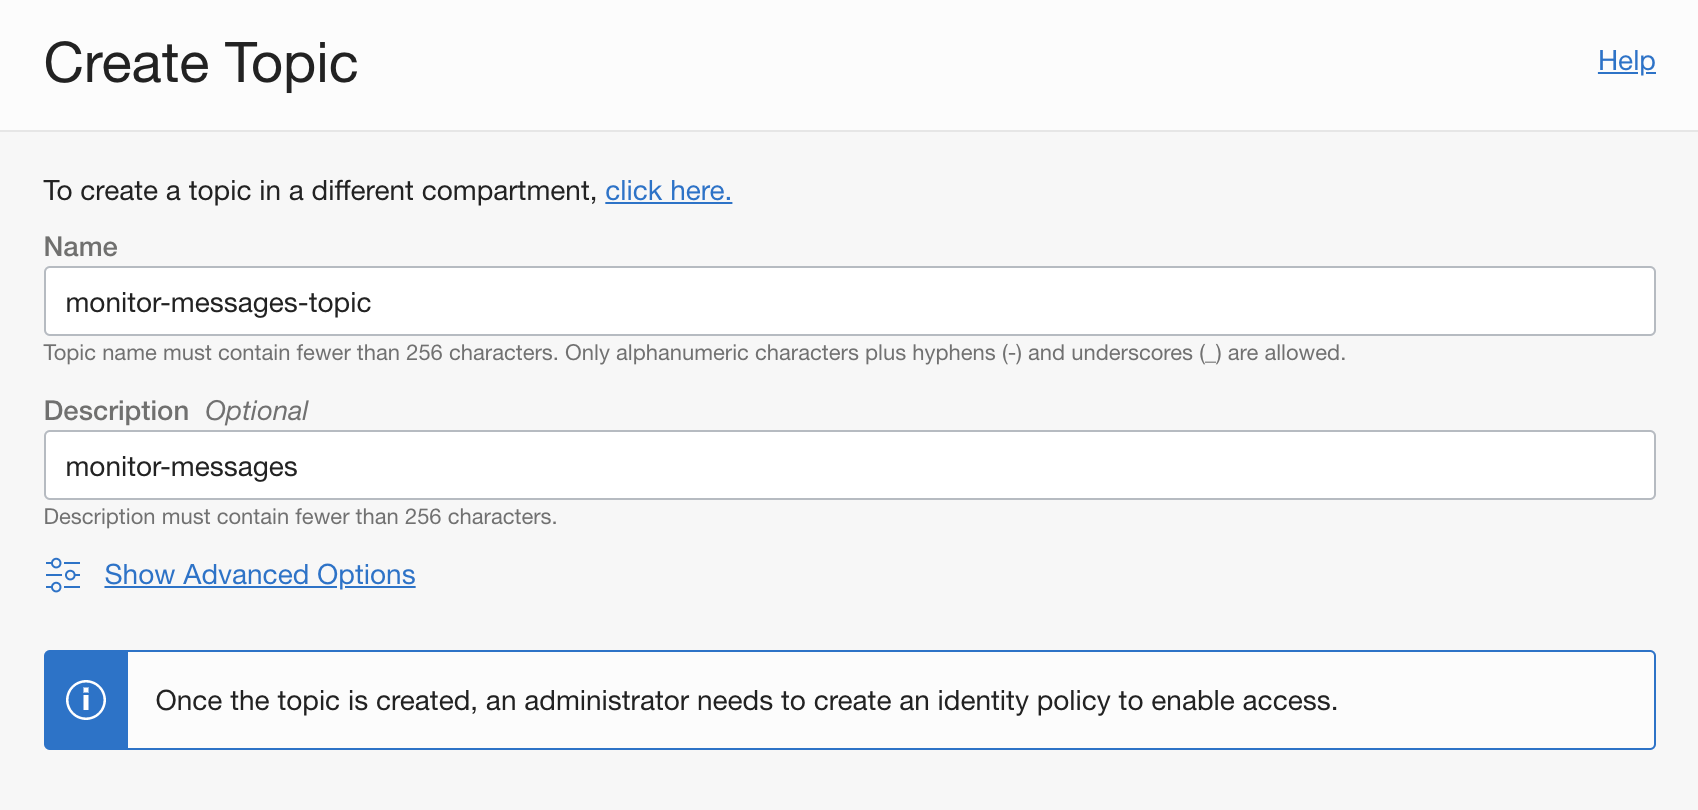
作成された monitor-messages-topic をクリックする

Email を選択し、受信可能なアドレスを入力して create をクリック
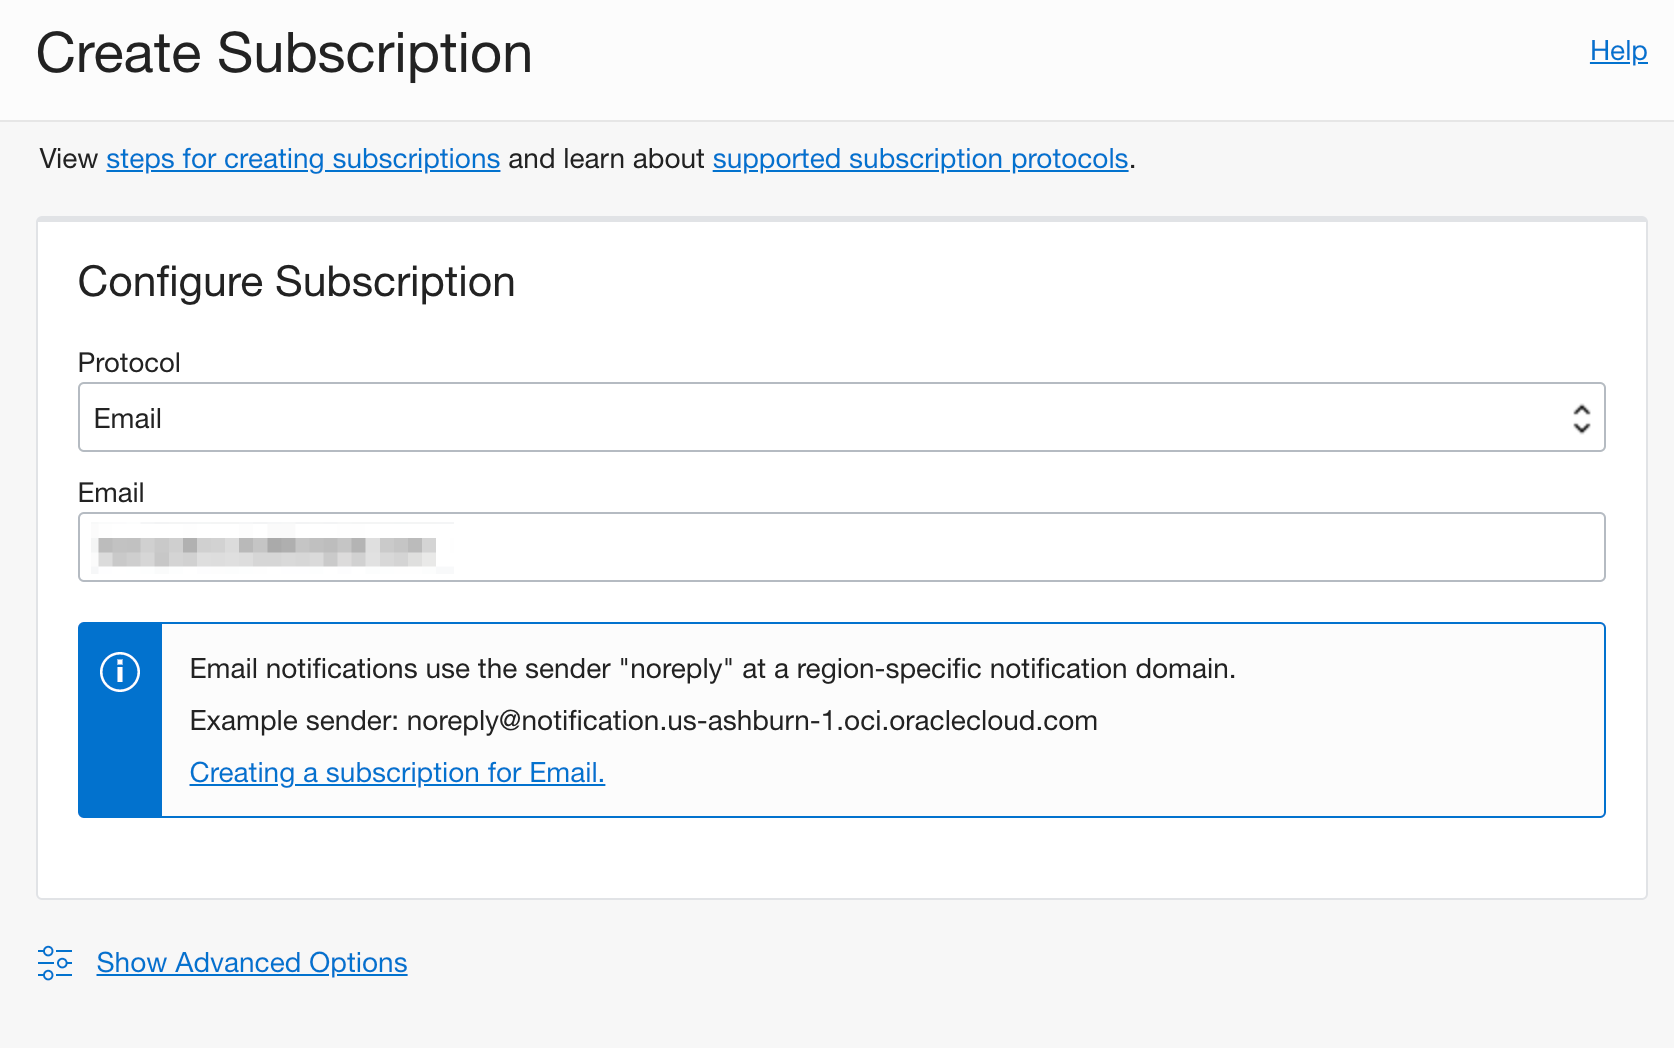
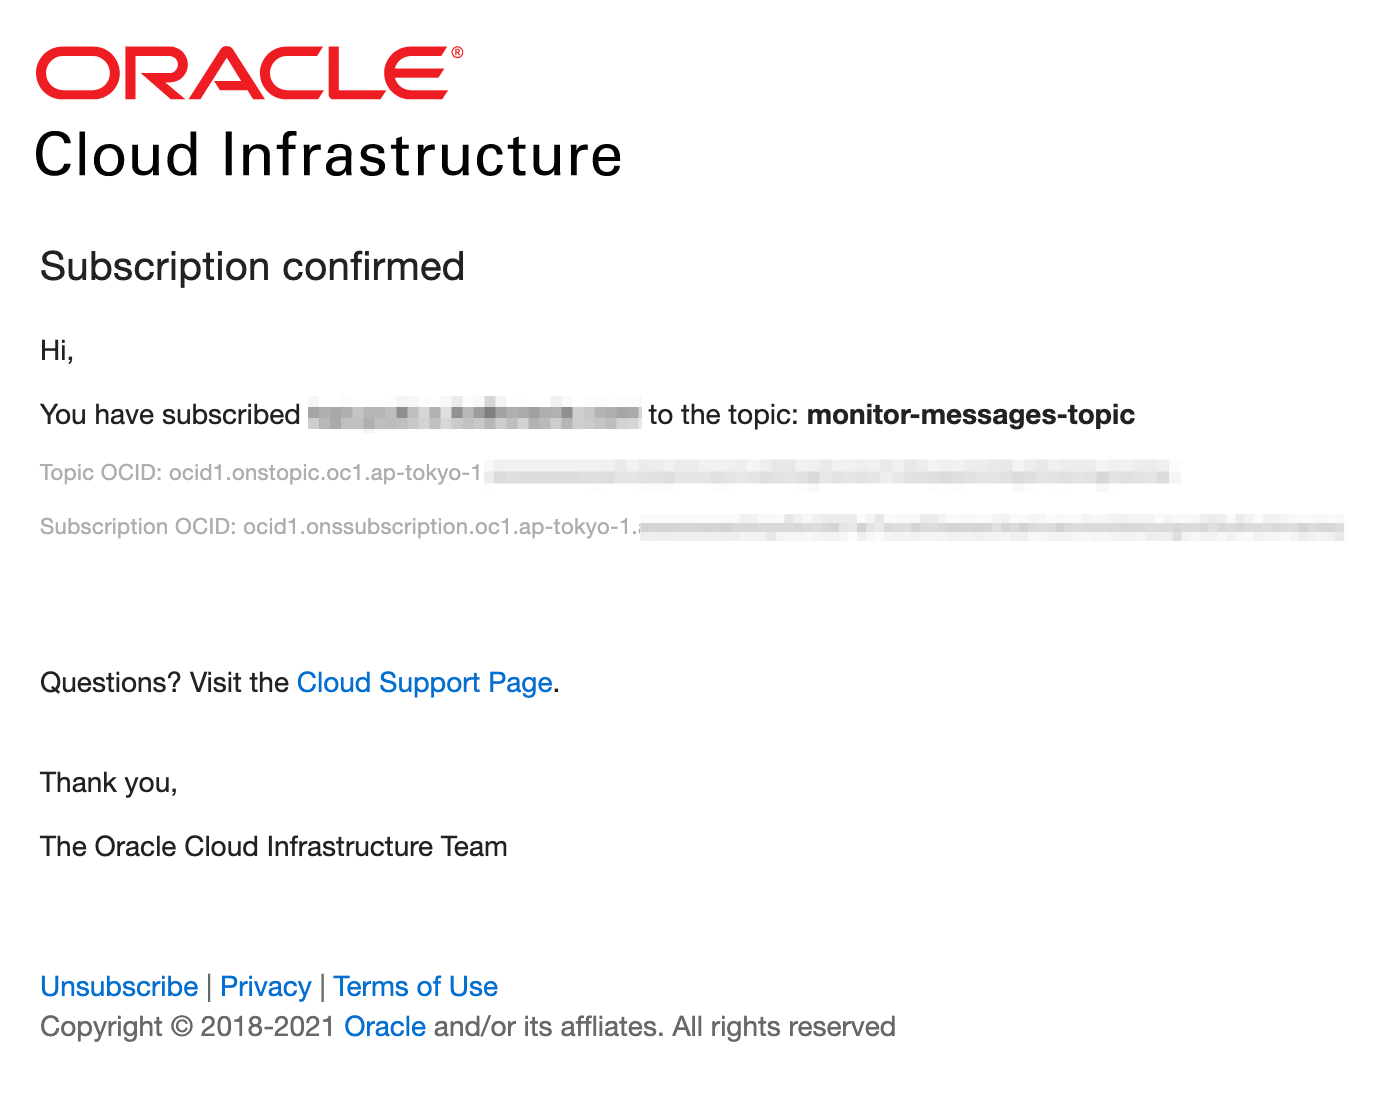
指定したアドレスに以下のメールが届くので、 Confirm Subscription をクリックする

Service Connector Hub の設定
hub と検索し、Service Connector hub をクリック

Create Service Connector をクリック

Connector Name と Description を入力

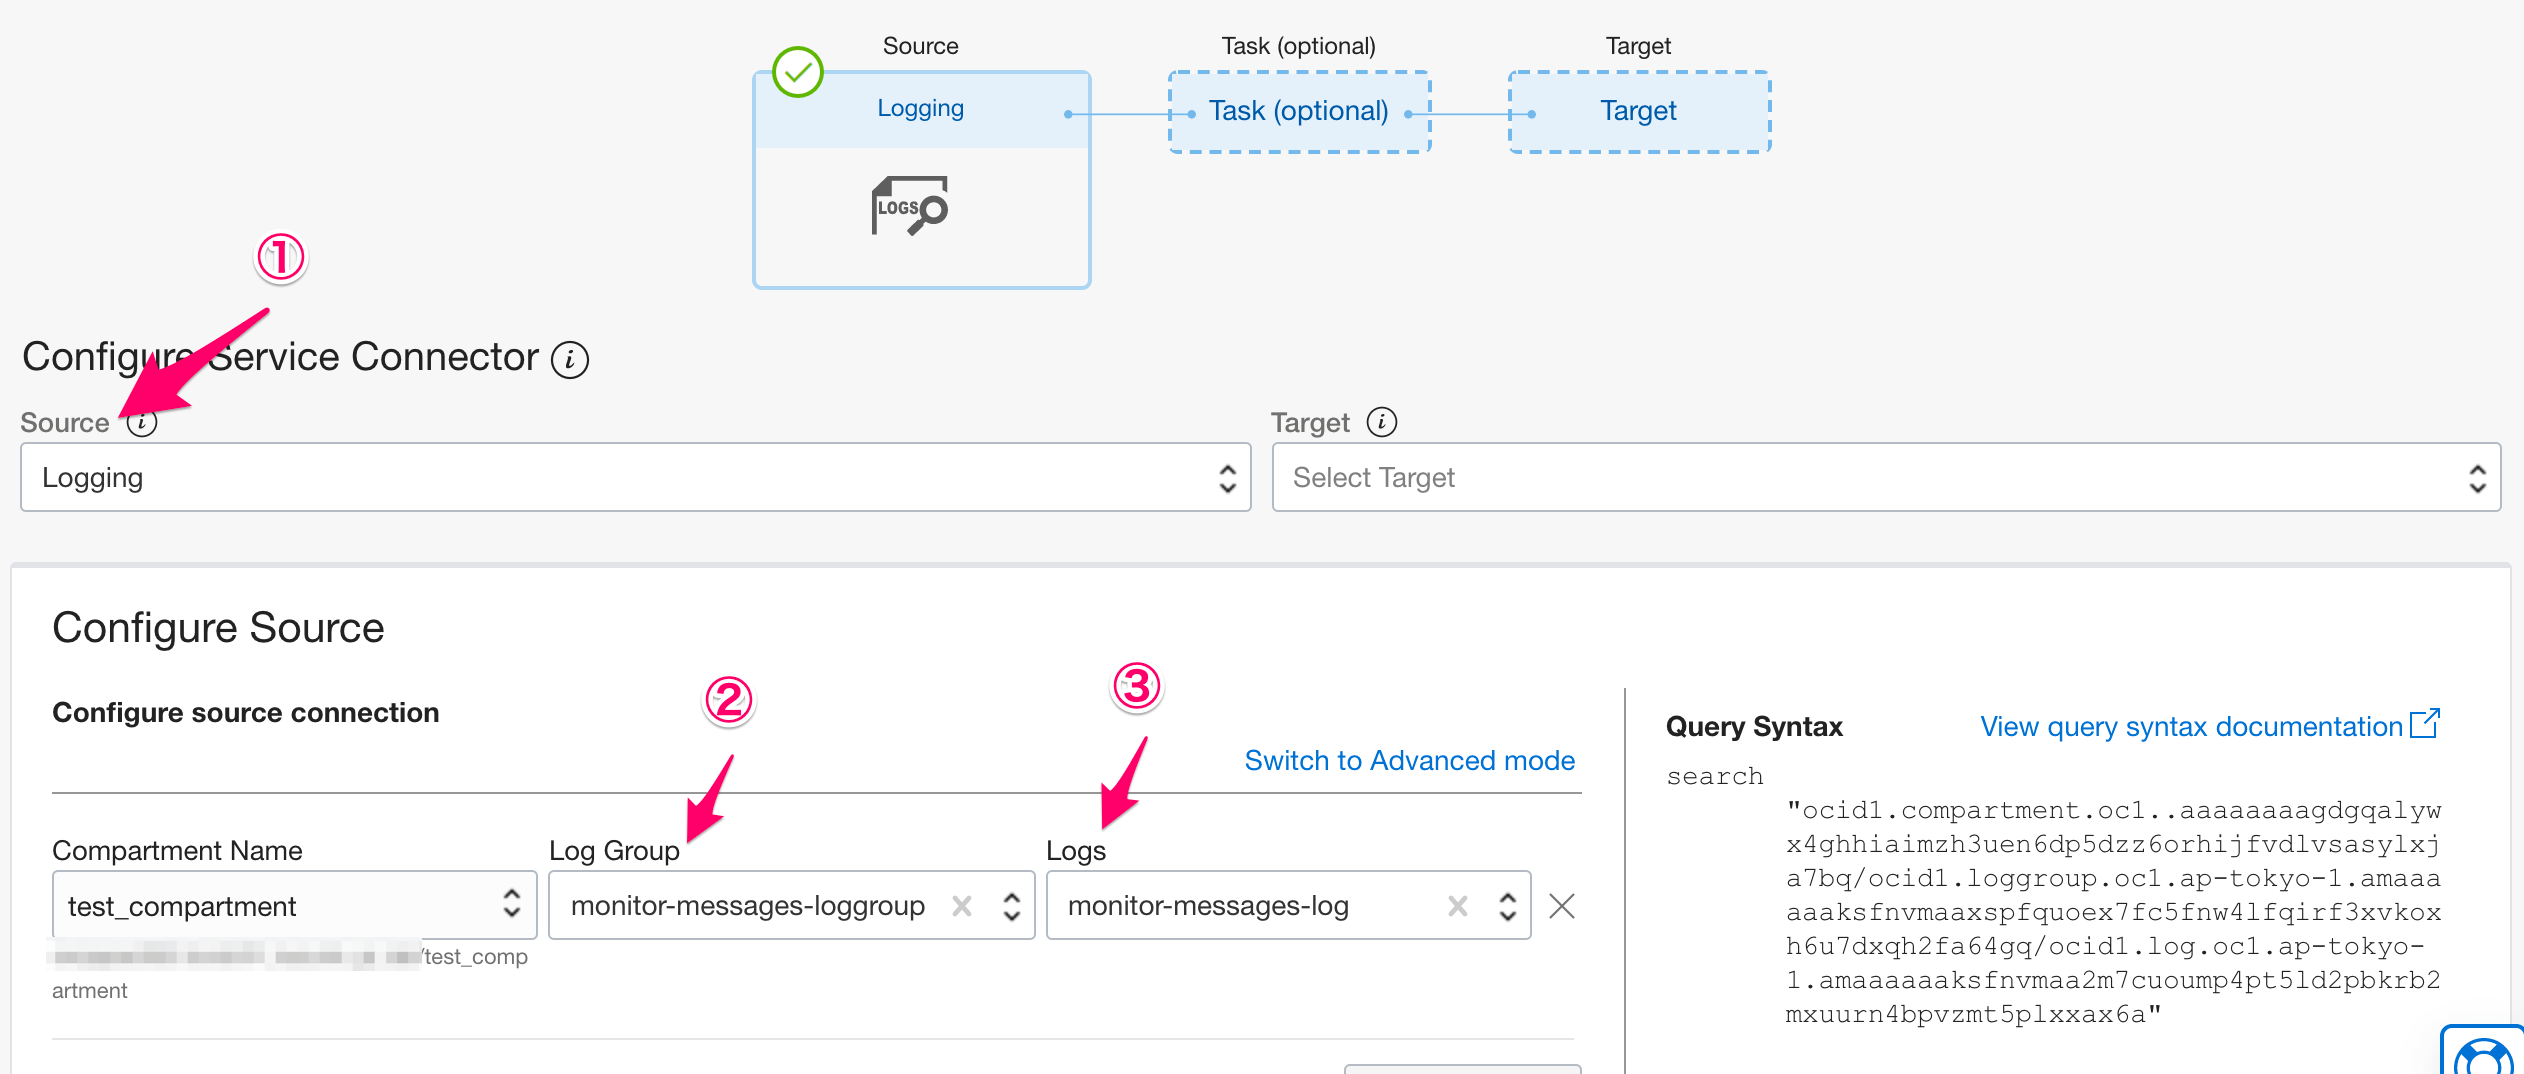
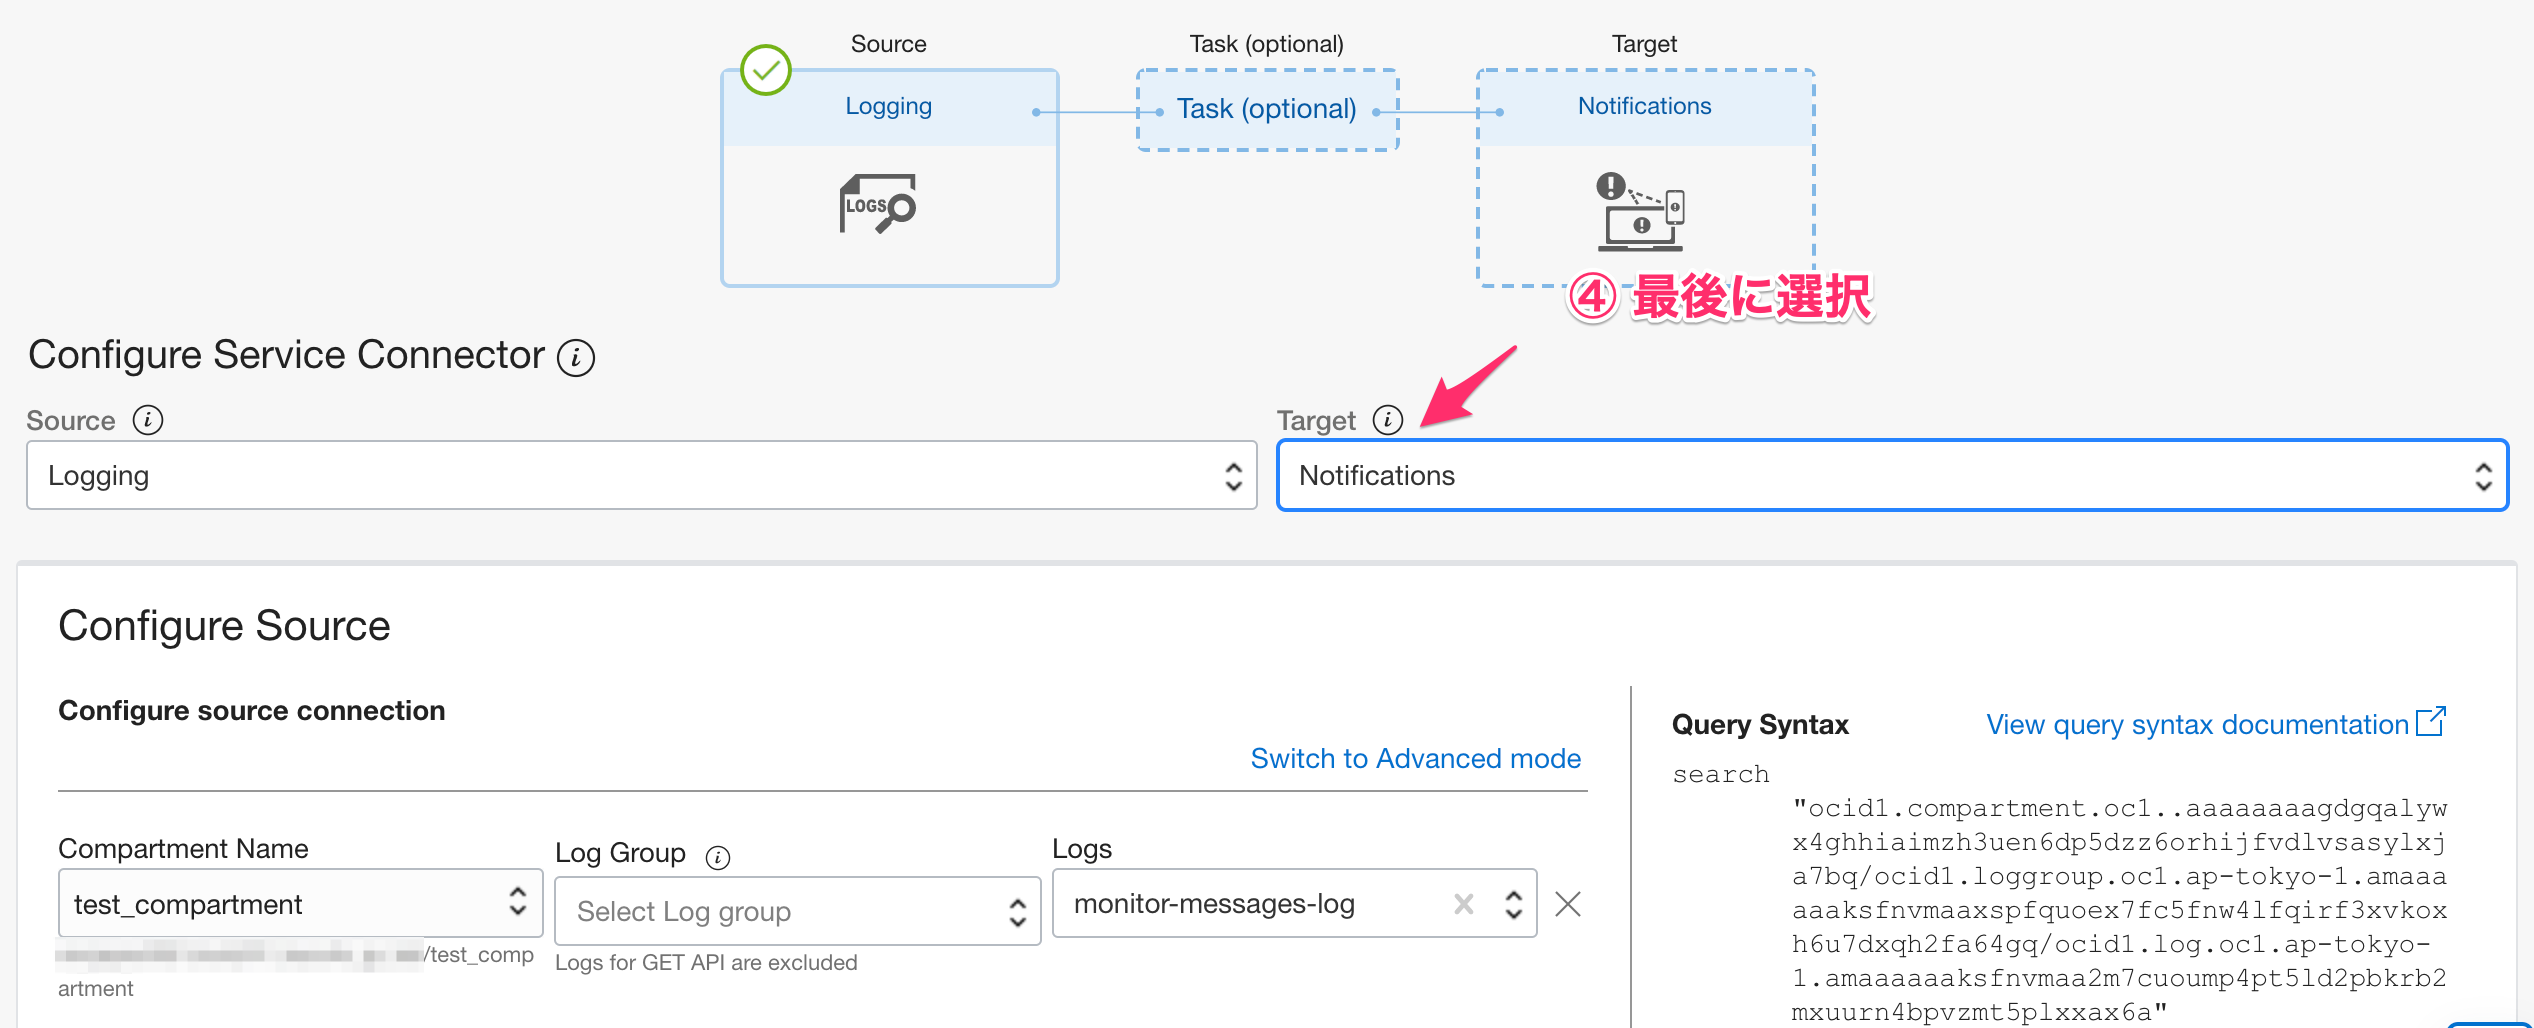
※なぜか以下の順番でないと選択できたい
Source に Logging を選択し、Log Group と Logs に指定したものを選択
最後に target に Notifications を選択する
Log Filter Task にて Property と Operator と Value を指定する。
今回はテストとして hogehoge という文字列を拾いたいのでこの様に指定した。

Configure Target で Topic に先程作成したものを選択すし、Message Format は Send formatted messages にする

以下の警告文が表示されるので、create をクリックする

問題なければ以下のように変わる

Create をクリックし完了。
動作確認
今回は対象が messages なのでインスタンスにログインし、以下のような logger を実行します
[opc@instance01 ~]$ logger -ip kern.warn hogehoge
念の為、messages を確認すると、たしかに記録されています。
[opc@instance01 ~]$ sudo tail -f /var/log/messages
Nov 17 07:48:38 instance01 systemd: Started Session c6935 of user root.
Nov 17 07:48:38 instance01 systemd: Started Session c6936 of user root.
Nov 17 07:49:01 instance01 systemd: Started Session 2890 of user root.
Nov 17 07:50:01 instance01 systemd: Started Session 2891 of user root.
Nov 17 07:52:42 instance01 systemd: Created slice User Slice of opc.
Nov 17 07:52:42 instance01 systemd-logind: New session 2892 of user opc.
Nov 17 07:52:42 instance01 systemd: Started Session 2892 of user opc.
Nov 17 07:52:42 instance01 dbus[1284]: [system] Activating service name='org.freedesktop.problems' (using servicehelper)
Nov 17 07:52:42 instance01 dbus[1284]: [system] Successfully activated service 'org.freedesktop.problems'
Nov 17 07:53:45 instance01 opc[6954]: hogehoge
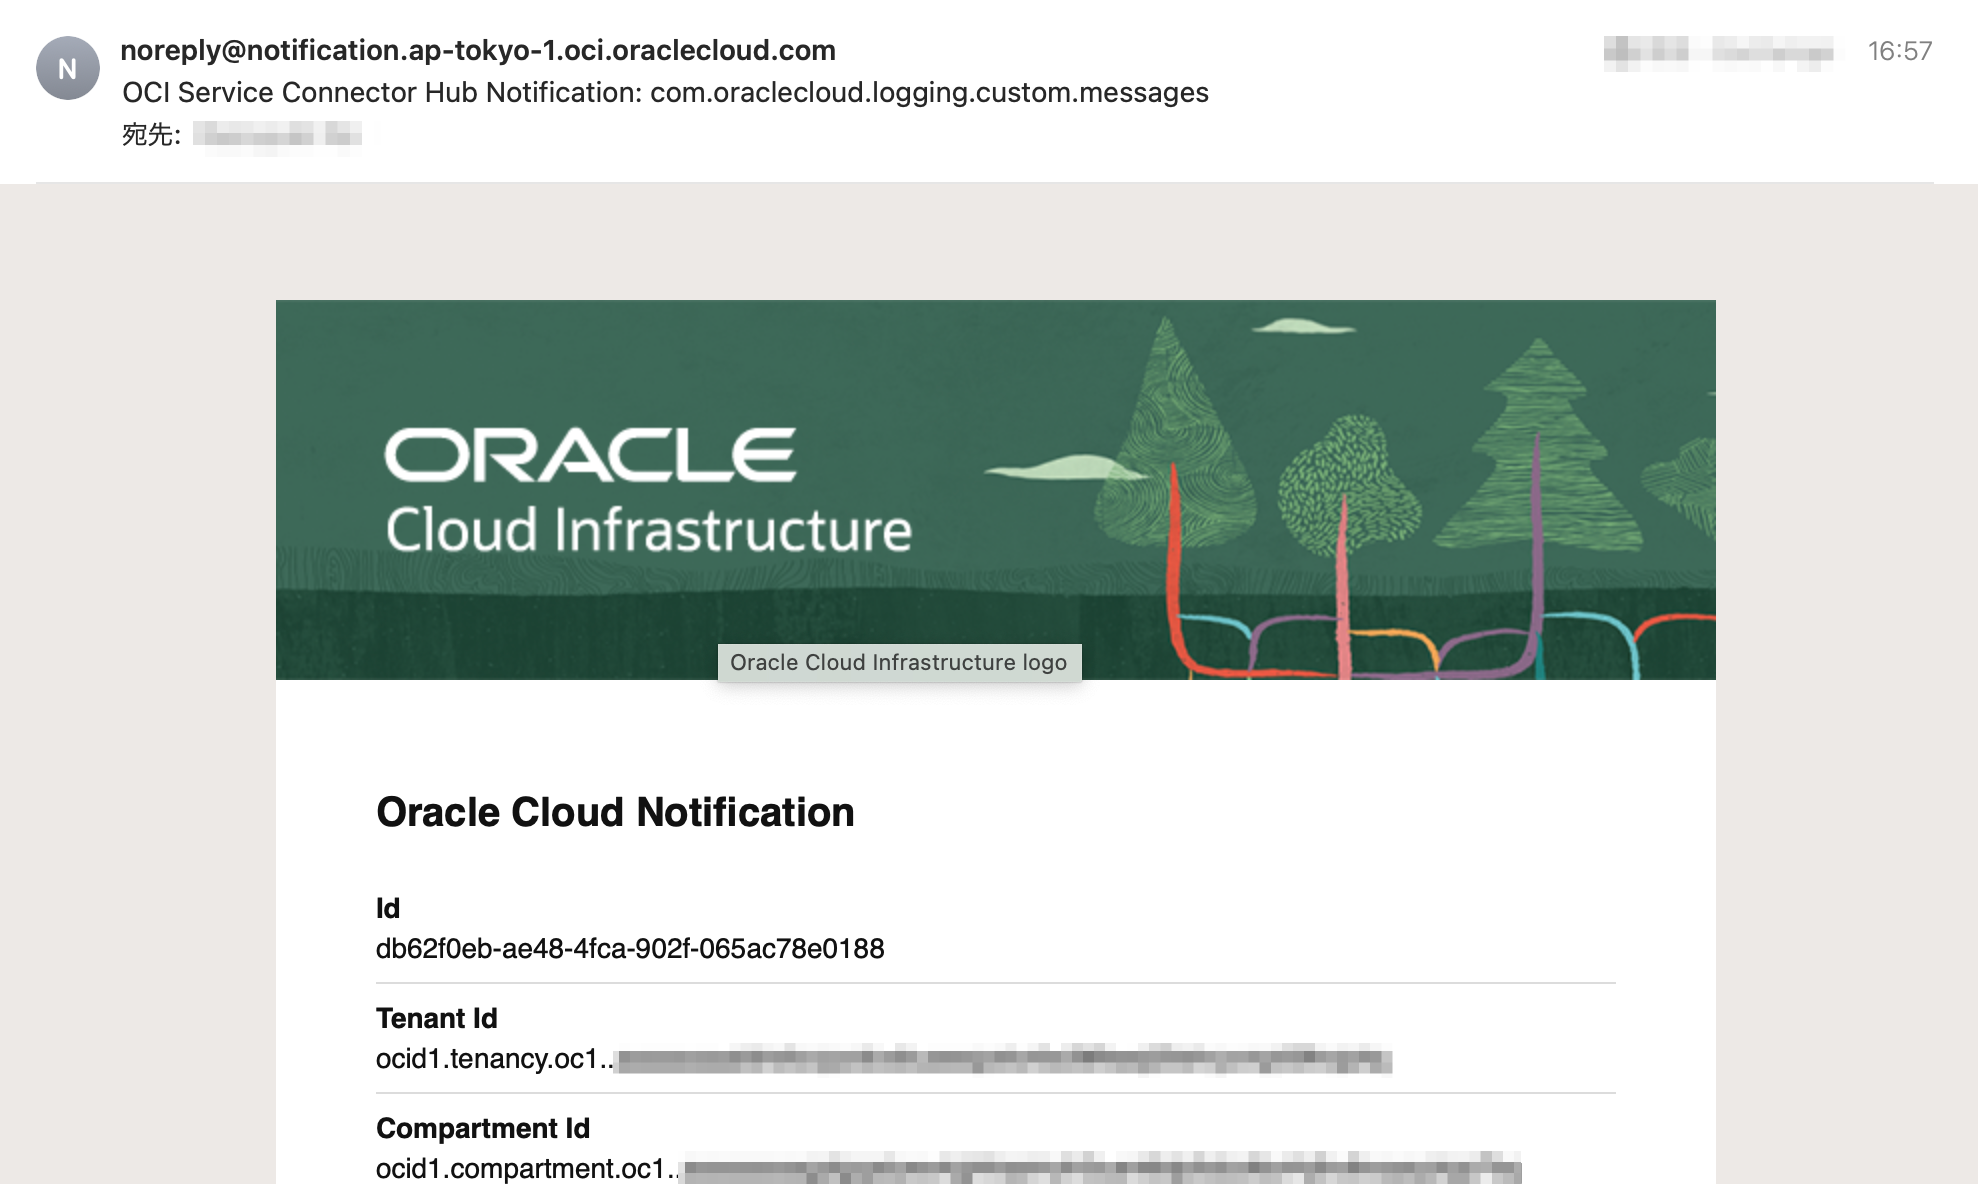
本文を見ると、 Source にインスタンス名、Subject にログファイル、Details/JSON にメッセージが確認できます。
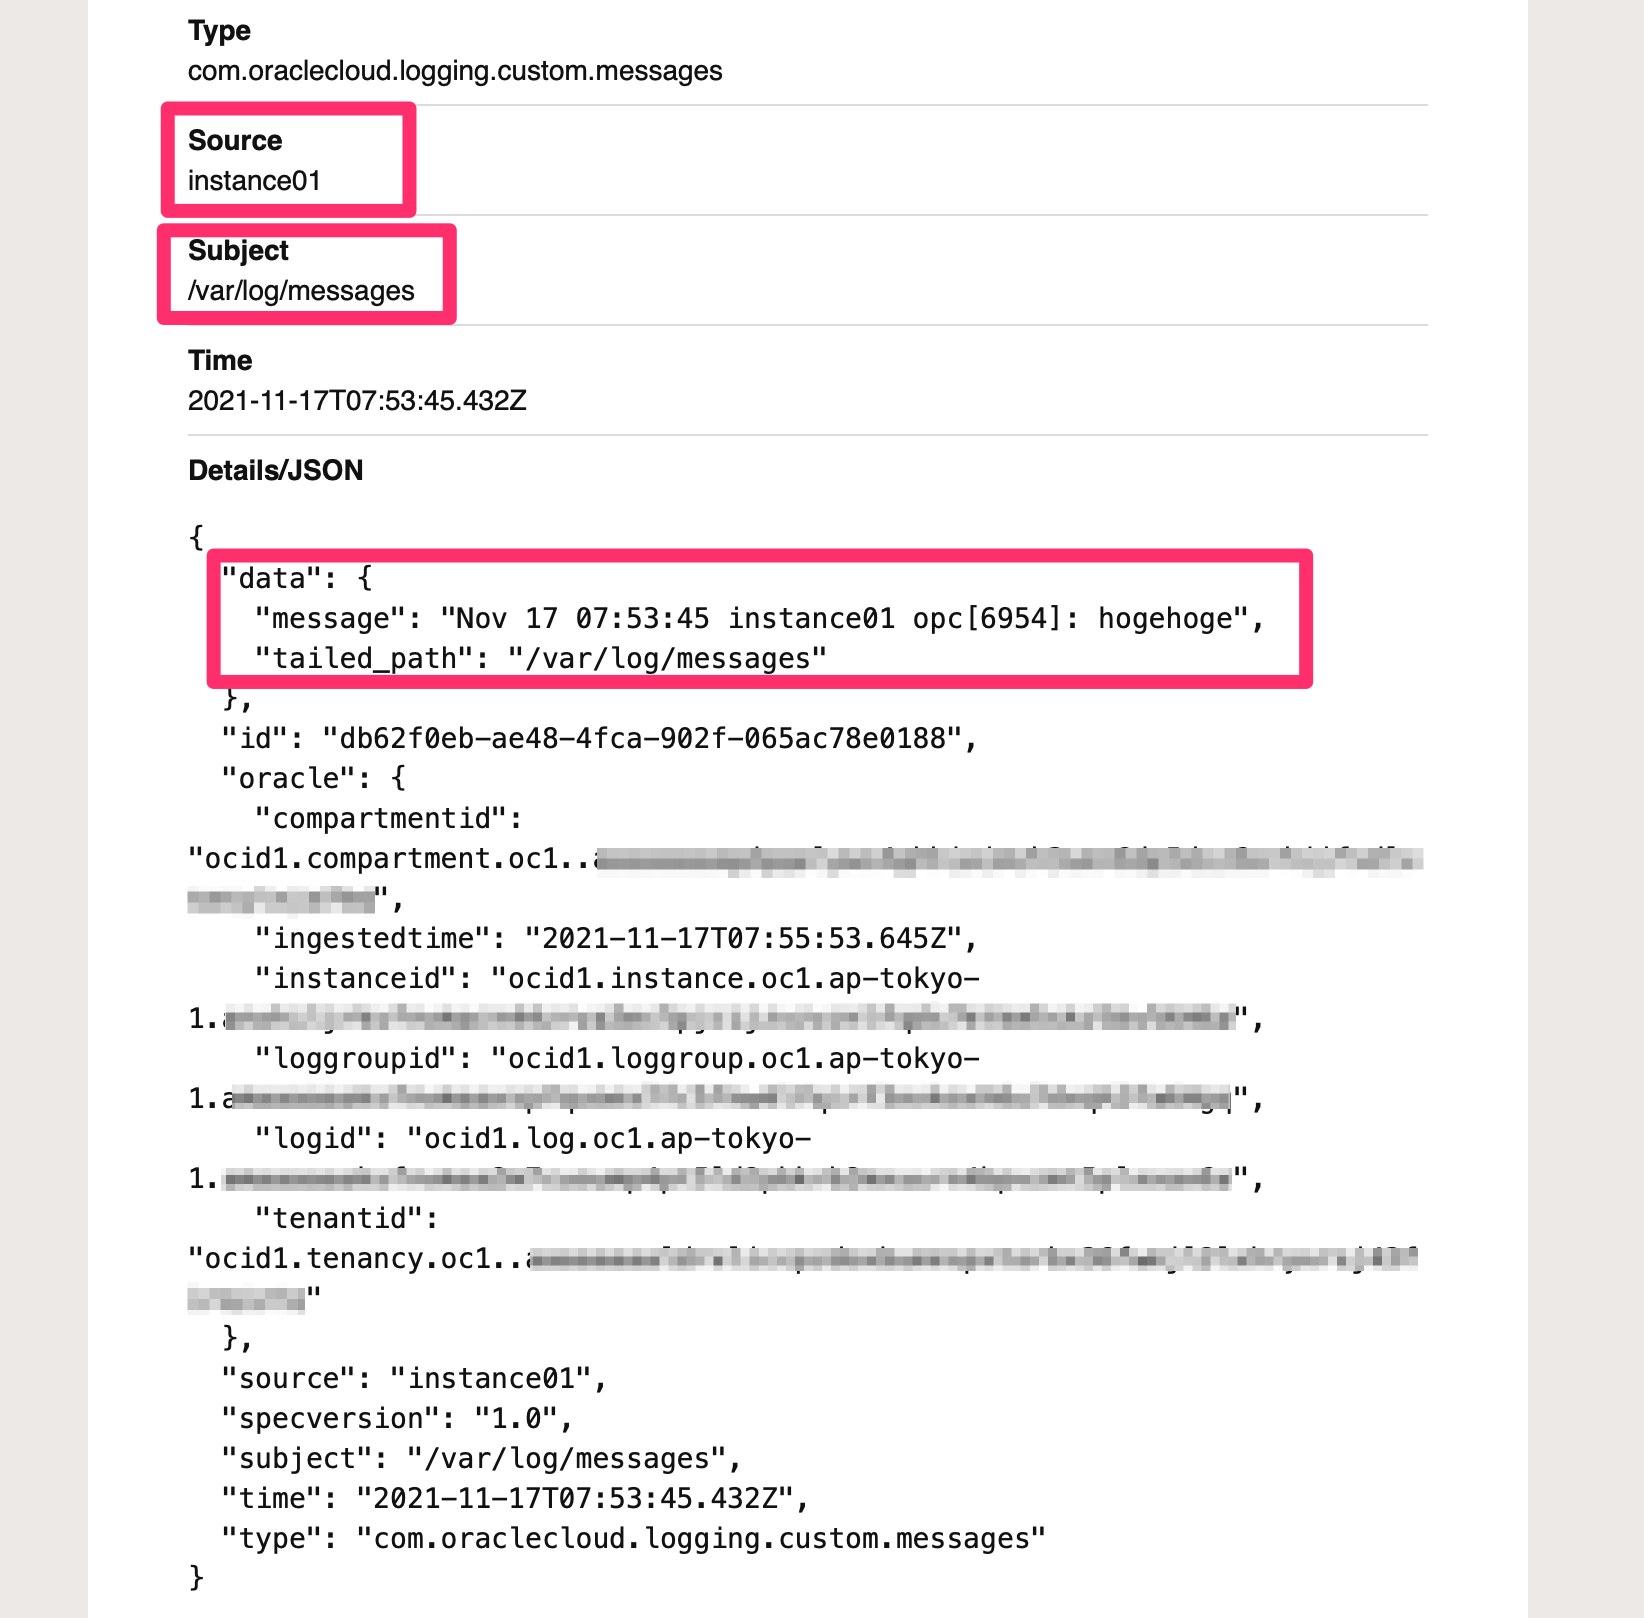
OCI のサービスを利用するだけで、シンプルなログ監視ができました。
挙動について確認する
検出した文字列の挙動について確認してみます。
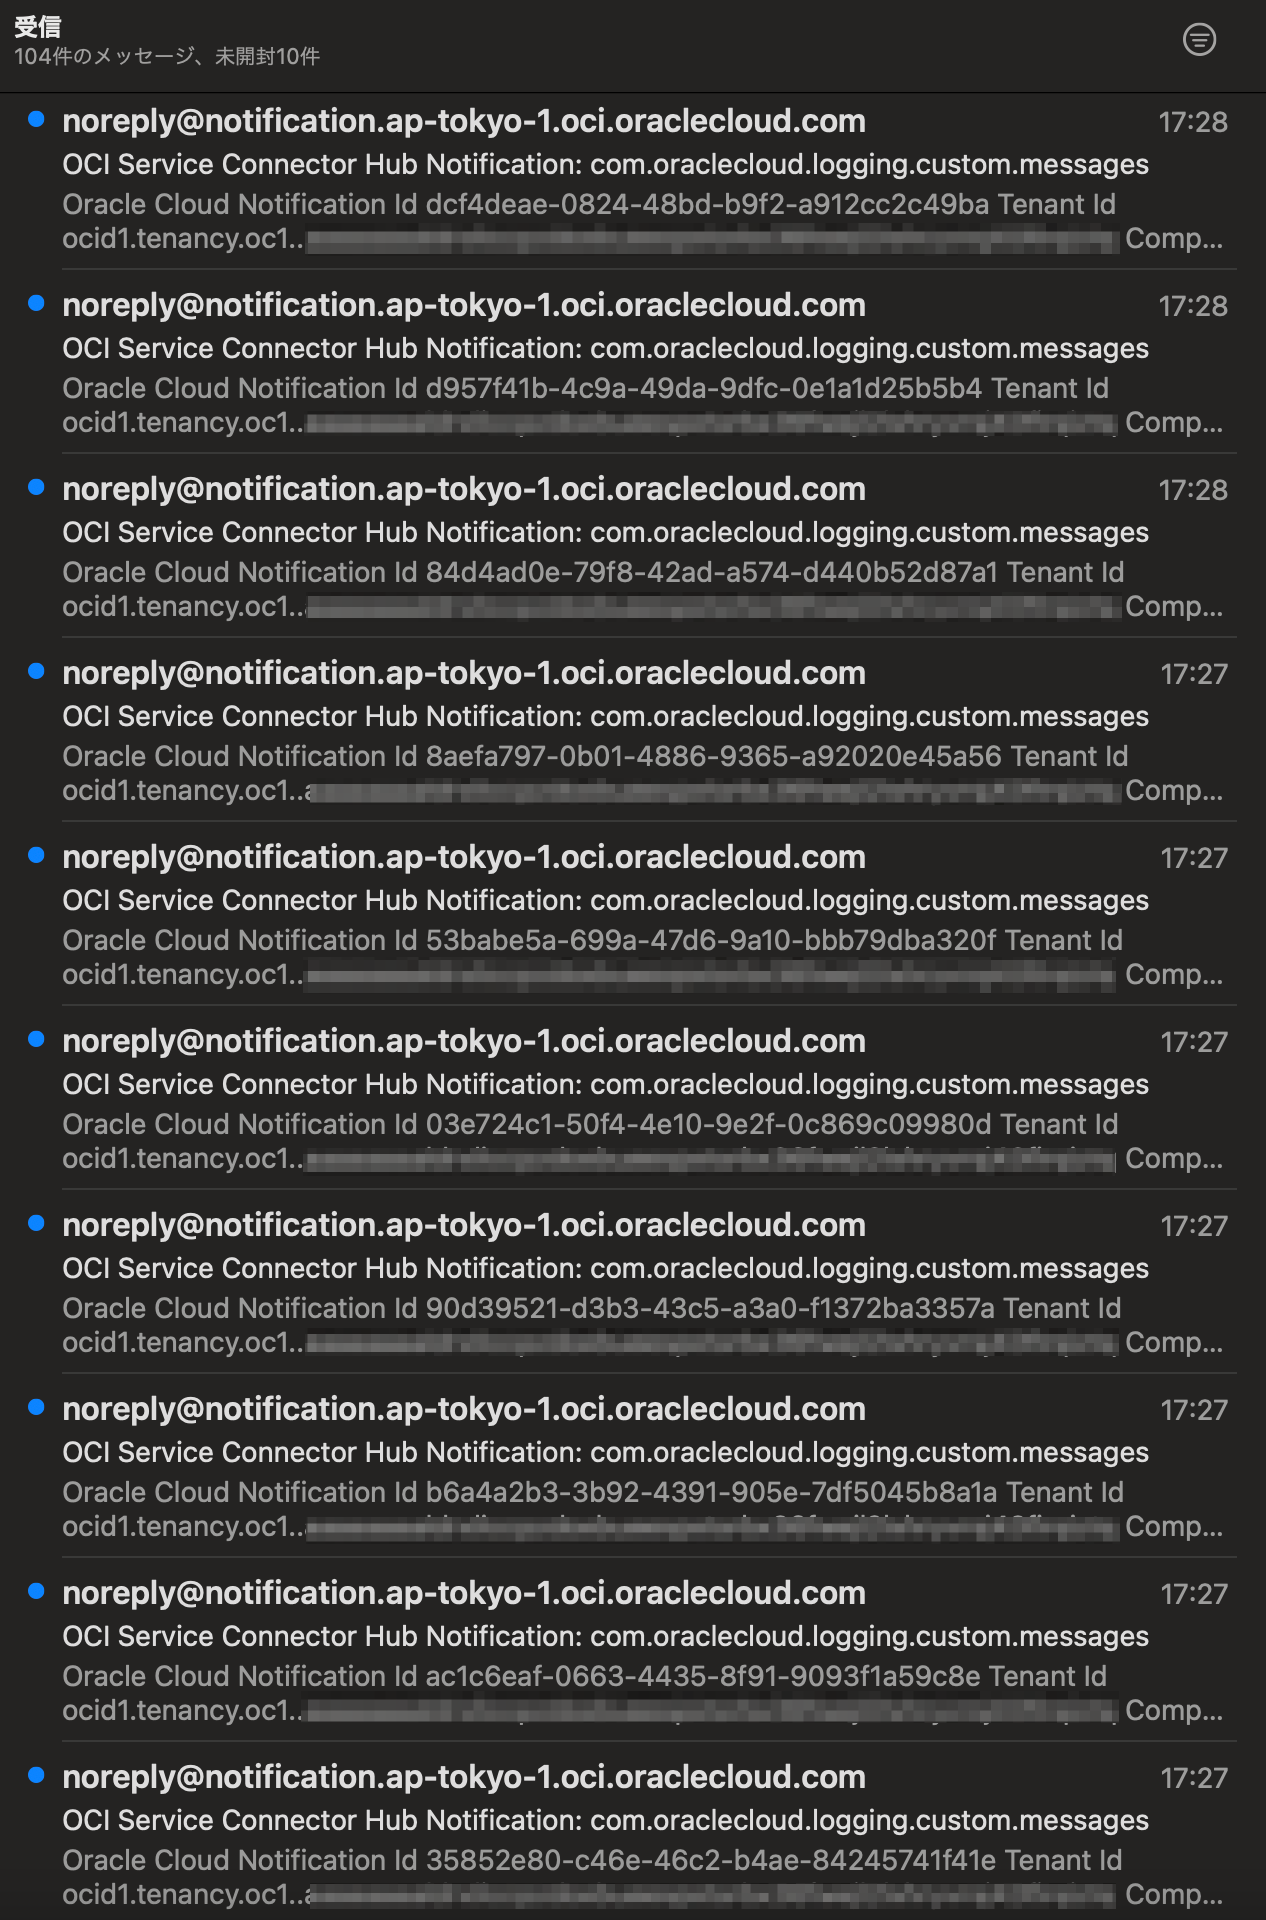
一度に複数の文字列が出た場合どうなる?
以下のように logger を10回連続で投げてみる。
[opc@instance01 ~]$ for i in {1..10}
> do
> logger -ip kern.warn hogehoge
> done
[opc@instance01 ~]$ sudo tail -f /var/log/messages
Nov 17 08:23:53 instance01 opc[14842]: hogehoge
Nov 17 08:23:53 instance01 opc[14843]: hogehoge
Nov 17 08:23:53 instance01 opc[14844]: hogehoge
Nov 17 08:23:53 instance01 opc[14845]: hogehoge
Nov 17 08:23:53 instance01 opc[14846]: hogehoge
Nov 17 08:23:53 instance01 opc[14847]: hogehoge
Nov 17 08:23:53 instance01 opc[14848]: hogehoge
Nov 17 08:23:53 instance01 opc[14849]: hogehoge
Nov 17 08:23:53 instance01 opc[14850]: hogehoge
Nov 17 08:23:53 instance01 opc[14851]: hogehoge
どのタイミングでログがチェックされている?
Custom Log などには unified-monitoring-agent という systemd のサービスが動いている。
[opc@instance01 ~]$ systemctl status unified-monitoring-agent
● unified-monitoring-agent.service - unified-monitoring-agent: Fluentd based data collector for Oracle Cloud Infrastructure
   Loaded: loaded (/usr/lib/systemd/system/unified-monitoring-agent.service; enabled; vendor preset: disabled)
   Active: active (running) since 水 2021-11-17 07:23:54 GMT; 1h 39min ago
     Docs: https://docs.cloud.oracle.com/
  Process: 31338 ExecStop=/bin/kill -TERM ${MAINPID} (code=exited, status=0/SUCCESS)
  Process: 31346 ExecStart=/opt/unified-monitoring-agent/embedded/bin/fluentd --log /var/log/unified-monitoring-agent/unified-monitoring-agent.log --daemon /var/run/unified-monitoring-agent/unified-monitoring-agent.pid --log-rotate-size 1048576 --log-rotate-age 10 $EXTRA_OPTIONS (code=exited, status=0/SUCCESS)
 Main PID: 31355 (fluentd)
   Memory: 95.2M (limit: 5.0G)
   CGroup: /system.slice/unified-monitoring-agent.service
           ├─31355 /opt/unified-monitoring-agent/embedded/bin/ruby /opt/unified-moni...
           └─31359 /opt/unified-monitoring-agent/embedded/bin/ruby -Eascii-8bit:asci...

11月 17 07:23:50 instance01 systemd[1]: Starting unified-monitoring-agent: Fluent.....
11月 17 07:23:54 instance01 systemd[1]: Started unified-monitoring-agent: Fluentd...e.
Hint: Some lines were ellipsized, use -l to show in full.
この agent のログが /var/log/unified-monitoring-agent/unified-monitoring-agent.log に吐かれていて、これを見ると約5分に動作している模様。
この5分間間隔の中で検出された回数分のメールが飛ぶ、っということのようです。
ログの検索
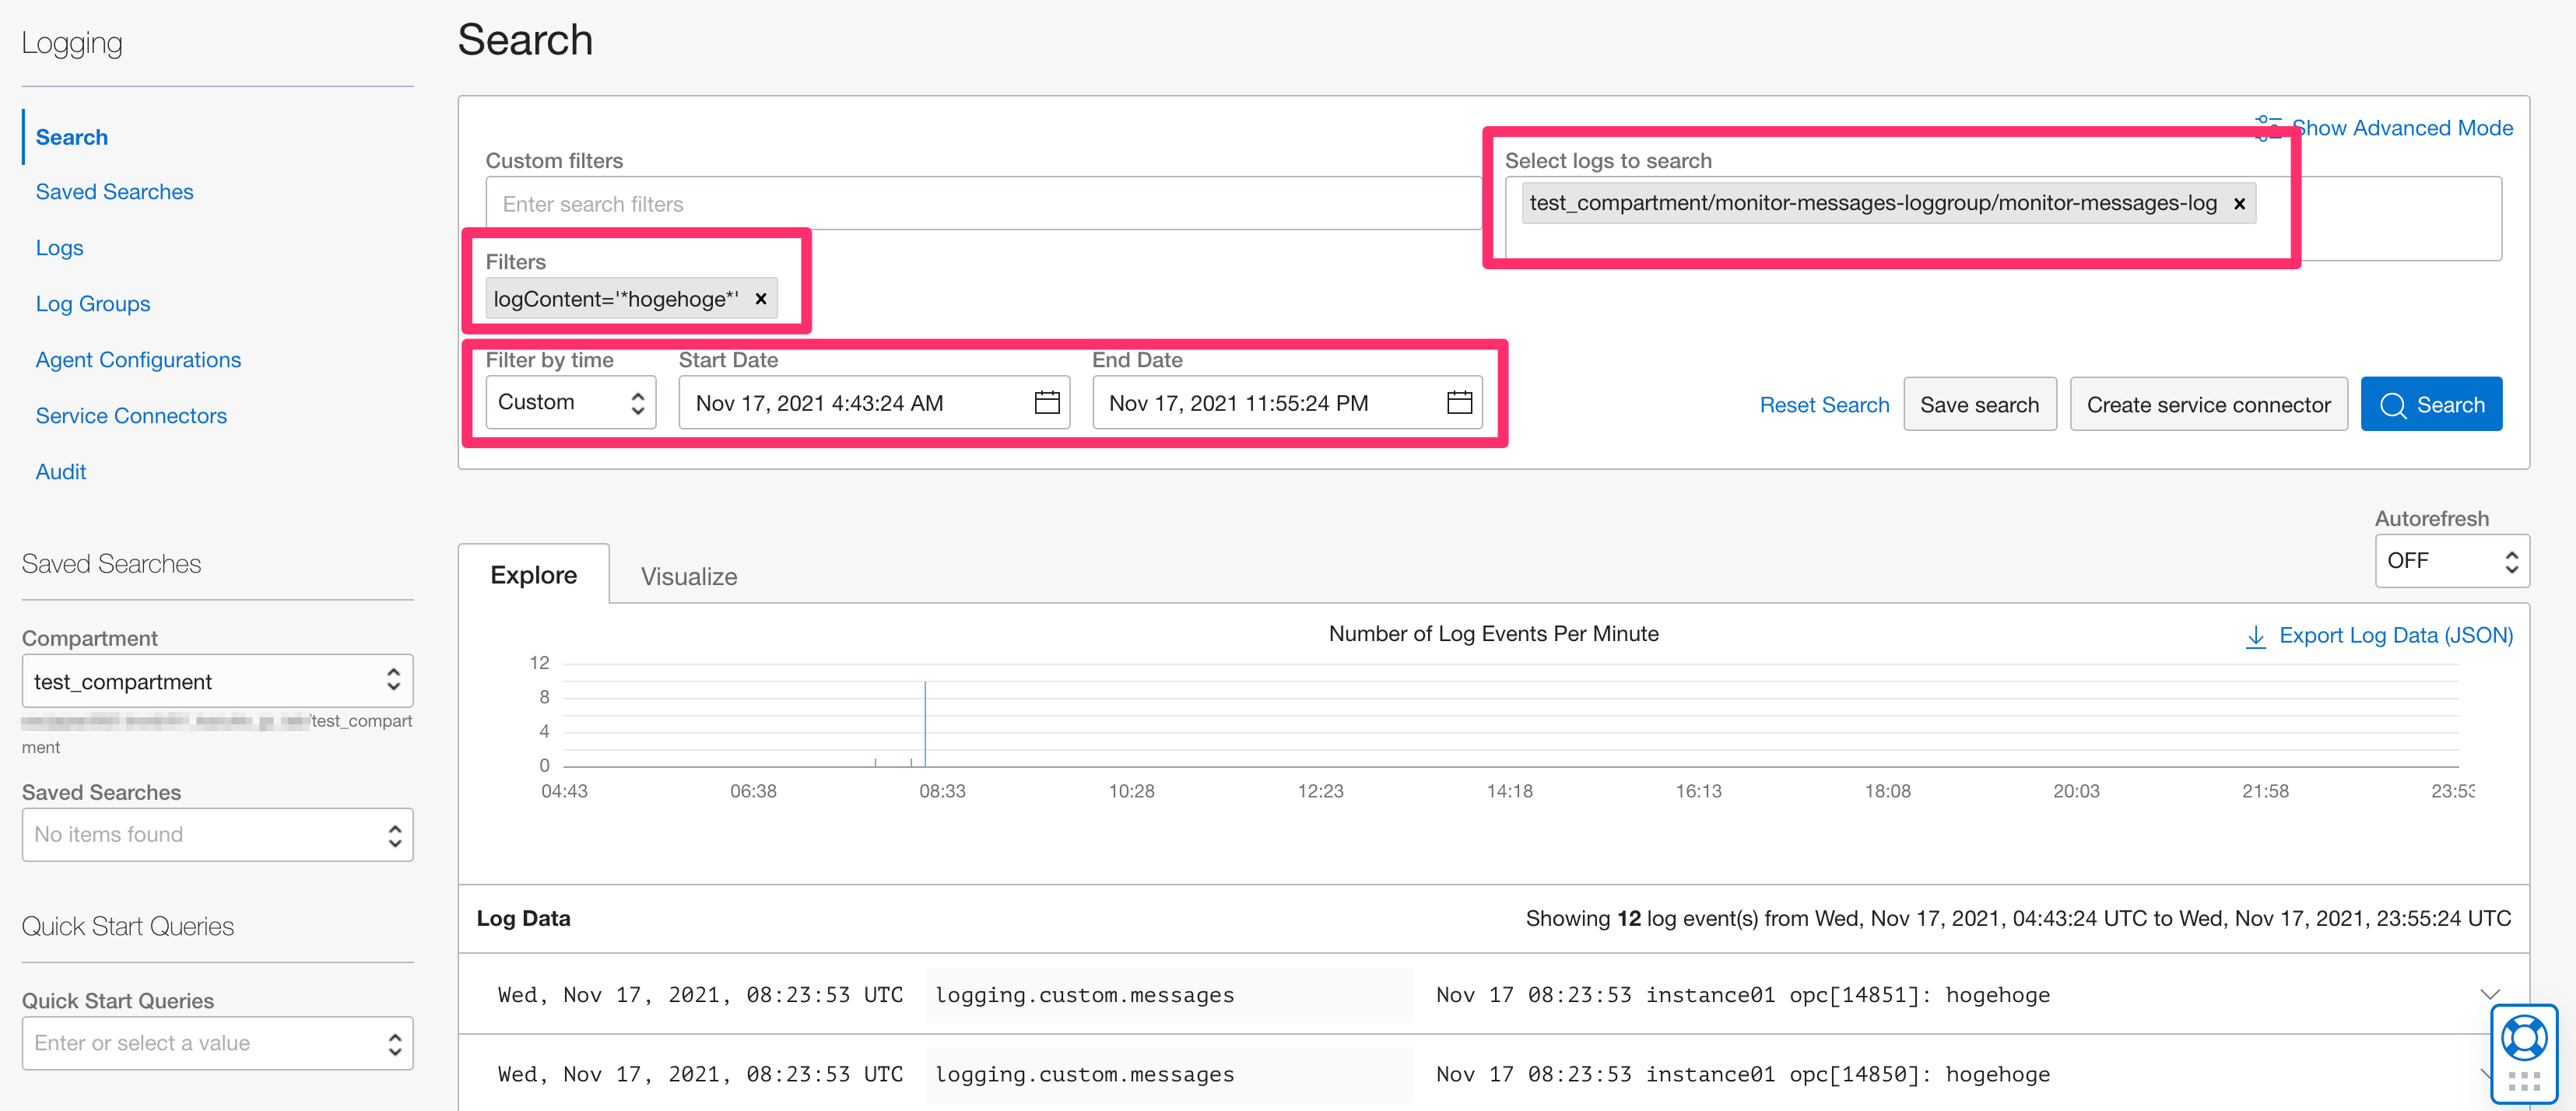
カスタムログを設定すると Logging サービスにログが保管される(デフォルトで1ヶ月保持され、最大6ヶ月保管可能)。
保管されたログは以下のようにあとから検索することもできます。
料金
Notifications
今回メール通知に利用したサービス。
料金は以下の URL より確認できます。
https://www.oracle.com/jp/devops/notifications/
Logging
カスタムログ(今回は /var/log/messages)の取り込み・保管に利用したサービス。
料金は以下の URL より確認できます。
https://www.oracle.com/jp/devops/logging/
Service Connector Hub
Logs で保管したログから特定の文字列が検出した場合、Notificatons でメール通知する、っという連携に利用したサービス。
料金は以下の URL より確認できます。
https://www.oracle.com/jp/devops/service-connector-hub/
