はじめに
前回の記事でHTTP TriggerなAzure Functionsを作成しました。
前回作成したものにAzure Blob Storage Triggerの機能を今回は追加したいと思います。
環境
- Windows11
- Visual Studio Code
- Azure Functions Core Tools v4.0
- Microsoft Azure Storage Explorer
①Azure Blob Storage Triggerを追加する
Azureマークをクリックしその後、WorkSpaceのFunctionマークをクリックします。

その後、以下を順にクリックしていきます。
- Azure Blob Storage trigger
- BlobTrigger1(機能名、今回はデフォルトのままです)
- Company.Function(namespace、今回はデフォルトのままです)
- AzureWebJobsStorage(local.settings.jsonになければ追加します。)
- samples-workitems(監視するストレージ名)
※4に関して補足
{
    "Values": {
        "AzureWebJobsStorage": "UseDevelopmentStorage=true",
    }
}
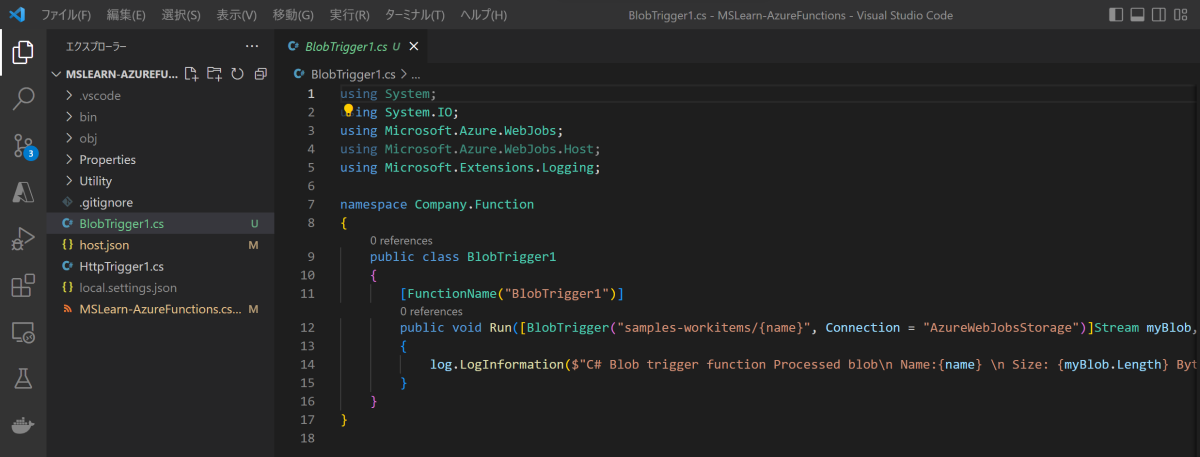
作成後はBlobTrigger1.csが追加されていると思います。

②Azure Blob Storage Triggerの稼働確認
- Ctrl + Shift + Pでコマンドパレットを開き「Azurite: Start」をクリックします。
- デバッグ実行します。(F5キー)
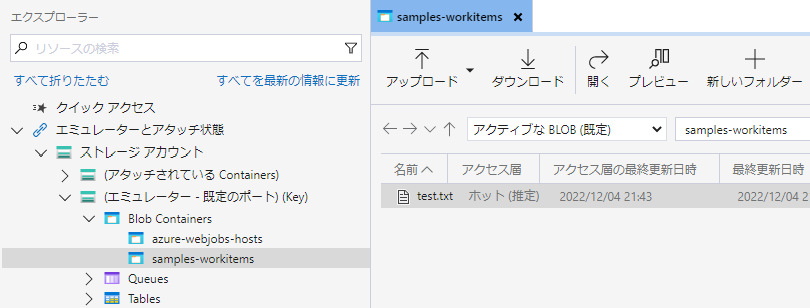
- Azure Storage Explorerを開き、エミュレータのBlobコンテナに「samples-workitems」コンテナを作成します。
- 作成後、適当なファイルをアップロードしてみます。
※今回はtest.txtというファイルをアップロードしてみました。

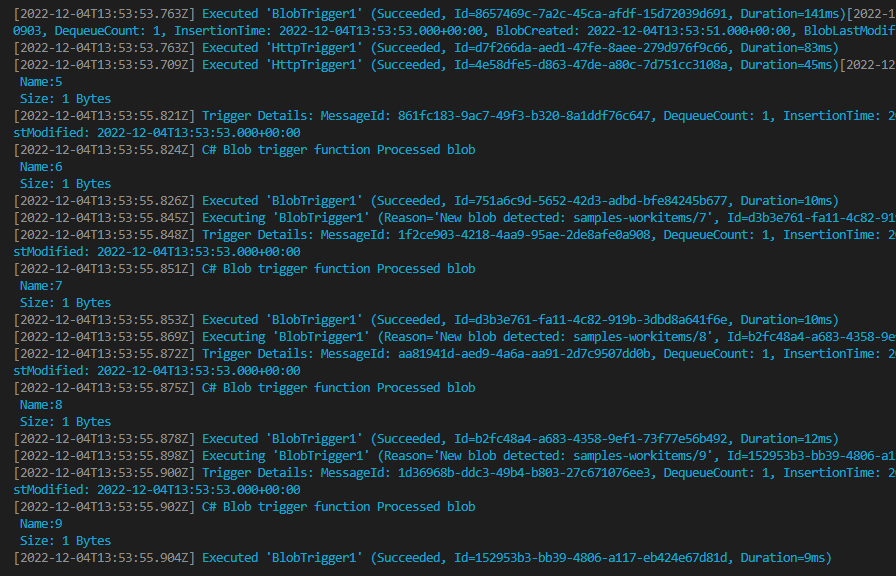
アップロード後、VSCodeのターミナルを確認すると以下のようなものが出力されていると思います。

番外編:HTTP Triggerで受け取った文字列をBlobにアップロードし、さらにそれをAzure Blob Storage Triggerする
①Requestの文字列を取得しその文字列をBlobにアップロードする
※前回作成分に追記
Utility/AzureStorageClientUtility.cs
using System;
using System.Threading.Tasks;
using Azure;
using Azure.Storage.Blobs;

namespace Company.Function.Utility
{
    public class AzureStorageClientUtility
    {
        /// <summary>
        /// コンテナクライアント
        /// 接続文字列はAzuriteでのエミュレータ共有キー資格情報
        /// </summary>
        BlobServiceClient blobServiceClient = new BlobServiceClient("DefaultEndpointsProtocol=http;AccountName=devstoreaccount1;AccountKey=Eby8vdM02xNOcqFlqUwJPLlmEtlCDXJ1OUzFT50uSRZ6IFsuFq2UVErCz4I6tq/K1SZFPTOtr/KBHBeksoGMGw==;BlobEndpoint=http://127.0.0.1:10000/devstoreaccount1;");

        /// <summary>
        /// Blobに文字列をアップロードする
        /// 今回追加
        /// </summary>
        public async Task<BlobContainerClient> UploadFileAsync(string name)
        {
            BlobContainerClient containerClient = blobServiceClient.GetBlobContainerClient("samples-workitems");
            BlobClient blobClient = containerClient.GetBlobClient(name);
            await blobClient.UploadAsync(BinaryData.FromString(name), overwrite: true);
            return null;
        }
    }
}
HttpTrigger1.cs
using System;
using System.IO;
using System.Threading.Tasks;
using Microsoft.AspNetCore.Mvc;
using Microsoft.Azure.WebJobs;
using Microsoft.Azure.WebJobs.Extensions.Http;
using Microsoft.AspNetCore.Http;
using Microsoft.Extensions.Logging;
using Newtonsoft.Json;
using Company.Function.Utility;

namespace Company.Function
{
    public static class HttpTrigger1
    {
        [FunctionName("HttpTrigger1")]
        public static async Task<IActionResult> Run(
            [HttpTrigger(AuthorizationLevel.Function, "get", "post", Route = null)] HttpRequest req,
            ILogger log)
        {
            log.LogInformation("C# HTTP trigger function processed a request.");

            string name = req.Query["name"];

            string requestBody = await new StreamReader(req.Body).ReadToEndAsync();
            dynamic data = JsonConvert.DeserializeObject(requestBody);
            name = name ?? data?.name;

            string responseMessage = string.IsNullOrEmpty(name)
                ? "This HTTP triggered function executed successfully. Pass a name in the query string or in the request body for a personalized response."
                : $"Hello, {name}. This HTTP triggered function executed successfully.";

            // 今回追加
            AzureStorageClientUtility azureUtility = new AzureStorageClientUtility();
            if (!string.IsNullOrWhiteSpace(name))
            {
                await azureUtility.UploadFileAsync(name);
            }

            return new OkObjectResult(responseMessage);
        }
    }
}
②稼働確認
デバッグ実行し、APIRequestしてみる
Invoke-WebRequest -Uri "http://localhost:7071/api/HttpTrigger1" `
                  -Method POST `
                  -Headers @{"Content-Type"="application/json"} `
                  -Body "{'name':'hello world'}"
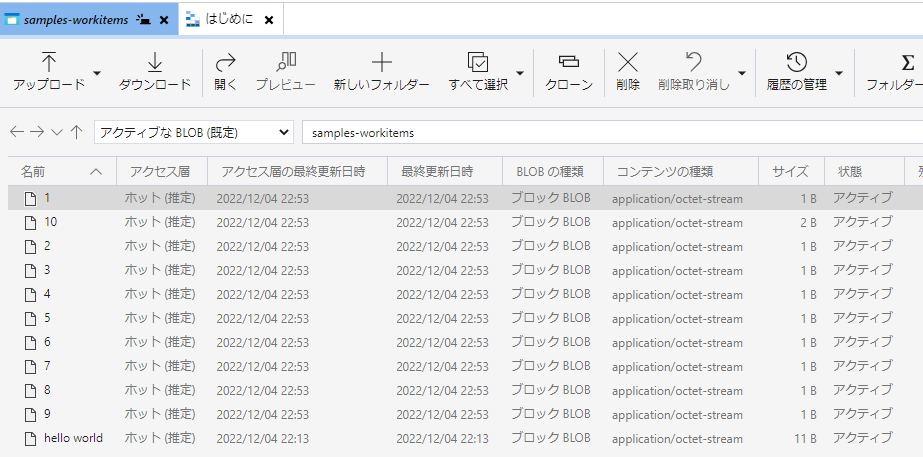
Azure Storage Explorerにファイルが作成されていることが確認できます。

アップロード後、VSCodeのターミナルを確認すると以下のようなものが出力されていると思います。

おまけ
# powershellバージョン要確認
1..10 | ForEach-Object -Parallel { Invoke-WebRequest -Uri "http://localhost:7071/api/HttpTrigger1" -Method POST  -Headers @{"Content-Type"="application/json"}  -Body "{'name':$_}" }
所感
今回は前回の機能に追加でローカルでAzure Blob Storage Triggerな環境構築を行いました。
まだまだAzure Functionsには機能があるので深堀していけたらよいなと思います。
今後もいろいろチャレンジしてみたいと思います。

