はじめに
Ruby on RailsでGoogle Calendar APIを叩くの激ムズだったんですけどようやく完全に理解したので以下備忘録。
https://developers.google.com/calendar/quickstart/ruby
ググって出てくるページは古いし公式のquickstartはRubyなので、それらをRailsで実現するのに大苦労した。
Google API Consoleでの下準備
Google API ConsoleでAPIを有効化しよう。
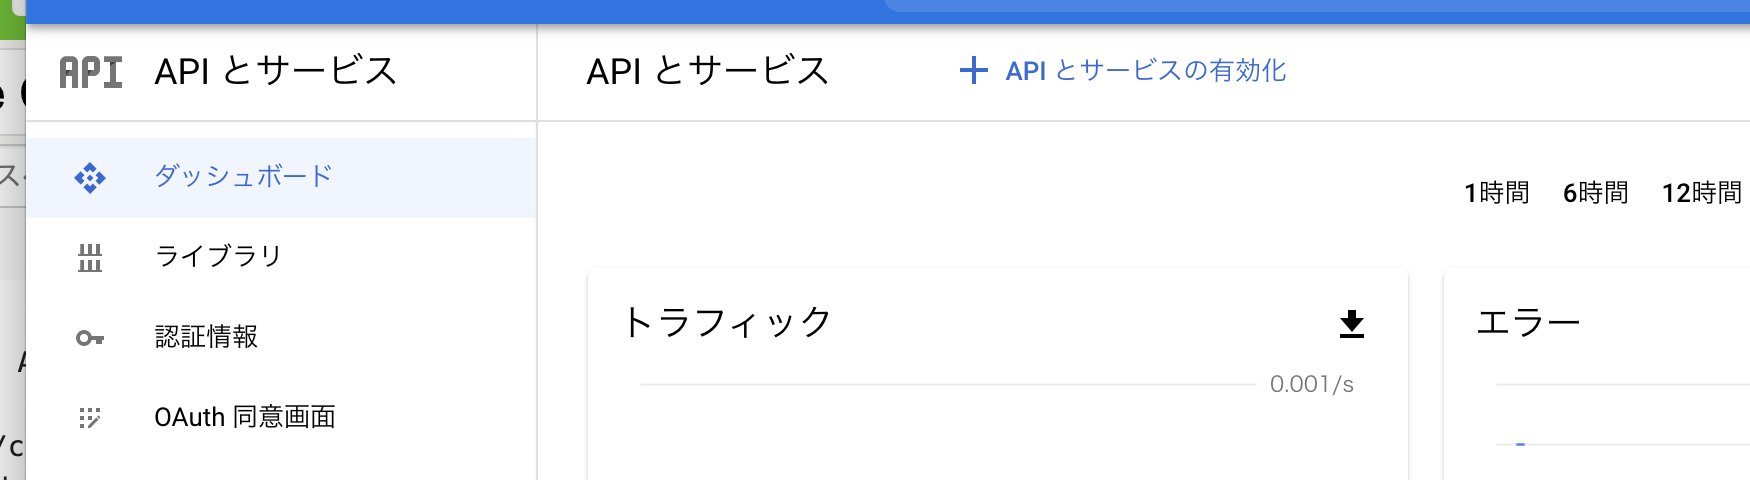
上画像の上にある「APIとサービスの有効化」からCalendarとGmailを有効化する。

次に上画像の上の「認証情報を作成」から「OAuthクライアントID」の作成を選択する。
アプリケーションの種類は「ウェブアプリケーション」
名前は各自好きなものを追加し、作成完了。
ここはググればいっぱい出てくるはずなので分からなかったら調べてください。
注意点
-
Google Calendar APIを使いたい場合は、CalendarとGmailも有効化しないといけないらしい。
-
APIキーはGoogle Map APIとか認証情報が必要ないものを使うときに使う。
Google Calendar APIはユーザーに認証してもらって代わりにアプリがデータを取ってくる流れになるのでOAuthクライアントが必要。
localhostからlvh.meへ
ローカルで開発している場合はHOSTが "http://localhost:3000" とかだと思うが、これだとgoogle OAuth的に何かよくないっぽい。(エラーと格闘してるときにそんな感じの記事見ただけでここはよく分からんです🙏 localhostでもいけるかもしれん)
Rails.application.configure do
  # 以下を追加
  config.hosts<<"lvh.me"
これで "http://lvh.me:3000" が使えるはず。
Calendarを扱うcontrollerの作成
さてrailsでゴリゴリやっていこう。まずカレンダーの認証等を扱うCalendarControllerを作成します。名前とかはなんでもいいけど。
rails generate controller Calendar index callback
とでもターミナルで実行してcontroller作成done
require "google/apis/calendar_v3"
require "googleauth"
require "googleauth/stores/file_token_store"
require "date"
require "fileutils"

class CalendarController < ApplicationController

  REDIRECT_URI = "http://lvh.me:3000/oauth2callback".freeze
  APPLICATION_NAME = "下準備の所で設定したアプリの名前".freeze
  CLIENT_SECRET_PATH = "client_secret.json".freeze
  # The file token.yaml stores the user's access and refresh tokens, and is
  # created automatically when the authorization flow completes for the first
  # time.
  TOKEN_PATH = "credentials.yaml".freeze
  SCOPE = Google::Apis::CalendarV3::AUTH_CALENDAR
  MY_CALENDAR_ID = 'primary'

  def index
  end

  def authorize
    client_id = Google::Auth::ClientId.from_file CLIENT_SECRET_PATH
    logger.debug(client_id.id)
    token_store = Google::Auth::Stores::FileTokenStore.new file: TOKEN_PATH
    authorizer = Google::Auth::UserAuthorizer.new client_id, SCOPE, token_store
    user_id = "hoge@gmail.com(テスト用なので自分のジーメール)"
    credentials = authorizer.get_credentials user_id
    if credentials.nil?
      code = session[:code]
      url = authorizer.get_authorization_url(base_url: REDIRECT_URI)
      logger.debug(url)
      credentials = authorizer.get_and_store_credentials_from_code(
        user_id: user_id, code: code, base_url: REDIRECT_URI
      )
    end
    credentials
  end


  def callback
    session[:code] = params[:code]
    logger.debug(session[:code])
    calendar = Google::Apis::CalendarV3::CalendarService.new
    calendar.client_options.application_name = APPLICATION_NAME
    calendar.authorization = authorize
    fetchEvents(calendar)
    redirect_to action: :index
  end

  def fetchEvents(service)
    # Fetch the next 10 events for the user
    calendar_id = MY_CALENDAR_ID
    response = service.list_events(calendar_id,
                                   max_results:   10,
                                   single_events: true,
                                   order_by:      "startTime",
                                   time_min:      DateTime.now.rfc3339)
    puts "Upcoming events:"
    puts "No upcoming events found" if response.items.empty?
    response.items.each do |event|
      start = event.start.date || event.start.date_time
      puts "- #{event.summary} (#{start})"
    end
  end
end
基本的には公式のquickstartを関数分けて移植したくらい。
公式のOOB_URIって意味わからんけど要はredirectURIのことやと理解したので、勝手に変数名変えて"http://lvh.me:3000/oauth2callback" にした。
細かい説明は割愛。
注意点
REDIRECT_URIは"http://lvh.me:3000/oauth2callback" にする。変更しない。
後に生成されるauthorizationのredirect_urlがこれなので、変更するとREDIRECT_URI_MISMATCHって出る(はず)
redirect_urlを設定
Google API Consoleで、先ほど作ったOAuthクライアントIDを選択し、
承認済みのJavaScript生成元に"http://lvh.me:3000"
承認済みのリダイレクト URIに"http://lvh.me:3000/oauth2callback"
と記載。
できたらJSONをダウンロードしアプリのルートディレクトリに"client_secret.json"とリネームし保存しておく。
ルーティングの設定
  get "calendar/index", to:"calendar#index"
  get "oauth2callback", to:"calendar#callback"
の二行を追加。
準備オッケー! 流れの確認
さて、ここまでできたらrails sして
https://accounts.google.com/o/oauth2/auth?response_type=code&
client_id=<client_secret.jsonに書いてるclient_id>&redirect_uri=http://lvh.me:3000/oauth2callback&
scope=https://www.googleapis.com/auth/calendar&
access_type=offline&
approval_prompt=force
のclient_idのとこを自分のものに変えてアクセスする。
するとgoogleの権限認証画面に遷移する。
許可するとまず "http://lvh.me:3000/oauth2callback" に、codeパラメータを持ってリダイレクトされる。
すなわちCalendarControllerのcallbackメソッドが実行される。
callbackメソッド内でauthorize関数を呼び出しているので、そこでcodeがtokenに変換され、credentials.yamlに保存される。
この時点でターミナルにurl = authorizer.get_authorization_url(base_url: REDIRECT_URI)で作成したurlが表示されているはず。
REDIRECT_URI_MISMATCHとかいうエラーが出る場合、設定しているリダイレクトURLが表示されてるurl内のredirect_urlと異なっている可能性がある。
(ここがわからなくてずっと詰まってた、、)
認証が上手く終わっていればfetchEventsが実行され、ターミナルにあなたのカレンダーの予定が表示されています!!!!
Congratulations!
今はローカルにcredentials等を保存しているので、Redisとかで管理できるといいっぽいですね!
おわりに
devise使ってOAuth認証でユーザー管理もしてるので、そっちとコードがごっちゃになっていたのが詰まっていた所以かもしれない。
抜けている所、これ不要だよ等々あったら教えてください!
lgtmもください!