はじめに
- 黒い画面を使わずにブラウザだけでSlack ChatBotの開発を行う方法を書いていきます
- クレジットカードの登録はありません、全て無料で出来ます
- JavaScript/Node.jsの知識があれば誰でもChatBotの開発ができます
- 具体的にはGlitch上でSlack Botkitを動かす手順を書いていきます
- 最終的にはスラッシュコマンドとボタンを利用したQiitaの記事検索、共有機能の開発を目指してやっていきます
- こちら実装はこの記事に書いてあります
- まずはGlitchとBotkitの説明をした後にChatBot開発の準備をやります
- その後にBotkitのサンプルを簡単に説明していきます
Glitch
- node.jsでWebサーバを立てられるPaaSでオンラインコードエディタとコミュニティ機能が付いています
- 他の誰かが作ったアプリを環境ごとコピーすることができます
- 少々変わったWebデザインですがファウンダーの1人はJoel on Softwareで有名なJoel Spolskyさんです
- 元々はFog Creek Softwareという会社名だったのですがサービスに合わせてGlitchという会社名に変えたみたいです
- Stack OverflowやTrelloを運営している会社でもあります
Botkit
- チャットボットのためのフレームワークです
- Slackが公式に推奨しています
- GitHub製のHubotより後に開発されました
- 具体的にはチャットツールのread/write権限などを委譲されたWebアプリケーションといったところです(Hubotなどもそうです)
- Expressで実装されています
Glitch上でbotkit-slackをRemixする
-
まずはGlithにアクセスしてサインインを行います
- GitHubかFacebookのアカウントでサインインできます
-
https://glitch.com/~botkit-slack にアクセスします
-
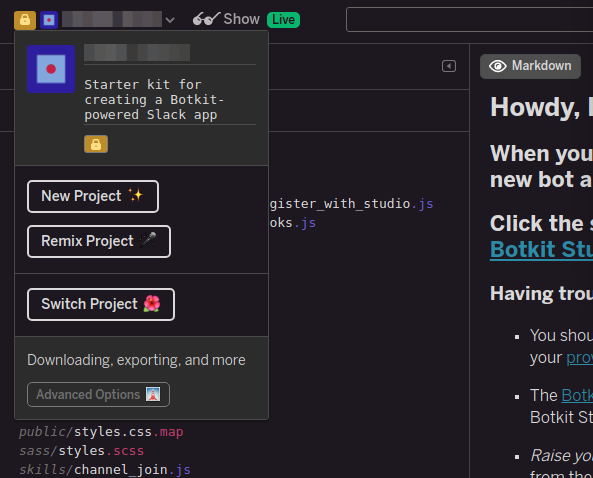
Remix your own ボタンをクリックしてbotkit-slackをRemixします- たったこれだけで自分の環境にコードとWebサーバのコピーができており実際にアクセスすることができます
- 画面左上のShowをクリックするとremixしたWebアプリにアクセスできます
-
https://somber-forest.glitch.me/ 左のようなURLの
somber-forest部分はランダム生成されておりremixするたびに変わります
-
デフォルトだとコードが公開状態になっています
- 非公開にしたい場合は鍵アイコンをクリックしてロック状態にしておきます
- 公開状態でも
.envファイルだけは非公開状態になっています(後ほど、ここにアクセストークンなどの隠したい情報を設定していきます)
-
Slack側の設定に使うのでURLを控えておきます
https://xxxx-xxxx.glitch.me/ -
Glitchは一旦ここまでにします
-
Slack側の設定をやってから戻ってきます
Slack上でbotの設定を行う
- https://api.slack.com/ にアクセスします
-
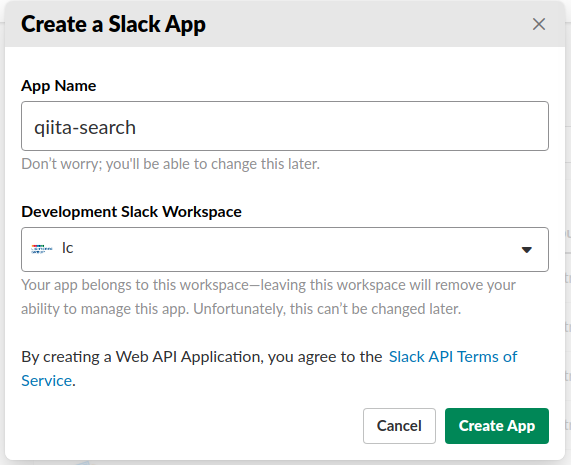
Start Building ボタンをクリック-
App Name:qiita-search(任意の名前でOK) -
Workspaceを選択 -
Create Appをクリック
-
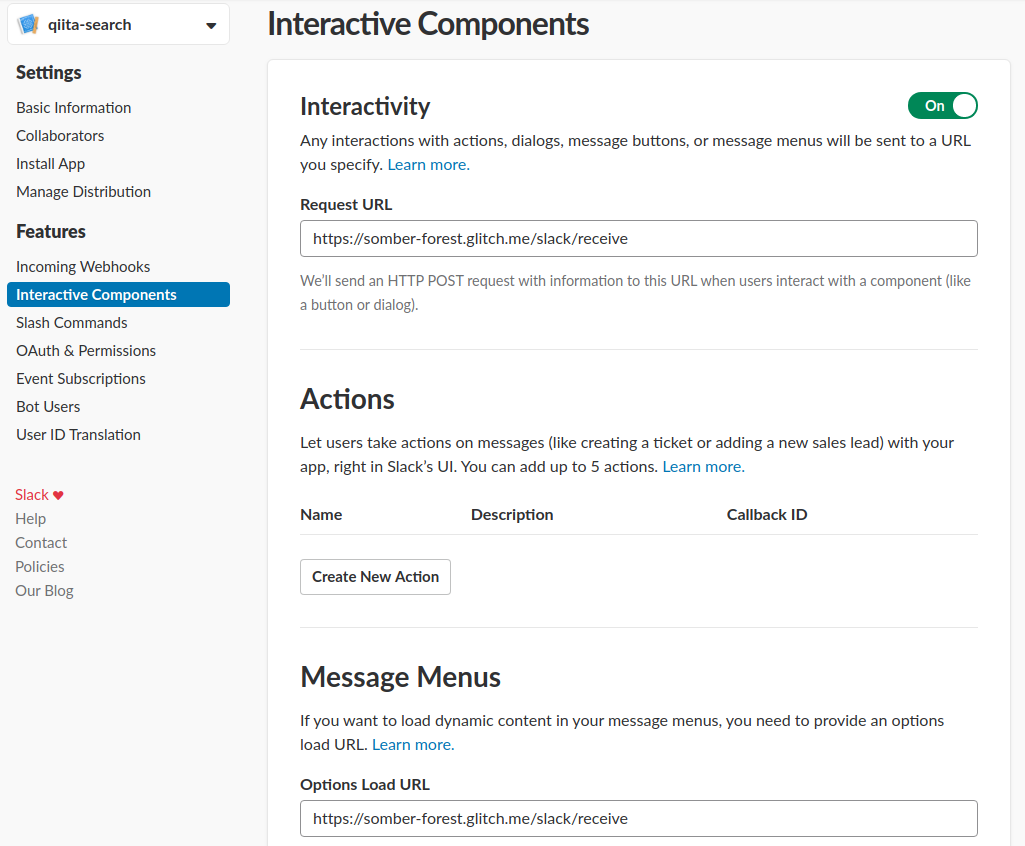
Interactive Components
-
Interactivity:On -
Request URL:https://xxxx-xxxx.glitch.me/slack/receive(xxxx-xxxxはglitchのURLから取ってください) -
Actions:設定不要(PinやEdit messageのようなメニュー追加が必要であれば設定します) -
Options Load URL:https://xxxx-xxxx.glitch.me/slack/receive
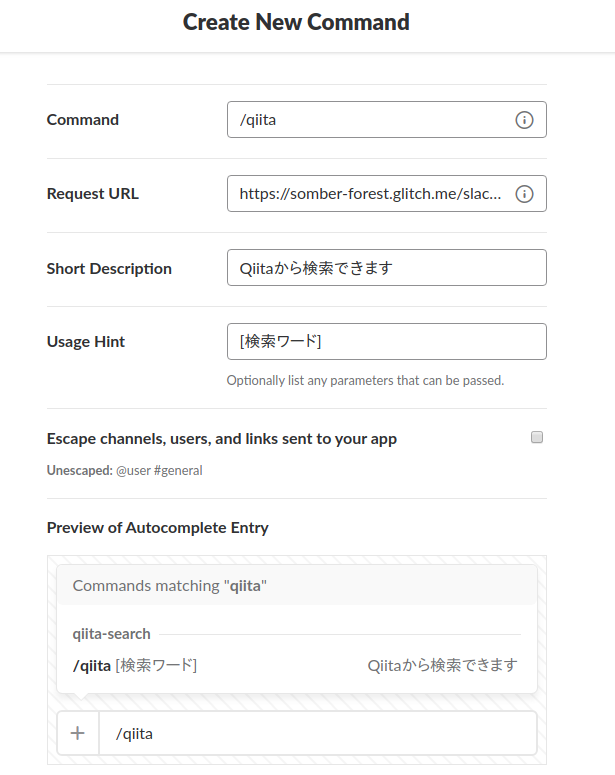
Slash Commands
-
Create New Command ボタンをクリック -
Command:/qiita -
Request URL:https://xxxx-xxxx.glitch.me/slack/receive -
Short Description:Qiitaから検索できます -
Usage Hint:[検索ワード]
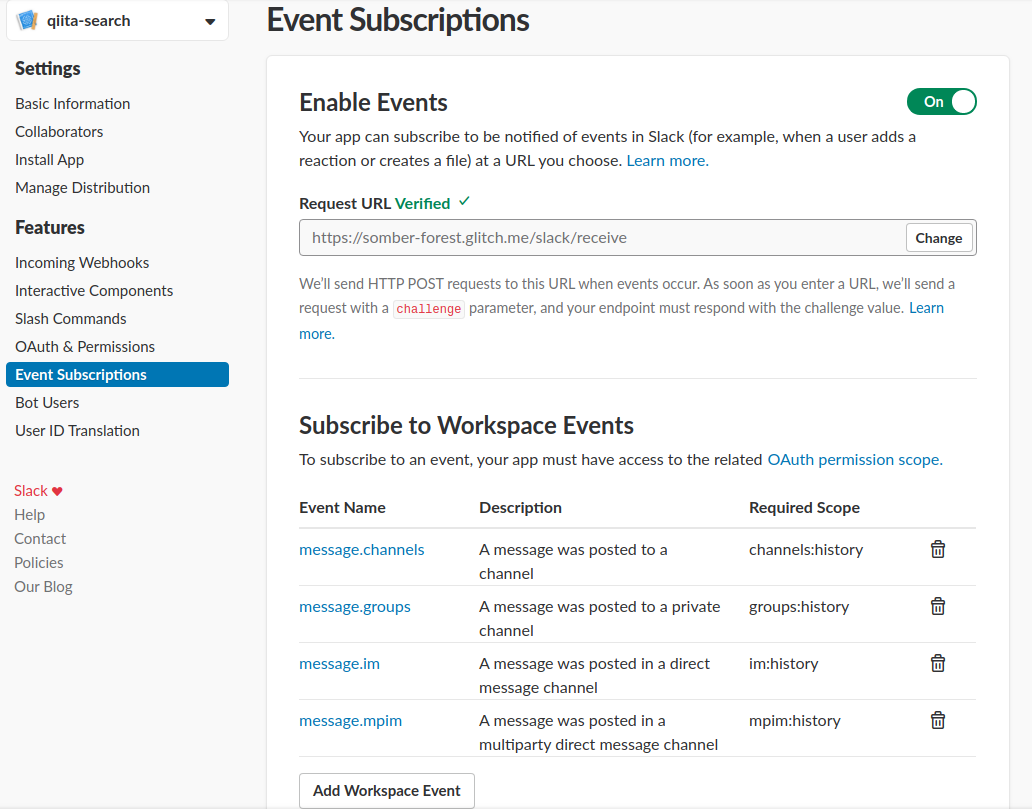
Event Subscriptions
-
Enable Events:On -
Request URL:https://xxxx-xxxx.glitch.me/slack/receive -
Subscribe to Workspace Events-
Add Workspace Event ボタンをクリックして以下設定を追加message.channelsmessage.groupsmessage.im-
message.mpim
-
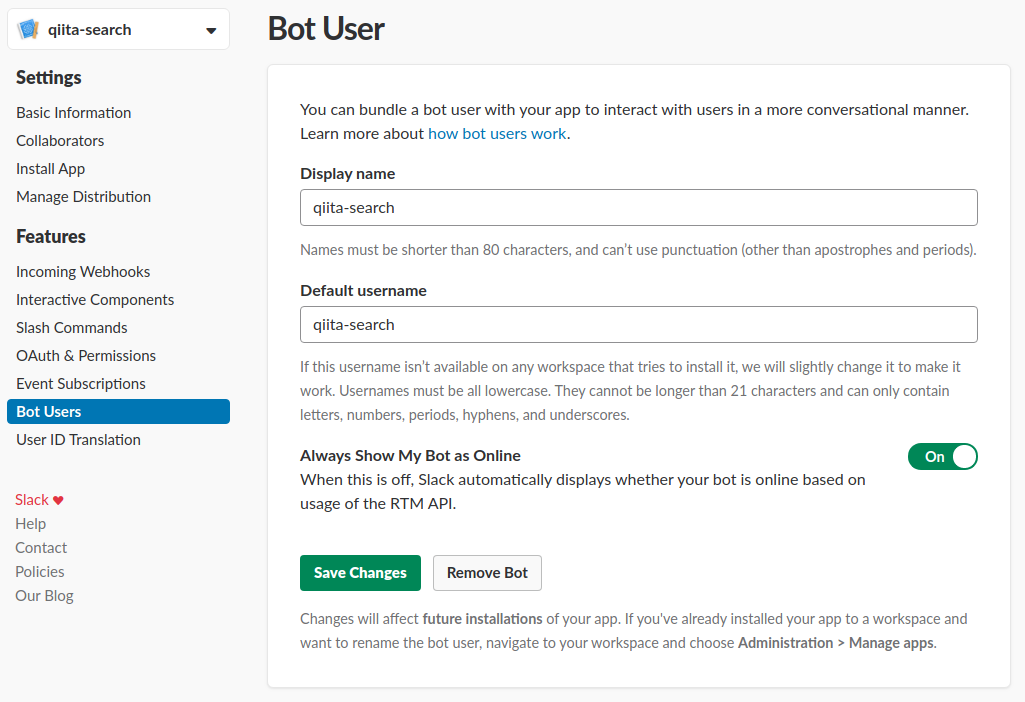
Bot User
-
Display name:qiita-search -
Default username:qiita-search -
Always Show My Bot as Online:On
OAuth & Permissions
-
Add New Redirect URL ボタンをクリック -
Redirect URLs:https://xxxx-xxxx.glitch.me/oauth-
Addボタンをクリック後にSave URLsボタンで保存
-
-
Select Permission Scopesに以下を設定Send messages as qiita-searchSend messages as user-
Add slash commands and add actions to messages (and view related content)-
Save Changesボタンをクリックして保存
-
-
Install App to Workspaceボタンをクリックし遷移先のページでAuthorizeボタンをクリック
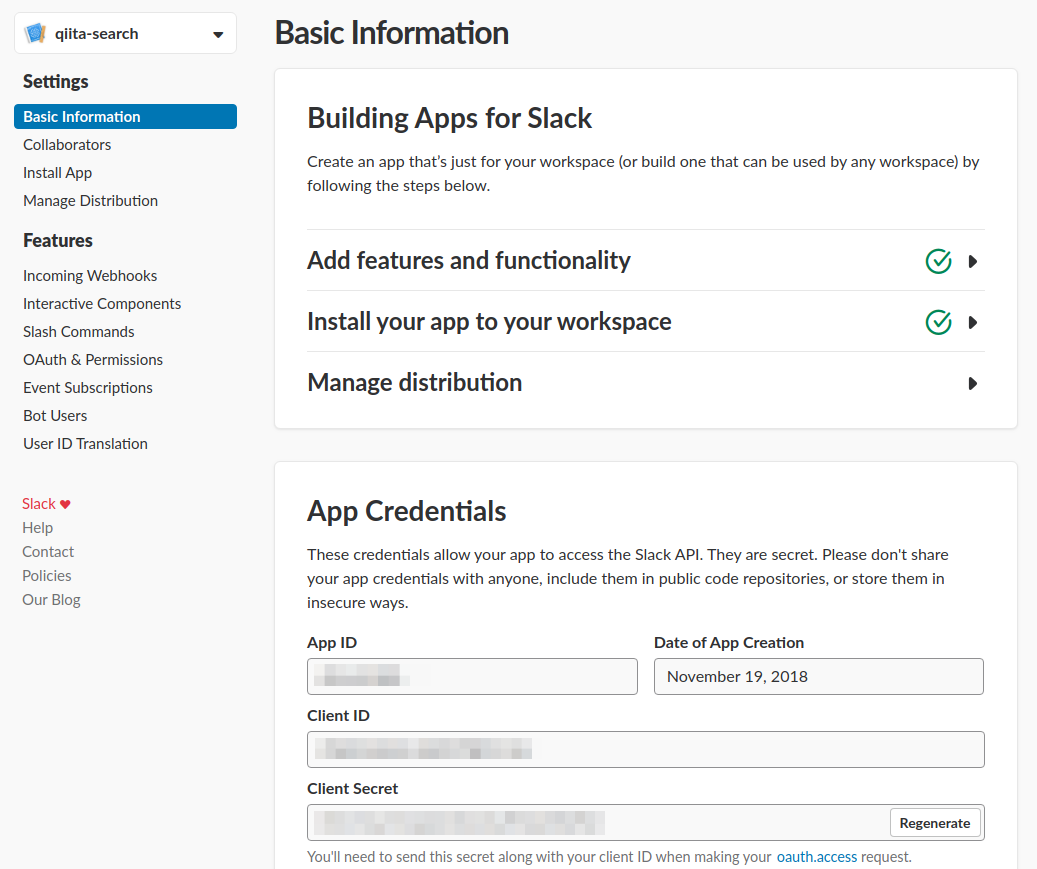
Basic Information
-
左メニューの
Basic Informationをクリック -
Client IDとClient Secretを控えます
-
Slackの設定は以上です
-
Glithに戻りBotkitの設定を行います
Botkit設定の続き
- glitchのエディタから
.envファイルに設定を行います- 保存はctrl+S(放っといても勝手に保存されます)
.env
clientId=[Slack AppのBasic Informationでコピったもの]
clientSecret=[Slack AppのBasic Informationでコピったもの]
studio_token=[空でOK、Botkit Studio用の設定]
PORT=
-
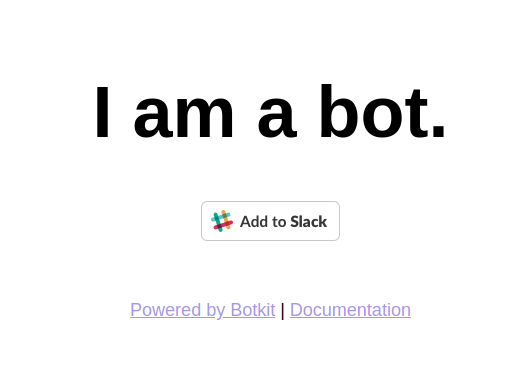
https://xxxx-xxxx.glitch.me/ にアクセスし
Add to Slack ボタンをクリック- glitchのコードエディタ画面にあるShowからでもアクセスできます
-
以下メッセージが表示されればOKです

-
これで全ての設定は終了です
ChatBotの動作確認
- Botkitのbot.jsがskillsディレクトリ配下のファイルを読み込んでいます
bot.js
  var normalizedPath = require("path").join(__dirname, "skills");
  require("fs").readdirSync(normalizedPath).forEach(function(file) {
    require("./skills/" + file)(controller);
  });
- skillsディレクトリ配下にsampleが置いてあるので処理の説明をしながら動作確認をやっていきます
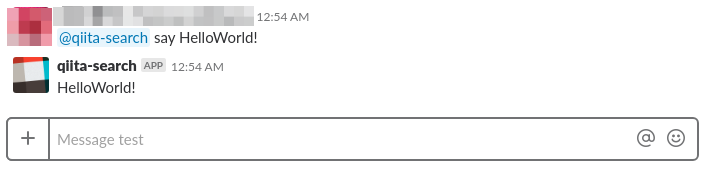
sample_hears.js
- botがメッセージを聞いて反応するサンプルコードです
- メンションかDMで
say hogehogeのようなメッセージがあるとオウム返しをしてくれます- echo serverですね
skills/sample_hears.js
    controller.hears(['^say (.*)','^say'], 'direct_message,direct_mention', function(bot, message) {
        if (message.match[1]) {

            if (!wordfilter.blacklisted(message.match[1])) {
                bot.reply(message, message.match[1]);
            } else {
                bot.reply(message, '_sigh_');
            }
        } else {
            bot.reply(message, 'I will repeat whatever you say.')
        }
    });
sample_conversations.js
- botと連続したメッセージのやりとりを行うサンプルコードです
- botの質問に答えると、その答えを利用したメッセージを返してくれます
skills/sample_conversations.js
    controller.hears(['color'], 'direct_message,direct_mention', function(bot, message) {

        bot.startConversation(message, function(err, convo) {
            convo.say('This is an example of using convo.ask with a single callback.');

            convo.ask('What is your favorite color?', function(response, convo) {

                convo.say('Cool, I like ' + response.text + ' too!');
                convo.next();
            });
        });
    });

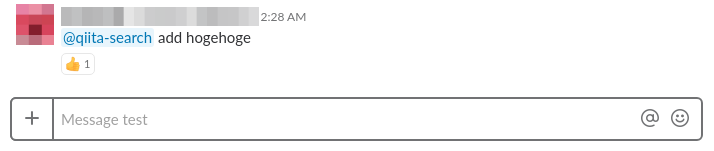
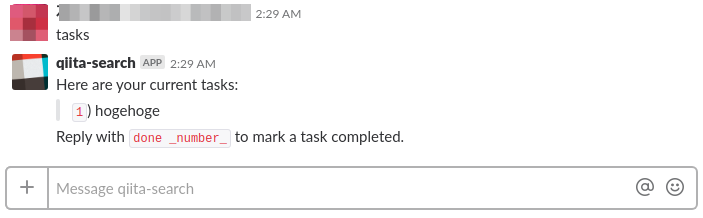
sample_taskbot.js
- タスクの追加と一覧表示を行うサンプルコードです
- つまりデータの管理を行うことができます
- jfs(JSON file store)でデータを保存しているっぽいです
skills/sample_taskbot.js
    controller.hears(['add (.*)'],'direct_message,direct_mention,mention', function(bot, message) {

        var newtask = message.match[1];
        controller.storage.users.get(message.user, function(err, user) {

            if (!user) {
                user = {};
                user.id = message.user;
                user.tasks = [];
            }

            user.tasks.push(newtask);

            controller.storage.users.save(user, function(err,saved) {

                if (err) {
                    bot.reply(message, 'I experienced an error adding your task: ' + err);
                } else {
                    bot.api.reactions.add({
                        name: 'thumbsup',
                        channel: message.channel,
                        timestamp: message.ts
                    });
                }

            });
        });

    });
skills/sample_taskbot.js
    controller.hears(['tasks','todo'], 'direct_message', function(bot, message) {

        // load user from storage...
        controller.storage.users.get(message.user, function(err, user) {

            // user object can contain arbitary keys. we will store tasks in .tasks
            if (!user || !user.tasks || user.tasks.length == 0) {
                bot.reply(message, 'There are no tasks on your list. Say `add _task_` to add something.');
            } else {

                var text = 'Here are your current tasks: \n' +
                    generateTaskList(user) +
                    'Reply with `done _number_` to mark a task completed.';

                bot.reply(message, text);

            }

        });

    });
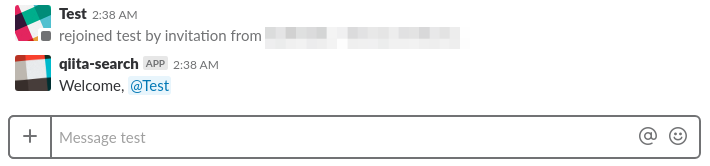
sample_events.js
- channel joinに反応するサンプルコードです
skills/sample_events.js
    controller.on('user_channel_join,user_group_join', function(bot, message) {

        bot.reply(message, 'Welcome, <@' + message.user + '>');

    });
- Botkitサンプルの説明はだいたい出来たと思うので一旦ここまでにします
- Qiitaの記事検索の話は次の記事でやっていきたいと思います
終わりに
- Glitch、Slack設定、Botkit説明で結構なボリュームになってしまいましたが、これまでの説明でサンプルファイルを参考にbotの開発がある程度できる状態になっていると思います
- 開発に必要なBotkitとSlackのドキュメントはこちらにあります
- 次回はスラッシュコマンドを使ったQiita検索を行う機能の開発を行う予定です
- ボタンを使ったインタラクティブ処理も行う予定なのでコードが少々複雑になってしまうと思います
追記: 実装編を書きました
[黒い画面不要] ブラウザだけで始めるSlack Bot開発(2) - 実装編]
https://qiita.com/ishihamat/items/53f1364e4b0d4453dfca