はじめに
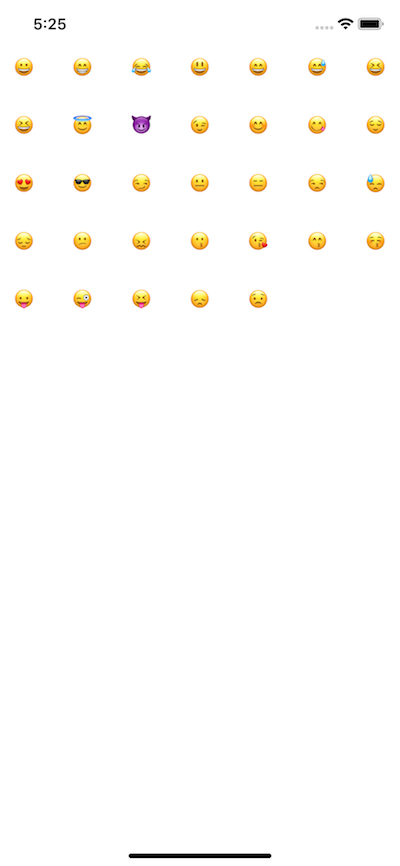
今回はUICollectionViewを使って、iOS版slackのリアクションスタンプを表示する画面、っぽい奴を作ります。
スタンプはUnicodeで文字として表示します(画像リソースとして扱うよりも良いかと)
開発環境
- macOS 10.13.6
- Xcode10
- Swift 4.2
Storyboard
まずはStoryboardでViewControllerにUICollectionViewを配置します。
Xcode10からオブジェクトの選択がナビゲーション上のボタンに変わったのは最初混乱しました。
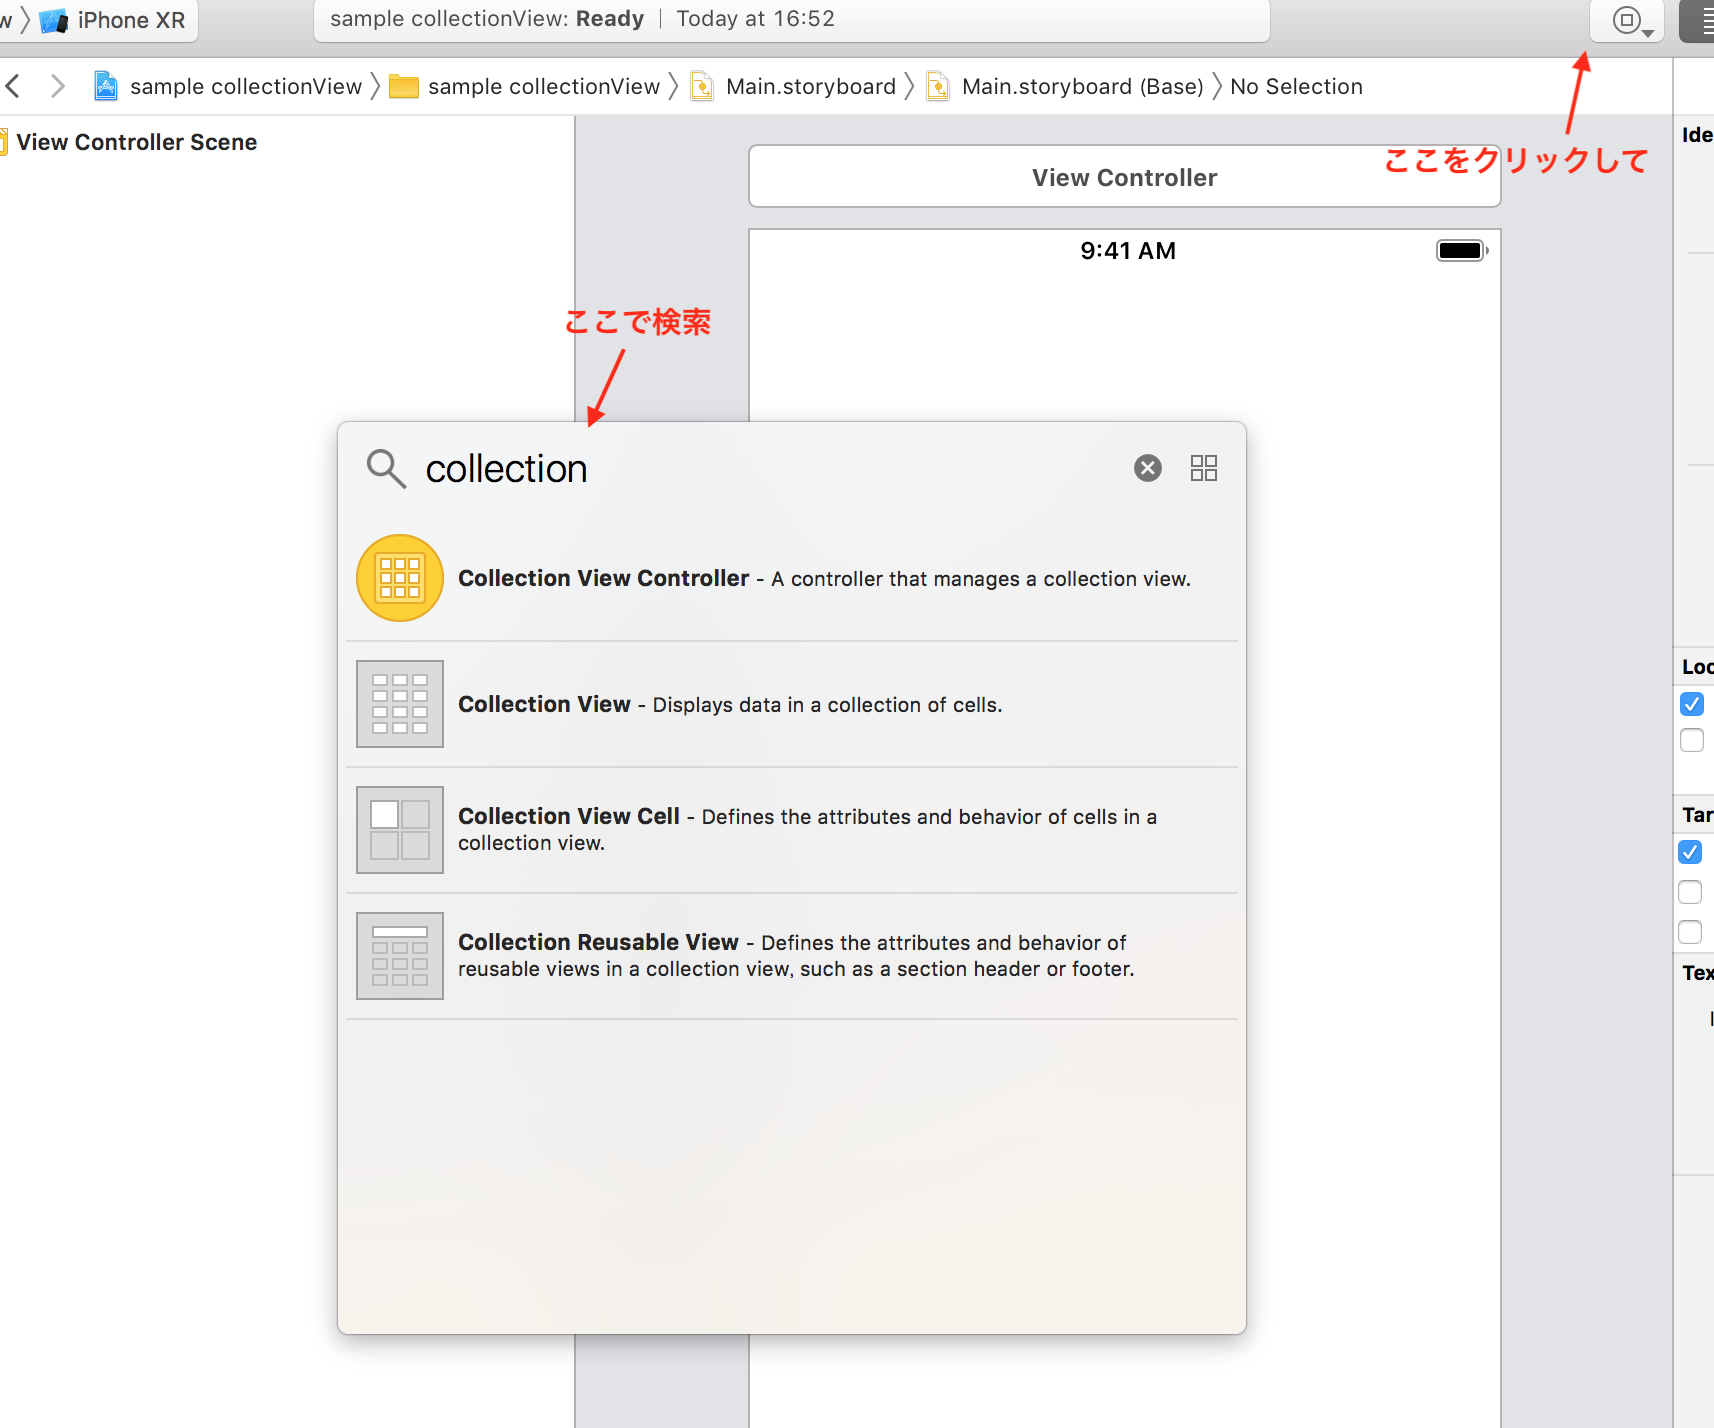
検索して
 CollectionViewを置いて
 制約を四方全て0にすればおkです。
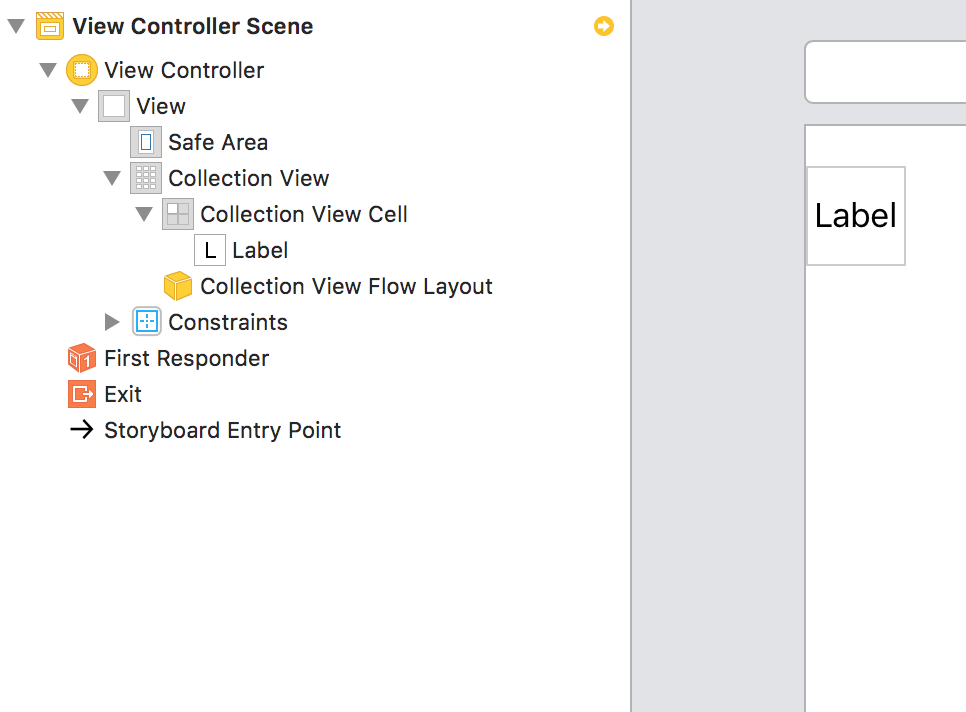
CollectionViewCell
xibでCellを作ってもいいのですが、スタンプを表示するだけなので今配置したCollectinoView内で完結させます。
CollectionViewの中にCellが内包されているので、そこにUILabelを配置します。
UILabelを置いて
 UILabelのtitleに😀を入力し、中央揃えにします。
 ViewControllerからCellのUILabelを参照するためにTagを指定します。
 ViewControllerで見るとこんな感じです。
 Cellを再利用するためにIDも設定しておきます。
 最後にViewControllerとUICollectionViewをアウトレット接続すればStoryboard上の作業は完了です!
ViewController
まずは表示するスタンプの定義と、CollectionViewのDelegate&DataSourceの紐付けを忘れないうちにやっておきましょう。
import UIKit

class ViewController: UIViewController {
    @IBOutlet weak var collectionView: UICollectionView!
    // スタンプの定義(Unicode)
    let stamps = ["1F600", "1F601", "1F602", "1F603", "1F604", "1F605", "1F606", "1F606",
 "1F607", "1F608", "1F609", "1F60A", "1F60B", "1F60C", "1F60D", "1F60E", "1F60F",
 "1F610", "1F611", "1F612", "1F613", "1F614", "1F615", "1F616", "1F617", "1F618",
 "1F619", "1F61A", "1F61B", "1F61C", "1F61D", "1F61E", "1F61F"]

    override func viewDidLoad() {
        super.viewDidLoad()
        // DelegateとDataSourceの紐付け
        self.collectionView.delegate = self
        self.collectionView.dataSource = self
    }
}
そしたらDelegateとDataSourceのプロトコルを実装します。
今回はタップして何かする的な処理は書かないので、Delegateは良しなにやってください。
extension ViewController: UICollectionViewDelegate {
    func collectionView(_ collectionView: UICollectionView, didSelectItemAt indexPath: IndexPath) {
        // スタンプが押された時の処理を書く
    }
}

extension ViewController: UICollectionViewDataSource {
    func collectionView(_ collectionView: UICollectionView, numberOfItemsInSection section: Int) -> Int {
        return self.stamps.count
    }

    func collectionView(_ collectionView: UICollectionView, cellForItemAt indexPath: IndexPath) -> UICollectionViewCell {
        let cell = collectionView.dequeueReusableCell(withReuseIdentifier: "cell", for: indexPath)
        if let label = cell.contentView.viewWithTag(1) as? UILabel {
            // CollectionViewCellのUILabelを取得し、絵文字をに代入する
            let text = UnicodeScalar(Int(self.stamps[indexPath.row], radix: 16)!)
            label.text = text?.description
        }

        return cell
    }
}
ViewController側の処理はこれだけです。
Unicodeの変換処理が入っているので若干のロジックが組み込まれていますが、UILabelに文字を表示するだけならさらにソースが減ります。
extension ViewController: UICollectionViewDataSource {
    func collectionView(_ collectionView: UICollectionView, numberOfItemsInSection section: Int) -> Int {
        return self.stamps.count
    }

    func collectionView(_ collectionView: UICollectionView, cellForItemAt indexPath: IndexPath) -> UICollectionViewCell {
        let cell = collectionView.dequeueReusableCell(withReuseIdentifier: "cell", for: indexPath)
        if let label = cell.contentView.viewWithTag(1) as? UILabel {
            // 文字列を代入
            label.text = "hogehoge"
        }

        return cell
    }
}
終わりに
以上でUICollectionViewを使って、iOS版slackのリアクションスタンプを表示する画面っぽい奴が作れました。UICollectionViewもCellのレイアウトを考えなければかなり簡単に使用することができます。
Cell間のマージンやら一行に表示する要素数やらは良しなにコントロールしてくれるのも魅力ですね。