この記事は富士通システムズウェブテクノロジーの社内技術コミュニティで、「イノベーション推進コミュニティ」
略して「いのべこ」が企画する、いのべこ夏休みアドベントカレンダー 2020の15日目の記事です。
本記事の掲載内容は私自身の見解であり、所属する組織を代表するものではありません。
ここまでお約束 ![]()
概要
Scala初心者が、小慣れているSpringBoot/GradleでScalaに入門してみた記事です。
なぜSpringBoot/Gradleか?
業務で使用した経験もあり、ある程度簡単に実装が始められるので。
PlayなどのScalaでよく使われるFWをつかって勉強していると、Playの勉強をしてるのか、Scalaの勉強をしてるのか・・・・つらくなってくるので、やっぱりみなれたFW/ビルドツールのほうがとっつきやすいだろうと。
手順!
大まかな手順はこんな感じです。
- Spring Initializrを使ってSpringBootのプロジェクトを作成する
- Scalaのプラグインを設定する
- src/{main,test}/scalaを作成する
- コーディング
Scalaのプラグインをgradleに設定してあげるところが肝です
コードなど
Spring Initializrを使ってSpringBootのプロジェクトを作成する
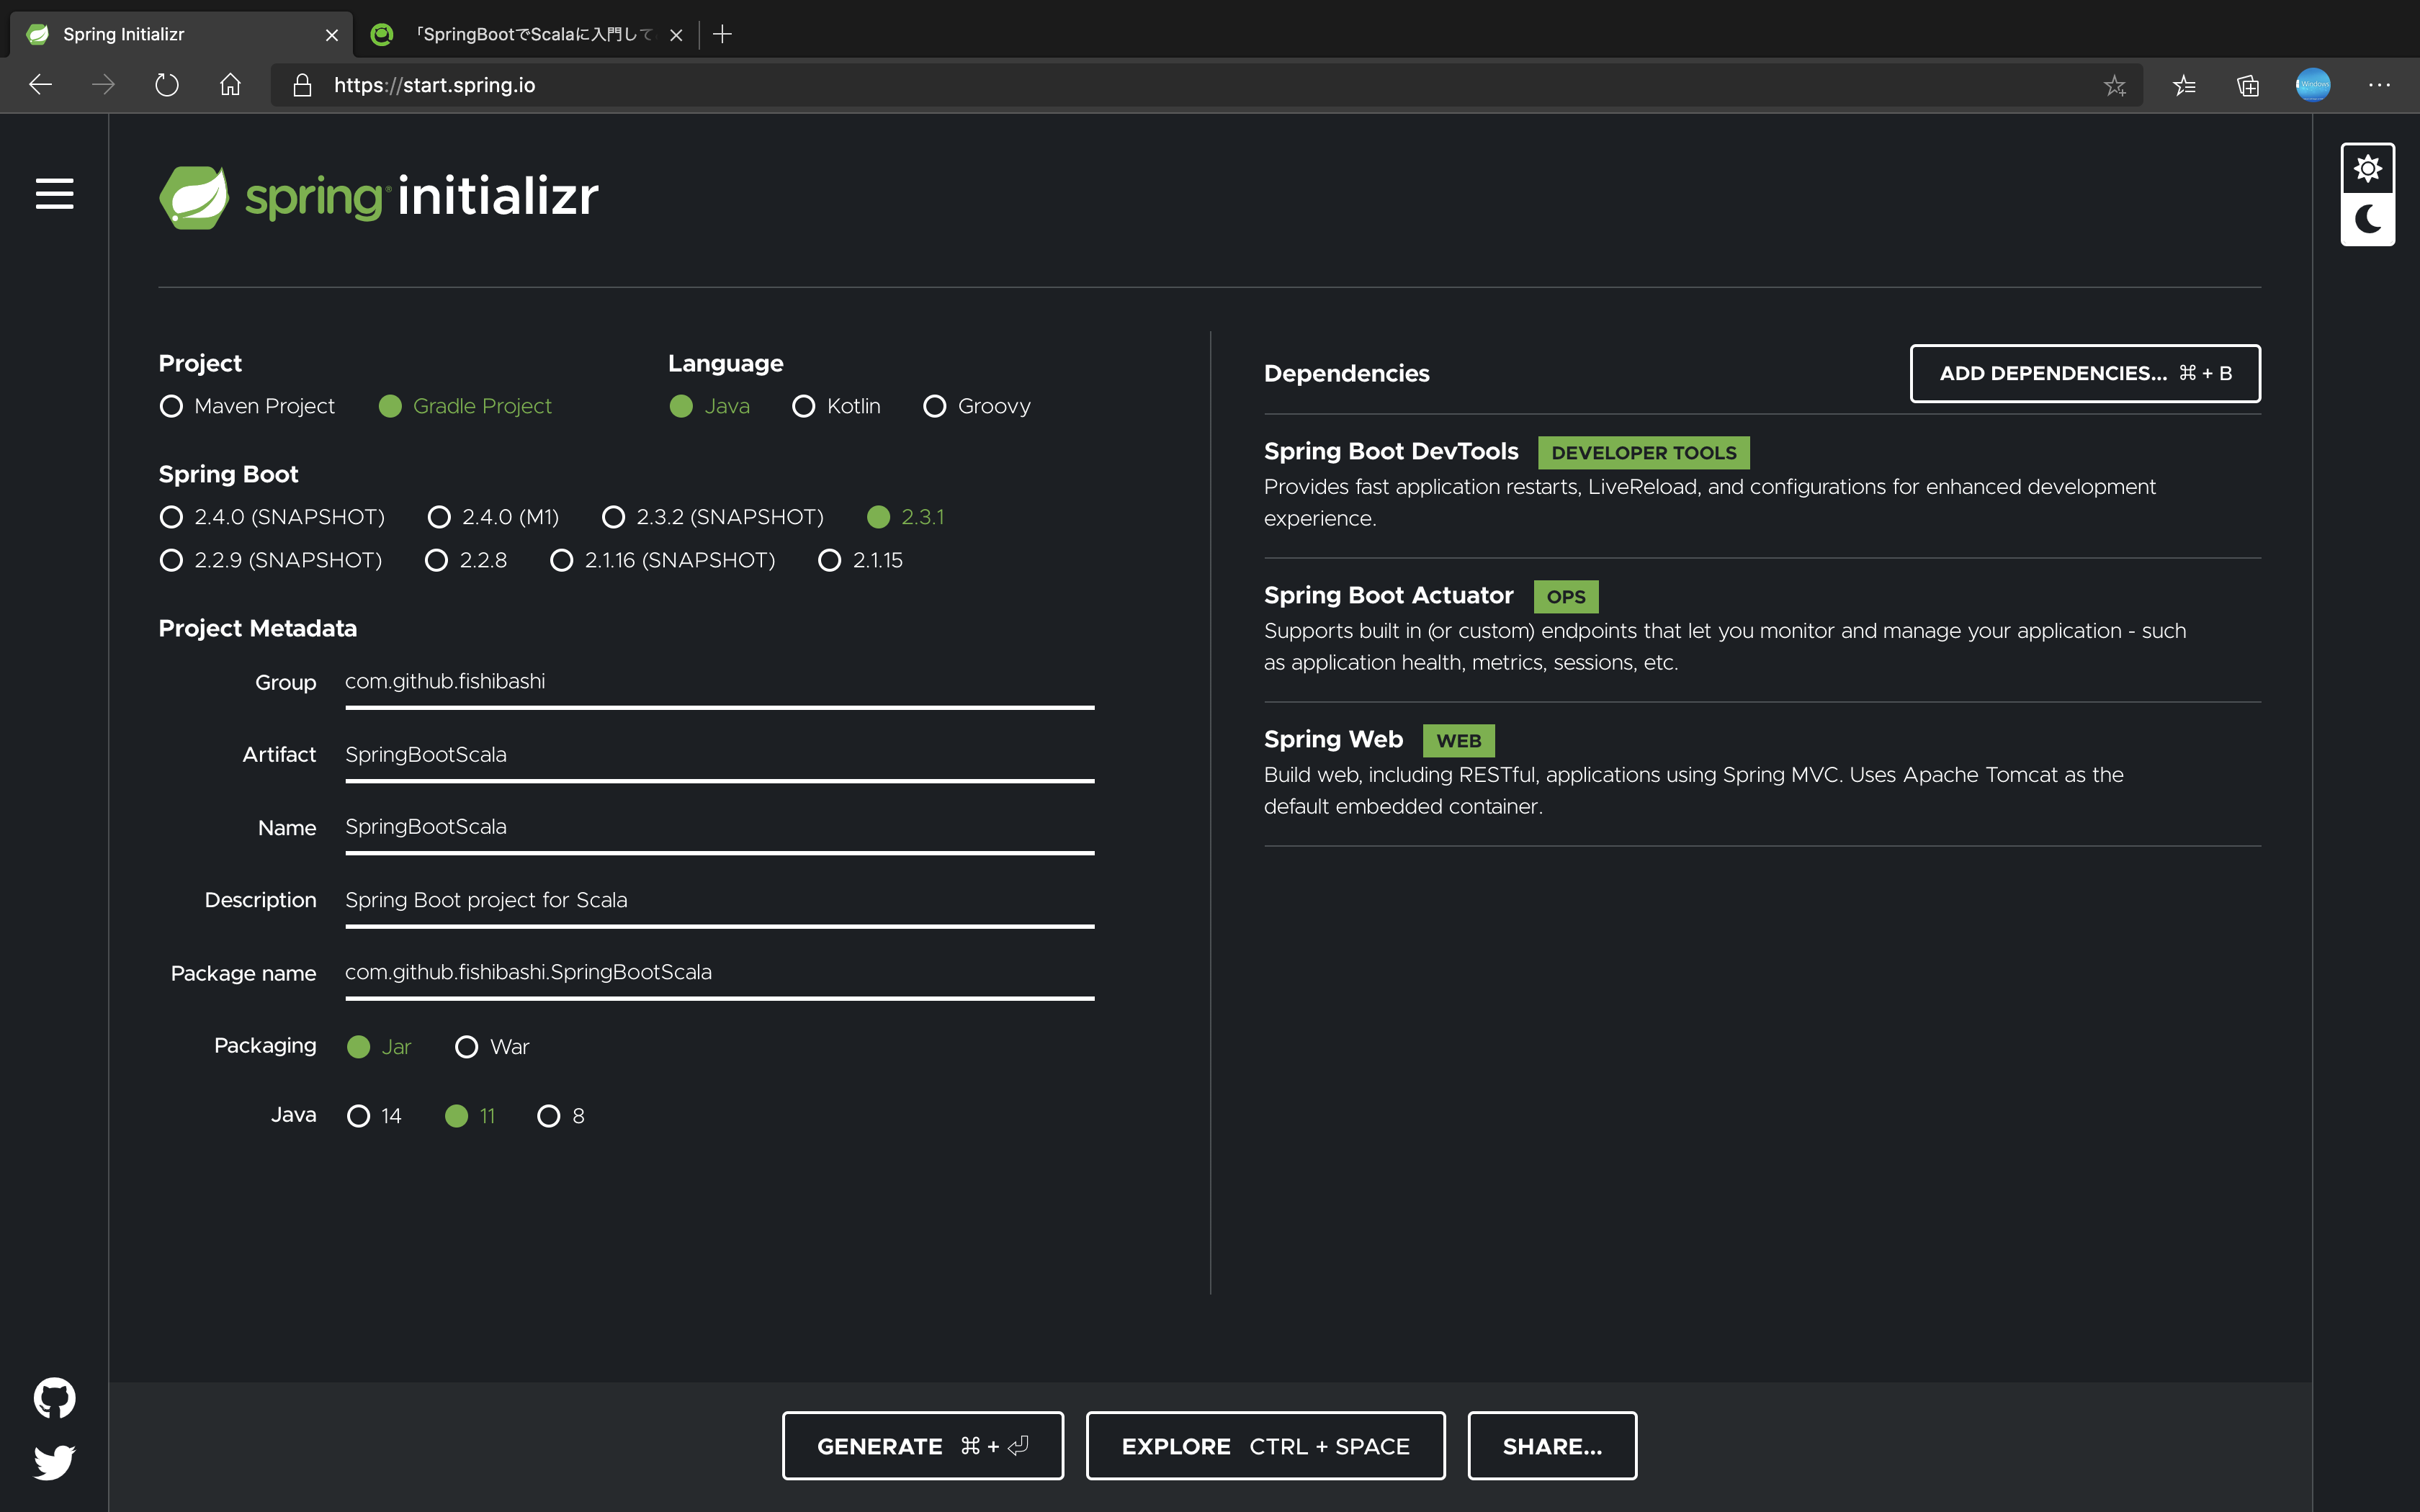
Spring Initializrでは、Dependencies/LanguageでScalaを選ぶことなどができますが、
Scalaを選択することができません。
そのため、一度Javaプロジェクトなりの言語で作成し、Scalaを使えるように設定してあげる必要があります。
Scalaプラグインを設定する
build.gradleを編集し、scalaプラグイン・ライブラリを追加します。
plugins {
	id 'scala'  // 追加
	id 'org.springframework.boot' version '2.3.1.RELEASE'
	id 'io.spring.dependency-management' version '1.0.9.RELEASE'
	id 'java'
	id 'idea'  // お好みで。エディタ系のプロジェクトファイルを出してくれるプラグイン。'eclipse'とかもある。
}
// 中略

dependencies {
  // scalaのライブラリを追加
  implementation "org.scala-lang:scala-library:2.13.3"
  implementation 'org.springframework.boot:spring-boot-starter-web'
  implementation 'org.springframework.boot:spring-boot-starter-actuator'
  developmentOnly 'org.springframework.boot:spring-boot-devtools'
  testImplementation('org.springframework.boot:spring-boot-starter-test') {
    exclude group: 'org.junit.vintage', module: 'junit-vintage-engine'
  }
  compile group: 'org.hibernate', name: 'hibernate-validator', version: '6.1.5.Final'
}
[Tips] REPLをGradleでも使えるようにする方法
sbtを使用していると使えるREPL(Read Eval Print Loop)をgradleからも使えるようにしたいので、
build.gradleに設定を追加してあげます。
ポイントは
- scalaのコンパイラをimplementationに追加する
- REPLタスクを追加する
です
dependencies {
  // scalaのライブラリを追加
  implementation "org.scala-lang:scala-library:2.13.3"
  implementation "org.scala-lang:scala-compiler:2.13.3" // ←追加
  // 省略・・・
}

// repl用のタスクを追加
task repl(type: JavaExec) {
    main = 'scala.tools.nsc.MainGenericRunner'
    classpath = sourceSets.main.runtimeClasspath
    standardInput System.in
    args '-usejavacp'
}
以上のように追加すると、gradle repl --console plain --no-daemonコマンドを実行することで、REPLが使えるようになります。
--console plainというオプションですが、つけないとgradle自体の処理の進捗バーとかが邪魔で(コンソールを勝手にアップデートされて)REPLが使えませんので、ご注意ください。
というかこのオプション、CIとかでgradle buildするときも便利なのでは・・・(変な進捗バーとかでないし)
注意点
このままbuildすると、jarの中にscala-compilerとその依存関係が取り込まれてしまうため、jarがかなりFatになります。
(体感15MBぐらい。。。)
なので、ローカルで作業するとき以外はdependenciesからscala-compilerを外しておく(コメントアウトしておく)ほうがいいようです。
implementationをやめてdevelopmentOnlyを指定すると、jarにも含まれなくなるようですが、副作用がいまいちわかりません(SpringDevToolとかと同じ依存関係のタイプ)
この辺の情報は公式ページを読めば詳しく書かれているのだろうか・・・
src/{main,test}/scalaを作成する
javaのソースコードとはお別れし、scala用のディレクトリを作成してあげてください。
あとはいい感じにmainクラスとかを作ってあげれば動きます。(急に丸投げ)
SpringBoot&ScalaでAPIを作ってみる。
とりあえずSpringBootでAPIとして使えるようにした状態。
package com.github.fishibashi.SpringBootScala

import org.springframework.boot.SpringApplication
import org.springframework.boot.autoconfigure.SpringBootApplication

@SpringBootApplication
class SpringBootScala {}

object SpringBootScala {
  def main(args: Array[String]): Unit = SpringApplication.run(classOf[SpringBootScala], args:_ *)
}
メッセージをEchoしてくれるだけのControllerも書いてみる
package com.github.fishibashi.SpringBootScala.controller

import org.springframework.web.bind.annotation.{RequestMapping, RequestMethod, RequestParam, RestController}

@RestController
@RequestMapping(Array("/echo"))
class EchoController {
  @RequestMapping(method = Array(RequestMethod.GET))
  def echo(@RequestParam("message") message: String): String = message + "\n"
}
非常にCoolですね(?)。
Javaで書くとこんな感じでしょうか。
// SpringBootScala.java
package com.github.fishibashi.SpringBootScala;

import org.springframework.boot.SpringApplication;
import org.springframework.boot.autoconfigure.SpringBootApplication;

@SpringBootApplication
class SpringBootScala {
  static void main(String args[]) {
    SpringApplication.run(SpringBootScala.class, args);
  }
}

// EchoController
package com.github.fishibashi.SpringBootScala.controller;

import org.springframework.web.bind.annotation.RequestMapping;
import org.springframework.web.bind.annotation.RequestMethod;
import org.springframework.web.bind.annotation.RequestParam;
import org.springframework.web.bind.annotation.RestController;

@RestController
@RequestMapping("/echo")
class EchoController {
  @RequestMapping(method = RequestMethod.GET)
  public String echo(@RequestParam("message") String message) {
    return message + "\n";
  }
}
DI
SpringBootをやるならDIも試してみたいですよね?
先ほどの処理を、Service化します。
Javaの場合はinterfaceなどでServiceを定義し、テスト時にMock化したりしますが、
Scalaの場合はtraitで定義します(正しいやり方がわかりませんが、これでとりあえずできました)
package com.github.fishibashi.SpringBootScala.service

trait EchoService {
  def echo(message: String): String
}
続いては、EchoServiceの実装クラスを作ります
package com.github.fishibashi.SpringBootScala.service

import org.springframework.stereotype.Component

@Component
class DefaultEchoService extends EchoService {
  @Override
  def echo(message: String): String = message + "\n\n"
}
最後に、EchoControllerのコンストラクタで、EchoServiceをインジェクションし(コンストラクタインジェクション)、
呼び出します。
@RestController
@RequestMapping(Array("/echo"))
class EchoController(val service: EchoService) {
  @RequestMapping(method = Array(RequestMethod.GET))
  def echo(@RequestParam("message") message: String): String = service.echo(message)
}
無事、DIができました。
% curl "http://localhost:8080/echo?message=Hello,World"
Hello,World

% # DefaultEchoServiceでは、改行を2つ付けて文字列を返却してくれる。
traitには、実装を持たせることもできます(Java8以降のinterface defaultと違い、フィールドが定義できる。使えるかどうかは未確認)。
なので、EchoServiceに実装を追加してみましょう。
trait EchoService {
  def echo(message: String): String
  // 文字列をreplaceして返却するメソッドを追加。
  def replace(message: String, subStr: String, newSubStr: String): String = message.split("").map(s => if (s == subStr) newSubStr else s).mkString
}
このまま、Controllerでreplaceメソッドを呼ぶとどうなるか・・・?
@RestController
@RequestMapping(Array("/echo"))
class EchoController(val service: EchoService) {
  @RequestMapping(method = Array(RequestMethod.GET))
  def echo(@RequestParam("message") message: String): String = service.echo(message)

  // messageのsubstrをnewsubstrにreplaceする
  @RequestMapping(path = Array("replace"), method = Array(RequestMethod.GET))
  def replace(@RequestParam("message") message: String, @RequestParam("substr") subStr: String, @RequestParam("newsubstr") newSubStr: String): String = service.replace(message, subStr, newSubStr)
}
curl "http://localhost:8080/echo/replace?message=Hello,World&substr=e&newsubstr=a"
Hallo,World%
無事、eがreplaceされてHalloになりましたね(改行を入れてなかったので、改行されませんでしたが。。。)
もちろん、処理をOverrideしたいときは、実装クラスでOverrideしてあげればいいだけです。
@Component
class DefaultEchoService extends EchoService {
  @Override
  def echo(message: String): String = message + "\n\n"

  // superの処理結果に、"\n"を足してます
  @Override
  override def replace(message: String, subStr: String, newSubStr: String): String = super.replace(message, subStr, newSubStr) + "\n"
}
無事、改行されて見やすくなりましたね。
 % curl "http://localhost:8080/echo/replace?message=Hello,World&substr=e&newsubstr=a"
 Hallo,World
 %
ScalaとJavaの相互運用
ScalaとJavaは互換性があるので、1つのプロジェクト内にJavaとScalaを共存させることもできそうです。
(普段そんなことが必要になることがあるのかどうかは置いといて)
今回は、Springで@interfaceを定義する方法がわからなかったので(勉強不足)、
CustomValidatorをJavaで作成し、Scalaで利用したいと思います。
まず、先ほど消したjavaディレクトリ を復活させます。
% mkdir src/{main,test}/java/.... # パッケージも
いつも通りValidatorに必要なものを準備していきます。
今回は、RequestParamで取得した文字列に対して、文字列長をチェックするアノテーションを作成します。
import javax.validation.Constraint;
import javax.validation.Payload;
import java.lang.annotation.*;

@Target(ElementType.PARAMETER) // 引数に対して動作するアノテーション
@Retention(RetentionPolicy.RUNTIME) // 実行時に有効
@Constraint(validatedBy = {LengthConstraint.class}) // Validatorの実装クラス
public @interface Length {
  // message, groups, payloadは実装必須なので適当に実装しておきます
  String message() default "length error";
  Class<?>[] groups() default {};
  Class<? extends Payload>[] payload() default {};
  // max,minを指定できるようにして、規定値も与えます
  int max() default 65535;
  int min() default 0;
}
先ほどのアノテーションに紐づくValidationの実装です
import org.springframework.stereotype.Component;

import javax.validation.ConstraintValidator;
import javax.validation.ConstraintValidatorContext;

@Component
public class LengthConstraint implements ConstraintValidator<Length, String> {
  private int max;
  private int min;
  // 引数にLengthを受け取り、Validatorを初期化します
  @Override
  public void initialize(Length constraintAnnotation) {
    this.min = constraintAnnotation.min();
    this.max = constraintAnnotation.max();
  }

  @Override
  public boolean isValid(String value, ConstraintValidatorContext context) {
    // この結果でValidationの結果が決まります
    return value.length() >= min && value.length() <= max;
  }
}
あとは、Controllerに組み込むだけです。
  @RequestMapping(path = Array("replace"), method = Array(RequestMethod.GET))
  def replace(@Valid @RequestParam("message") @NotNull @NotBlank message: String,
              @Valid @RequestParam("substr") @NonNull @Length(max = 1, min = 1) subStr: String,
              @Valid @RequestParam("newsubstr") @NonNull @Length(max = 1, min = 1) newSubStr: String): String = service.replace(message, subStr, newSubStr)
最後に
非常に薄っぺらい内容でしたが、目的のSpringBootを使ってScalaを学ぶための環境を手に入れられそうです。
DIのところでInterfaceの代わりにtraitを定義したりしてましたが、使い方があってるのか若干不安です。
生成されるclassの構造とかを逆コンパイルして確認してみたいですねー
あと、@interfaceはどう定義するのだろうか。。。
Javaとの違いについても、今後学んでいく必要がありそうです。