導入
こちらの記事で紹介されていますが、Databricksのノートブックについて、新しいUIが試せるようになっています。
新しいセルの見た目はこんな感じ。

新UIはDatabricksのアシスタント機能と強く融合が図られていると感じました。
今回の新UIでアシスタントを使ったコメント生成の体験が非常によくなったと感じたので、やった内容の記録を以下に残しておきます。
コメント付けをやってみる
例とUI解説
例えば、以下のようなコードを書いたとします。
from langchain.prompts import ChatPromptTemplate
from langchain.prompts.chat import (
    SystemMessagePromptTemplate,
    AIMessagePromptTemplate,
    HumanMessagePromptTemplate,
)
from langchain.schema.output_parser import StrOutputParser
from langchain.schema.runnable import RunnablePassthrough, RunnableLambda
from exllamav2_chat import ChatExllamaV2Model

def create_llm_chain(model_id:str):

    chat_model = ChatExllamaV2Model.from_model_dir(
        model_id,
        system_message_template="[INST] <<SYS>>\n{}\n<</SYS>>",
        human_message_template="{}[/INST]",
        ai_message_template="{}",
        temperature=0,
        max_new_tokens=1024,
        repetition_penalty=1.25,
        tokenizer_force_json=True,
    )

    prompt = ChatPromptTemplate.from_messages(
        [
            SystemMessagePromptTemplate.from_template("You are a helpful assitant."),
            HumanMessagePromptTemplate.from_template("{query}"),
        ]
    )

    chain = {"query": RunnablePassthrough()} | prompt | chat_model | StrOutputParser()

    return chain
一切コメントを書いていないクソコードです。
これにdocstringの追加やコメント付けをしてみます。
セル上でCtrl+I(Windowsの場合。MacだとCmd+Iかな)を押すか、セル右上のアシスタント切り替えボタンを押すと、アシスタントへの入力フィードが表示されます。


ここでアシスタントにコメント付けなどのコード修正指示を入力できます。
またフィールド内で/を入力すると、現時点で以下の3種類のコマンドを選ぶこともできます。

では、一連の操作を実行してみます。
docstringを追加する
まずは、アシスタントに「関数にdocstringを追加して」と入力して指示します。
すると以下のようにcreate_llm_chain関数にdocstringを追加する変更候補を出してくれます。
ここで承認ボタンを押すと変更が反映されます。

反映後は以下のようになりました。
from langchain.prompts import ChatPromptTemplate
from langchain.prompts.chat import (
    SystemMessagePromptTemplate,
    AIMessagePromptTemplate,
    HumanMessagePromptTemplate,
)
from langchain.schema.output_parser import StrOutputParser
from langchain.schema.runnable import RunnablePassthrough, RunnableLambda
from exllamav2_chat import ChatExllamaV2Model

def create_llm_chain(model_id:str):
    """
    This function creates a chatbot model using the exllama chat V2 model from the input directory.

    Args:
    model_id (str): The id of the model

    Returns:
    Object: A chained object of the following: `RunnablePassthrough` object, `ChatPromptTemplate` object, `ChatExllamaV2Model` object and `StrOutputParser` object respectively.
    """
    chat_model = ChatExllamaV2Model.from_model_dir(
        model_id,
        system_message_template="[INST] <<SYS>>\n{}\n<</SYS>>",
        human_message_template="{}[/INST]",
        ai_message_template="{}",
        temperature=0,
        max_new_tokens=1024,
        repetition_penalty=1.25,
        tokenizer_force_json=True,
    )


    prompt = ChatPromptTemplate.from_messages(
        [
            SystemMessagePromptTemplate.from_template("You are a helpful assitant."),
            HumanMessagePromptTemplate.from_template("{query}"),
        ]
    )

    chain = {"query": RunnablePassthrough()} | prompt | chat_model | StrOutputParser()

    return chain
コメントを追加する
docstringだけだと説明不足に感じるので、コードにコメントを付与してみます。
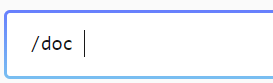
アシスタントの入力フィールドに/docを入れて実行。
同様に変更候補画面が出るので、承諾ボタンで反映させます。
反映後のコードは以下のようになりました。
# Importing necessary library to create chatbot model
from langchain.prompts import ChatPromptTemplate
# Importing templates for human, system and ai messages from chat prompt
from langchain.prompts.chat import (
    SystemMessagePromptTemplate,
    AIMessagePromptTemplate,
    HumanMessagePromptTemplate,
)
# Importing output parser to convert the output from model to string
from langchain.schema.output_parser import StrOutputParser
# Importing runnable passthrough and lambda to use in chatbot chain
from langchain.schema.runnable import RunnablePassthrough, RunnableLambda
# Importing exllama v2 model from exllamav2_chat module
from exllamav2_chat import ChatExllamaV2Model

# Defining a function to create chatbot model using exllama v2 model
def create_llm_chain(model_id:str):
    """
    This function creates a chatbot model using the exllama chat V2 model from the input directory.

    Args:
    model_id (str): The id of the model

    Returns:
    Object: A chained object of the following: `RunnablePassthrough` object, `ChatPromptTemplate` object, `ChatExllamaV2Model` object and `StrOutputParser` object respectively.
    """
    # Setting up the chat model by defining its templates and settings
    chat_model = ChatExllamaV2Model.from_model_dir(
        model_id,
        system_message_template="[INST] <<SYS>>\n{}\n<</SYS>>",
        human_message_template="{}[/INST]",
        ai_message_template="{}",
        temperature=0,
        max_new_tokens=1024,
        repetition_penalty=1.25,
        tokenizer_force_json=True,
    )

    # Setting up the initial prompt templates
    prompt = ChatPromptTemplate.from_messages(
        [
            SystemMessagePromptTemplate.from_template("You are a helpful assitant."),
            HumanMessagePromptTemplate.from_template("{query}"),
        ]
    )

    # Chaining the passthrough function, prompt template, chat model, output parser together
    chain = {"query": RunnablePassthrough()} | prompt | chat_model | StrOutputParser()

    # Return the complete model chain object
    return chain
少し冗長ですが、一旦このままで良しとします。
コメントを日本語にする
英語のコメントだと、我々Japanese Peopleにはちょっとハードルが高いので、コメントを日本語にします。
アシスタントには「英語で記載されているコメントを日本語に変換してください。」と指示・実行しました。
変換後のコードは以下のようになります。
# 必要なライブラリのインポート
from langchain.prompts import ChatPromptTemplate
# チャットプロンプトから人間、システム、AIのテンプレートをインポート
from langchain.prompts.chat import (
    SystemMessagePromptTemplate,
    AIMessagePromptTemplate,
    HumanMessagePromptTemplate,
)
# モデルの出力を文字列に変換する出力パーサーをインポート
from langchain.schema.output_parser import StrOutputParser
# チャットボットチェーンで使用するためのRunnablePassthroughとランダムラムダをインポート
from langchain.schema.runnable import RunnablePassthrough, RunnableLambda
# exllama v2モデルをexllamav2_chatモジュールからインポート
from exllamav2_chat import ChatExllamaV2Model

# exllama v2モデルを使用してチャットボットモデルを作成する関数を定義する
def create_llm_chain(model_id:str):
    """
    この関数は、入力ディレクトリから exllama chat V2 モデルを使用してチャットボットモデルを作成します

    Args:
    model_id (str): モデルのID

    Returns:
    Object: `RunnablePassthrough`オブジェクト、`ChatPromptTemplate`オブジェクト、`ChatExllamaV2Model`オブジェクト、`StrOutputParser`オブジェクトを順番に連結したオブジェクトを返します。
    """
    # モデルのテンプレートと設定を定義してチャットモデルをセットアップ
    chat_model = ChatExllamaV2Model.from_model_dir(
        model_id,
        system_message_template="[INST] <<SYS>>\n{}\n<</SYS>>",
        human_message_template="{}[/INST]",
        ai_message_template="{}",
        temperature=0,
        max_new_tokens=1024,
        repetition_penalty=1.25,
        tokenizer_force_json=True,
    )

    # 初期プロンプトテンプレートをセットアップ
    prompt = ChatPromptTemplate.from_messages(
        [
            SystemMessagePromptTemplate.from_template("You are a helpful assitant."),
            HumanMessagePromptTemplate.from_template("{query}"),
        ]
    )

    # パススルー関数、プロンプトテンプレート、チャットモデル、出力パーサーを連鎖させる
    chain = {"query": RunnablePassthrough()} | prompt | chat_model | StrOutputParser()

    # 完全なモデルチェーンオブジェクトを返す
    return chain
というわけで日本語になりました。
あとは冗長な部分を削ったり、微修正すれば完成です。
まとめ
新セルUI上でのアシスタント機能を使ったコメント付けでした。
冗長なコメント部の削除とかもやらせてみたのですが、こちらはあまりいい結果になりませんでした。
プロンプトのテクニックが必要かな。
とはいえ、効率よくコメント付けができるのはかなり有用な機能です。
しかも、現状では追加コスト無くこれが利用できるのでDatabricks社は何を考えているんだろうユーザとしては有難い限りです。
今回のような機能を皮切りに、開発体験がどんどん良くなってきていると感じます。
これからの進化も非常に期待しています。