今週もAI関連いろいろありましたね。キャッチアップが大変でとても楽しいです。
今回は以下の精神的続編?です。
2025/4/16 エージェントクラスMCPChatAgentを修正しました。
predict_streamの追加やplaywrightのインストールを遅延実行するように変更しています。
はじめに
Model Context Protocol(MCP)の普及が著しいです。
こちらでもDatabricksのGenie Conversation APIを用いたMCPサーバを作られたりと、
LLMを通信するための様々なMCPサーバが作られています。
GithubでもAwesomeシリーズとしてまとめられていますね。
そんなMCPサーバをDatabricks/Mlflowのエージェントからも利用できると良いなと思い、Databricks上でMCPサーバを利用するエージェントを作成してMosaic AI Model Serving上にデプロイまでを試してみました。
今回は例としてPlaywright-MCPと連携してみます。
応用すれば他のMCPサーバとの連携も可能です。少なくともfastmcpで作られたpython関連は容易に連携できると思います。
ついで?に、最近RCが公開されたMLflow 3.0も部分的に使ってみます。
ただし、本題ではないため解説はほとんどしていません。
詳細は以下の記事がよく解説されていると思います!
実行はDatabricks on AWS、ノートブックはDBR16.3MLの"専用モード"クラスタを利用しました。
Step1. MCPを使うエージェントを定義
MCPサーバをツールとして利用するエージェントを定義します。
まずはノートブックを作成し、必要なパッケージをインストール。
%pip install langchain-mcp-adapters langgraph databricks-langchain databricks-agents uv rich nest-asyncio playwright 'nodejs-bin[cmd]'
%pip install --upgrade 'mlflow>=3.0.0rc0' --pre

%restart_python
インストールしたパッケージの一部解説ですが、今回MCPサーバと連携するためのモジュールとしてLangChain MCP Adaptersを利用しました。
これはMCPをLangChainやLangGraphで使いやすくするための軽量ラッパーです。
他に、playwrightパッケージもインストールしています。これはPlaywrightを利用するための依存関係をインストールするために利用しています。
また、MLflow 3.0のリリース候補版をインストールしました。
MLflow 2.xに比べてモデルに対するアーキテクチャが変更になっており、モデルロギングも一部変更になっています。
詳しくは以下の公式DocもしくはDatabricksのDocを確認ください。
次に、nest_asyncioパッケージを使って、async.ioをノートブック内で利用可能にします。
import nest_asyncio

nest_asyncio.apply()
では、MCPを使うエージェントを定義します。
MLflowのChatAgentインターフェースを備えたカスタムクラスとして定義しています。
%%writefile playwright_mcp_agent.py

from typing import Literal, Generator, List, Optional, Any, Dict, Mapping, Union
import uuid
import subprocess
import asyncio
import sys

import mlflow
from databricks_langchain import ChatDatabricks
from langgraph.prebuilt import create_react_agent

from langchain_core.messages import BaseMessage, convert_to_openai_messages
from mlflow.pyfunc import ChatAgent
from mlflow.types.agent import (
    ChatAgentChunk,
    ChatAgentMessage,
    ChatAgentResponse,
    ChatContext,
)
from mcp import ClientSession, StdioServerParameters
from mcp.client.stdio import stdio_client
from langchain_mcp_adapters.tools import load_mcp_tools
from playwright._impl._driver import compute_driver_executable, get_driver_env
from functools import reduce

# Tracingの有効化
mlflow.langchain.autolog()


def install_playwright():
    """Playwrightの依存関係をインストールします。"""

    # 依存関連のインストール
    args = ["npx", "playwright", "install-deps"]
    proc = subprocess.run(args, capture_output=True, text=True, check=True)

    # ブラウザのインストール
    args = ["npx", "playwright", "install"]
    proc = subprocess.run(args, capture_output=True, text=True, check=True)

    return proc.returncode == 0

class MCPChatAgent(ChatAgent):
    def __init__(self, model, playwright_installed: bool = False):
        """LangGraphのグラフを指定して初期化"""
        self.model = model
        self.playwright_installed = playwright_installed

    def predict(
        self,
        messages: list[ChatAgentMessage],
        context: Optional[ChatContext] = None,
        custom_inputs: Optional[dict[str, Any]] = None,
    ) -> ChatAgentResponse:
        """
        指定されたチャットメッセージリストを使用して回答を生成する

        Args:
            messages (list[ChatAgentMessage]): チャットエージェントメッセージのリスト。
            context (Optional[ChatContext]): オプションのチャットコンテキスト。
            custom_inputs (Optional[dict[str, Any]]): カスタム入力のオプション辞書。

        Returns:
            ChatAgentResponse: 予測結果を含むChatAgentResponseオブジェクト。
        """

        gen_messages = []
        usages = []
        for c in self.predict_stream(messages, context, custom_inputs):
            gen_messages.append(c.delta)
            usages.append(c.usage.model_dump(exclude_none=True))

        return ChatAgentResponse(messages=gen_messages, usage=self._sum_usages(usages))

    def predict_stream(
        self,
        messages: list[ChatAgentMessage],
        context: Optional[ChatContext] = None,
        custom_inputs: Optional[dict[str, Any]] = None,
    ) -> Generator[ChatAgentChunk, None, None]:
        """
        指定されたチャットメッセージリストを使用して、非同期的にエージェントを呼び出し、結果を取得します。

        Args:
            messages (list[ChatAgentMessage]): チャットエージェントメッセージのリスト。
            context (Optional[ChatContext]): オプションのチャットコンテキスト。
            custom_inputs (Optional[dict[str, Any]]): カスタム入力のオプション辞書。

        Returns:
            ChatAgentResponse: 予測結果を含むChatAgentResponseオブジェクト。
        """

        async def stream_with_mcp_tools(model, server_params, messages: list):
            """MCP Serverと通信して回答を取得する"""

            async with stdio_client(server_params, errlog=None) as (read, write):
                async with ClientSession(read, write) as session:
                    # 接続を初期化
                    await session.initialize()

                    # ツールを取得
                    tools = await load_mcp_tools(session)

                    # エージェントを作成して実行
                    agent = create_react_agent(model, tools)
                    async for event in agent.astream(
                        {"messages": messages}, stream_mode="updates"
                    ):
                        for v in event.values():
                            messages = v.get("messages", [])
                            for msg in messages:
                                yield ChatAgentChunk(
                                    delta=self._convert_lc_message_to_chat_message(msg),
                                    usage=msg.response_metadata.get("usage", {}),
                                )

        # Lazy install playwright
        if not self.playwright_installed:
            self.playwright_installed = install_playwright()

        server_params = StdioServerParameters(
            command="npx",
            args=["@playwright/mcp@latest", "--headless"],
        )

        streamer = stream_with_mcp_tools(
            self.model,
            server_params,
            self._convert_messages_to_dict(messages),
        )

        loop = asyncio.get_event_loop()

        while True:
            try:
                yield loop.run_until_complete(streamer.__anext__())

            except StopAsyncIteration:
                break
            except Exception as e:
                # for "Attempted to exit cancel scope in a different task than it was entered in" Exception.
                break

    def _convert_lc_message_to_chat_message(
        self, lc_message: BaseMessage
    ) -> ChatAgentMessage:
        """LangChainメッセージをChatAgentMessageに変換する。"""
        msg = convert_to_openai_messages(lc_message)
        if not "id" in msg:
            msg.update({"id": str(uuid.uuid4())})

        return ChatAgentMessage(**msg)

    def _sum_usages(self, usages: list[dict]) -> dict:
        """使用量のリストから使用量を合計する。"""

        def add_usages(a: dict, b: dict) -> dict:
            pt = "prompt_tokens"
            ct = "completion_tokens"
            tt = "total_tokens"
            return {
                pt: a.get(pt, 0) + b.get(pt, 0),
                ct: a.get(ct, 0) + b.get(ct, 0),
                tt: a.get(tt, 0) + b.get(tt, 0),
            }

        return reduce(add_usages, usages)

# DatabricksネイティブのClaude 3.7 SonnetをLLMとして利用
LLM_ENDPOINT_NAME = "databricks-claude-3-7-sonnet"
llm = ChatDatabricks(model=LLM_ENDPOINT_NAME)

# エージェントを作成
AGENT = MCPChatAgent(model=llm, playwright_installed=False)
mlflow.models.set_model(AGENT)
このコードを簡単に解説すると、MCPとの連携部分はinvoke_with_mcp_tools関数に集約しています。
ここでLangChain MCP Adaptersを利用してMCPサーバと通信し、MCPのToolをLangChainのToolに変換しています。
その後、LangGraphのReActエージェントを作成して実行、という流れです。
ちなみにPlaywright-MCPで使用するブラウザをfirefoxにしていますが、深い意味はありません。chromiumでも問題ないと思います。 Chromeにしました。
なお、 2025/4/16 predict_streamの実装は省略しました。コードをシンプルにしたかったので。predict_streamの実装を追加しました。
MLflow ChatAentの実装詳細については、以下のDocを参照ください。
個人的ハマりポイントその1。
invoke_with_mcp_tools内でstdio_client関数を呼び出していますが、errlogパラメータにsys.stderr以外を指定するようにしてください。今回はNoneを設定しています。(パラメータ指定しない場合、デフォルトでsys.stderrが設定されます)
sys.stderrを設定した場合、Mosaic AI Model Servingにデプロイ後の推論でエラーになります。
エラーの原因は想像がつくのですが、詳細はわからないので解説は省略します。。。
Step2. エージェントをロギング
作成したエージェントをMLflow上にロギング(保管)します。
log_modelのパラメータ設定はMLflow 3.0方式です。
MLflow 3.0はartifact_pathの指定が非推奨になったりと一部変更があります。
import mlflow
from playwright_mcp_agent import LLM_ENDPOINT_NAME
from mlflow.models.resources import DatabricksServingEndpoint

resources = [DatabricksServingEndpoint(endpoint_name=LLM_ENDPOINT_NAME)]

input_example = {
    "messages": [
        {
            "role": "user",
            "content": "今日の日経平均株価はいくら?"
        }
    ]
}

with mlflow.start_run():
    logged_agent_info = mlflow.pyfunc.log_model(
        # artifact_path ="playwright_mcp_agent", # for mlflow 2.0
        name="playwright_mcp_agent", # for mlflow 3.0
        python_model="playwright_mcp_agent.py",
        input_example=input_example,
        pip_requirements=[
            "mlflow",
            "langgraph==0.3.29",
            "langchain-mcp-adapters==0.0.7",
            "databricks-langchain==0.4.2",
            "playwright==1.51.0",
            "nodejs-bin[cmd]",
        ],
        resources=resources,
        model_type="agent", # for mlflow 3.0
    )
正常終了するとモデルが保管されます。
個人的ハマりポイントその2。
クラスタがプロキシサーバを経由してパブリックネットワークに接続している場合、nodejsのプロキシ設定が必要です。
例えば、以下のようなコマンドを別セルであらかじめ実行しておく必要があります。
!npm -g config set proxy http://プロキシサーバのURL:ポート
!npm -g config set https-proxy https://プロキシサーバのURL:ポート
!npm -g config set registry http://registry.npmjs.org/
!npm -g config set strict-ssl=false
Step3. エージェントをデプロイ
ロギングしたエージェントをMosaic AI Model Servingを使ってデプロイします。
まず、Databricks Unity Catalog上にモデルを登録します。
catalog = "training"
schema = "llm"
model_name = "playwright_mcp_agent"
UC_MODEL_NAME = f"{catalog}.{schema}.{model_name}"

mlflow.set_registry_uri("databricks-uc")

# モデルをUCに登録する
uc_registered_model_info = mlflow.register_model(
    model_uri=logged_model.model_uri, name=UC_MODEL_NAME
)
次にMosaic AI Agent Frameworkを使ってデプロイします。
from databricks import agents
agents.deploy(UC_MODEL_NAME, uc_registered_model_info.version, scale_to_zero=True)
しばらく後にデプロイが完了してエージェントが作成されます。
では、使ってみましょう。
Step4. エージェントを使ってみる
DatabricksのPlaygroundを使ってデプロイしたエージェントを実行してみます。
まずはサンプル質問。

すると、エージェントの判断で日経のサイトにアクセスしました。
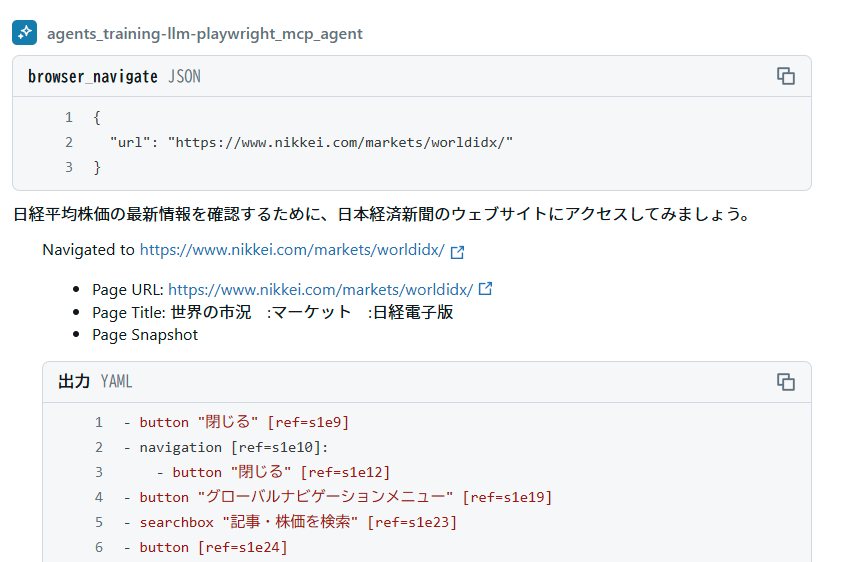
最終的に情報が取れています。

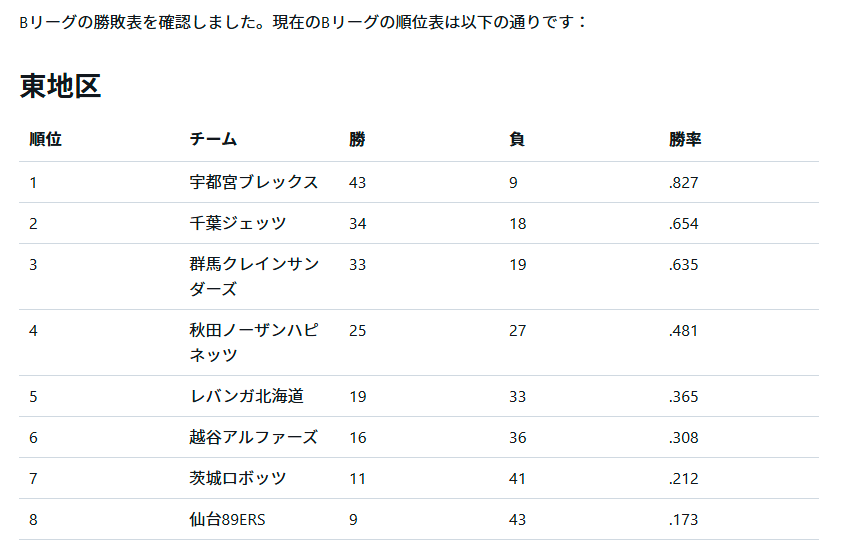
違う依頼もしてみます。
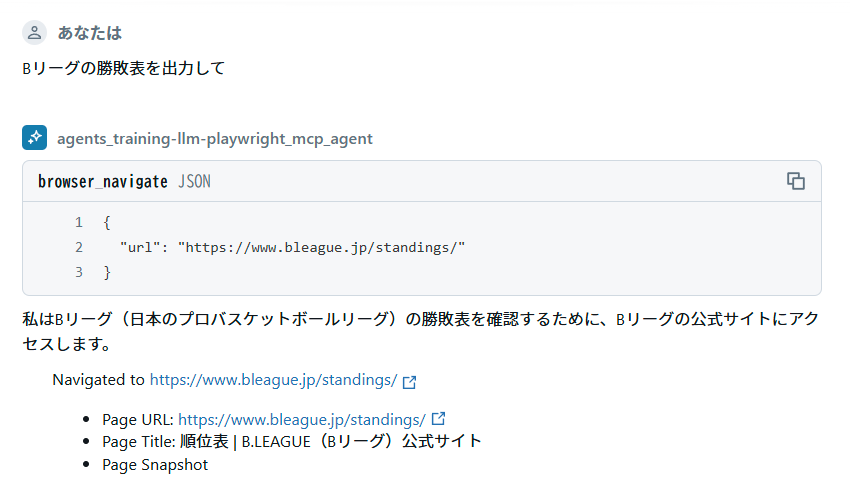
最終結果の一部は以下のようになります。
うーん、便利。
まとめ
DatabricksでMCPを利用するエージェントを作成してみました。
LangChain/LangGraphからMCPを使う分には、従来のToolと同じ使い方ができるので非常に便利ですね。
非常に多くのMCPサーバ(特にTool面)が出ているので、いろいろ利用や自作をしたいと思います。
その上で、エージェントをA2Aで通信させるのも面白そうですね。
A2Aの立ち位置がどうなるかまだわかりませんが、マルチエージェントが一気に普及する未来も遠くないかも。
そして、今回の内容はいろいろハマりました。予想外に時間をとられて、今週はこの1本の投稿になりそう。。。
特に1はModel Servingでは動かないというデバッグも厄介な個所でしたので、読んでる方の知見になれば幸いです。
MLflow 3.0も興味深い。キャッチアップしていろいろ試しているところですが、正式リリースが楽しみです。
ホント、AIエージェント全盛でいろいろ面白いですね。