どうも、学生エンジニアのirohasです。
今回はOpenCVとkerasを用いて、感情分析をしてみました。
今回のは共有というよりか、備忘録ならびに自己満記事ですので、説明聞きたい!という方はブラウザバック推奨です...
手順としては、モデルを作成→作成したモデルを使ってディープラーニング→webカメラで実行という形です。
ディープラーニングにおけるモデル作成などの説明はインターネット上や書籍などで詳しく解説されているものが多いのでこの記事では割愛させていただきます。
この記事ではディレクトリ構成と、起動する際のコードを貼り付けようと思います。
C:.
├─detector
├─models
├─__pycache__
├─cnn.py
├─load.py
├─make_model.py
└─emotion_detector.py
ディレクトリ構成はこんな感じです。
続いて、動かすコードの中身です。
emotion_detector.py
from keras.preprocessing.image import img_to_array
import imutils
import cv2
from keras.models import load_model
import numpy as np

# モデルと分類器の読み込み
detection = 'detector/haarcascade_frontalface_default.xml'
emotion = 'models/_mini_XCEPTION.102-0.66.hdf5'

# モデルの読み込み
face_detection = cv2.CascadeClassifier(detection)
emotion_classifier = load_model(emotion, compile=False)
EMOTIONS = ["angry" ,"disgust","scared", "happy", "sad", "surprised",
 "neutral"]


# ビデオの開始
cv2.namedWindow('Camera')
cam = cv2.VideoCapture(0)
while True:
    frame = cam.read()[1]
    frame = imutils.resize(frame,width=300)
    gray = cv2.cvtColor(frame, cv2.COLOR_BGR2GRAY)
    faces = face_detection.detectMultiScale(gray,scaleFactor=1.1,minNeighbors=5,minSize=(30,30),flags=cv2.CASCADE_SCALE_IMAGE)

    canvas = np.zeros((250, 300, 3), dtype="uint8")
    frameClone = frame.copy()
    if len(faces) > 0:
        faces = sorted(faces, reverse=True,
        key=lambda x: (x[2] - x[0]) * (x[3] - x[1]))[0]
        (fX, fY, fW, fH) = faces
        #グレースケール画像から顔のROIを抽出、28x28ピクセル固定にリサイズして準備。
        # ROIをCNN経由で分類する
        roi = gray[fY:fY + fH, fX:fX + fW]
        roi = cv2.resize(roi, (64, 64))
        roi = roi.astype("float") / 255.0
        roi = img_to_array(roi)
        roi = np.expand_dims(roi, axis=0)


        preds = emotion_classifier.predict(roi)[0]
        emotion_probability = np.max(preds)
        label = EMOTIONS[preds.argmax()]
    else: continue


    for (i, (emotion, prob)) in enumerate(zip(EMOTIONS, preds)):
                #ラベルテキストを構築
                text = "{}: {:.2f}%".format(emotion, prob * 100)
                w = int(prob * 300)
                cv2.rectangle(canvas, (7, (i * 35) + 5),
                (w, (i * 35) + 35), (0, 0, 255), -1)
                cv2.putText(canvas, text, (10, (i * 35) + 23),
                cv2.FONT_HERSHEY_SIMPLEX, 0.45,
                (255, 255, 255), 2)
                cv2.putText(frameClone, label, (fX, fY - 10),
                cv2.FONT_HERSHEY_SIMPLEX, 0.45, (0, 0, 255), 2)
                cv2.rectangle(frameClone, (fX, fY), (fX + fW, fY + fH),
                              (0, 0, 255), 2)

    cv2.imshow('camera', frameClone)
    cv2.imshow("Emotion Now", canvas)
    if cv2.waitKey(1) & 0xFF == ord('q'):
        break

camera.release()
cv2.destroyAllWindows()
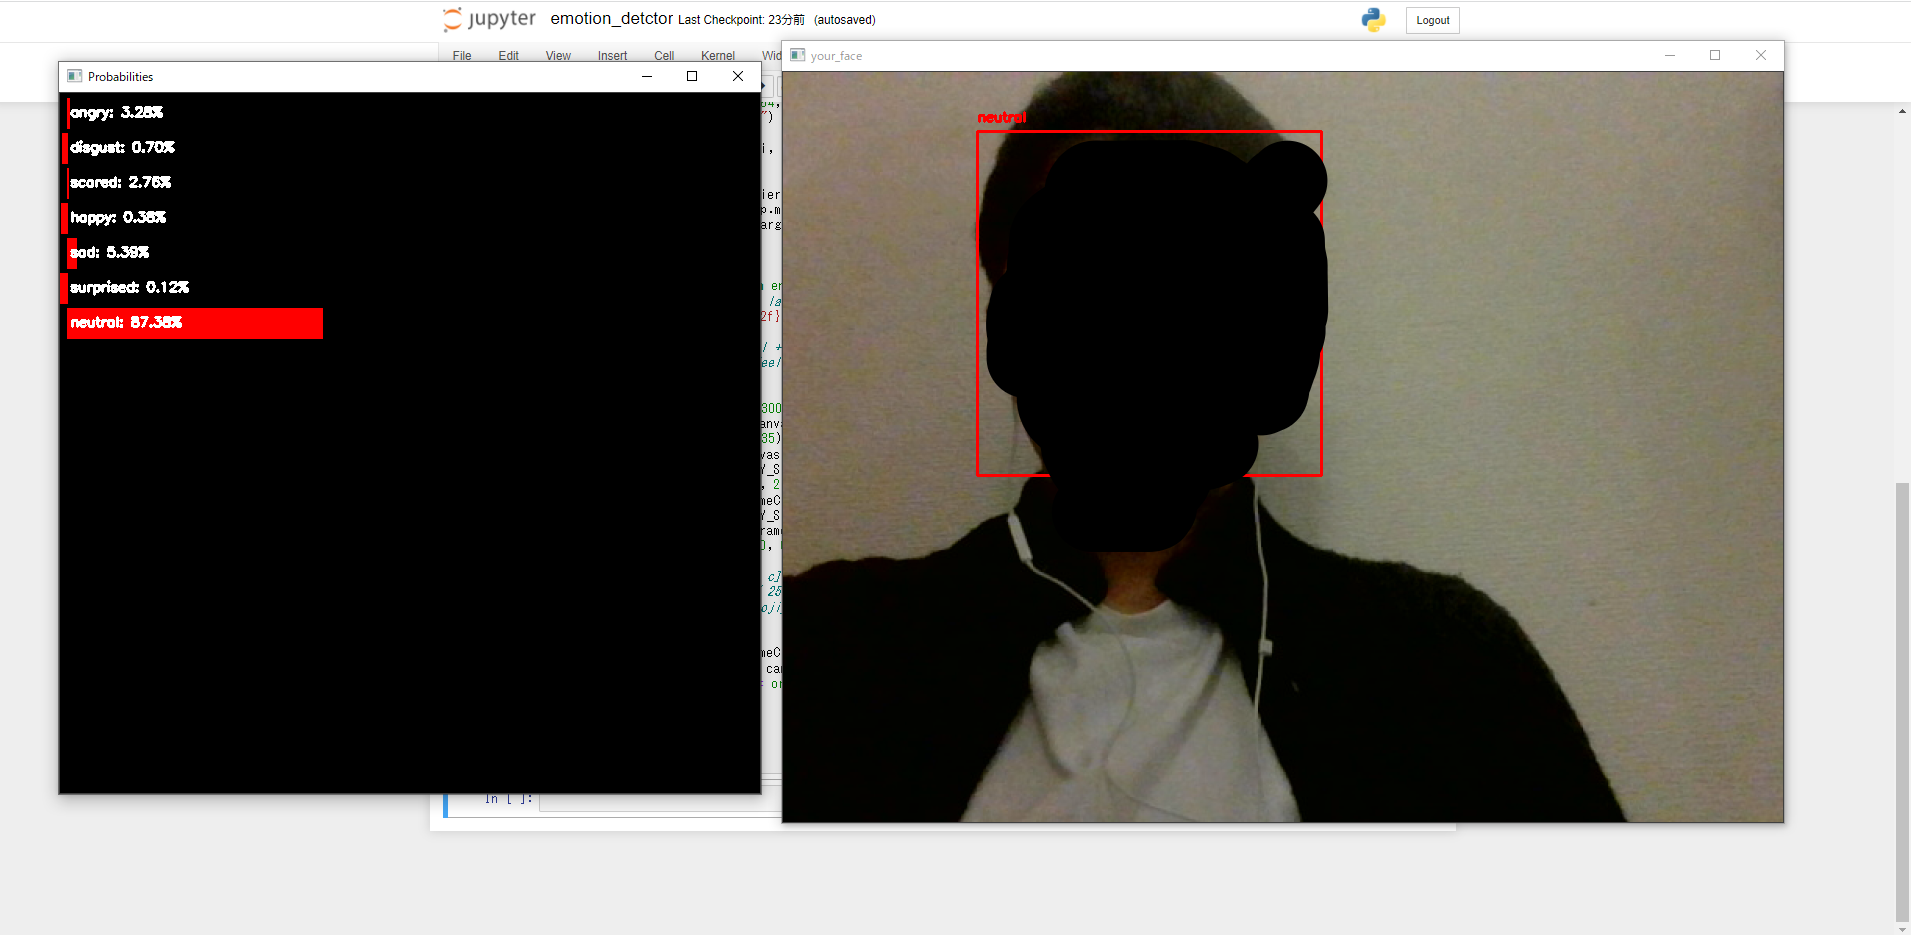
こんな感じで上手くいきました。
個人的にはFERとか他のライブラリでも作成してみたいと思ったのと、二画面ではなく一画面でリアルタイム感情分析ができたらなと思っています。
ディープラーニングはまだまだ奥深いなと感じたので、これからも引き続き勉強していきます。
