API PlatformはオープンソースのAPIフレームワークです。Symfony上で動作し、ちょっとした設定で簡単にAPIサーバを構築することができます。ここではSymfonyとAPI PlatformでAPIサーバを構築する手順をご紹介します。タイトルの通り、サクッと5分ほどで構築できます。
Symfony4用に記事を作成していましたが、最新のSymfony7版にリライトしました。手順が多少変わりましたが、引き続き5分程度でAPIサーバが作れます。
1-2分:インストール
インストールはSymfony CLIとcomposerを利用します。APIサーバを構築するだけであればapiのみで必要なものは全てインストールできますが、ここでは動作確認用と作業効率向上のため、makerを追加でインストールしています。
# Symfony CLIのインストール
brew install symfony-cli

# Symfonyプロジェクトを作成
symfony new symfony-api-sample
cd symfony-api-sample

# API Platformフレームワークインストール
symfony composer require api

# Entityをコマンドラインから作成するためにmakerをインストール
symfony composer require maker --dev
今回はPostgreSQLを利用します。API Platformをインストールした際に、開発用のPostgreSQLがDockerで動作するよう、 compose.yaml compose.override.yaml が生成されています。
3分:ローカル環境準備
ローカルでの開発用にPostgreSQLがDocker上で動作するようになっています。ここでは、後述するローカルWebサーバを起動した際に、自動でDocker上のPostgreSQLが起動するようにします。
workers:
    docker_compose: ~
この記述で、ローカルWebサーバを起動と同時に docker compose up -d が自動で実行されます。
また、 環境変数に、DBへの接続情報が DATABASE_URL として追記されます。これにより、 .env にDBへの接続情報を記載する必要がなくなります。
4分:ローカルWebサーバ起動
ここでローカルWebサーバを起動します。上述の通り、同時にDocker上でPostgreSQLが起動します。
symfony server:start -d
5分:Entity作成
今回はProductというEntityを作成します。フィールドは
- name(string)
- price(integer)
- isAvailable(bool)
を用意しました。
% symfony console make:entity

 Class name of the entity to create or update (e.g. VictoriousGnome):
 > Product

 Mark this class as an API Platform resource (expose a CRUD API for it) (yes/no) [no]:
 > yes

 created: src/Entity/Product.php
 created: src/Repository/ProductRepository.php

 Entity generated! Now let's add some fields!
 You can always add more fields later manually or by re-running this command.
ここで、 Mark this class as an API Platform resource に yes と答えると、EntityにAttributeが自動的に追加されます。
<?php

namespace App\Entity;

use ApiPlatform\Metadata\ApiResource;
use App\Repository\ProductRepository;
use Doctrine\ORM\Mapping as ORM;

#[ORM\Entity(repositoryClass: ProductRepository::class)]
+ #[ApiResource]
class Product
{
作成したEntityを利用してDBにテーブルを作成しましょう。
symfony console doctrine:migrations:diff
symfony console doctrine:migrations:migrate
実行
ここまでの作業が完了したら、実際にアクセスしてみましょう。
http://localhost:8000/api にアクセスすると…
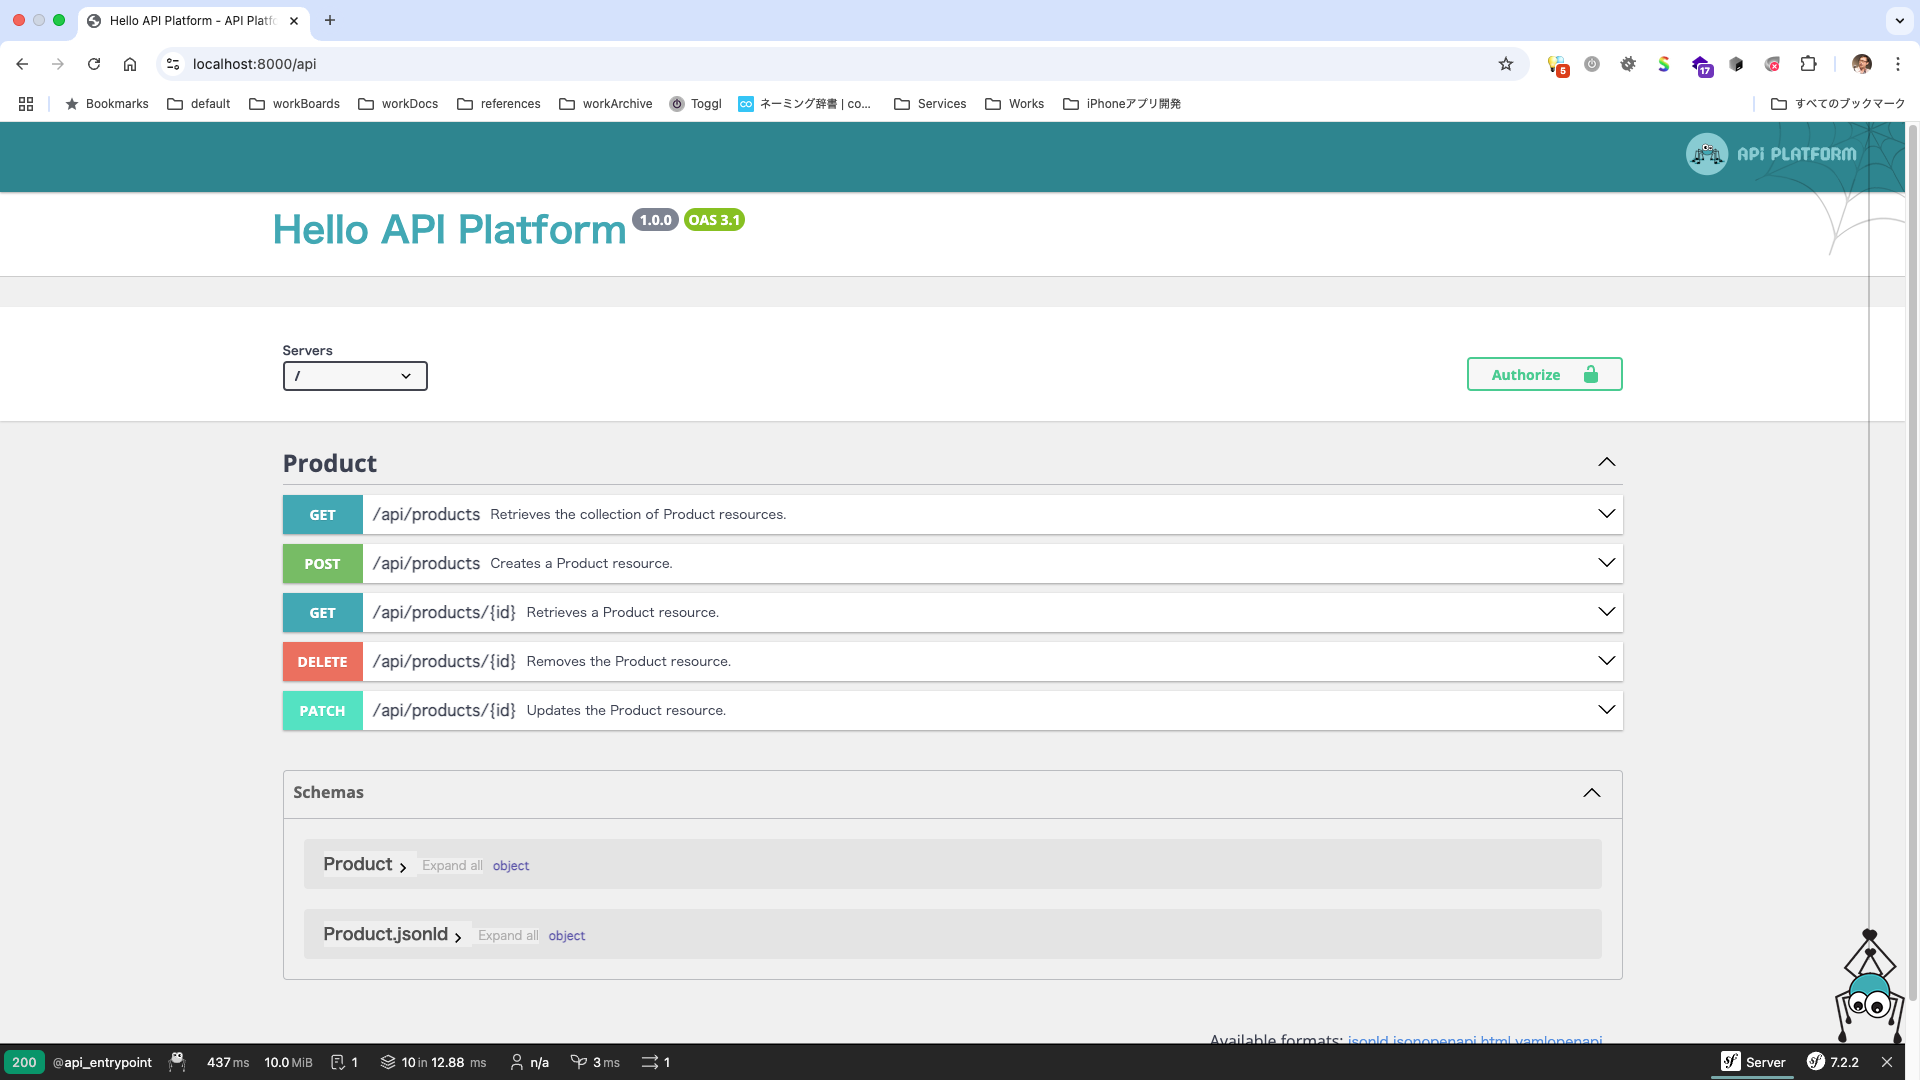
できました!Productを制御するためのAPIのリストと利用方法を記載したページができあがりました。では、実際にAPIを実行してみましょう。ここでは登録とリスト取得を実行してみます。
登録
curl -X 'POST' \
  'https://localhost:8000/api/products' \
  -H 'accept: application/ld+json' \
  -H 'Content-Type: application/ld+json' \
  -d '{
  "name": "紅茶",
  "price": 450,
  "isActive": true
}'
{
  "@context": "/api/contexts/Product",
  "@id": "/api/products/2",
  "@type": "Product",
  "id": 2,
  "name": "紅茶",
  "price": 450,
  "active": true
}
取得
curl -X 'GET' \
  'https://localhost:8000/api/products?page=1' \
  -H 'accept: application/ld+json'
{
  "@context": "/api/contexts/Product",
  "@id": "/api/products",
  "@type": "Collection",
  "totalItems": 2,
  "member": [
    {
      "@id": "/api/products/1",
      "@type": "Product",
      "id": 1,
      "name": "コーヒー",
      "price": 320,
      "active": true
    },
    {
      "@id": "/api/products/2",
      "@type": "Product",
      "id": 2,
      "name": "紅茶",
      "price": 450,
      "active": true
    }
  ]
}
現在のAPI Platformではレスポンスのデフォルト形式が、JSON から JSON-LD になっています。 JSONにする場合は、少し設定を変更します。
api_platform:
    title: Hello API Platform
    version: 1.0.0
+    formats:
+        json: ['application/json']
+        jsonld: ['application/ld+json']
    defaults:
        stateless: true
        cache_headers:
            vary: ['Content-Type', 'Authorization', 'Origin']
まとめ
こんな感じでサクッとAPIサーバが構築できます。設定などでOAuth2を仕込んだりバリデーションを設定したりなどカスタマイズできるので、ぜひ一度お試しください。