前提条件
Node.jsのインストール
実行環境を整える
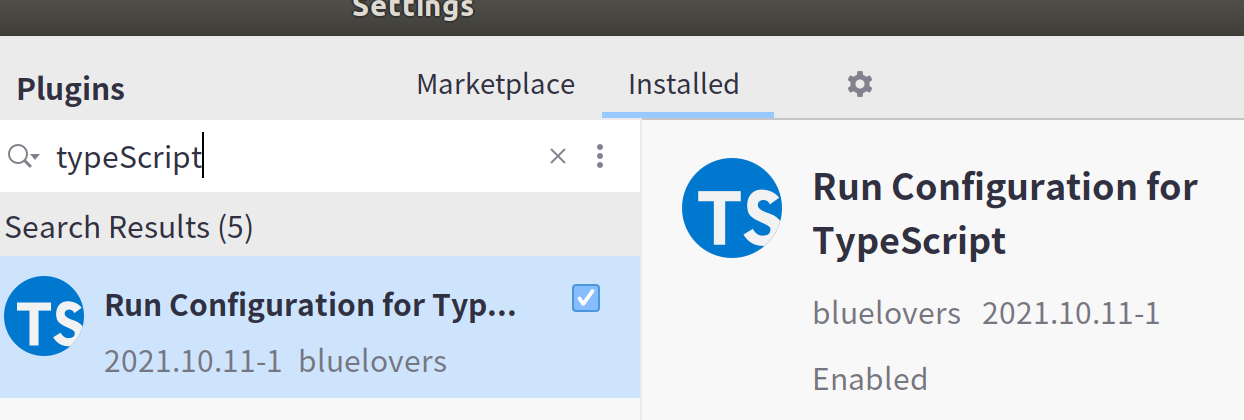
RiderにTypeScriptプラグインをインストール


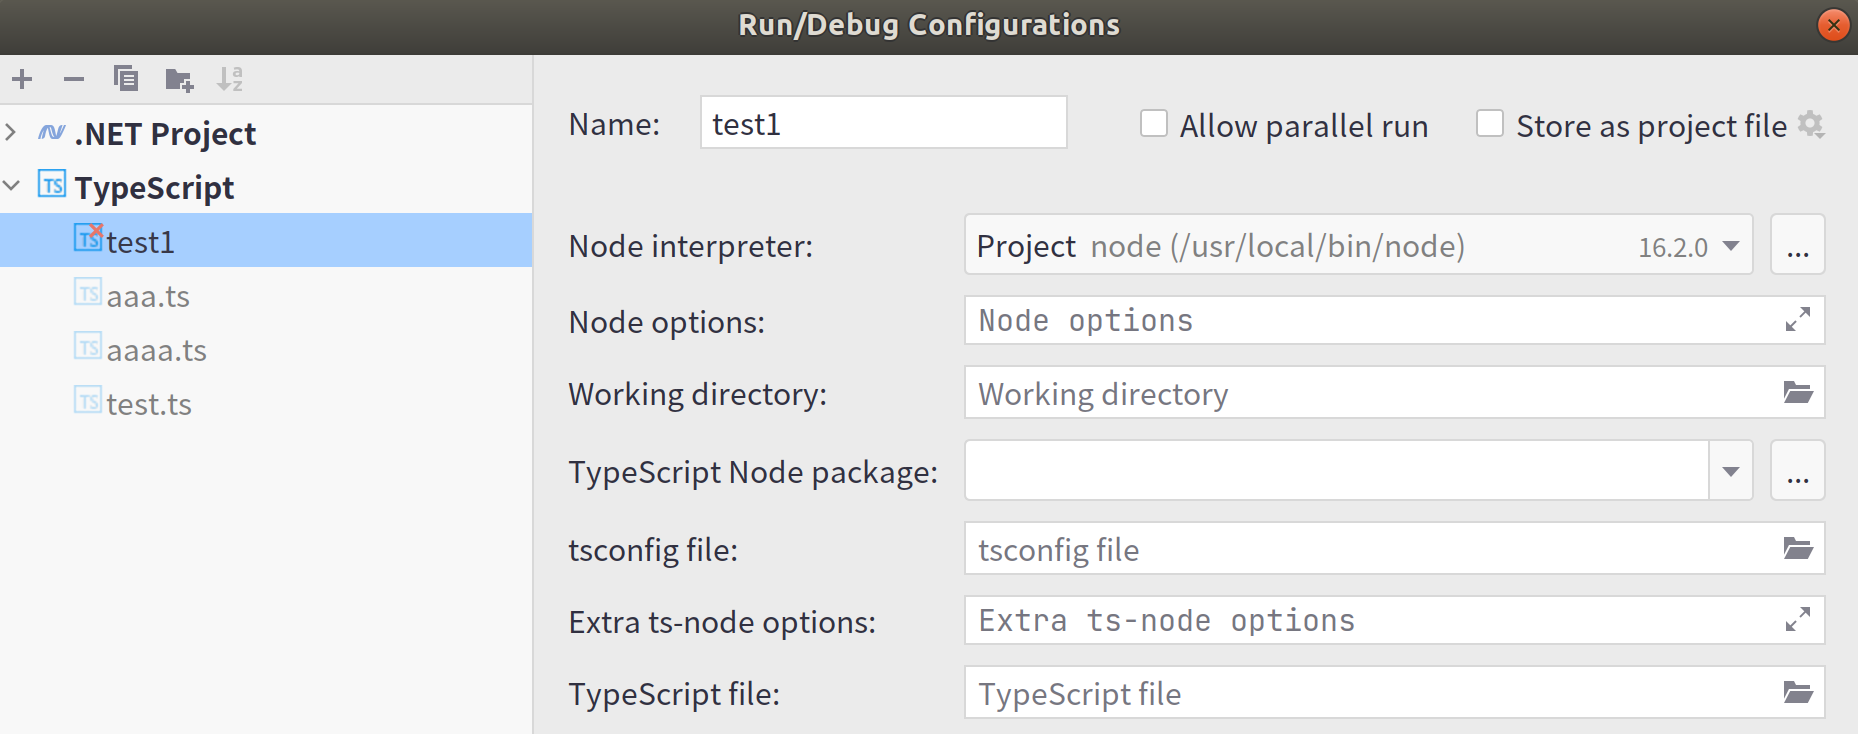
拡張子TSから実行できるようにする
まずはpacakge.jsonを作成する
pacakge.jsonのある同じ階層フォルダ内で実行します。
# Dev環境のみ
npm install --save-dev ts-node typescript

# 本番環境
npm install --save-dev ts-node
ts-nodeをインストールするとpacakge.jsonに記述されます。
node_modulesフォルダがその場に作成され、その中にts-nodeモジュールがインストールされます。
{
  "name": "ConsoleApp0",
  "version": "1.0.0",
  "dependencies": {
    "ts-node": "^10.4.0",
    "typescript": "^4.5.4"
  }
}
RiderのTypeScriptプラグインのts-nodeのパス欄にも記入します。

ts-nodeをインストールすることでJs自動でコンパイルしてくれます。そのあとJSを実行してくれます
tsから実行できるようになります
/usr/local/bin/node --require ts-node/register /test.ts
tsconfig.jsonのテンプレートをコピーして使う
tsconfigのテンプレートがありコピーして使えます。
npx tsc --init --rootDir src --outDir lib --esModuleInterop --resolveJsonModule --lib es6,dom --module commonjs
TSconfigの設定
詳しくはここで
"baseUrl": "./",
"strict": true,
"include": []
"exlude" :[]
tsファイルからJSファイルを生成する
TSファイルをビルドしてJsファイルを生成します
npx tsc ./index.ts
TypeScriptを学ぶ
C#風に書くことを心がける
Class
export class clsTest {
    private _name: string;
    public constructor(name: string) {
        this._name = name;
    }
    public profile(): string {
        return this._name;
    }
}
Async Await
export class Foo {
    private async bar1() {
       var a = await this.wait();
       console.log(a);
    }
    public static async bar2() {
       var a = await wait();
       console.log(a);
    }
}

async function main() {
    const val = await Foo.bar2();
}

main();
パーシャルクラスのAsync Await
import {clsTest} from './clsTest';
declare module './clsTest' {
    interface clsTest {
        _goToLunch(): void;
    }
}

clsTest.prototype._goToLunch = async function(){
    const val = await Foo.bar2();
}
awaitがうまく動作しない場合はtargetをes2017以降にします。
Riderのエラーメッセージを参考にしてください
Model
export class testModel {
    test_id: number = 0;
    name : string = "";
    counter1 : number = 0;
}
var testModel1 : testModel = new testModel();
Singleton
export class SingletonClass
{
    private static _instance: SingletonClass;
    static getInstance(): SingletonClass {
        if (!SingletonClass._instance) {
            SingletonClass._instance = new SingletonClass();
        }
        return SingletonClass._instance
    }
    private constructor() {
    }
}
Enum
enum Card {
    Clubs = "clubs",
    Diamonds = "diamonds",
    Hearts = "hearts",
    Spades = "spades",
}
console.log(Card.Diamonds); // diamonds
enum Card2 {
    Clubs, // 0
    Diamonds, // 1
    Hearts, // 2
    Spades, // 3
}
const card : Card2 = Card2.Hearts;
console.log(card); // 2
Staticメソッド Static変数
export class clsTest {
    public static static_name = "";
    public static _getTest() : string{
        return clsTest.static_name;
    }
}
パーシャルクラス
export class partialClassTest {
    doWork () : void {

    }
}
import "./partialClassTest-1";
import {partialClassTest} from './partialClassTest';
declare module './partialClassTest' {
    interface partialClassTest {
        _goToLunch(): void;
    }
}

partialClassTest.prototype._goToLunch = function(){
    console.log("aaaaaa");
}
var v : partialClassTest = new partialClassTest();
v._goToLunch();
OverRide
export class clsSub {
    get name(): string {
        return this._name;
    }
    set name(value: string) {
        this._name = value;
    }
    private _name: string;
    constructor(name: string) {
        this._name = name;
    }
    public profile(): string {
        return this._name;
    }
}
export class clsTest extends clsSub {
    constructor(name: string) {
        super(name);
    }
    public profile(): string {
        this.name = super.profile();
        return this.name;
    }
}
Getter Setter
export class clsTest {
    get name(): string {
        return this._name;
    }
    set name(value: string) {
        this._name = value;
    }
    private _name: string;
    constructor(name: string) {
        this._name = name;
    }
}
RiderにはGeneratorツールがありGetterSetterを作成してくれる

拡張メソッド
ビルドインしたクラスオブジェクトにメソッドを拡張できます
interface String {
    _add(str: string): string;
}
String.prototype._add = function (str: string) {
    return "1111111";
};
拡張メソッドをts-nodeで有効にする
ts-nodeでコンパイル実行する際にエラーになることがあります。
ts-configに"ts-node"を追加し、transpileOnlyをtrueにするとエラーがなくなります。
詳しくはts-nodeサイトで
{
  "ts-node": {
    // It is faster to skip typechecking.
    // Remove if you want ts-node to do typechecking.
    "transpileOnly": true,
    "files": true,
    "compilerOptions": {
      // compilerOptions specified here will override those declared below,
      // but *only* in ts-node.  Useful if you want ts-node and tsc to use
      // different options with a single tsconfig.json.
    }
  },
  "compilerOptions": {
  }
}
全モジュール共通 ts-nodeや開発環境を整える工夫
includeを使うことで、import文を自動で挿入できる。
includeでimport文を読み込みたいディレクトリを設定します。
インテリセンスが効くようになる
モジュールを読み込むにはImport文になります。
 "include": [
     "./**/*", //現在の位置
     "/commonClasses/**/*",
     "/extension/**/*",
 ],
baseUrlを使うことでimport文から相対パスが使えるようになる
../../
./
など
moduleResolutionやtypeRootsもやっておくとよい
"baseUrl": "./",
"moduleResolution": "node",
"typeRoots": [
   ".",
   "node_modules/@types"
],
クラス(モジュール)はimportを使って読み込む
クラスやモジュールはimportで読み込みます。
importでないとコンパイルが通りません。includeではないです。
Riderには自動でImport文を生成してくれる機能がある。
import文にも種類があり、オブジェクトを宣言していないもの(拡張メソッド)を呼ぶ時は書き方が違う
拡張子tsはつけない
import '../../../commonclasses/extension/clsString'
import {clsTest} from "./class";
拡張メソッドをts-noddeで実行する時はts-configに"ts-node"を追加してやる
transpileOnlyをtrueにしないとエラーになる
{
  "ts-node": {
    // It is faster to skip typechecking.
    // Remove if you want ts-node to do typechecking.
    "transpileOnly": true,
    "compilerOptions": {
      // compilerOptions specified here will override those declared below,
      // but *only* in ts-node.  Useful if you want ts-node and tsc to use
      // different options with a single tsconfig.json.
    }
  },
  "compilerOptions": {
  }
}
import文の中にimport文を書く
importの中で絶対パスならimportできる。
importのまとめたものが作れる
import '絶対パス/test1'
import '絶対パス/test2'
import '絶対パス/test3'
Riderのimport補完機能を使う
アイコンをクリックすることで相対パスのImportが補完できる

tsConfigの詳しい説明はここで
ポイント
tsconfig.jsonを作成する
pacakge.jsonを作成してからパッケージをインストールする。
typescrptとts-nodeパッケージをインストールする。
npm install --save-dev typescript ts-node
pacakge.jsonと同じフォルダで実行する。
includeにパスを記入する。カレントパスと自分のオリジナルライブラリのパス 再帰的にしておく
includeにパスを記入するとimport文が自動で生成されるようになる
typeRootsも記入しておく。インテリセンスが効くようになる。
tsconfig.jsonにts-noddeを追加する。transpileOnlyをtrueにする
