0
1

Delete article

Deleted articles cannot be recovered.

Draft of this article would be also deleted.

Are you sure you want to delete this article?

More than 3 years have passed since last update.

VSCode から Redmine の REST API を実行する

Last updated at Posted at 2021-11-01

はじめに

VisualStudioCode の拡張機能「REST Client」を使って Redmine の REST API を実行する方法をまとめました。

拡張機能「REST Client」の導入

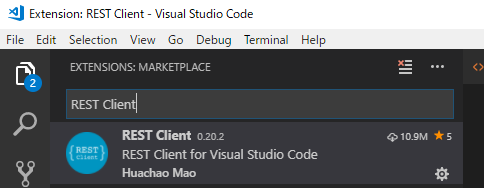
  1. VSCode の「拡張機能」タブで「REST Client」と入力し検索
  2. 以下の拡張機能をインストール(未インストールの場合 Install ボタンが表示されるのでクリック)
    cap_01.PNG

リクエストの投げ方

  1. 新規作成した Untitled.txt を拡張子を「.rest」に変更して保存
  2. 実行したいリクエストを書く
  3. Send Request をクリックによってリクエストを送信
    ([F1] -> [Rest Client: Send Request] でも可能)
    cap_02.PNG
  4. 右側にレスポンスの内容が表示される
    cap_03.PNG

各リクエストの書き方

GET

  • key : API アクセスキー
GET http://localhost:3000/issues/12345.json HTTP/1.1
content-type: application/json

{
    "key":"xxxxxxxxxxxxxxxxxxxxxxxxxxxxxx"
}

PUT

  • key : API アクセスキー
  • subject : 「タイトル」
  • status_id : 「ステータス」の ID (一覧は GET /issue_statuses で取得)

チケットの様々な項目が設定できます。詳細に関しては こちら を参考にしてください。

PUT http://localhost:3000/issues/12345.json HTTP/1.1
content-type: application/json

{
    "key":"xxxxxxxxxxxxxxxxxxxxxxxxxxxxxx",
    "issue": {
        "subject":"Bug yyyy Fixed",
        "status_id":"3"
      }
}
0
1
0

Register as a new user and use Qiita more conveniently

  1. You get articles that match your needs
  2. You can efficiently read back useful information
  3. You can use dark theme
What you can do with signing up
0
1

Delete article

Deleted articles cannot be recovered.

Draft of this article would be also deleted.

Are you sure you want to delete this article?