はじめに
Google Colab で TuriCreate を使って Object Detection のトレーニングを行い、iOS 向けの CoreML Model(.mlmodeol) を出力するまで行った時のメモです
事前作業
画像データのラベリング
学習に使用する画像に対するラベリング作業は別途必要となります。
今回は、simple_image_annotator を使用して annotatioon を用意しました。
Google Colab
ランタイムタイプの変更
今回は、GPU を使用するため、Google Colab のランタイムタイプを変更します
Google Colab のメニューから [ランタイム] → [ランタイムのタイプを変更] を選択
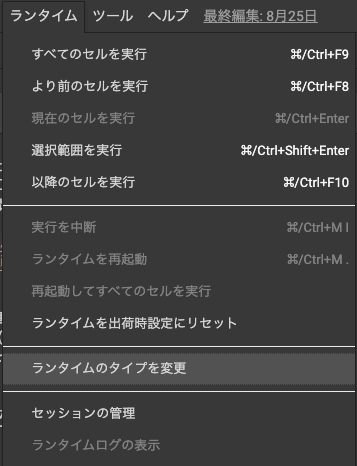
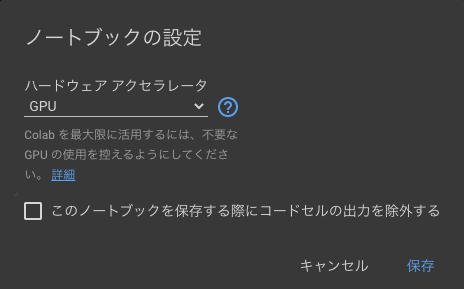
ハードウェアアクセラレータを 「None」 から 「GPU」 に変更して 「保存」 をクリックしてください。
初期設定
Turi Create のインストール
Turi Create のインストールを行います
!pip install -U turicreate
Cuda 8 のインストール
Cuda 8 を利用するため、デフォルトでインストールされている mxnet をアンインストールして、Cuda 8 のインストールを行います。
!pip uninstall -y mxnet
!pip install mxnet-cu100==1.4.0.post0
!export LD_LIBRARY_PATH=/usr/local/cuda/lib64:$LD_LIBRARY_PATH
TensorFlow GPU のインストール
TensorFlow で GPU を利用するため、デフォルトでインストールされている tensorflow をアンインストールして、tensorflow-gpu をインストールします
!pip uninstall -y tensorflow
!pip install tensorflow-gpu
Turi Create の初期化
import mxnet as mx
import turicreate as tc

# Use all GPUs(default)
tc.config.set_num_gpus(-1)
Google Drive のマウント
今回は、学習に使用する画像データを Google Drive に配置して動かすため Google Drive をマウントします
from google.colab import drive
drive.mount('/content/gdrive')
SFrame の生成
事前作業のラベリングで生成された annotation ファイルを利用します。
annotation ファイルを指定して、Google Drive 上にアップロードします
from google.colab import files
import os

uploaded = files.upload()
for fn in uploaded.keys():
  os.rename(fn, 'out.csv')
今回は、学習に使用する画像は Google Drive 上の images フォルダを想定して IMAGE_DIR にしていますが、適宜変更してください
# 学習に使用する画像のディレクトリ
IMAGE_DIR = '/content/gdrive/My Drive/images'
# annotation file
csv_path = 'out.csv'

csv_sf = tc.SFrame.read_csv(csv_path)

def row_to_bbox_coordinates(row):
  """
  Takes a row and returns a dictionary representing bounding
  box coordinates: (center_x, center_y, width, height) e.g. {'x': 100, 'y': 120, 'width': 80, 'height': 120}
  """
  return {'x': row['xMin'] + (row['xMax'] - row['xMin'])/2,
          'width': row['xMax'] - row['xMin'],
          'y': row['yMin'] + (row['yMax'] - row['yMin'])/2,
          'height': (row['yMax'] - row['yMin'])}
csv_sf['coordinates'] = csv_sf.apply(row_to_bbox_coordinates)
# delete no longer needed columns
del csv_sf['id'], csv_sf['xMin'], csv_sf['xMax'], csv_sf['yMin'], csv_sf['yMax']
# rename columns
csv_sf = csv_sf.rename({'name': 'label', 'image': 'name'})

# Load all images in random order
sf_images = tc.image_analysis.load_images(IMAGE_DIR, recursive=True, random_order=True)

# Split path to get filename
info = sf_images['path'].apply(lambda path: os.path.basename(path).split('/')[:1])

# Rename columns to 'name'
info = info.unpack().rename({'X.0': 'name'})

# Add to our main SFrame
sf_images = sf_images.add_columns(info)

# Original path no longer needed
del sf_images['path']

# Combine label and coordinates into a bounding box dictionary
csv_sf = csv_sf.pack_columns(['label', 'coordinates'], new_column_name='bbox', dtype=dict)

# Combine bounding boxes of the same 'name' into lists
sf_annotations = csv_sf.groupby('name', {'annotations': tc.aggregate.CONCAT('bbox')})

# Join annotations with the images. Note, some images do not have annotations,
# but we still want to keep them in the dataset. This is why it is important to
# a LEFT join.
sf = sf_images.join(sf_annotations, on='name', how='left')

# The LEFT join fills missing matches with None, so we replace these with empty
# lists instead using fillna.
sf['annotations'] = sf['annotations'].fillna([])

# Save SFrame
sf.save('lifull.sframe')
学習作業
SFrame からデータを読み込んでトレーニングを開始します。
BATCH_SIZE, MAX_ITERATIONS は適宜変更してから実行してください
BATCH_SIZE=32
MAX_ITERATIONS=1000

import turicreate as tc

# Load the data
data = tc.SFrame('lifull.sframe')

# Make a train-test split
train_data, test_data = data.random_split(0.8)

# Create a model
model = tc.object_detector.create(train_data, batch_size=BATCH_SIZE, max_iterations=MAX_ITERATIONS)

# Save predictions to an SArray
predictions = model.predict(test_data)

# Evalute the model and save the results into a dictionary
metrics = model.evaluate(test_data)
print(metrics)

# Save the model for later use in Turi Create
model.save('lifull.model')

# Export for use in Core ML
model.export_coreml('LifullObjectDetector.mlmodel')
動作確認
出力された CoreML Model(.mlmodel) を Google Drive へコピーします
!mv LifullObjectDetector.mlmodel /content/gdrive/My\ Drive/images/
コピーされた CoreML Model(.mlmodel) を Apple のサンプル に組み込んでお試しください