参考
https://github.com/flutter/samples/tree/master/provider_shopper
https://qiita.com/aoinakanishi/items/e58e7dd537ca1d1b76d6
bin配下のディレクトリ構成
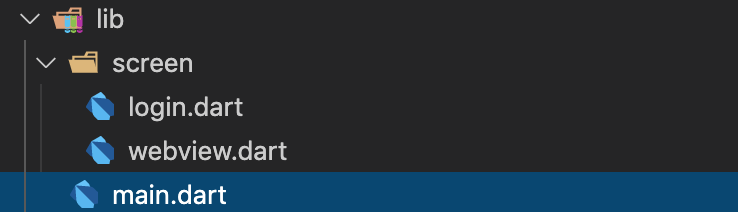
main
main.dart
import 'package:flutter/material.dart';
import 'HOGE/screen/login.dart';
import 'HOGE/screen/webview.dart';

void main() {
  runApp(new MaterialApp(
    title: 'Navigation with Routes',
    routes: <String, WidgetBuilder>{
      '/': (_) => new Login(),
      '/webview': (_) => new Webview(),
    },
  ));
}
画面遷移について
別ファイルのクラスを使用するためにはファイルをimportする必要がある。
HOGEはプロジェクト名
import 'HOGE/screen/login.dart';
画面遷移を管理する処理
'/' で指定されるクラスが初期表示画面になる。
    routes: <String, WidgetBuilder>{
      '/': (_) => new Login(),
      '/webview': (_) => new Webview(),
    },
画面遷移処理
'/webview'で指定されている画面に遷移したい場合
Navigator.of(context).pushNamed("/webview");
pushするとNavigatoorBarに戻るボタンが追加される。
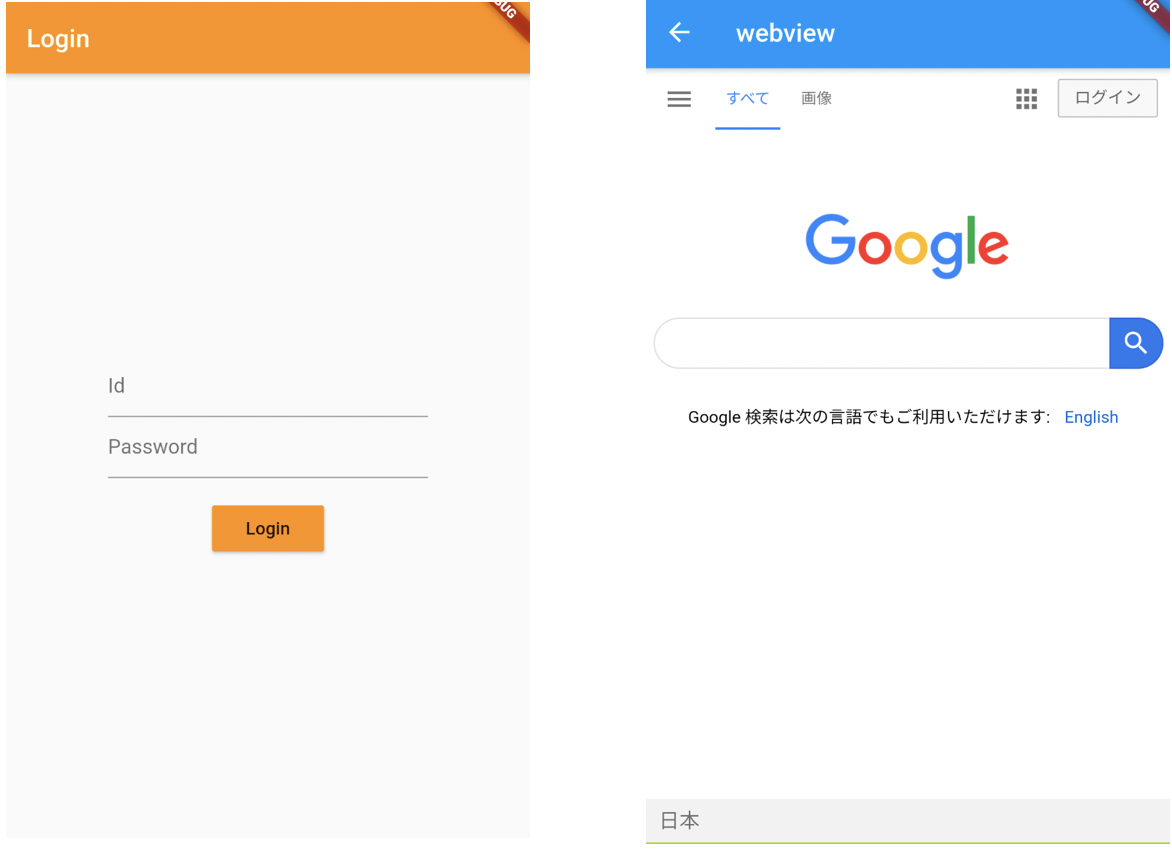
ログイン画面
screen/login.dart
import 'package:flutter/material.dart';

// ---------
// ログイン画面
// ---------
class Login extends StatefulWidget {
  @override
  _LoginState createState() => new _LoginState();
}

class _LoginState extends State<Login> {
  @override
  Widget build(BuildContext context) {
    return Scaffold(
      appBar: AppBar(
        title: const Text("Login"),
        backgroundColor: Colors.orange,
      ),
      body: Center(
        child: Container(
          padding: EdgeInsets.only(right: 80.0, left: 80.0),
          child: Column(
            mainAxisAlignment: MainAxisAlignment.center,
            children: [
              TextFormField(
                decoration: InputDecoration(
                  hintText: 'Id',
                ),
              ),
              TextFormField(
                decoration: InputDecoration(
                  hintText: 'Password',
                ),
                obscureText: true,
              ),
              SizedBox(
                height: 16,
              ),
              RaisedButton(
                color: Colors.orange,
                child: Text('Login'),
                onPressed: () {
                  Navigator.of(context).pushNamed("/webview");
                },
              )
            ],
          ),
        ),
      ),
    );
  }
}
レイアウトについて
左右に余白を作る
// 右から80pt、左から80ptの余白を開ける「
padding: EdgeInsets.only(right: 80.0, left: 80.0),

// 上下に余白を開ける場合
padding: EdgeInsets.only(top: 80.0, bottom: 80.0),

// 全方向を指定する場合
padding: EdgeInsets.all(80.0),
Containerに複数の部品を配置する
child: Container(
  child: Column(
    children: [
    // ここに部品を記述
    ]
  )
)
間隔をあける部品
loginボタンとパスワードの縦方向の間隔をあけるのに使っている。
SizedBox(
  height: 16,
),
入力したパスワードを隠す設定
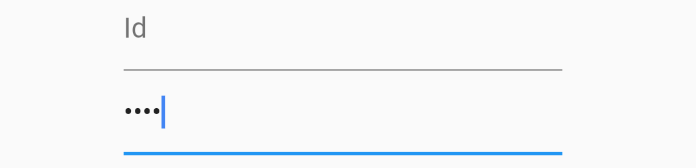
obscureText: true,
weview
参考
screen/webview.dart
import 'package:flutter/material.dart';
import 'package:webview_flutter/webview_flutter.dart';

// ---------
// Webview画面
// ---------
class Webview extends StatelessWidget {

  @override
  Widget build(BuildContext context) {
    return Scaffold(
      appBar: AppBar(
        title: Text("webview"),
      ),
      body: WebView(
        initialUrl: 'https://www.google.com',
        javaScriptMode: JavaScriptMode.unrestricted,
      ),
    );
  }
}
pubspecファイルにwebview_flutterを追加
pubspec.yaml
dependencies:
  flutter:
    sdk: flutter

  # The following adds the Cupertino Icons font to your application.
  # Use with the CupertinoIcons class for iOS style icons.
  cupertino_icons: ^0.1.2
#///追加
  webview_flutter: ^0.1.0+1

dev_dependencies:
  flutter_test:
    sdk: flutter
ライブラリのインポート
import 'package:webview_flutter/webview_flutter.dart';
webview表示
      body: WebView(
        initialUrl: 'https://www.google.com',
        // jsを制限しない設定を追加する場合
        javaScriptMode: JavaScriptMode.unrestricted,
      ),