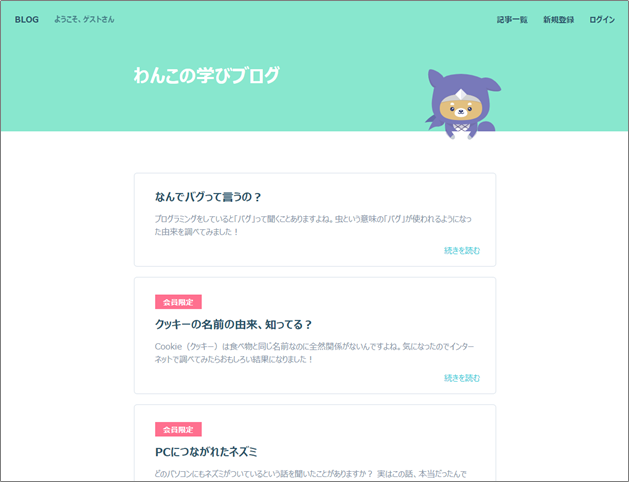
目標物の確認
ProgateのNode.jsコースで作ったブログアプリと同じものをDjangoで作ってみます。
Djangoでのアプリ開発の一連の流れを整理するために記していきます。
初期設定
まずは初期設定です。
プロジェクトを作成して、アプリ(blogapp)を作成します。
> django-admin startproject blogapp
> cd blogapp
> python manage.py startapp blog
「templates」ディレクトリと「static」ディレクトリを作成して、さらにそれぞれの下層に「blog」ディレクトリを作成します(☆1)。
「blog」ディレクトリ構造は、今の段階でこんな感じです。
blog
├── __init__.py
├── admin.py
├── apps.py
├── migrations
│   └── __init__.py
├── models.py
├── static # ☆1
│   └── blog # ☆1
├── templates # ☆1
│   └── blog # ☆1
├── tests.py
├── urls.py
└── views.py
setting.pyのINSTALLED_APPSにアプリ名(blog)を登録します(☆2)。
INSTALLED_APPS = [
    'django.contrib.admin',
    'django.contrib.auth',
    'django.contrib.contenttypes',
    'django.contrib.sessions',
    'django.contrib.messages',
    'django.contrib.staticfiles',
    'blog', #☆2
]
プロジェクトのurls.pyファイルからアプリのurls.pyファイルを呼び出すためのコードを書きます(☆3)。
from django.contrib import admin
from django.urls import path, include

urlpatterns = [
    path('admin/', admin.site.urls),
    path('', include('blog.urls')) #☆3
]
トップ画面を作るところまでやっていきます。アプリのurls.pyにコードを追加します。
アプリのurls.pyに最低限のコードを書かないとマイグレーションを実行したときにエラーが出てしまいます。
なので、トップページだけ作ります。
namespace(app_name)も設定しておきます。
from django.urls import path
from .views import BlogTop

app_name = 'blog'

urlpatterns = [
    path('', BlogTop.as_view(), name='top'),

]
トップページの表示はTemplateViewで対応します(☆4)。
from django.shortcuts import render
from django.views.generic import TemplateView

class BlogTop(TemplateView): #☆4
    # top.htmlをレンダリング
    template_name = 'blog/top.html'
トップページはDjangoのタグで整えます(☆5)。
{% load static %} <!--☆5-->
<!DOCTYPE html>
<html>
  <head>
    <meta charset="utf-8">
    <title>BLOG</title>
    <link rel="stylesheet" href="{% static 'blog/style.css' %}"> <!--☆5-->
  </head>
  <body>
    <div class="top">
      <div class="wrapper">
        <div class="content">
          <h2>わんこの学びブログ</h2>
          <h1><img src="{% static 'blog/top-logo.svg' %}" alt=""></h1> <!--☆5-->
          <p>プログラミングに関する雑学ブログ。<br>だれかに教えたくなる豆知識をお届けします。</p>
          <a class="btn" href="{% url 'blog:list' %}">読みはじめる</a> <!--☆5-->
        </div>
        <img class="image" src="{% static 'blog/top.svg' %}" alt=""> <!--☆5-->
      </div>
    </div>
  </body>
</html>
models.pyはまだ作成していませんが、Djangoがデフォルトで準備しているUserテーブルを作成するため、マイグレーションしておきます。
> python manage.py makemigrations
> python manage.py migrate
これで初期設定は完了しました。
トップページも表示されました。

