今回は、ReactとRailsを使ってSPAを作成した際に一つのEC2インスタンスにデプロイする方法を忘備録としてまた、同じ事象で悩んでいる方のために残しておきます。
フロント側をAmplifyやnetlifyでデプロイしようと考えていましたが、RailsのAPI側をhttps化しなければリクエストを受け付けてくれなかったので、EC2に両方ぶち込んじゃえという手法になります。
概要
前提として、今回はフロント側について記述するため、RailsAPI側の方法は後日記述します。
EC2のインバウンドルールを編集しましょう。
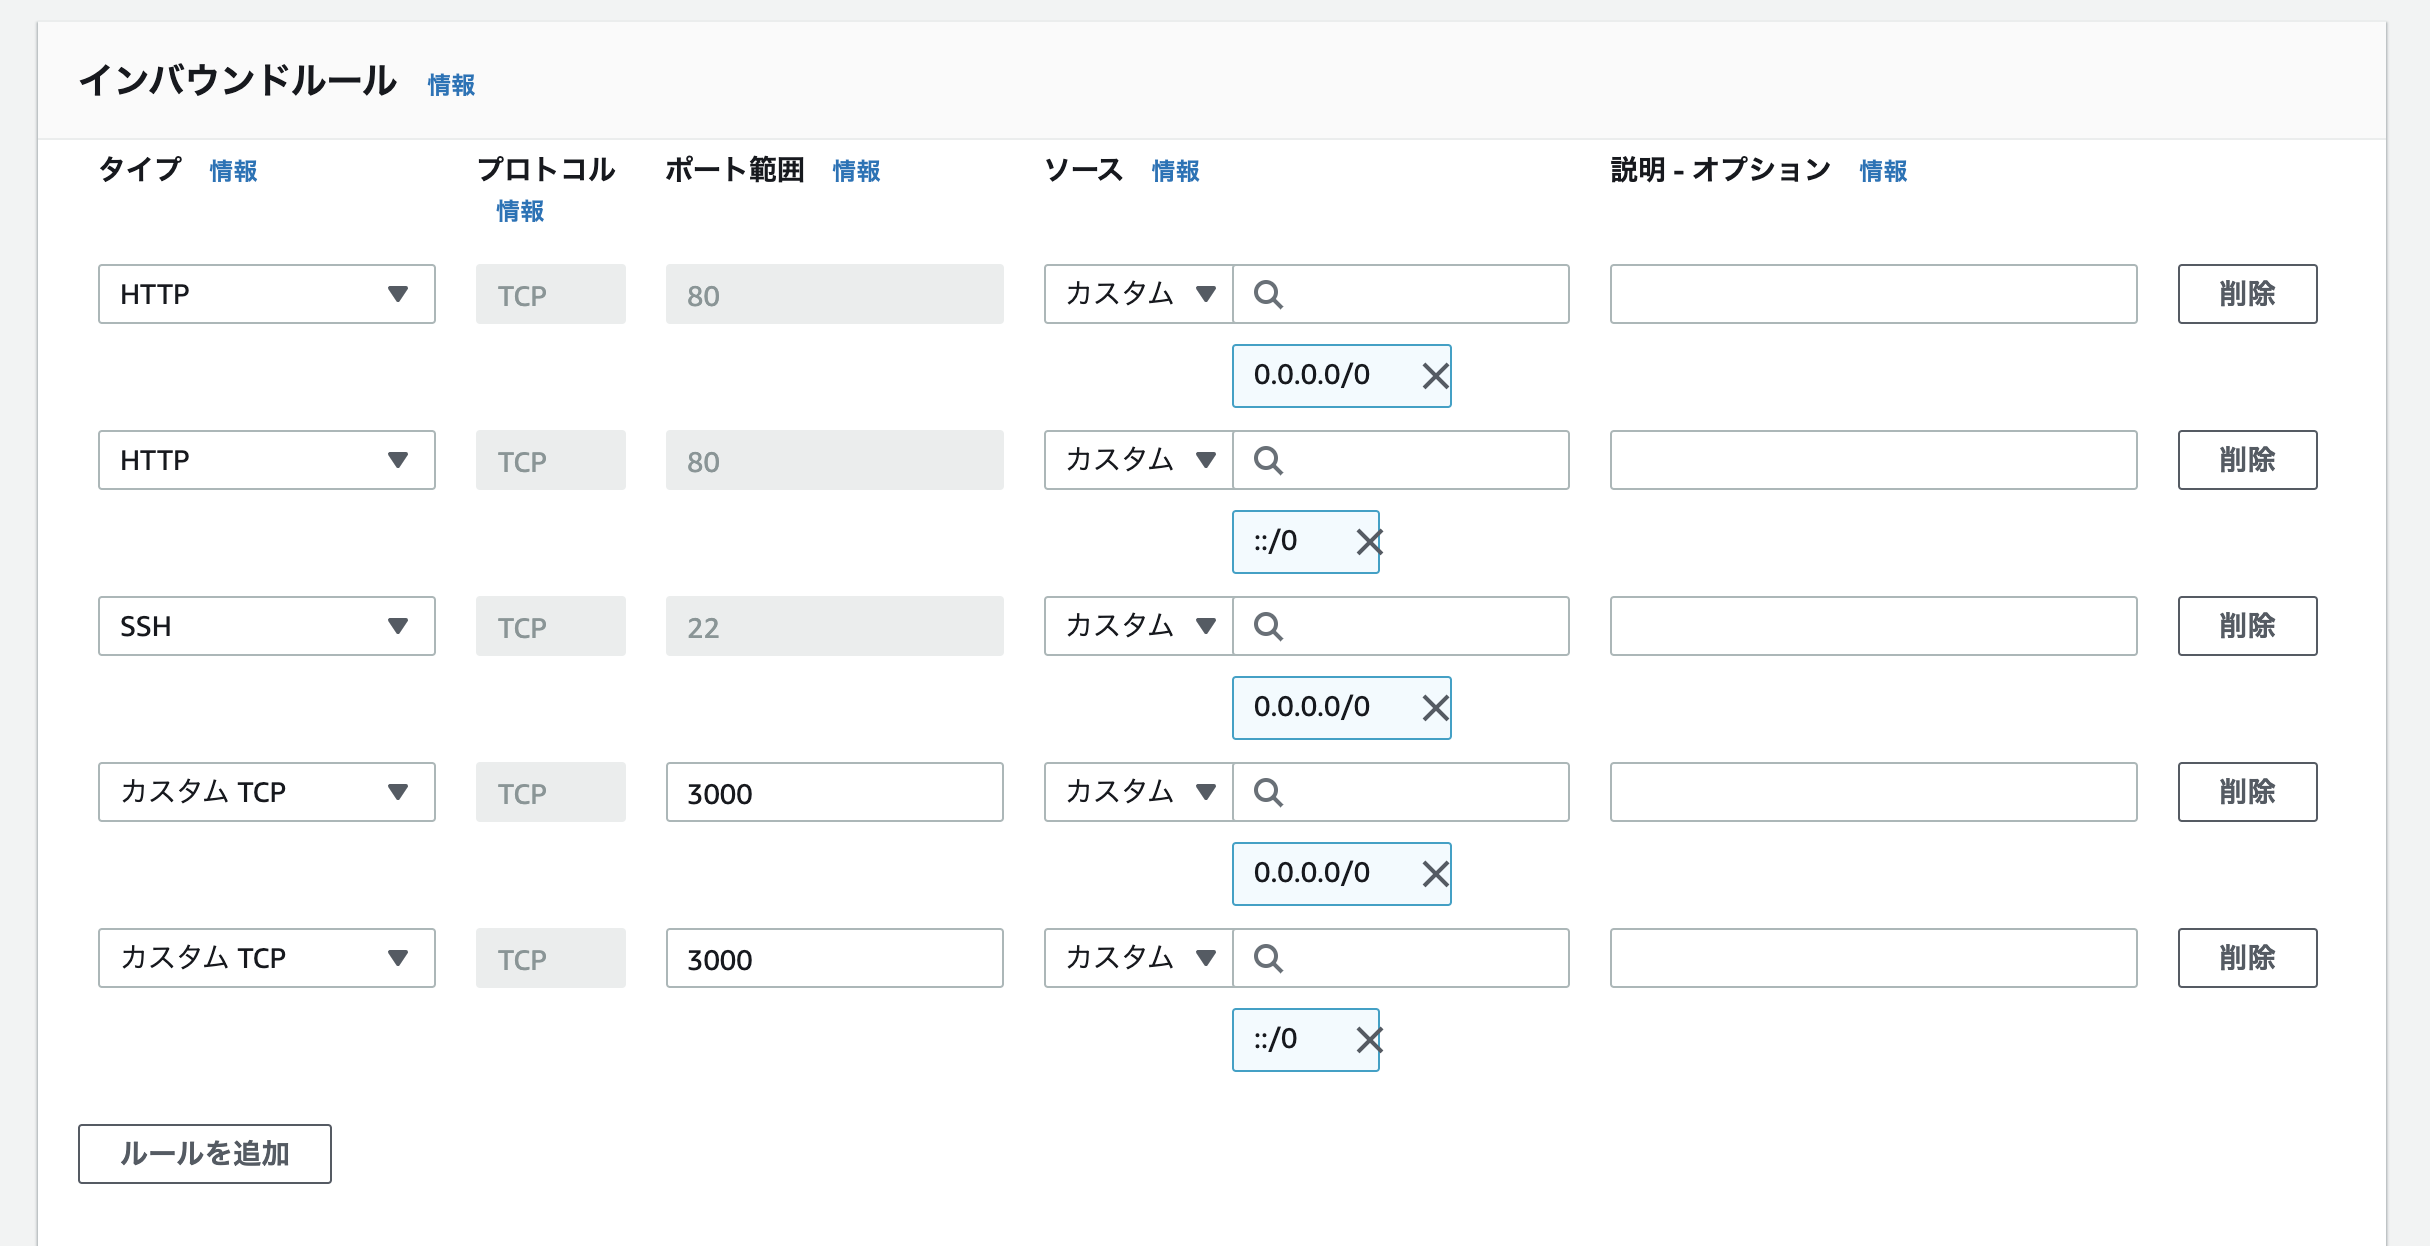
まずは、EC2のセキュリティグールプからインバウンドを画像のように編集しましょう。

簡単な説明として、API側のポートとして3000番を設定しています。
また、IPV4とIPV6すべてのリクエストに対応するため、::/0と0.0.0.0/0は2つずつ設定しています。
EC2インスタンスにsshで接続し、ディレクトリを作成しましょう。
私の場合は、~/var/wwwというディレクトリを作成しました。
作成したディレクトリにReactアプリをgit cloneしましょう。
先程作成したディレクトリにgit cloneをしましょう。
EC2インスタンスにgit cloneをする場合は、作成したEC2インスタンスのssh公開鍵をGitHubに登録する必要があります。
EC2サーバーのssh鍵のペアを作成し、GitHubにssh鍵を登録しましょう。
[ec2-user@ip-192-32-33-129 ~]$ ssh-keygen -t rsa -b 4096
Generating public/private rsa key pair.
Enter file in which to save the key (/home/ec2-user/.ssh/id_rsa):
Enter passphrase (empty for no passphrase):
Enter same passphrase again:
Your identification has been saved in /home/ec2-user/.ssh/id_rsa.
Your public key has been saved in /home/ec2-user/.ssh/id_rsa.pub.
The key fingerprint is:
3a:8c:1d:d1:a9:22:c7:6e:6b:43:22:31:0f:ca:63:fa ec2-user@ip-172-31-23-189
The key's randomart image is:
+--[ RSA 4096]----+
|    +            |
| . . =           |
|  = . o .        |
| * o . o         |
|= *     S        |
|.* +     .       |
|  * +            |
| .E+ .           |
| .o              |
+-----------------+
※Enterを押せば画像のような表記になります。
ssh公開鍵の値をGitHubに登録しましょう。
catコマンドで、公開鍵が含まれているファイルid_rsa.pubの中身をターミナル上に表示します。
[ec2-user@ip-192-32-33-129 ~]$ cat ~/.ssh/id_rsa.pub
すべて(ssh-rsaから最後の文字まで)コピーします。
ssh-rsa AAAs3NzaC1yc2EAAASADAQABavasAQDLwt......
https://github.com/settings/keys
上記のURLからkeyを追加しましょう。(タイトルはなんもでもOKです。)
git cloneが出来たらyarn run buildを実行しましょう。
先程の作成したディレクトリにgit cloneが完了しましたら、cloneしたアプリに移動し、yarn run buildを実行しましょう。
実行すると、アプリ内にbuildディレクトリが作成され、その中にindex.htmlが生成されていればOKです。
※yarn run buildを実行してもindex.htmlが生成されない場合はメモリ不足の可能性があります。
yarn run buildコマンドはメモリをかなり食うらしく、何度やっても生成されない場合は、一度EC2を停止させて、再起動し、再度実行してみましょう。
Nginxの設定ファイルを作成し編集しましょう。
Nginxの設定ファイルは/etc/nginx/conf.d/***.confに作成しましょう。(ファイル名は何でもOKです)
作成できましたら、下記のように編集しましょう。
server {
  listen       80;
  server_name  IPアドレス;
  charset      utf-8;

  # ドキュメントルートを指定.
  root /var/www/アプリ名/build;
  index index.html;

  # リクエストされたリソースがなければ、index.htmlを返却.
  location / {
    try_files $uri /index.html;
  }

}
上記でフロントエンド側の設定は終了です。
IPアドレスに接続し、アプリが表示されていればOKです。
※Nginxの設定ファイルを編集した跡は必ずrestartしましょう。
sudo systemctl restart nginx
ありがとうございました。
参考文献リスト