この記事は、フラー株式会社 Advent Calendar 2021 の8日目の記事です。
担当は昨年フラーにサーバーサイドエンジニアとして合流しました@inoriko711です
7日目の記事は @jfurudo さんによる Fastlane で AppStoreConnect にアップロードするまで でした。
背景
きっかけはアドベントカレンダーを担当することを宣言したときに、変換をミスったことでした。
そんなわけで、フラーのサーバーサイドが採用しているGolangを用いてきらめく星を描きたいと思います。
タイトルの意味がわからない方はこちらのアニメ・映画を見てください。
点を打つ
まずは点を打ちます。
image/drawを利用すると簡単に、X×Yのサイズのビットマップに対して任意の点に背景色とは異なる色を入れることで生成できます。
package main

import (
	"image"
	"image/color"
	"image/draw"
	"image/png"
	"log"
	"os"
)

func main() {
	// 11 x 13 のビットマップを準備する
	m := image.NewRGBA(image.Rect(0, 0, 11, 13))

	// 背景色は白 color.RGBA{255, 255, 255, 255}
	draw.Draw(m, m.Bounds(), &image.Uniform{color.RGBA{255, 255, 255, 255}}, image.Point{}, draw.Src)

	// ビットマップの中央(x,y)=(5,6)の位置に黒color.RGBA{0, 0, 0, 0}を打つ
	m.Set(5, 6, color.RGBA{0, 0, 0, 0})

	// 適当なファイルに出力する
	file, err := os.Create("point.png")
	if err != nil {
		log.Fatal(err)
	}
	defer file.Close()

	err = png.Encode(file, m)
	if err != nil {
		log.Fatal(err)
	}
}
線を引く
線は点の応用でいけます。
始点としたいXY座標から終点としたいXY座標までの間のすべての点を塗ることで線になります。
package main

import (
	"image"
	"image/color"
	"image/draw"
	"image/png"
	"log"
	"os"
)

func main() {
	m := image.NewRGBA(image.Rect(0, 0, 11, 13))
	draw.Draw(m, m.Bounds(), &image.Uniform{color.RGBA{255, 255, 255, 255}}, image.Point{}, draw.Src)

	// 始点(1,6)から終点(9,6)までの間の点全てに色を塗る
	for x := 1; x < 10; x++ {
		m.Set(x, 6, color.RGBA{0, 0, 0, 0})
	}

	// ファイルに出力する
	file, err := os.Create("line.png")
	if err != nil {
		log.Fatal(err)
	}
	defer file.Close()

	err = png.Encode(file, m)
	if err != nil {
		log.Fatal(err)
	}
}
斜めの線を書きたい場合は、2つの点の距離と角度を求めてから、間にある座標を求めます。
※なるべく細かく描画するために、float64で定義していますが、実際に座標を描画する際はintを用います
type Point struct {
	X float64
	Y float64
}

// 2点の座標(xy1とxy2)を受け取ってその間の座標を返す
func getCoordinates(xy1, xy2 *Point) []*Point {
	dx := xy2.X - xy1.X
	dy := xy2.Y - xy1.Y

	// 距離
	length := math.Sqrt(dx*dx + dy*dy)

	// ラジアン
	radian := math.Atan2(dy, dx)

	// 2点間の座標を格納するスライス
	var points []*Point

	for l := 0.0; l < length; l++ {
		// x座標とy座標を計算
		x := xy1.X + l*math.Cos(radian)
		y := xy1.Y + l*math.Sin(radian)

		// ビットマップ外の点は描写しない
		// widthはビットマップの横幅、heightはビットマップの縦幅を指す
		if (x >= 0 && x < width) && (y >= 0 && y < height) {
			points = append(points, &Point{x, y})
		}
	}

	return points
}
星の外側の頂点を求める
星を描くために、ここでは星の外側(鋭角になっている方)の頂点の位置を求めます。
星の外側の座標は正五角形の頂点の座標とイコールになります。
正五角形の頂点は、中心座標と中心からの距離を定めれば以下のコードで求められます。
// 星の外側の頂点座標を求める
func (s *Star) pentagonOutside() []*Point {
	// 頂点の数
	vertexNum := 5.0

	// 中心から頂点までの距離。ここではwidth(横幅)の半分の長さで定義する。
	R := width / 2.0

	// 中心から頂点への直線同士が成す角度
	radian := math.Pi * 2 / vertexNum

	var points []*Point
	for i := 0.0; i < vertexNum; i++ {
		// 正五角形の中心を(centerX, centerY) とする
		x := centerX + R*math.Cos(radian*i)
		y := centerY + R*math.Sin(radian*i)
		points = append(points, &Point{x, y})

		// 求めた座標の小数を四捨五入して表示させる
		fmt.Printf("外側:(x,y)=(%d,%d)\n", int(math.Round(x)), int(math.Round(y)))
	}
	return points
}
正五角形の中心を(500,500)、中心から頂点までの距離を500と定め、実行すると以下のように座標を求められます
外側:(x,y)=(1000,500)
外側:(x,y)=(655,976)
外側:(x,y)=(95,794)
外側:(x,y)=(95,206)
外側:(x,y)=(655,24)
中心から各頂点までを結んだ画像はこちら
星の内側の頂点を求める
今度は星の内側(鈍角)の頂点座標を求めます。内側の頂点座標も先程と同様に正五角形の頂点になるので考え方は同じです。
注意点としては、きれいな星を描くためには、中心から外側の頂点を結んだ直線と、中心から内側の頂点を結んだ直線から成す角度が36度(外側の頂点と中心を結んだ直線が成す角度の半分)になるように座標を求める必要があります。
// 星の内側の頂点座標を求める
func pentagonInside() []*Point {
	// 頂点の数
	vertexNum := 5.0

	// 中心から頂点までの距離
	R := width / 4.0

	// 外側の1/2の角度を求める
	radian := math.Pi / vertexNum

	var points []*Point
	for i := 1.0; i < vertexNum*2; i = i + 2 { // 外側と角度をずらしつつ幅を揃える
		// 正五角形の中心を(centerX, centerY) とする
		x := centerX + R*math.Cos(radian*i)
		y := centerY + R*math.Sin(radian*i)
		points = append(points, &Point{x, y})


		// 求めた座標の小数を四捨五入して表示させる
		fmt.Printf("内側:(x,y)=(%d,%d)\n", int(math.Round(x)), int(math.Round(y)))
	}

	return points
}
正五角形の中心を(500,500)、中心から頂点までの距離を250と定め、実行すると以下のように座標を求められます
内側:(x,y)=(702,647)
内側:(x,y)=(423,738)
内側:(x,y)=(250,500)
内側:(x,y)=(423,262)
内側:(x,y)=(702,353)
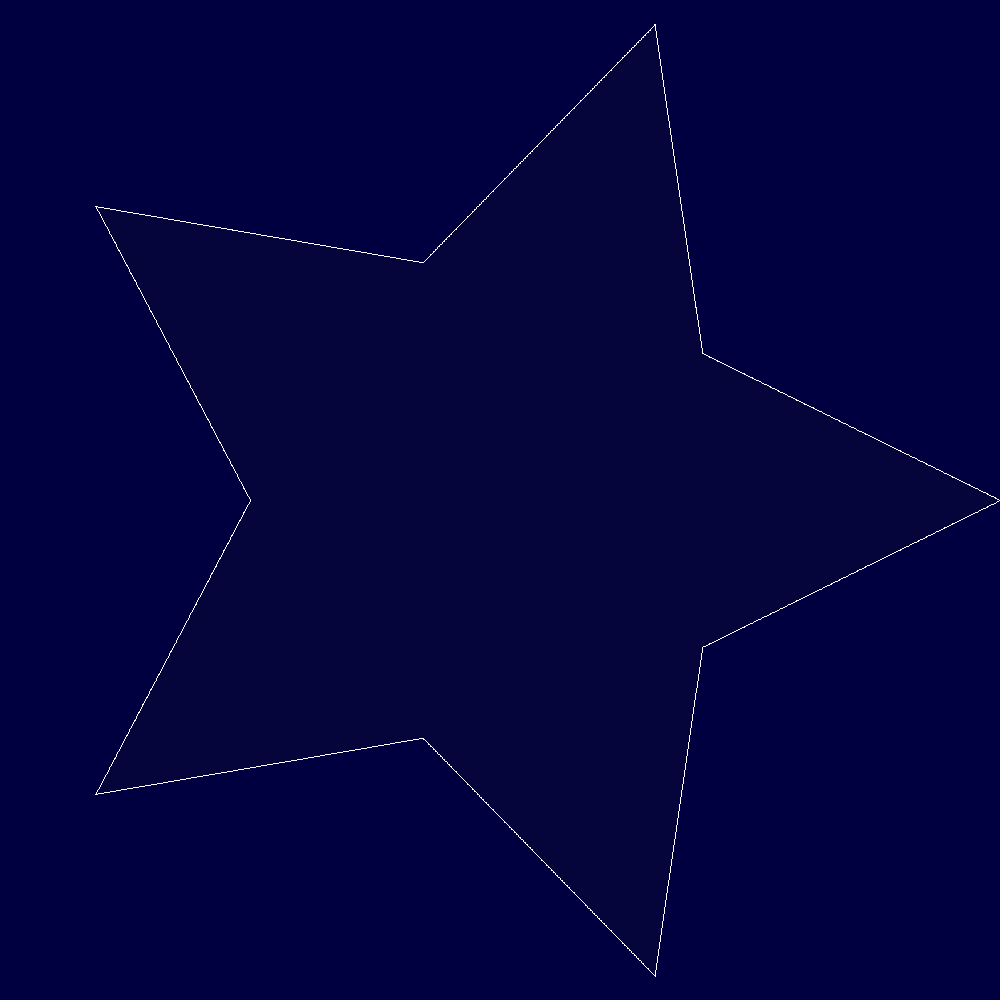
中心から各外側・内側の頂点までを結んだ画像はこちら
星を描く
先までで求めた星の頂点座標と、線を引く方法を応用すれば星を描くことができます。
//  座標を保持するスライス
var starOutsidePoints []*Point
for i := 0; i < len(pOutside); i++ {
	// 星の外枠の座標を求める(pOutside:星の外側の頂点群、pInside:星の内側の頂点群)
	starOutsidePoints = append(starOutsidePoints, getCoordinates(pOutside[i], pInside[i])...)

	if i+1 == len(pOutside) {
		// 内側の頂点の最後の点は外側の頂点の最初の点につなげる
		starOutsidePoints = append(starOutsidePoints, getCoordinates(pInside[i], pOutside[0])...)
	} else {
		starOutsidePoints = append(starOutsidePoints, getCoordinates(pInside[i], pOutside[i+1])...)
	}
}
そんな感じで作り上げた画像がこちら
星の中を座標を求める
さて、星の中の座標を求めます。ここが一番の関門です。
失敗したやりかた
中心座標と星のラインを成す座標が求まっているので、中心からライン上までの各座標を結ぶ直線上をすべて星の内側の座標として定めました。
これであれば、各座標と直線を引く方法で完結する……のですが……………その方法で色を塗ってみた画像がこちら。

クリックしていただくとはっきりわかると思うのですが、星の鈍角近くにチラチラと白い箇所があります。内側として判定されなかった座標です。
落ち着いて考えればわかると思うのですが、中心から離れるほど、そして星のラインを成す座標が疎であるほど、中心座標からライン座標の直線上に乗り切れない座標が出てきてしまいます。残念。
比較的成功したやりかた
各マス目に対して、それが星の内側か外側かライン上かを判定させます。
かなり力技ですが、x座標を固定しy座標を動かしながら、最初のマス目は星の外側、ラインを超えたら内側、再度ラインを超えたら外側……と判定します。
type DrawPoint struct {
	X     int
	Y     int
	Color color.Color
}

type LinePoint struct {
	FromY int
	ToY   int
}

// 各マス目の色を決める(outsideDrawPoints:星のラインを成す座標、pOutside:星の外側の頂点を成す座標)
func registerColor(outsideDrawPoints []*DrawPoint, pOutside []*Point) []*DrawPoint {
	var drawPoints []*DrawPoint

	// x座標を固定して調べる(width:ビットマップの横幅)
	for x := 0; x <= int(width); x++ {
		// 直前のマスがライン上かどうか保持する変数
		isLine := false
		yTo := 0
		yFrom := 0
		var linePoints []*LinePoint

		// 星の枠線のy座標を求める(height:ビットマップの縦幅)
		for y := 0; y <= int(height); y++ {
			if !isLine && includePoint(x, y, outsideDrawPoints) {
				// ラインじゃないところからライン上に変わったらFromToを両方設定する
				yFrom = y
				yTo = y
				isLine = true
			} else if isLine && includePoint(x, y, outsideDrawPoints) {
				// 前のマスに引き続きライン上なら、Toの値を更新する
				yTo = y
			} else if isLine && !includePoint(x, y, outsideDrawPoints) {
				// ラインから外れたらライン情報を格納する
				linePoints = append(linePoints, &LinePoint{yFrom, yTo})
				isLine = false
			}
		}

		// マスの色を決定する(bgColor:背景色, lineColor:ラインの色, starColor:星の内部の色)
		for y := 0; y <= int(height); y++ {
			color := bgColor
			switch len(linePoints) {
			case 0:
				drawPoints = append(drawPoints, &DrawPoint{x, y, bgColor})
			case 1:
				// ラインが1箇所しかないときは、ライン以外は背景色
				if y >= linePoints[0].FromY && y <= linePoints[0].ToY {
					color = lineColor
				}
				drawPoints = append(drawPoints, &DrawPoint{x, y, color})
			case 2:
				// ラインが2箇所有るときは、背景→ライン→星→ライン→背景のパターンと、背景→頂点(ライン)→背景→頂点(ライン)→背景のパターンがある
				if x == int(math.Round(pOutside[3].X)) || x == int(math.Round(pOutside[3].X))+1 {
					// 背景→頂点(ライン)→背景→頂点(ライン)→背景のパターン
					if y < linePoints[0].FromY {
						color = bgColor
					} else if y >= linePoints[0].FromY && y <= linePoints[0].ToY {
						color = lineColor
					} else if y > linePoints[0].ToY && y < linePoints[1].FromY {
						color = bgColor
					} else if y >= linePoints[1].FromY && y <= linePoints[1].ToY {
						color = lineColor
					} else {
						color = bgColor
					}
				} else {
					// 背景→ライン→星→ライン→背景のパターン
					if y < linePoints[0].FromY {
						color = bgColor
					} else if y >= linePoints[0].FromY && y <= linePoints[0].ToY {
						color = lineColor
					} else if y > linePoints[0].ToY && y < linePoints[1].FromY {
						color = starColor
					} else if y >= linePoints[1].FromY && y <= linePoints[1].ToY {
						color = lineColor
					} else {
						color = bgColor
					}
				}
				drawPoints = append(drawPoints, &DrawPoint{x, y, color})
			case 3:
				if y < linePoints[0].FromY {
					color = bgColor
				} else if y >= linePoints[0].FromY && y <= linePoints[0].ToY {
					color = lineColor
				} else if y > linePoints[0].ToY && y < linePoints[1].FromY {
					color = starColor
				} else if y >= linePoints[1].FromY && y <= linePoints[1].ToY {
					color = lineColor
				} else if y > linePoints[1].ToY && y < linePoints[2].FromY {
					color = starColor
				} else if y >= linePoints[2].FromY && y <= linePoints[2].ToY {
					color = lineColor
				} else {
					color = bgColor
				}
				drawPoints = append(drawPoints, &DrawPoint{x, y, color})
			case 4:
				if y < linePoints[0].FromY {
					color = bgColor
				} else if y >= linePoints[0].FromY && y <= linePoints[0].ToY {
					color = lineColor
				} else if y > linePoints[0].ToY && y < linePoints[1].FromY {
					color = starColor
				} else if y >= linePoints[1].FromY && y <= linePoints[1].ToY {
					color = lineColor
				} else if y > linePoints[1].ToY && y < linePoints[2].FromY {
					color = bgColor
				} else if y >= linePoints[2].FromY && y <= linePoints[2].ToY {
					color = lineColor
				} else if y > linePoints[2].ToY && y < linePoints[3].FromY {
					color = starColor
				} else if y >= linePoints[3].FromY && y <= linePoints[3].ToY {
					color = lineColor
				} else {
					color = bgColor
				}
				drawPoints = append(drawPoints, &DrawPoint{x, y, color})
			}
		}
	}

	return drawPoints
}

// (x,y)が[]*DrawPointに含まれているかどうかを判定する
func includePoint(x, y int, points []*DrawPoint) bool {
	for _, p := range points {
		if x == p.X && y == p.Y {
			return true
		}
	}
	return false
}
そんなこんなで求めた座標とそれに対する色で描きあげた星がこちら。

背景色をつける
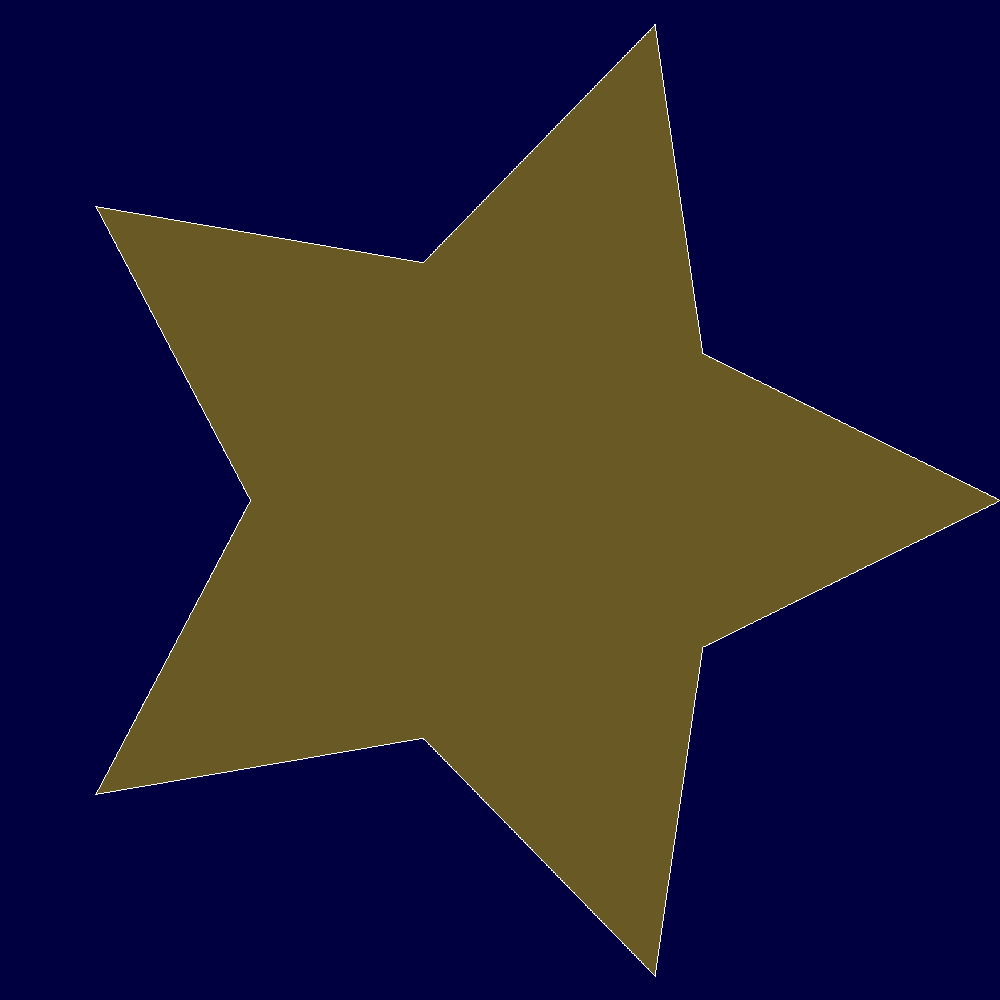
星の色をいわゆる金色のcolor.RGBA{255, 215, 6, 255}に、背景色を夜空感のあるcolor.RGBA{0, 0, 64, 255}に定め、画像を作ります。
するとあら不思議、夜空に浮かぶ星ができました!

GIFアニメをつくる
ここまでで作ったコードを利用すれば、好きな色の星の画像をいくらでも何枚でも作成できます。
画像を複数枚準備できれば、image/drawを利用してGIFアニメを作れます。
てなわけで、Shogo Ichinoseさんのこちらの記事を参考に作ってみました。
// GIFアニメの元としたい画像一覧
files := []string{"hoge.png", "fuga.png"}

// 各フレームの画像を GIF で読み込んで outGif を構築する
outGif := &gif.GIF{}
for _, f := range files {
	f, err := os.Open(f.filename)
	if err != nil {
		log.Fatal(err)
		return
	}
	defer f.Close()

	// image.Imageへとデコード
	img, err := png.Decode(f)
	if err != nil {
		log.Fatal(err)
		return
	}
	q := median.Quantizer(256)
	p := q.Quantize(make(color.Palette, 0, 256), img)
	paletted := image.NewPaletted(img.Bounds(), p)
	draw.FloydSteinberg.Draw(paletted, img.Bounds(), img, image.Point{})

	outGif.Image = append(outGif.Image, paletted)
	outGif.Delay = append(outGif.Delay, 0)
}

// out.gif に保存する
f, _ := os.OpenFile("out.gif", os.O_WRONLY|os.O_CREATE, 0600)
defer f.Close()

err := gif.EncodeAll(f, outGif)
if err != nil {
	log.Fatal(err)
}
twinkleさせる
先程作成した夜空に浮かぶ星の画像の他に、星の色を少しずつ背景色に近づけながら画像を10枚ほど生成します。
 |
color.RGBA{255, 215, 6, 255} |
 |
color.RGBA{230, 194, 12, 255} |
 |
color.RGBA{205, 173, 18, 255} |
 |
color.RGBA{180, 152, 24, 255} |
 |
color.RGBA{155, 131, 30, 255} |
 |
color.RGBA{130, 110, 36, 255} |
 |
color.RGBA{105, 89, 42, 255} |
 |
color.RGBA{80, 68, 48, 255} |
 |
color.RGBA{55, 47, 54, 255} |
 |
color.RGBA{30, 26, 60, 255} |
 |
color.RGBA{5, 5, 64, 255} |
これらの画像を先程のGIFアニメ生成用のコードを通すとこうなります

きらめかせる
twinkle画像と同様に、今度は色相環の12色で作成した画像をGIFアニメにすると、結構うるさい感じのアニメが簡単にできました

さいごに
今回生成したコードはGitHubで公開しております。
より簡単にできるアルゴリズムを思いついた方はぜひともコメント・PRください。