Windows10にてルーティング周辺
ネットワークカードを購入し、複数ネットワークを構築できる環境ができたので、Windows10にて、ルーティング周辺の調査をした際の備忘録。
ルーティング
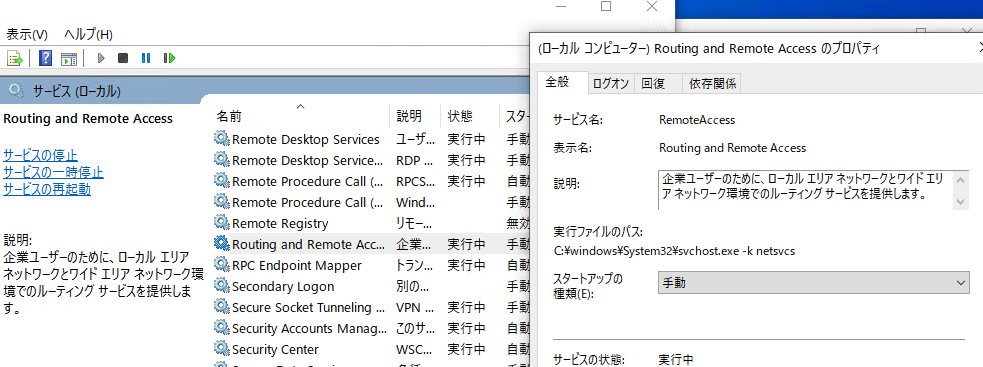
”Routing and Remote Access”サービスが有効化されている必要がある。
有効化後、”route”コマンドでルートを追加する。
> route ADD 157.0.0.0 MASK 255.0.0.0 157.55.80.1 METRIC 3 IF 2
基本的に、相手側もルーティング(スタティックルートなど)しておく必要がある。
NAT
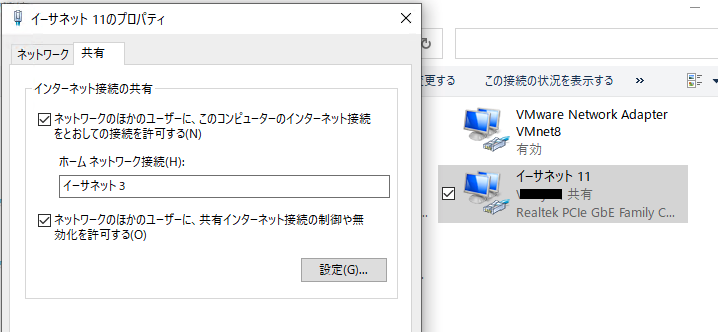
Windowsのインターネット共有を使うのが常套手段。下記は共有される側の設定。
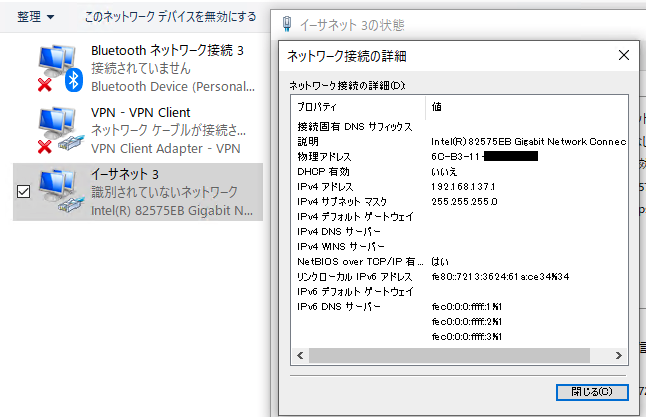
共有設定後、共有する側のインターフェースには、IPアドレス”192.168.137.1”が割り当てられることが多い。
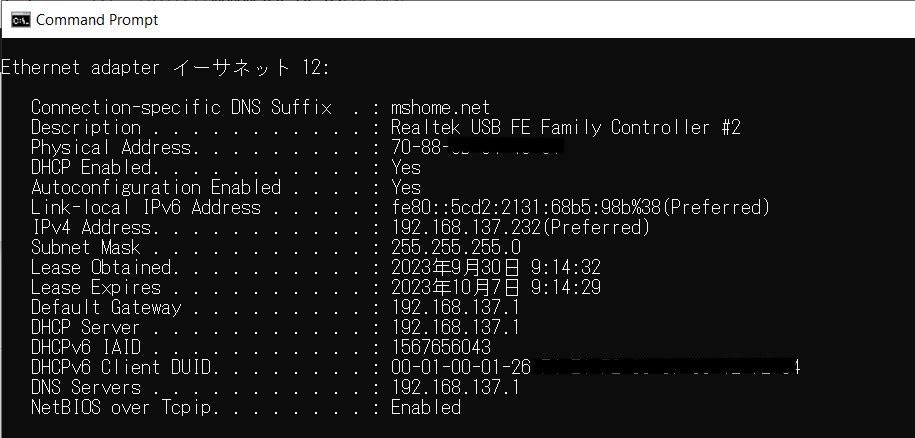
そして、そのインターフェースに接続されたクライアントには、DHCPによりIPアドレスが配布される。
Port Forward
まずは情報
WindowsでのPort Forwardに関しては、下記の記事などが見つかる。
- Windowsでポートフォワーディング、Linuxでポートフォワーディング
- Windowsサーバでポートフォワーディングを使ってみた
- Steps to configure port forwarding on windows using netsh
最初の2つの記事を見て設定を行い、テストしたが動作せず。あれこれトライして、Windows Defenderを無効化すると動作。同時に3番目の記事が見つかる。
検証環境
検証環境は下記となる。
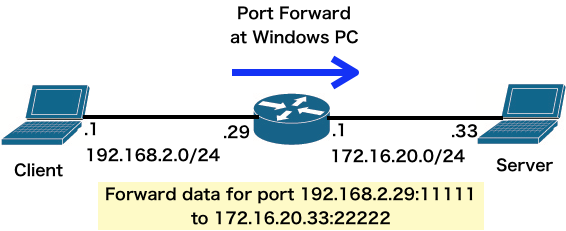
Windows PCは、2つのIPアドレス192.168.2.29および172.16.20.1を所持する。192.168.2.29かつTCPポート11111に来たデータを、IPアドレス172.16.20.33のTCPポート22222に転送する。
設定
Windows PCでの実際の設定状況は下記となる。
C:\WINDOWS\system32>netsh interface portproxy add v4tov4 listenport=11111 listenaddr=* connectport=22222 connectaddress=172.16.20.33
C:\WINDOWS\system32>netsh interface portproxy show all
ipv4 をリッスンする:         ipv4 に接続する:

Address         Port        Address         Port
--------------- ----------  --------------- ----------
*               11111       172.16.20.33    22222

C:\WINDOWS\system32>netsh advfirewall firewall add rule name="allow11111" protocol=TCP dir=in localport=11111 action=allow
OK

C:\WINDOWS\system32>netsh advfirewall firewall show rule name="allow11111"

規則名:                               allow11111
----------------------------------------------------------------------
有効:                                 はい
方向:                                 入力
プロファイル:                         ドメイン,プライベート,パブリック
グループ:
ローカル IP:                          任意
リモート IP:                          任意
プロトコル:                           TCP
ローカル ポート:                      11111
リモート ポート:                      任意
エッジ トラバーサル:                  いいえ
操作:                                 許可
OK
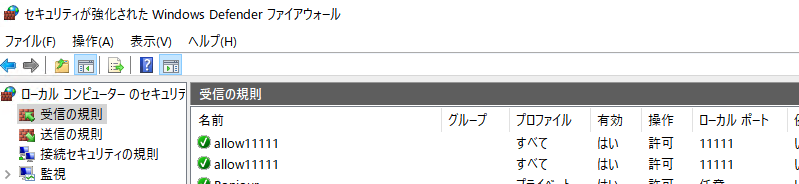
この設定後、GUIでのFirewall状況は下記となった。
検証
コマンド
nc(netcat)を利用。Client(192.168.2.1)にて下記コマンドを実行。
$ echo abc123 | nc 192.168.2.29 11111
Server(172.16.20.33)に下記コマンドを実行(および結果)。
$ nc -l 22222
abc123
Clientからのデータを受信できている。
パケットキャプチャ
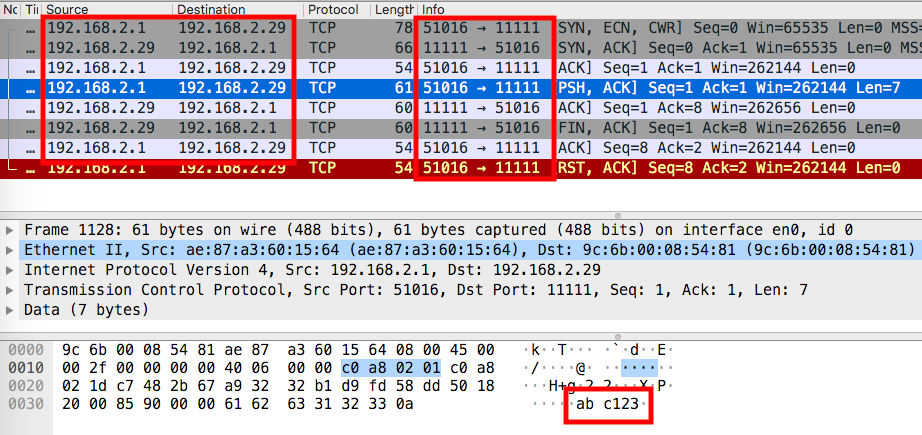
上記コマンド実行時のキャプチャデータである。
Client - Windows PC
Windows PC - Server
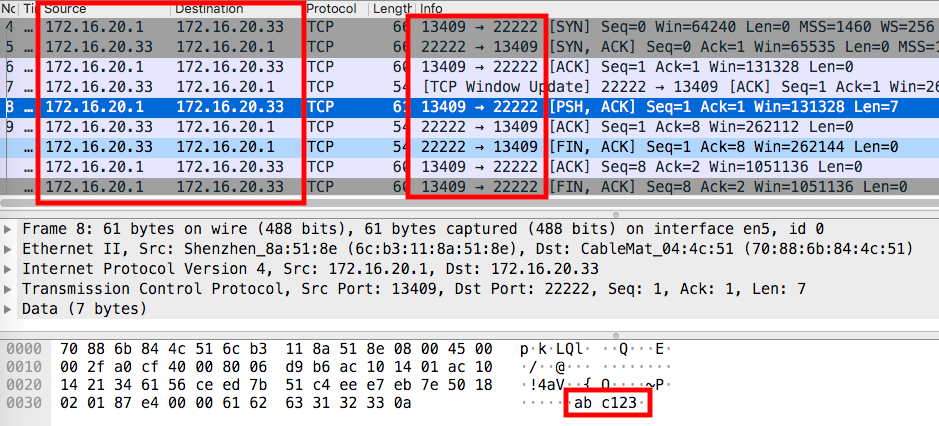
正しく、Port Forwardされている様子が伺える。
その他
- インターネット共有(NAT)時も同様に動作した。
- 上述したルーティングに関しては、ICMP(ping)でのみしか確認していない。ここでの記述にあるように、単なるルーティングでもTCPやUDPに関しては、Firewallを考慮する必要がありそうだ。
- Port Forwardには、上述した”Routing and Remote Access”サービスが有効化されている必要はないようだ。
EOF