Squidで透過型プロキシ
Squidで透過型プロキシを実現する。クライアントのブラウザにてProxy設定を不要とするものである(証明書インポートを除く)。
環境
PCやUbuntuの状況は、その1と同じである。

今回は、Squidを動作させるUbuntuに、IP Forwardingを設定したNATを用意する(これらがなければ動作しなかった)。
設定
カーネルレベルでの転送設定
$ sudo sysctl -w net.ipv4.ip_forward=1
net.ipv4.ip_forward = 1
nftables
NATおよび転送設定に、nftablesを利用した。
NAT
I/F名などは異なるが、「トライしたかったnftablesの基本(その2)」と同じ。
$ sudo nft create table ip nat_filter
$ sudo nft create chain ip nat_filter src_nat {type nat hook postrouting priority srcnat \;}
$ sudo nft add rule ip nat_filter src_nat oif enp3s0 masquerade
$ sudo nft create chain ip nat_filter dst_nat {type nat hook prerouting priority dstnat \;}
$ sudo nft create chain ip nat_filter filter_1 {type filter hook forward priority 0 \; policy drop \;}
$ sudo nft add rule ip nat_filter filter_1 iif enp1s0f0 oif enp3s0 accept
$ sudo nft add rule ip nat_filter filter_1 ct state related,established accept
”enp1s0f0”がLAN側、”enp3s0”がWAN側である。
ポート80および443の転送
$ sudo nft add rule ip nat_filter dst_nat iif enp1s0f0 tcp dport http redirect to :3128
$ sudo nft add rule ip nat_filter dst_nat iif enp1s0f0 tcp dport https redirect to :3129
状況
下記となる。
$ sudo nft -a list ruleset
table ip nat_filter { # handle 1
	chain src_nat { # handle 1
		type nat hook postrouting priority srcnat; policy accept;
		oif "enp3s0" masquerade # handle 4
	}

	chain dst_nat { # handle 5
		type nat hook prerouting priority dstnat; policy accept;
		iif "enp1s0f0" tcp dport 80 redirect to :3128 # handle 8
		iif "enp1s0f0" tcp dport 443 redirect to :3129 # handle 9
	}

	chain filter_1 { # handle 10
		type filter hook forward priority filter; policy drop;
		iif "enp1s0f0" oif "enp3s0" accept # handle 11
		ct state established,related accept # handle 14
	}
}
Squid
ここはかなり苦労した。数多くのサイトを見たが、下記サイトに多少の手を加えたものでようやく動作。
openssl付squidのインストール。
$ sudo apt install squid-openssl
$ squid -v
Squid Cache: Version 5.7
Service Name: squid
Ubuntu linux

This binary uses OpenSSL 3.0.2 15 Mar 2022. configure options:  '--build=x86_64-linux-gnu' '--prefix=/usr' '--includedir=${prefix}/include' '--mandir=${prefix}/share/man' '--infodir=${prefix}/share/info' '--sysconfdir=/etc' '--localstatedir=/var' '--disable-option-checking' '--disable-silent-rules' '--libdir=${prefix}/lib/x86_64-linux-gnu' '--runstatedir=/run' '--disable-maintainer-mode' '--disable-dependency-tracking' 'BUILDCXXFLAGS=-g -O2 -ffile-prefix-map=/build/squid-Apg30N/squid-5.7=. -flto=auto -ffat-lto-objects -flto=auto -ffat-lto-objects -fstack-protector-strong -Wformat -Werror=format-security -Wdate-time -D_FORTIFY_SOURCE=2 -Wl,-Bsymbolic-functions -flto=auto -ffat-lto-objects -flto=auto -Wl,-z,relro -Wl,-z,now ' 'BUILDCXX=g++' '--with-build-environment=default' '--enable-build-info=Ubuntu linux' '--datadir=/usr/share/squid' '--sysconfdir=/etc/squid' '--libexecdir=/usr/lib/squid' '--mandir=/usr/share/man' '--enable-inline' '--disable-arch-native' '--enable-async-io=8' '--enable-storeio=ufs,aufs,diskd,rock' '--enable-removal-policies=lru,heap' '--enable-delay-pools' '--enable-cache-digests' '--enable-icap-client' '--enable-follow-x-forwarded-for' '--enable-auth-basic=DB,fake,getpwnam,LDAP,NCSA,PAM,POP3,RADIUS,SASL,SMB' '--enable-auth-digest=file,LDAP' '--enable-auth-negotiate=kerberos,wrapper' '--enable-auth-ntlm=fake,SMB_LM' '--enable-external-acl-helpers=file_userip,kerberos_ldap_group,LDAP_group,session,SQL_session,time_quota,unix_group,wbinfo_group' '--enable-security-cert-validators=fake' '--enable-storeid-rewrite-helpers=file' '--enable-url-rewrite-helpers=fake' '--enable-eui' '--enable-esi' '--enable-icmp' '--enable-zph-qos' '--enable-ecap' '--disable-translation' '--with-swapdir=/var/spool/squid' '--with-logdir=/var/log/squid' '--with-pidfile=/run/squid.pid' '--with-filedescriptors=65536' '--with-large-files' '--with-default-user=proxy' '--enable-linux-netfilter' '--with-systemd' '--with-openssl' '--enable-ssl-crtd' 'build_alias=x86_64-linux-gnu' 'CFLAGS=-g -O2 -ffile-prefix-map=/build/squid-Apg30N/squid-5.7=. -flto=auto -ffat-lto-objects -flto=auto -ffat-lto-objects -fstack-protector-strong -Wformat -Werror=format-security -Wall' 'LDFLAGS=-Wl,-Bsymbolic-functions -flto=auto -ffat-lto-objects -flto=auto -Wl,-z,relro -Wl,-z,now ' 'CPPFLAGS=-Wdate-time -D_FORTIFY_SOURCE=2' 'CXXFLAGS=-g -O2 -ffile-prefix-map=/build/squid-Apg30N/squid-5.7=. -flto=auto -ffat-lto-objects -flto=auto -ffat-lto-objects -fstack-protector-strong -Wformat -Werror=format-security'
opensslにて自己証明書などの作成
$ sudo openssl dhparam -outform PEM -out my.pem 2048
$ sudo openssl req -new -newkey rsa:2048 -sha256 -days 3650 -nodes -x509 -extensions v3_ca -subj "/OU=PrivateCA/C=JP/CN=Private" -keyout my.key -out my.crt
/etc/squid/squid.conf
最小化設定を目指したこともあり、セキュリティ視点は足りておらず、運用には不適切である。
acl localnet src 172.16.1.0/24
http_access allow localnet

# for SSL Bump
sslcrtd_program /usr/lib/squid/security_file_certgen -s /var/spool/squid/ssl_db -M 4MB
sslproxy_cert_error allow all
acl step1 at_step SslBump1
ssl_bump peek step1
ssl_bump bump all

http_port 8080	# Necessary
http_port 3128 intercept

https_port 3129 intercept ssl-bump generate-host-certificates=on tls-cert=/etc/squid/my.crt tls-key=/etc/squid/my.key tls-dh=prime256v1:/etc/squid/my.pem
- ”http_port 8080”は必須のようだ(3128とは別に)。これがないと、”sudo systemctl status squid”に”FATAL: mimeLoadIcon: cannot parse internal URL: http://ホスト名:0/squid-internal-static/icons/silk/image.png”なるログが残り、squidが起動しない。
- ssl-bumpの設定がなくても起動するが、”sudo systemctl status squid”に”WARNING: No ssl_bump configured. Disabling ssl-bump on https_port [::]:3129”なるログが残り、正常に動作しない。
ポートのオープン状況は下記となる。
$ netstat -ntl
稼働中のインターネット接続 (サーバのみ)
Proto 受信-Q 送信-Q 内部アドレス            外部アドレス            状態
tcp        0      0 127.0.0.53:53           0.0.0.0:*               LISTEN
tcp        0      0 0.0.0.0:22              0.0.0.0:*               LISTEN
tcp        0      0 127.0.0.1:631           0.0.0.0:*               LISTEN
tcp6       0      0 :::8080                 :::*                    LISTEN
tcp6       0      0 ::1:631                 :::*                    LISTEN
tcp6       0      0 :::3129                 :::*                    LISTEN
tcp6       0      0 :::3128                 :::*                    LISTEN
tcp6       0      0 :::22                   :::*                    LISTEN
おまけ:iptables利用の場合(nftablesの代わりに)
iptables利用の場合のNATや転送の設定は下記となる。
$ sudo iptables -t nat -A POSTROUTING -o enp3s0 -j MASQUERADE
$ sudo iptables -t nat -A PREROUTING -i enp1s0f0 -p tcp --dport 80 -j REDIRECT --to-ports 3128
$ sudo iptables -t nat -A PREROUTING -i enp1s0f0 -p tcp --dport 443 -j REDIRECT --to-ports 3129
$ sudo iptables -P FORWARD DROP
$ sudo iptables -A FORWARD -i enp1s0f0 -o enp3s0 -j ACCEPT
$ sudo iptables -A FORWARD -m state --state ESTABLISHED,RELATED -j ACCEPT
ちなみに、iptablesで設定を行うと、nftablesの設定にも反映されるようだ(下記)。(ただし、nftablesで設定を行っても、iptablesでは設定は見えない。)
$ sudo iptables -L
Chain INPUT (policy ACCEPT)
target     prot opt source               destination

Chain FORWARD (policy DROP)
target     prot opt source               destination
ACCEPT     all  --  anywhere             anywhere
ACCEPT     all  --  anywhere             anywhere             state RELATED,ESTABLISHED

Chain OUTPUT (policy ACCEPT)
target     prot opt source               destination
$ sudo iptables -L -t nat
Chain PREROUTING (policy ACCEPT)
target     prot opt source               destination
REDIRECT   tcp  --  anywhere             anywhere             tcp dpt:http redir ports 3128
REDIRECT   tcp  --  anywhere             anywhere             tcp dpt:https redir ports 3129

Chain INPUT (policy ACCEPT)
target     prot opt source               destination

Chain OUTPUT (policy ACCEPT)
target     prot opt source               destination

Chain POSTROUTING (policy ACCEPT)
target     prot opt source               destination
MASQUERADE  all  --  anywhere             anywhere
$ sudo nft -a list ruleset
table ip nat { # handle 2
	chain POSTROUTING { # handle 1
		type nat hook postrouting priority srcnat; policy accept;
		oifname "enp3s0" counter packets 113 bytes 7781 masquerade  # handle 2
	}

	chain PREROUTING { # handle 3
		type nat hook prerouting priority dstnat; policy accept;
		iifname "enp1s0f0" meta l4proto tcp tcp dport 80 counter packets 9 bytes 576 redirect to :3128 # handle 4
		iifname "enp1s0f0" meta l4proto tcp tcp dport 443 counter packets 33 bytes 2112 redirect to :3129 # handle 5
	}
}
table ip filter { # handle 3
	chain FORWARD { # handle 1
		type filter hook forward priority filter; policy drop;
		iifname "enp1s0f0" oifname "enp3s0" counter packets 76 bytes 8220 accept # handle 2
		ct state related,established counter packets 63 bytes 10664 accept # handle 3
	}
}
検証
/var/log/squid/access.log
本ファイルのさわりである。
1704799577.279    403 172.16.1.201 NONE_NONE/000 0 CONNECT 17.248.201.64:443 - ORIGINAL_DST/17.248.201.64 -
1704799578.839     37 172.16.1.201 TCP_MISS/200 5342 GET http://init-p01st.push.apple.com/bag - ORIGINAL_DST/23.220.68.4 application/x-apple-plist
1704799578.991     52 172.16.1.201 NONE_NONE/000 0 CONNECT 17.57.145.148:443 - HIER_NONE/- -
1704799583.160    383 172.16.1.201 NONE_NONE/000 0 CONNECT 17.248.201.64:443 - ORIGINAL_DST/17.248.201
ブラウザ
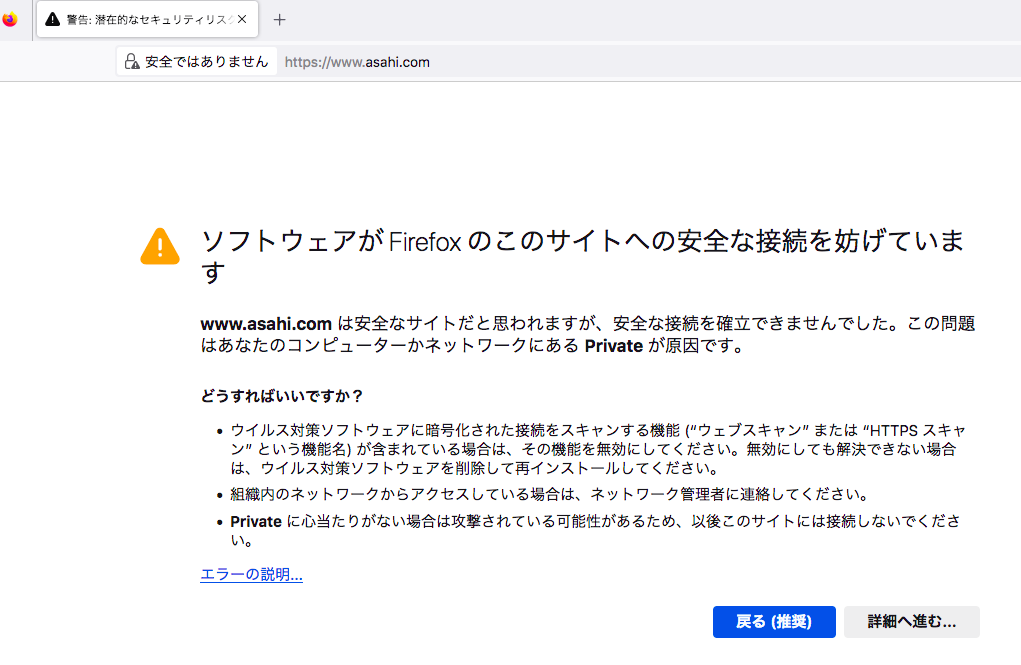
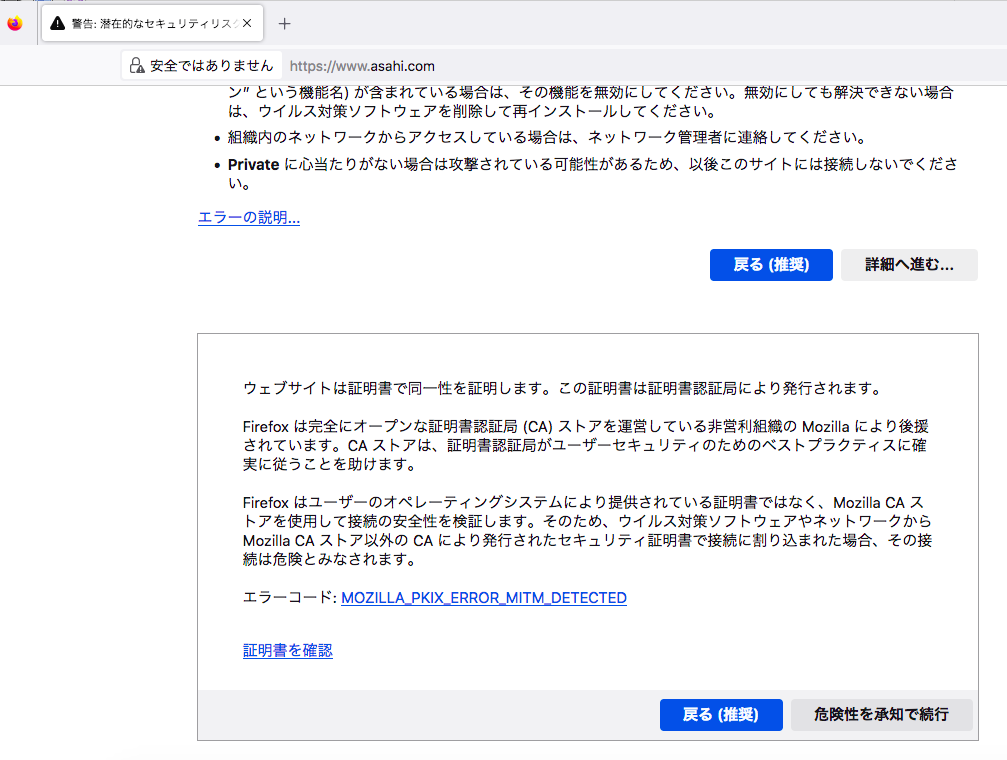
opensslで作成したCAのインストール前には、下記のようなメッセージが表示される。
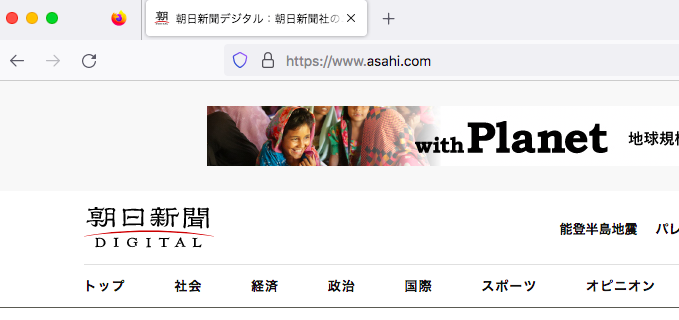
インストール後には、下記となった。
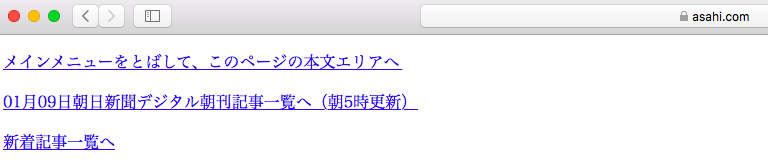
CAをインストールしていないと、表示がいびつになるケースもあるようだ。
まずは、ここまでか。
終わりに
ログに次のエラーが表示されていた。
- ERROR: failure while accepting a TLS connection
- security_file_certgen helper database '/var/spool/squid/ssl_db' failed: Failed to open file /var/spool/squid/ssl_db/index.txt
ネット上を調べると、前者は中間証明書の取り扱いに関連する可能性があり、後者はデータベースのハンドリングに失敗している様子、、、。少々調べたがタイムアウトで、今回はGiveUp。余裕ができたら、詳細に調べてみたい。