コンパレータを試す
秋月電子で購入したコンパレータ「4回路入コンパレータ NJM2901N」の超基本動作を確認してみる。
コンパレータとは
比較器である。参照(基準)電圧があり、その電圧より大きければ供給電圧を出力、小さければ0Vを出力するのが基本。下記サイト参照。
データシート
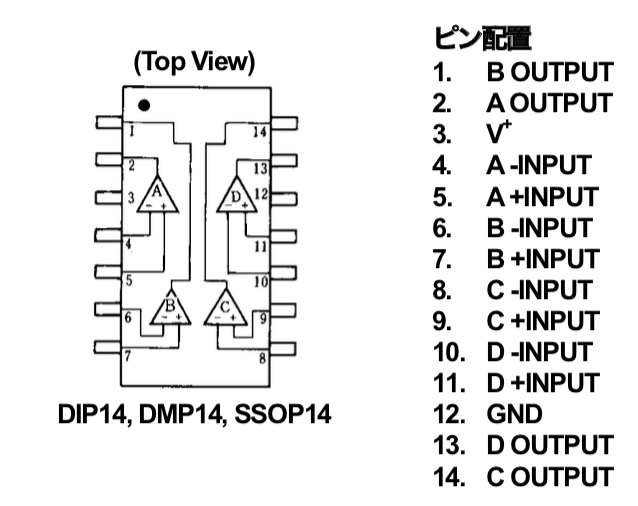
NJM2901Nのデータシートは、こちらを参照。ピン配置および基本回路を下記。
ピン配置
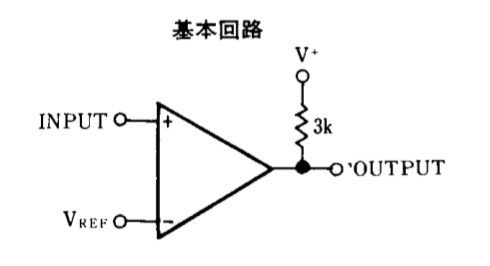
基本回路
実験回路
上記基本回路をもとに作成した回路は下記。
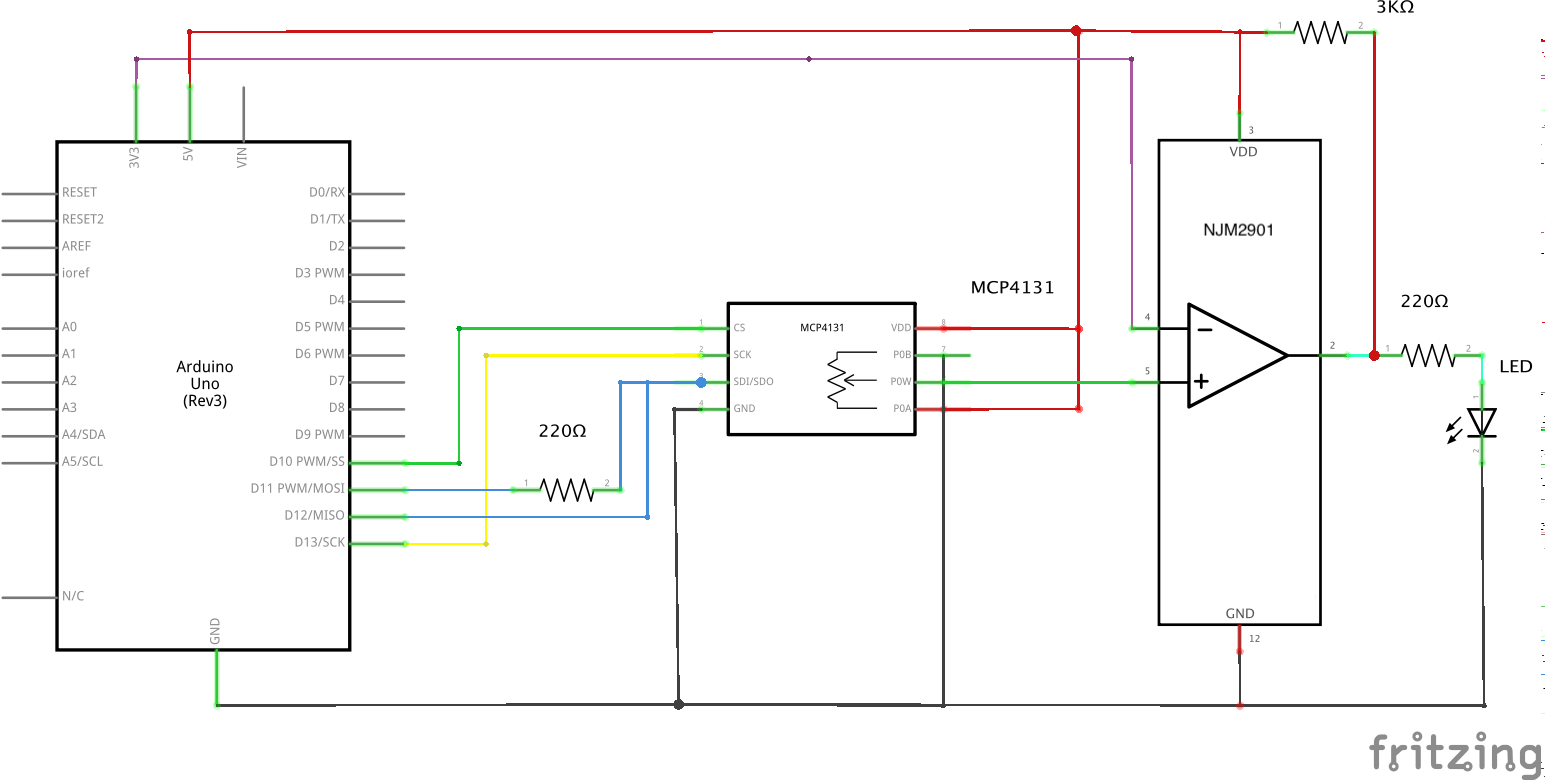
Arduino互換機からの3.3Vを基準電圧とし(NJM2901NのPin4)、Arduino互換機で制御するデジタルポテンショメーター(POW)により入力電圧(Pin5)を変化させる。Pin2がアウトプットとなり、上記ではLEDが接続されている。実際の状況は下記のとおり。
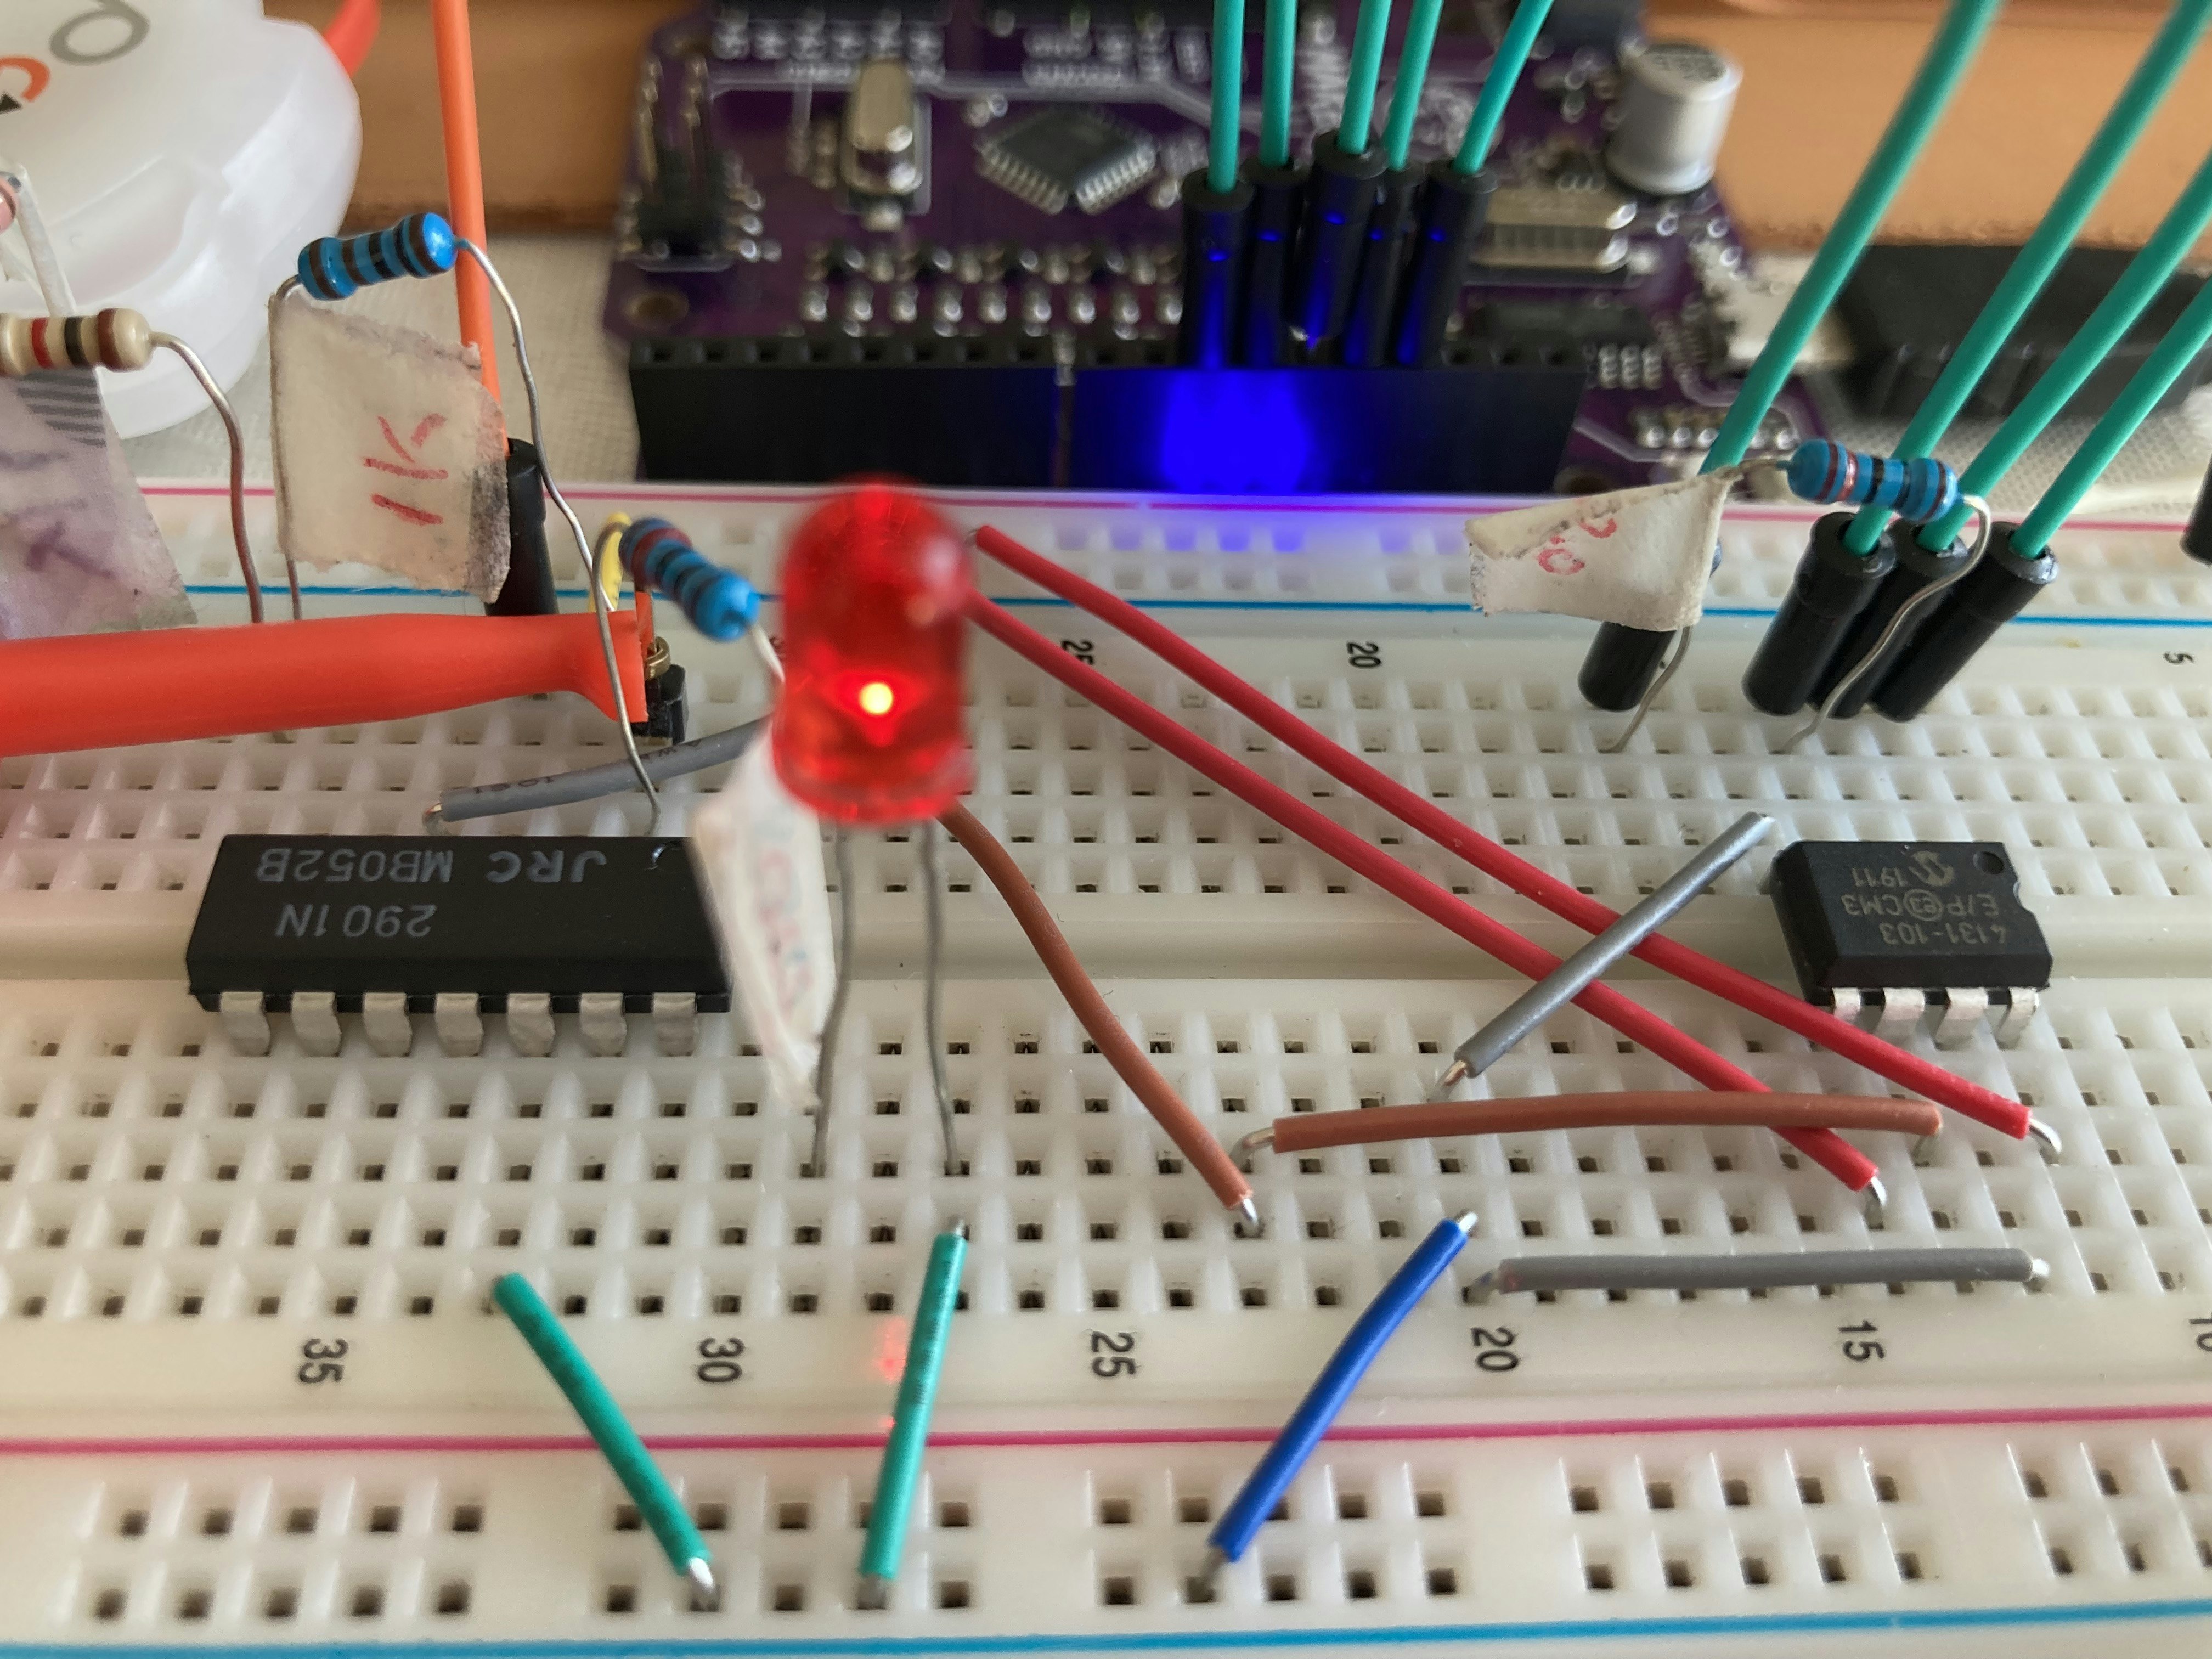
左側がコンパレータNJM2901N、右側がポテンショメーターであり、Arduino互換機から制御されている。なお、後述する「実験」では、LEDを接続せず、Pin2の電圧測定も行っている。
ソースコード
デジタルポテンショメーターを操作するもの。こちらの回「エレキ素人が何か考える(その6:ツェナーダイオード;失敗?)」のコードと全く同じ。
#include <SPI.h>

#define W_ADDR 0x00
#define R_ADDR 0x0c
#define CS 10

void setup() {
  pinMode(CS, OUTPUT);
  SPI.begin();
  Serial.begin(9600);
  digitalPotWrite(127);  // 0: Vwb=0V;Vaw=Max   127: Vwb=Max;Vaw=0V
  delay(10);
  int r_val = digitalPotRead();
  Serial.print("Read  "); Serial.println(r_val);
}

void loop() {
  while (Serial.available()) {  // Waiting for writing data (0-127)
    String data = Serial.readStringUntil('\n');
    int w_val = data.toInt();
    Serial.print("Write "); Serial.println(w_val);
    digitalPotWrite(w_val);
    delay(10);
    int r_val = digitalPotRead();
    Serial.print("Read  "); Serial.println(r_val);
  }
  delay(10);
}

int digitalPotWrite(int value) {
  digitalWrite(CS, LOW);
  SPI.transfer(W_ADDR);
  SPI.transfer(value);
  digitalWrite(CS, HIGH);
}

int digitalPotRead() {
  int val;
  digitalWrite(CS, LOW);
  SPI.transfer(R_ADDR);
  val = SPI.transfer(255); // Must be 255, instead of 127
  digitalWrite(CS, HIGH);
  return val;
}
シリアルコンソールから入力された数値(0-127)により、ポテンショメーターの出力(=コンパレータへの入力)電圧をコントロールするもの。
実験
シリアルコンソールから入力された数値(入力電圧)により、コンパレータのPin5(インプット)およびPin2(アウトプット)の電圧を測定する。
Arduino互換ボードの、5Vおよび3.3Vの電圧
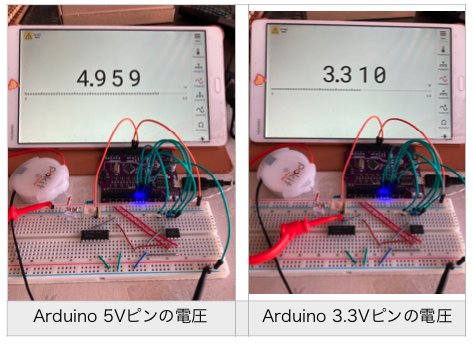
この<3.310V>がコンパレータの基準となる電圧である。
シリアルからの入力値:127
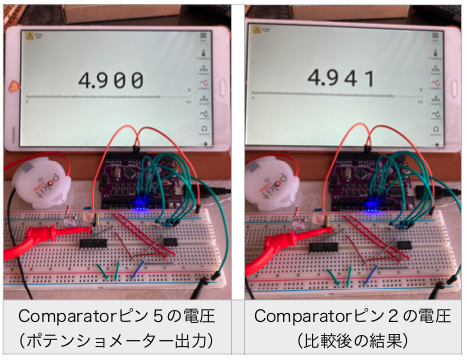
ポテンショメーター出力値最大のケースである。基準値<3.310V>より大きいので、コンパレータの出力はVdd(約5V:上記の写真で<4.959V>)となる。
シリアルからの入力値:86
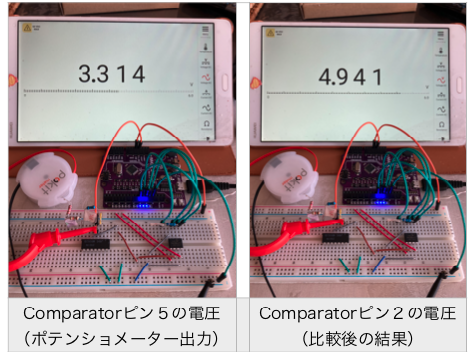
入力値は、基準値<3.310V>より若干大きい値(3.314V)を探した結果である。コンパレータの出力はVddとなる。
シリアルからの入力値:85
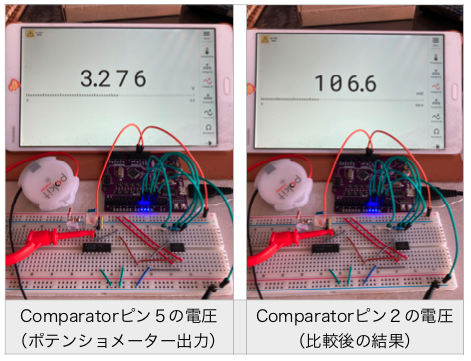
入力値は、基準値<3.310V>より若干小さい値(3.276V)を探した結果である。コンパレータの出力は限りなく0Vに近くなり、ここでは、<106.6mv>となっている。
終わりに
まずは基本動作を確認。(レベルは低いけど。)