fortran-langはFortran-lang Community Projectsの成果を記事にする際に用いているタグです.
概要
前の記事に引き続きfpmを使ってみました.
今回は,fpm (Fortran Package Manager)をVSCodeから呼べるようにしました.
tasks.jsonやショートカットキーなど,VSCodeの設定を利用することで,fpm buildとfpm testは簡単に実行できるようになります.
fpm 0.5.0での設定をfpm (Fortran Package Manager)とVSCodeの連携で解説しています.
環境
- Ubuntu 18.04 (WSL)
- fpm version 0.1.2
- gfortran 8.4.0
- VSCode 1.49.2
- Remote - WSL 0.44.5
- Modern Fortran 2.2.2
題材
fpmでビルドするプロジェクトとして,基記事で正しくビルドできなかった,階層化されたモジュールを持つプロジェクトを利用します.
プロジェクトの作成
fpm new multi_level_modulesでプロジェクトを作成します.
前の記事でも説明したように,プロジェクトディレクトリと,いくつかのファイルとサブディレクトリが作成されます.
multi_level_modules
├── app
│   └── main.f90
├── src
│   └── multi_level_modules.f90
├── test
│   └── main.f90
├── fpm.toml
├── README.md
└── .gitignore
fpmのプロジェクトでは,(app/main.f90とは別ファイルに記述される)モジュールを作成する際に,二つの要件を守る必要があります.
- モジュールは,fpm.tomlファイルで指定されたディレクトリに置く
- fpmは,モジュールに関して独自の名前付けのルールがある
名前付けのルールは,基記事に書いてあるので,それを引用しておきます.
srcディレクトリのサブディレクトリに置かれたモジュールの名前は,src以下のサブディレクトリ名をアンダースコア_で順次つないでいき,最後にファイル名で終わります.
モジュールをsrc/a/b/c/d.f90で定義するとき,モジュール名はa_b_c_dになるということです.
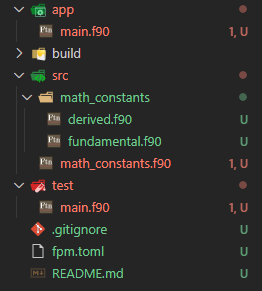
このルールに沿って,プロジェクトのディレクトリ構造を変更し,新しくソースファイルを作ります.
multi_level_modules
├── app
│   └── main.f90
├── src
│   ├── math_constants
│   │   ├── derived.f90
│   │   └── fundamental.f90
│   └── math_constants.f90
├── test
│   └── main.f90
├── fpm.toml
├── README.md
└── .gitignore
ファイルの内容も,基記事と同じですが,テストは新しく作りました.
`app/main.f90`
program main
    use :: math_constants, only: PI, PI05, PI2
    implicit none

    print *, "application and static library demo"
    print *, "π = ", PI
    print *, "π/2 = ", PI05
    print *, "2π = ", PI2
end program main
`src/math_constants.f90`
module math_constants
    use :: math_constants_fundamental, only: PI
    use :: math_constants_derived, only: PI05, PI2
end module math_constants
`src/math_constants/fundamental.f90`
module math_constants_fundamental
    use, intrinsic :: iso_fortran_env
    implicit none

    real(real64),parameter :: PI = acos(-1d0)

end module math_constants_fundamental
`src/math_constants/derived.f90`
module math_constants_derived
    use, intrinsic :: iso_fortran_env
    use :: math_constants_fundamental, only: PI
    implicit none

    real(real64),parameter :: PI2  = PI * 2.0_real64
    real(real64),parameter :: PI05 = PI * 0.5_real64

end module math_constants_derived
`test/main.f90`
program main
    use :: math_constants, only: PI, PI05, PI2
    use, intrinsic :: iso_fortran_env, only: error_unit, output_unit, real64
    implicit none

    if(is_approx_equals(PI, 3.1415926535897932384626433832795_real64))then
        write(output_unit, *) "Parameter π TEST PASSED"
    else
        write(error_unit, *) "Parameter π TEST FAILED"
        stop
    end if

    if(is_approx_equals(PI05, 1.5707963267948966192313216916398_real64))then
        write(output_unit, *) "Parameter π/2 TEST PASSED"
    else
        write(error_unit, *) "Parameter π/2 TEST FAILED"
        stop
    end if

    if(is_approx_equals(PI2, 6.283185307179586476925286766559_real64))then
        write(output_unit, *) "Parameter 2π TEST PASSED"
    else
        write(error_unit, *) "Parameter 2π TEST FAILED"
        stop
    end if

    contains

    logical pure function is_approx_equals(val_a, val_b, tol)
        use, intrinsic :: iso_fortran_env
        implicit none
        real(real64),intent(in) :: val_a
        real(real64),intent(in) :: val_b
        real(real64),value,optional :: tol

        is_approx_equals = .false.
        if(present(tol))then
            if( abs(val_a - val_b) <= tol)then
                is_approx_equals = .true.
            end if
        else
            if( abs(val_a - val_b) <= epsilon(val_a))then
                is_approx_equals = .true.
            end if
        end if
    end function is_approx_equals
end program main
プロジェクトのビルドとテスト
fpm build,fpm runおよびfpm testコマンドを実行し,プロジェクトが正しく実行できるのかを確認します.
`fpm build`
$ fpm build
 + mkdir -p build/gfortran_debug/multi_level_modules
 + gfortran -c ./src/math_constants/fundamental.f90 -Wall -Wextra -Wimplicit-interface -fPIC -fmax-errors=1 -g -fbounds-check -fcheck-array-temporaries -fbacktrace -fcoarray=single  -J build/gfortran_debug/multi_level_modules -I build/gfortran_debug/multi_level_modules -o build/gfortran_debug/multi_level_modules/math_constants_fundamental.f90.o
 + gfortran -c ./src/math_constants/derived.f90 -Wall -Wextra -Wimplicit-interface -fPIC -fmax-errors=1 -g -fbounds-check -fcheck-array-temporaries -fbacktrace -fcoarray=single  -J build/gfortran_debug/multi_level_modules -I build/gfortran_debug/multi_level_modules -o build/gfortran_debug/multi_level_modules/math_constants_derived.f90.o
 + gfortran -c ./src/math_constants.f90 -Wall -Wextra -Wimplicit-interface -fPIC -fmax-errors=1 -g -fbounds-check -fcheck-array-temporaries -fbacktrace -fcoarray=single  -J build/gfortran_debug/multi_level_modules -I build/gfortran_debug/multi_level_modules -o build/gfortran_debug/multi_level_modules/math_constants.f90.o
 + ar -rs build/gfortran_debug/multi_level_modules/libmulti_level_modules.a build/gfortran_debug/multi_level_modules/math_constants.f90.o build/gfortran_debug/multi_level_modules/math_constants_derived.f90.o build/gfortran_debug/multi_level_modules/math_constants_fundamental.f90.o
ar: build/gfortran_debug/multi_level_modules/libmulti_level_modules.a を作成しています
 + mkdir -p build/gfortran_debug/app/
 + gfortran -c app/main.f90 -Wall -Wextra -Wimplicit-interface -fPIC -fmax-errors=1 -g -fbounds-check -fcheck-array-temporaries -fbacktrace -fcoarray=single  -J build/gfortran_debug/multi_level_modules -I build/gfortran_debug/multi_level_modules -o build/gfortran_debug/app/main.f90.o
 + mkdir -p build/gfortran_debug/test/
 + gfortran -c test/main.f90 -Wall -Wextra -Wimplicit-interface -fPIC -fmax-errors=1 -g -fbounds-check -fcheck-array-temporaries -fbacktrace -fcoarray=single  -J build/gfortran_debug/multi_level_modules -I build/gfortran_debug/multi_level_modules -o build/gfortran_debug/test/main.f90.o
 + gfortran  -Wall -Wextra -Wimplicit-interface -fPIC -fmax-errors=1 -g -fbounds-check -fcheck-array-temporaries -fbacktrace -fcoarray=single  -J build/gfortran_debug/multi_level_modules -I build/gfortran_debug/multi_level_modules build/gfortran_debug/app/main.f90.o build/gfortran_debug/multi_level_modules/libmulti_level_modules.a  -o build/gfortran_debug/app/multi_level_modules
 + gfortran  -Wall -Wextra -Wimplicit-interface -fPIC -fmax-errors=1 -g -fbounds-check -fcheck-array-temporaries -fbacktrace -fcoarray=single  -J build/gfortran_debug/multi_level_modules -I build/gfortran_debug/multi_level_modules build/gfortran_debug/test/main.f90.o build/gfortran_debug/multi_level_modules/libmulti_level_modules.a  -o build/gfortran_debug/test/runTests
$ fpm run
 + build/gfortran_debug/app/multi_level_modules
 application and static library demo
 π =    3.1415926535897931
 π/2 =    1.5707963267948966
 2π =    6.2831853071795862
$ fpm test
 + build/gfortran_debug/test/runTests
 Parameter π TEST PASSED
 Parameter π/2 TEST PASSED
 Parameter 2π TEST PASSED
Prototype版では正しくビルド出来ませんでしたが,ver. 0.1.2では正しくビルド,実行できているようです.
VSCodeからfpmを使う
Modern Fortranのエラー表示への対処
VSCodeで先ほど作成したプロジェクトのディレクトリ(multi_level_modules)を開くと,サブディレクトリやファイルにアクセスできるようになります.
しかし,Modern Fortran拡張に起因して,いくつかのファイルにエラーが表示されます.
どのようなエラーか見てみると,例えばapp/main.f90ファイルは,math_constantsモジュールをuseするところで,math_constants.modが見つからないというエラーが生じています.
Modern Fortran拡張を用いると,モジュールとなるソースファイルを保存した時点で,モジュール名.modというファイルが自動で作成されます.Modern Fortran拡張は,それを利用してモジュールが存在するかを確認しているのですが,fpmのプロジェクトではディレクトリ構造が定められているので,あるルーチンが利用する.modファイルが,必ずしも同じ場所にあるとは限りません.
そこで,Modern Fortran拡張の設定を利用して,.modファイルの探索場所を設定します.
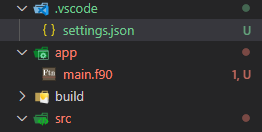
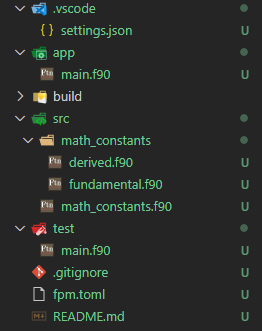
fpmのプロジェクトディレクトリ下に,.vscode/settings.jsonファイルを作成し(既に存在している場合には既存のsettings.jsonに),設定を追加します.
{
    "fortran.includePaths": [
        "multi_level_modules/srcへのフルパス",
        "multi_level_modules/src/math_constantsへのフルパス"
    ],
}
fortran.includePathsに.modファイルが存在しているディレクトリへのフルパスを追加し,.modファイルの探索場所をカレントディレクトリから広げます.著者の場合は,下記の通りです1.
"/home/ユーザ名/projects/fpm/multi_level_modules/src",
"/home/ユーザ名/projects/fpm/multi_level_modules/src/math_constants"
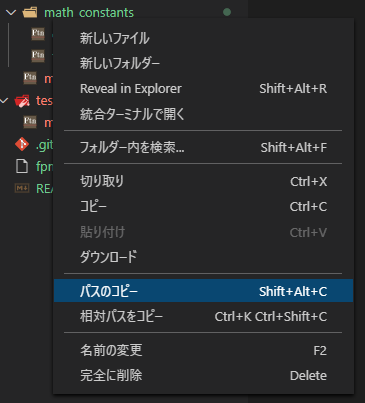
相対パスは受け付けてくれず,~などを使って省略するのも受け付けてくれません.VSCodeを使っているのであれば,ディレクトリを右クリックし,パスのコピーを選択すれば,簡単にフルパスを取得できます.
その後,エラーが表示されているファイルを開き,保存するとエラーが消えます.このとき,ファイルを変更する必要はなく,ctrl+sを入力する等,保存する動作を行うだけで構いません.
ビルドタスクの設定
VSCodeのビルドタスクを設定し,ショートカットキーでビルドできるようにします.設定の方法は何通りかありますが,結局はtasks.jsonを編集することになります.
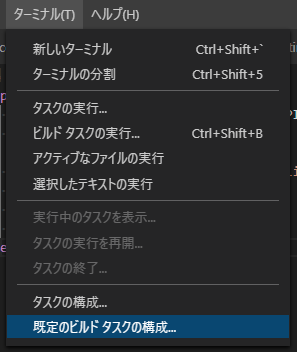
- [ターミナル]→[既定のビルドタスクの構成...]→[テンプレートからtasks.jsonを生成]→[Others]
あるいは,
-
ctrl+shift+bを入力→[実行するビルドタスクがありません。タスクを構成する...]→[テンプレートからtasks.jsonを生成]→[Others]
を選択し,tasks.jsonを作成します.
{
    // See https://go.microsoft.com/fwlink/?LinkId=733558
    // for the documentation about the tasks.json format
    "version": "2.0.0",
    "tasks": [
        {
            "label": "echo",
            "type": "shell",
            "command": "echo Hello"
        }
    ]
}
"label": "echo"から始まる3行を消して書き換えます.
{
    // See https://go.microsoft.com/fwlink/?LinkId=733558
    // for the documentation about the tasks.json format
    "version": "2.0.0",
    "tasks": [
        {
            "label": "build",
            "type": "shell",
            "options": {
                "cwd": "${workspaceRoot}"
            },
            "group": {
                "kind": "build",
                "isDefault": true
            },
            "command": "fpm build",
            "presentation": {
                "echo": true,
                "reveal": "always",
                "focus": true,
                "panel": "shared",
                "showReuseMessage": true,
                "clear": false
            }
        },
    ]
}
ここでは,重要な設定が3個あります.
-
"command": "fpm build"で,ビルドタスクとして実行されるコマンドを指定します.ここではfpm buildを指定しています. -
"options": {"cwd": "${workspaceRoot}"}で,ビルドタスクが実行されるディレクトリが,必ずfpmプロジェクトのルートディレクトリとなるように指定しています. -
"group": {"kind": "build","isDefault": true}で,標準のビルドタスクであることを設定しています.この設定を行うことで,キーボードショートカット(ctrl+shift+b)を利用してこのタスクを起動できるようになります.
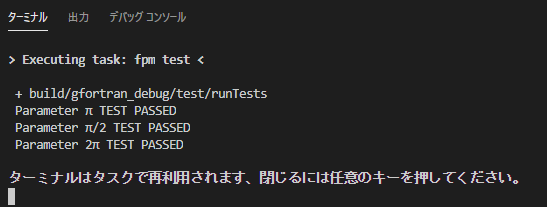
ctrl+shift+bでビルドタスクを実行すると,ターミナルが表示され,fpm buildを実行した時の結果が表示されます.
テストタスクの設定
ビルドタスクと同様にして,テストタスクも構成できます.
ビルドタスクをコピペして,"label","group"の"kind","command"を編集するだけです.
{
    // See https://go.microsoft.com/fwlink/?LinkId=733558
    // for the documentation about the tasks.json format
    "version": "2.0.0",
    "tasks": [
        {
            "label": "build",
            中略
        },
        {
            "label": "run test",
            "type": "shell",
            "options": {
                "cwd": "${workspaceRoot}"
            },
            "group": {
                "kind": "test",
                "isDefault": true
            },
            "command": "fpm test",
            "presentation": {
                "echo": true,
                "reveal": "always",
                "focus": true,
                "panel": "shared",
                "showReuseMessage": true,
                "clear": false
            },
            "problemMatcher": []
        },
    ]
}
"label"を"run test"に,"group"の"kind"を"test"に,"command"を"fpm test"に変更しました.
テストタスクを実行するショートカットキーは定められていないので,各自で設定する必要があります.
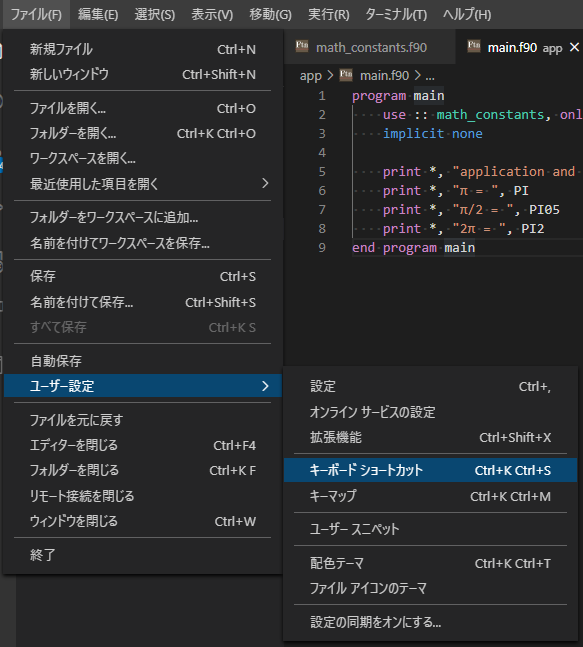
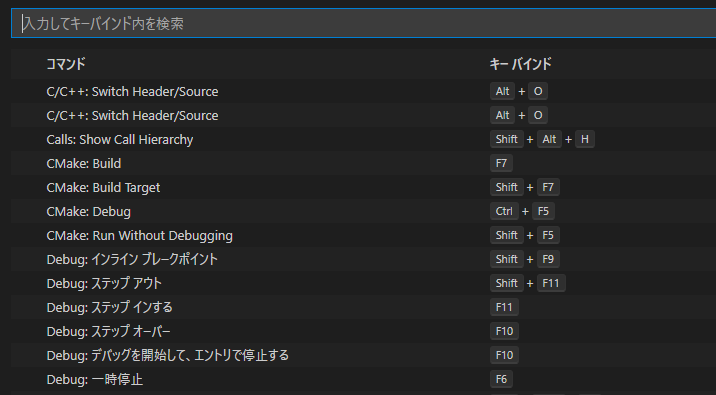
設定は,[ファイル]→[ユーザー設定]→[キーボードショートカット]を選択してキーボードショートカットの一覧を表示し,"テストタスク"を検索すると,タスク: テスト タスクの実行に関する設定が見つかります.
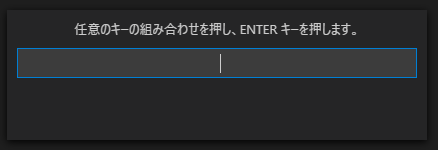
左にある+記号をクリックして,キーバインドを設定します.
著者は,ctrl+t, ctrl+tを割り当てました.このようにすると,ctrlキーを押したままtを2回連続で押すことで,テストタスクを実行できるようになります.
まとめ
VSCodeからfpmを呼び出すための設定を紹介しました.
残念ながら,"fpm run"を簡単に呼び出すための設定は判らずじまいでした.タスクに登録することは可能ですが,呼び出すには,ctrl+shift+pから[タスク: タスクの実行]を選択し,実行用のタスクを呼び出す必要があり,手間がかかります.
[デバッグなしで実行]から呼べるようにするには,拡張機能で対応する必要があるようです.
何かよい方法を知っている方はご教示ください.
-
Windowsでも同じ事はできますが,パスの区切りが"\\"(円記号2個)になるので気をつけてください.例えば,"D:\\projects\\fpm\\multi_level_modules\\src"といった具合です. ↩
