概要
PythonとPILを使って,文字列から,その文字列が描かれた画像を出力する方法をまとめました.単に背景画像を用意し,文字を描画しているだけです.
PIL
PIL(Python Image Library)はPythonの画像処理ライブラリです.現在は開発が停止しているようで,その後継であるPillowを使った方がよいのでしょうが,AnacondaにはPILが標準でインストールされていること,PILの機能で実現可能だったことの2点から,PILを用いています.
画像の出力
文字列を画像に変換するという題目のページは見つかりませんでしたので,画像処理ライブラリの使い方を見ながら,文字を描く方法を調べて流用しました.そもそも,文字列を画像に変換するという需要がないのだろうと思いますが,迷惑メール対策として,メールアドレスを画像に変換するなど,細々とした用途はあると思います.そのため,題目はあえて「文字列を画像に変換する」としました.
作業に際して,Pythonの画像処理ライブラリPillow(PIL)の使い方を参考にしました.
PIL.Image.new()でImageオブジェクトを作成した後,PIL.ImageDraw.Draw()でDrawオブジェクトを作成しています.PIL.Image.new()では,引数に色モード,画像サイズ,背景色を指定しています.
PIL.ImageFont.truetypeで用いるフォントとそのサイズを指定します.その後,draw.textsize()で描画されるテキストのサイズ(ピクセル数)を取得して,テキストが所望の場所にくるよう調整し,draw.text()で描画しました.
import PIL.Image
import PIL.ImageDraw
import PIL.ImageFont

# 使うフォント,サイズ,描くテキストの設定
ttfontname = "C:\\Windows\\Fonts\\meiryob.ttc"
fontsize = 36
text = "暗黙の型宣言"

# 画像サイズ,背景色,フォントの色を設定
canvasSize    = (300, 150)
backgroundRGB = (255, 255, 255)
textRGB       = (0, 0, 0)

# 文字を描く画像の作成
img  = PIL.Image.new('RGB', canvasSize, backgroundRGB)
draw = PIL.ImageDraw.Draw(img)

# 用意した画像に文字列を描く
font = PIL.ImageFont.truetype(ttfontname, fontsize)
textWidth, textHeight = draw.textsize(text,font=font)
textTopLeft = (canvasSize[0]//6, canvasSize[1]//2-textHeight//2) # 前から1/6,上下中央に配置
draw.text(textTopLeft, text, fill=textRGB, font=font)

img.save("image.png")
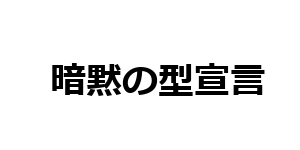
出力された画像
無事に画像が出力されました.
