はじめに
家のV6プラス環境では一部サイト(というか勤務先)につながりにくいという問題があります。
このままだと将来的に行うことになるかもしれないテレワークの障害になりそうだったので、VPNで接続しているさくらVPSにローカルプロキシを構築し、該当サイトのみプロキシを経由して接続するようにしてみました。
(まあ全部プロキシ経由でもいい気はしますが、うっかりYoutubeなんかでVPSの帯域制限に引っかかっても嫌なので・・・)
前提環境
- サーバ:debian 10 Buster
- クライアント:Windows 10
- 自宅サーバとVPSが拠点間VPNで接続されている
作業の概要
VPS(debian 10 Buster)
- squidのセットアップ
自宅サーバ(debian 10 Buster)
- nginxのインストール(デフォルト設定のみ)
- PACファイルの配置
LAN内PC(Windows 10)
- 自動プロキシの設定
構築手順
VPS
squidのインストール
# apt install squid
squidの設定
# vi /etc/squid/squid.conf
/etc/squid/squid.conf
# ローカルネットワークのネットワークアドレス
acl lan src 192.168.1.0/24

# 接続先として指定されているポート以外を拒否
acl Safe_ports port 80      # http
acl Safe_ports port 21      # ftp
acl Safe_ports port 443     # https
acl Safe_ports port 70      # gopher
acl Safe_ports port 210     # wais
acl Safe_ports port 1025-65535  # unregistered ports
acl Safe_ports port 280     # http-mgmt
acl Safe_ports port 488     # gss-http
acl Safe_ports port 591     # filemaker
acl Safe_ports port 777     # multiling http
http_access deny !Safe_ports

# SSL接続時に 443 ポート以外の CONNECT を拒否
acl SSL_ports port 443
acl CONNECT method CONNECT
http_access deny CONNECT !SSL_ports

# ローカルホストを許可
http_access allow localhost

# ローカルアドレスを許可
http_access allow lan

# その他のアドレスを拒否
http_access deny all

# 応答ポートを指定
http_port 8080

# コアダンプ出力場所
coredump_dir /var/spool/squid

# キャッシュの設定
refresh_pattern ^ftp:       1440    20% 10080
refresh_pattern ^gopher:    1440    0%  1440
refresh_pattern -i (/cgi-bin/|\?) 0 0%  0
refresh_pattern .       0   20% 4320

# squidを経由していることを隠す
request_header_access Referer deny all
request_header_access X-Forwarded-For deny all
request_header_access Via deny all
request_header_access Cache-Control deny all
forwarded_for off

# ログローテートの設定
logfile_rotate 0
設定が終わったらsquidを再起動する。
# systemctl restart squid
自宅サーバ
nginxのインストール
設定は何もいりませんwどうせローカル運用だし。
# apt install nginx
PACファイルの配置
nginxのデフォルトルートフォルダ(/var/www/html)配下にproxy.pacを作成する。
# vi /var/www/html/proxy.pac
/var/www/html/proxy.pac
function FindProxyForURL(url,host){
        if(shExpMatch(host,"<ホスト名のマッチング文字列>")){
                return "PROXY <VPSのVPNアドレス>:<ポート番号>";
        }
        return "DIRECT";
}
作成したproxy.pacの所有者をwww-dataに変更
# chown www-data:www-data /var/www/html/proxy.pac
作成したproxy.pacのパーミッションを変更
# chmod 644 /var/www/html/proxy.pac
LAN内PC(Windows 10)
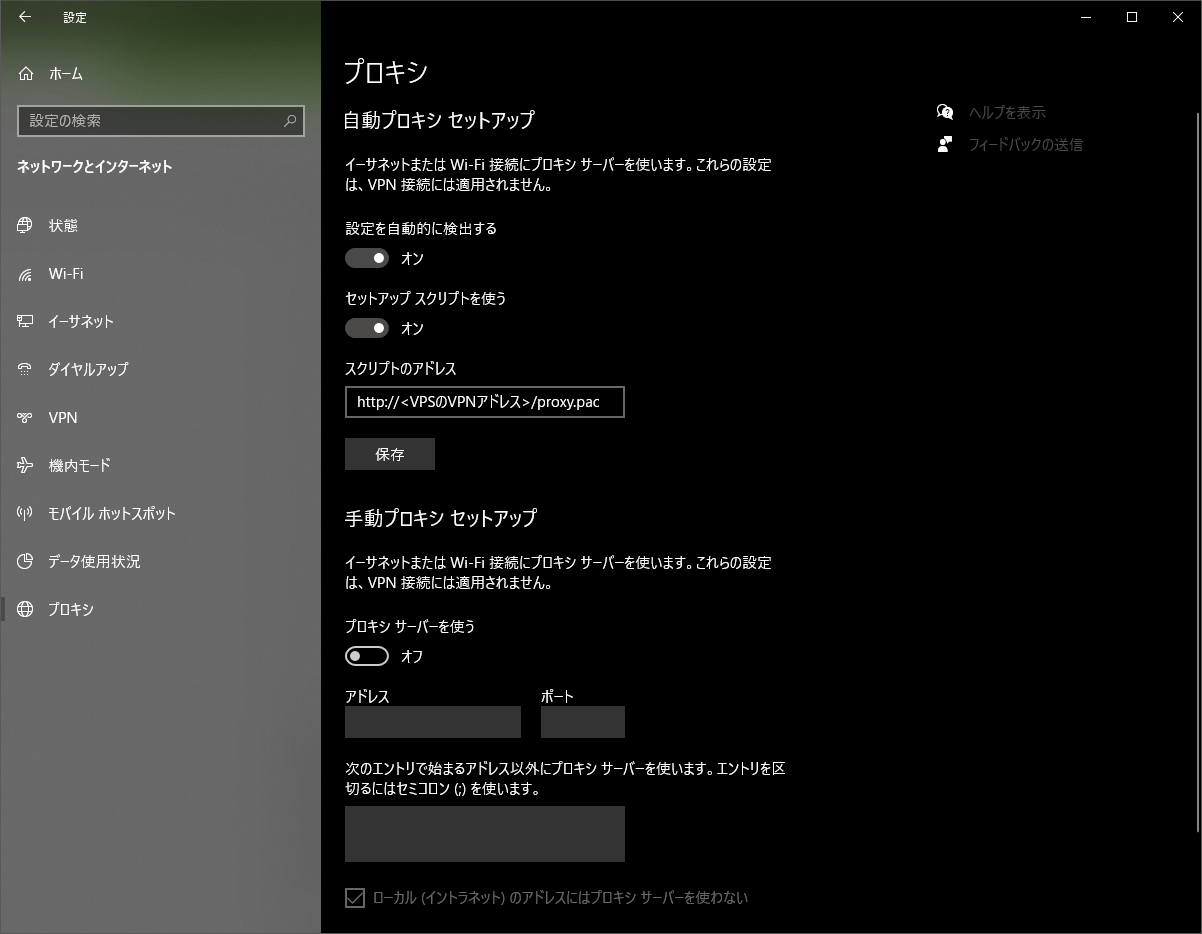
自動プロキシ設定
[スタートメニュー] → [設定] → [ネットワークとインターネット] → [プロキシ] と開き、
[自動プロキシ セットアップ] の
[セットアップ スクリプトを使う] をオンにし、
[スクリプトのアドレス] に
http://<VPSのVPNアドレス>/proxy.pac と入力する。
あとはブラウザを開き、サイトに正常にアクセスできるか確認して終了です!