この記事について
- Chrome 拡張機能として開発した Vite アプリをサブモジュール化し Chrome 拡張機能と Electron を使ったデスクトップアプリの両方で利用できるようにした
- Electron は名前だけ知っていて今回初めて触ったレベル
- セキュリティ部分の知識があやふやな状態
- ビルドには electron-builder を使用
今回の対応の中で追加した Electron 関係の npm パッケージのバージョン情報は以下の通りです
| パッケージ名 | バージョン |
|---|---|
| electron | 33.2.0 |
| vite-plugin-electron | 0.29.0 |
| electron-builder | 25.1.8 |
開発したChrome拡張機能について
今回 Electronを使ったデスクトップアプリ化を図った Chrome 拡張機能は以下になります
概要
- 東方Projectの原作シューティングゲームのリプレイ情報をブラウザでローカルに管理できる拡張機能です

- 拡張機能のメニューボタンのクリックをトリガーとしてブラウザ内に新規タブを開き、その中の GUI でリプレイ情報を管理できるようにしています
- リプレイファイルと読み取った解析データの管理には IndexedDB を活用しています
- 開発環境はいつもの構成(Docker(Node.js 20.x) + Vite5 + Vue3 + VueUse + PrimeVue4 + vue-i18n)に加え以下のプラグイン/ライブラリの導入も実施しました
-
vue-router
- ハッシュモード(
createWebHashHistory)を用いることでサーバーの立てられない環境で index.html を起点とした複数ページのルーティングを実現しています
- ハッシュモード(
-
unplugin-auto-import
- 自動インポートのためのプラグイン
-
unplugin-vue-components
- Vue コンポーネントの自動インポートのためのプラグイン
-
unplugin-vue-router
- ファイルベースのルーティングを可能とするためのプラグイン
-
idb
- IndexedDB を扱いやすくするライブラリ
- IndexedDB 自体を今回初めて使ったため、idb を使わない場合と比べた使用感はわかりませんでした...
- Flutter で SQLite を扱うためのライブラリ(sqflite)を使った感触になんとなく近いところがありました(マイグレーション部分とか)
- IndexedDB を扱いやすくするライブラリ
-
fflate
- zip ファイルの圧縮/展開をサポートするライブラリ
- 圧縮/展開共に対象データについて Uint8Array として扱うため IndexedDB との相性がとてもよかった(気がする)
-
vite-plugin-node-polyfills
- 各先品のリプレイ情報を解析する OSS は Node.js 向けに開発されており、これをブラウザで実行できるようにするためのポリフィル
- 具体的には Buffer を使用可能とするために導入しました
-
vue-router
移行作業前のフォルダ構造
移行前のフォルダ構成は以下のような感じ
/
├─ .docker
├─ .vscode
├─ public
├─ src
│  ├─ background
│  │  └─ index.ts ... バックグラウンドスクリプト
│  ├─ components ... コンポーネント置き場(※unplugin-vue-components による自動インポート対象)
│  ├─ composables ... コンポーサブル置き場(※unplugin-auto-import による自動インポート対象)
│  ├─ i18n
│  │  ├─ index.ts ... i18n のエントリー
│  │  └─ locales ... 言語設定ファイル置き場
│  │     └─ ja-JP.json ... 日本語の言語設定ファイル
│  │     └─ en-US.json ... 英語の言語設定ファイル
│  ├─ pages ... ファイルベースのルーティングを適用するページコンポーネント群
│  │  ├─ th10 ... 東方風神録のページ
│  │  ├─ th11 ... 東方地霊殿のページ
│  │  ├─ th12 ... 東方星蓮船のページ
│  │  ├─ th128 ... 妖精大戦争のページ
│  │  ├─ th13 ... 東方神霊廟のページ
│  │  ├─ th14 ... 東方輝針城のページ
│  │  ├─ th15 ... 東方紺珠伝のページ
│  │  ├─ th16 ... 東方天空璋のページ
│  │  ├─ th17 ... 東方鬼形獣のページ
│  │  ├─ th18 ... 東方虹龍洞のページ
│  │  ├─ th6 ... 東方紅魔郷のページ
│  │  │  ├─ index.vue ... 作品あたりのトップ画面
│  │  │  ├─ upload.vue ... 作品あたりのリプレイアップロード画面
│  │  │  └─ diff.vue ... 作品あたりのスコア比較画面
│  │  ├─ th7 ... 東方妖々夢のページ
│  │  └─ th8 ... 東方永夜抄のページ
│  ├─ stores ... 状態管理用のコンポーサブル置き場(※unplugin-auto-import による自動インポート対象)
│  ├─ style
│  ├─ types
│  │  ├─ app.d.ts ... アプリケーション固有の型を定義する場所
│  │  ├─ auto-imports.d.ts ... unplugin-auto-import プラグインによって自動更新される型ファイル
│  │  ├─ components.d.ts ... unplugin-vue-components プラグインによって自動更新される型ファイル
│  │  └─ typed-router.d.ts ... unplugin-vue-router プラグインによって自動更新される型ファイル
│  ├─ utils ... 上記以外のコード置き場(※unplugin-auto-import による自動インポート対象)
│  ├─ App.vue
│  ├─ index.ts ... Vite & Vue アプリのエントリー
│  ├─ manifest.ts ... @crxjs/vite-plugin プラグインを使用した Chrome 拡張用の manifest.json を生成するためのソース
│  ├─ router.ts ... vue-router の設定を切り離したファイル
│  ├─ theme.ts ... PrimeVue4 のテーマをカスタマイズしているファイル
│  └─ zip.js ... Chrome のウェブストアに公開する際のパッケージングを行うスクリプト
├─ .gitignore
├─ .prettierignore
├─ .prettierrc
├─ compose.yml
├─ package-lock.json
├─ package.json
├─ tsconfig.json
├─ tsconfig.node.json
└─ vite.config.ts
src ディレクトリ以下の大多数は Vite を使った Vue アプリケーションのコードで、ここは Electron 版でもそのまま流用できそうなことがわかりました。
↓
ただし、一部 Chrome 拡張機能用のコード(background/index.ts や manifest.ts、zip.js)を含むため src ディレクトリを丸ごと Electron 用に使えるわけでもないことがわかりました。。
移行作業① 共有可能部分を1つ深いディレクトリに移動
というわけで共有可能な部分をまずは shared という名前の新規ディレクトリ内に移動する修正を行い、その後 shared ディレクトリをサブモジュール化するような方針を取ることにしました。
import { defineConfig } from 'vite'
import { crx } from '@crxjs/vite-plugin'
import vue from '@vitejs/plugin-vue'
import AutoImport from 'unplugin-auto-import/vite'
import Components from 'unplugin-vue-components/vite'
import VueRouter from 'unplugin-vue-router/vite'
import { PrimeVueResolver } from '@primevue/auto-import-resolver'
import { nodePolyfills } from 'vite-plugin-node-polyfills'
// @ts-ignore
import manifest from './src/manifest'

// https://vitejs.dev/config/
export default defineConfig(({ mode }) => {
  const production = mode === 'production'

  return {
    server: {
      host: true,
      port: 5173,
      watch: {
        usePolling: true,
      },
      hmr: {
        port: 5173,
      },
    },
    build: {
      cssCodeSplit: true,
      emptyOutDir: true,
      outDir: 'build',
      rollupOptions: {
        input: {
          main: '/index.html',
        },
        output: {
          chunkFileNames: 'assets/chunk-[hash].js',
        },
      },
    },
    plugins: [
      // ↓ unplugin-vue-router プラグインのデフォルト設定から外れるため routesFolder オプションの追加が必須
      VueRouter({
-        dts: 'src/types/typed-router.d.ts',
+        dts: 'src/shared/types/typed-router.d.ts',
+        routesFolder: 'src/shared/pages',
      }),

      crx({ manifest }),
      vue(),

      AutoImport({
        imports: [
          'vue',
          'vue-router',
          '@vueuse/core',
          'vue-i18n',
          {
            'file-saver': [['saveAs', 'saveAs']],
          },
        ],
-        dts: 'src/types/auto-imports.d.ts',
-        dirs: ['src/composables/', 'src/stores/', 'src/utils/'],
+        dts: 'src/shared/types/auto-imports.d.ts',
+        dirs: ['src/shared/composables/', 'src/shared/stores/', 'src/shared/utils/'],
        vueTemplate: true,
      }),

      // ↓ unplugin-vue-components プラグインのデフォルト設定から外れるため dirs オプションの追加が必須
      Components({
-        dts: 'src/types/components.d.ts',
+        dts: 'src/shared/types/components.d.ts',
+        dirs: 'src/shared/components',
        resolvers: [PrimeVueResolver()],
      }),

      nodePolyfills(),
    ],
  }
})
- unplugin-vue-router プラグインを導入することで自動インポート対象となるディレクトリはデフォルトでは
src/pagesディレクトリです
今回の修正によってsrc/shared/pagesになるため上記のように routesFolder オプションの設定が必要でした

- unplugin-vue-components プラグインを導入することで自動インポート対象となるディレクトリはデフォルトでは
src/componentsディレクトリです
今回の修正によってsrc/shared/componentsになるため上記のように dirs オプションの設定が必要でした

移行作業② shared ディレクトリをサブモジュール化
Vite & Vue のアプリケーションについて src ディレクトリ内の1つ深い shared ディレクトリへの移動はできました。
続けて、shared ディレクトリについてGitのサブモジュールとして扱うための修正を行いました。
- filter-branch、filter-repo などのコマンドやスクリプトを使うことで shared ディレクトリ内に含まれるファイルのヒストリーを引き継ぐような方法があります。
- 今回は自分一人で開発している&後のためのヒストリーを形成していないため、そのような手段は取らずにサブモジュール用のリポジトリに init commit. することにしました。
具体的なサブモジュール化の作業メモは残っておらず、以下大体の作業手順
- サブモジュール用の新規リポジトリを用意
- サブモジュール化したいコードを含むリポジトリについてサブモジュール化作業用に別名でクローン
- 別名でクローンしたプロジェクトのプロジェクトルートの
.gitディレクトリ削除- エディタで開く前にやっておいた方が良いかもしれない
- サブモジュールに含めたくないすべてのファイル(
src/sharedディレクトリ以外のすべてのファイル)を削除 -
src/sharedディレクトリ内のすべてのファイルをルートに移動 -
git init、リモートURLやメインブランチの設定をしつつ、すべてのファイルをステージ&コミット&リモートにプッシュ - サブモジュールを利用する側のリポジトリで
src/sharedディレクトリを削除&変更の差異をステージ -
srcディレクトリでsharedという名前のサブモジュールを追加git submodule add [submoduleリポジトリURL] shared
- サブモジュールを利用する側のリポジトリで発生している変更差異をコミット&リモートにプッシュ
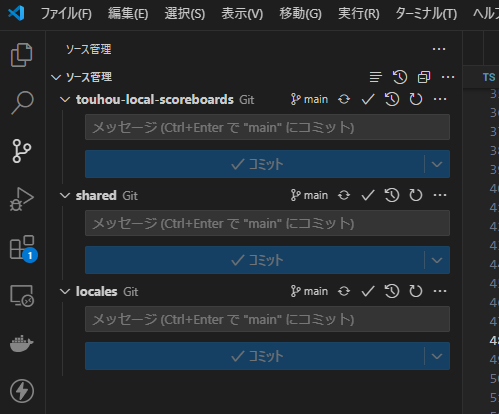
↓ VSCode でサブモジュールを含むリポジトリを開いた場合、ソース管理の画面は以下のようになる(※その後、この手順とは別に shared サブモジュールの中の vue-i18n のための言語設定ファイルを locales という名前のサブモジュールとして管理しているので、3つリポジトリがある)
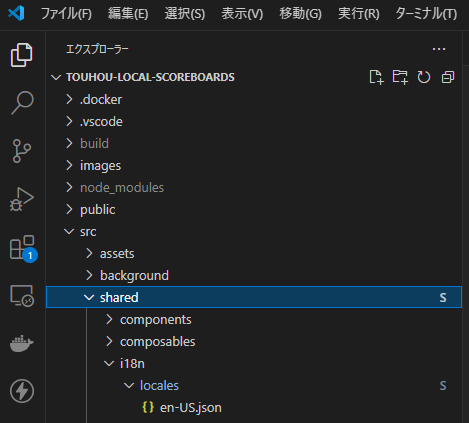
↓ エクスプローラの方ではディレクトリの右端に「S」というサブモジュールであることを意味する記号が表示される
移行作業後のフォルダ構造
↑ に書いた移行作業①、②の修正によって Chrome 拡張機能版の開発リポジトリのツリー構造は以下のようになりました。
/
├─ .docker
├─ .vscode
├─ public
├─ src
│  ├─ background
│  │  └─ index.ts
│  ├─ shared ... 親リポジトリから切り離された shared サブモジュール(親から見た子サブモジュール)
|  |  ├─ components
│  │  ├─ composables
│  │  ├─ i18n
│  │  │  ├─ index.ts
│  │  │  └─ locales ... shared サブモジュールから切り離された locales サブモジュール(親から見た孫サブモジュール)
│  │  │     └─ ja-JP.json
│  │  │     └─ en-US.json
│  │  ├─ pages
│  │  │  ├─ th10
│  │  │  ├─ th11
│  │  │  ├─ th12
│  │  │  ├─ th128
│  │  │  ├─ th13
│  │  │  ├─ th14
│  │  │  ├─ th15
│  │  │  ├─ th16
│  │  │  ├─ th17
│  │  │  ├─ th18
│  │  │  ├─ th6
│  │  │  │  ├─ index.vue
│  │  │  │  ├─ upload.vue
│  │  │  │  └─ diff.vue
│  │  │  ├─ th7
│  │  │  └─ th8
│  │  ├─ stores
│  │  ├─ style
│  │  ├─ types
│  │  │  ├─ app.d.ts
│  │  │  ├─ auto-imports.d.ts
│  │  │  ├─ components.d.ts
│  │  │  └─ typed-router.d.ts
│  │  ├─ utils
│  │  ├─ .gitmodules ... i18n/locales ディレクトリがサブモジュールであることを管理するファイル(要Git管理)
│  │  ├─ App.vue
│  │  ├─ index.ts
│  │  ├─ router.ts
│  │  └─ theme.ts
│  ├─ manifest.ts
│  └─ zip.js
├─ .gitignore
├─ .gitmodules ... src/shared ディレクトリがサブモジュールであることを管理するファイル(要Git管理)
├─ .prettierignore
├─ .prettierrc
├─ compose.yml
├─ package-lock.json
├─ package.json
├─ tsconfig.json
├─ tsconfig.node.json
└─ vite.config.ts
Electron を使ったデスクトップアプリ化
ここからが本題
必要なパッケージのインストール&設定
今回デスクトップアプリ化を図りたいコードは Vite を用いて開発しており、その辺考慮しつつ調べたところ以下の Vite プラグインを使うのがスムーズでした。
まず、Chrome 拡張機能用のリポジトリをコピーしたような新規のデスクトップアプリ用のリポジトリを作り、パッケージ周りを Electron 用に向けて修正
$ npm install -D electron vite-plugin-electron

Chrome 拡張機能開発用にインストールしていて、Electron化するにあたっては不要なものを削除
$ npm remove @crxjs/vite-plugin @types/chrome
tsconfig.json と vite.config.ts を以下のように修正
{
  "compilerOptions": {
    "target": "ESNext",
    "useDefineForClassFields": true,
    "module": "ESNext",
    "moduleResolution": "Bundler",
    "strict": true,
    "jsx": "preserve",
    "sourceMap": true,
    "resolveJsonModule": true,
    "isolatedModules": true,
    "esModuleInterop": true,
    "lib": ["ESNext", "DOM"],
    "skipLibCheck": true,
-    "types": ["chrome", "unplugin-vue-router/client"]
+    "types": ["unplugin-vue-router/client"]
  },
  "include": ["src/**/*.ts", "src/**/*.d.ts", "src/**/*.tsx", "src/**/*.vue"],
  "references": [{ "path": "./tsconfig.node.json" }]
}
import { defineConfig } from 'vite'
-import { crx } from '@crxjs/vite-plugin'
import vue from '@vitejs/plugin-vue'
import AutoImport from 'unplugin-auto-import/vite'
import Components from 'unplugin-vue-components/vite'
import VueRouter from 'unplugin-vue-router/vite'
import { PrimeVueResolver } from '@primevue/auto-import-resolver'
import { nodePolyfills } from 'vite-plugin-node-polyfills'
-// @ts-ignore
-import manifest from './src/manifest'
+import electron from 'vite-plugin-electron'

// https://vitejs.dev/config/
export default defineConfig(({ mode }) => {
  const production = mode === 'production'

  return {
    server: {
      host: true,
      port: 5173,
      watch: {
        usePolling: true,
      },
      hmr: {
        port: 5173,
      },
    },
    build: {
      cssCodeSplit: true,
      emptyOutDir: true,
      outDir: 'build',
      rollupOptions: {
        input: {
          main: '/index.html',
        },
        output: {
          chunkFileNames: 'assets/chunk-[hash].js',
        },
      },
    },
    plugins: [
      VueRouter({
        dts: 'src/shared/types/typed-router.d.ts',
        routesFolder: 'src/shared/pages',
      }),

-      crx({ manifest }),
      vue(),

      AutoImport({
        imports: [
          'vue',
          'vue-router',
          '@vueuse/core',
          'vue-i18n',
          {
            'file-saver': [['saveAs', 'saveAs']],
          },
        ],
        dts: 'src/shared/types/auto-imports.d.ts',
        dirs: ['src/shared/composables/', 'src/shared/stores/', 'src/shared/utils/'],
        vueTemplate: true,
      }),

      Components({
        dts: 'src/shared/types/components.d.ts',
        dirs: 'src/shared/components',
        resolvers: [PrimeVueResolver()],
      }),

      nodePolyfills(),

+      electron({
+        entry: 'src/electron/main.ts',
+      }),
    ],
  }
})
Electron のメインプロセスファイル作成
vite.config.ts に書いた Electron のメインプロセスにあたるファイルを新規作成
import { app, BrowserWindow, Menu } from 'electron'
import path from 'path'

function createWindow() {
  const win = new BrowserWindow({
    width: 1440,
    height: 900,
    icon: 'src/assets/logo.ico',
    webPreferences: {
      nodeIntegration: false,
    },
  })

  // ↓ File,Edit,View,Window,Help など、画面上部に表示されるメニューバーを非表示とする設定
  Menu.setApplicationMenu(null)

  // ↓ 開発環境と本番環境で読み込むURL/ファイルを分岐
  if (process.env.VITE_DEV_SERVER_URL) {
    win.loadURL(process.env.VITE_DEV_SERVER_URL)
    // ↓ 開発者ツールも併せて開く
    win.webContents.openDevTools()
  } else {
    // ↓ 本番利用時にウィンドウ内に読み込むファイル(後述)
    win.loadFile(path.join(app.getAppPath(), 'build', 'index.html'))
  }
}

app
  .whenReady()
  .then(createWindow)
  .catch((err) => {
    console.error('Failed to create the window:', err)
  })

app.on('window-all-closed', () => {
  if (process.platform !== 'darwin') {
    app.quit()
  }
})
ローカルでデスクトップアプリをデバッグ
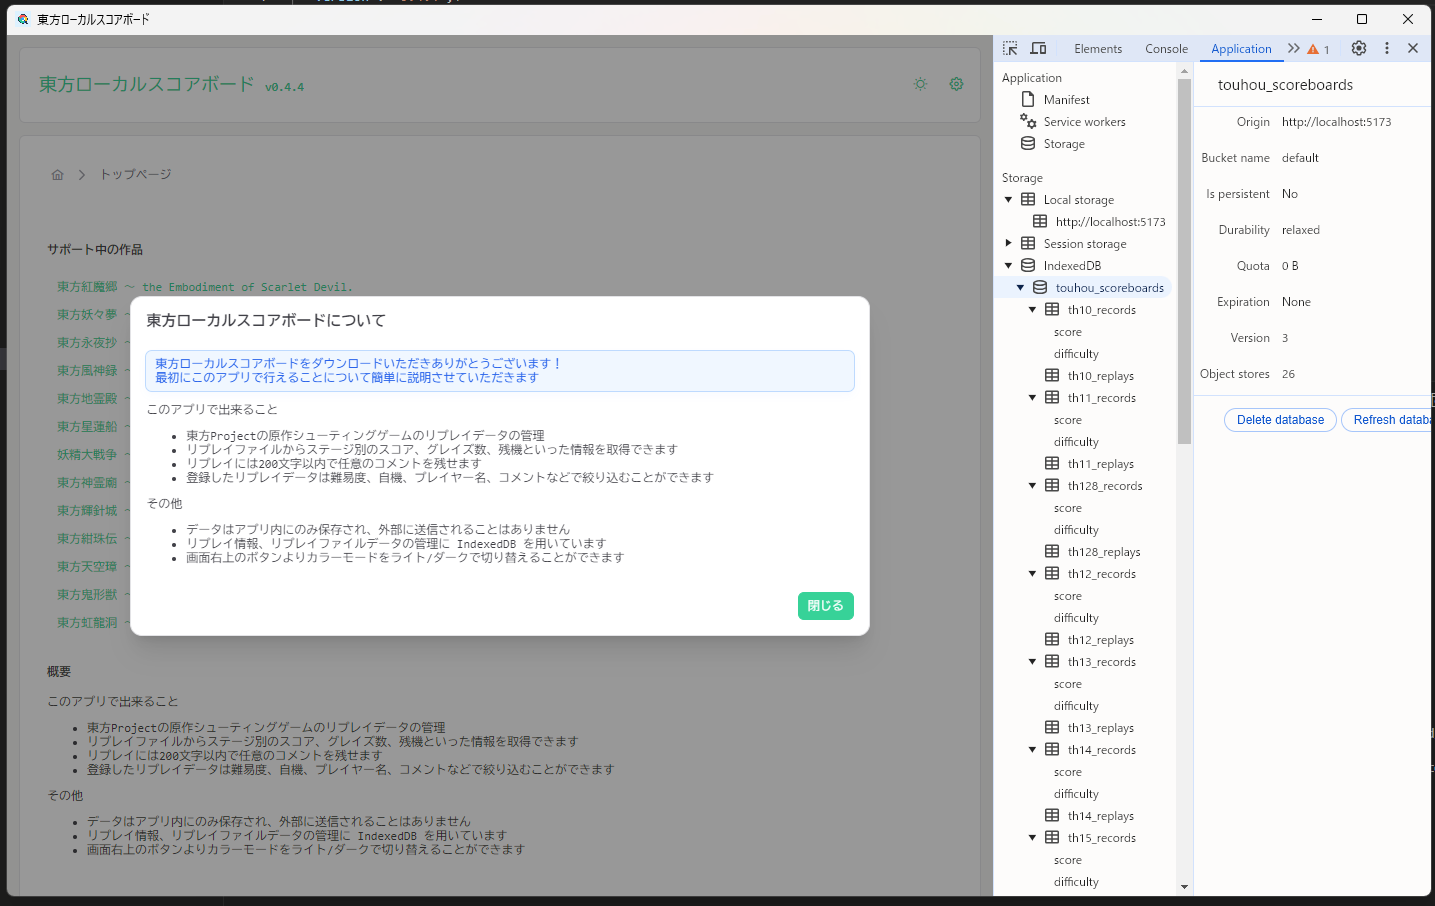
vite-plugin-electron プラグインを使用したためこれまでと変わらず npm scripts の dev(vite の dev サーバー起動)を呼び出すだけで開発用のElectronを用いたデスクトップアプリが立ち上がりました!
{
  // その他、省略
+  "main": "dist-electron/main.js",
  "scripts": {
    "dev": "vite",
    "build": "vue-tsc --noEmit && vite build",
    "preview": "vite preview",
    "fmt": "prettier --write '**/*.{vue,ts,json,css,scss,md}'"
  },
  // その他、省略
}
>npm run dev

> touhou-local-scoreboards@0.4.4 dev
> vite


  VITE v5.4.9  ready in 1901 ms

  ➜  Local:   http://localhost:5173/
  ➜  Network: http://172.24.144.1:5173/
  ➜  Network: http://172.23.144.1:5173/
  ➜  Network: http://192.168.10.101:5173/
  ➜  press h + enter to show help
vite v5.4.9 building for development...

watching for file changes...

build started...
✓ 1 modules transformed.
dist-electron/main.js  0.80 kB │ gzip: 0.61 kB
built in 145ms.

[38052:1127/171315.401:ERROR:CONSOLE(1)] "Request Autofill.enable failed. {"code":-32601,"message":"'Autofill.enable' wasn't found"}", source: devtools://devtools/bundled/core/protocol_client/protocol_client.js (1)
[38052:1127/171315.416:ERROR:CONSOLE(1)] "Request Autofill.setAddresses failed. {"code":-32601,"message":"'Autofill.setAddresses' wasn't found"}", source: devtools://devtools/bundled/core/protocol_client/protocol_client.js (1)
本番利用時の win.loadFile について
メインプロセスファイルの以下の部分
  } else {
    win.loadFile(path.join(app.getAppPath(), 'build', 'index.html'))
  }
-
app.getAppPath()で取得できるパスはインストールしたアプリケーションのresources/app.asarファイル- これは具体的なパスでいうと
C:\Users\[ユーザー名]\AppData\Local\Programs\[アプリ名]\resources\app.asar
- これは具体的なパスでいうと
-
app.asarファイルについて- アプリケーションは後述する
electron-builderというビルドツールでデフォルトではapp.asarというファイルにバンドルされる - このファイルは
electronインストール時?に併せてnode_modules\.bin以下にインストールされるasarという CLI を使用して展開することができる
- アプリケーションは後述する
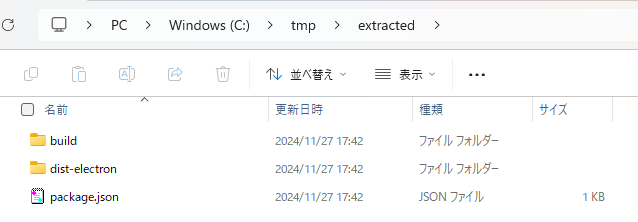
例として C:\tmp\extracted フォルダに app.asar ファイルを展開してみる
node_modules\.bin\asar extract [app.asarファイルのパス] C:\tmp\extracted
-
app.asarファイルを展開したC:\tmp\extractedフォルダ内にbuild/index.htmlというパスでメインプロセスの中で読み込みたい HTML ファイルが入っていることが確認できました - これらの情報を元にメインプロセスのファイル内において本番利用時に読み込むHTMLは「
app.getAppPath()で取得できるパス」「buildフォルダ」「index.htmlファイル」の3つを連結したパス文字列をwin.loadFile()に渡すことで解決できました
デスクトップアプリ向けバンドルについてローカルでビルドする
Electron を用いたデスクトップアプリのバンドルについては調べてみると3つくらい著名な OSS が出てくるようです。今回は electron-builder を使用しました。
- Electron を用いたデスクトップアプリをバンドル(exeファイル化)することができる
- これは使っていくうちに知りましたが、GitHub Actions で少しの記述でビルドによって生成した実行ファイルをアーティファクトとしてアップロードした GitHub Release を作成できました(後述)
以下の手順でインストール
> npm install -D electron-builder
続けてローカルでバンドルを作成するための設定ファイルを作成します。
appId: com.imo-tikuwa.app

productName: 'Touhou Local Scoreboards'

files:
  - 'build/**/*'
  - 'dist-electron/main.js'

win:
  target:
    - nsis
  icon: 'src/assets/logo.ico'
-
electron-builderはデフォルトではプロジェクトルートにあるelectron-builder.ymlという名前の設定ファイルを読み込みます。今回electron-builder.ymlは GitHub Actions 用の設定ファイルとして扱っているため、ローカルビルド用のファイルはelectron-builder.local.ymlとしました -
electron-builderはデフォルトではプロジェクトルートに含むファイルをバンドル対象とみなすとのこと-
こちらの件、具体的に何がバンドル対象になるか気になったので
electron-builder.local.ymlの files オプションをコメントアウトした状態でビルド&インストールを行い、AppData フォルダ以下の app.asar を展開したところ以下のようになりました。
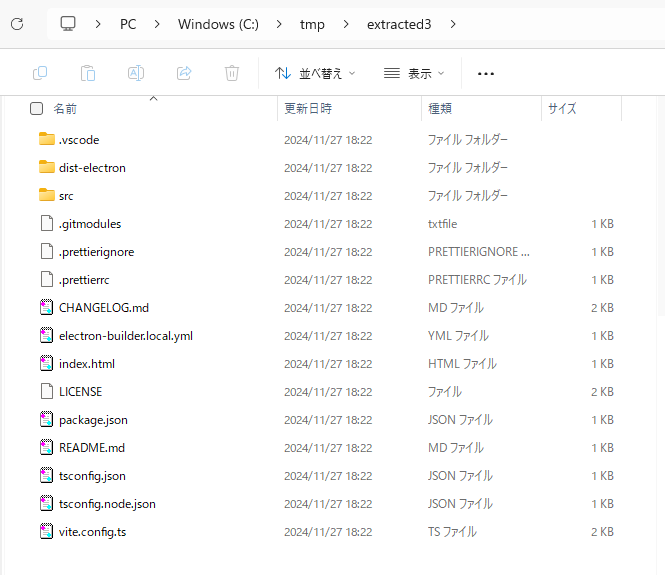
- 話に聞く通りプロジェクトルート内のほぼすべてのファイルが含まれていました
-
electron-builder.local.ymlは含まれてますがelectron-builder.ymlは含まれていないようです - また
node_modules/以下の大量のライブラリは含まれない模様 - Vite ビルドによって出来上がったはずの
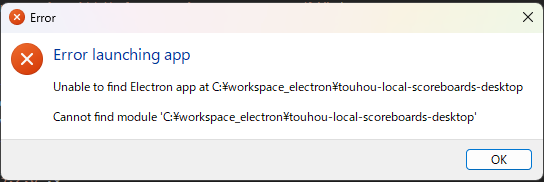
build/はフォルダごと含まれていませんでした- インストール自体は成功しても起動しようとすると真っ白な画面が立ち上がります
- Vite を用いたアプリケーションのため
src/以下のソースファイルなどをバンドルに含める必要は当然ありません。上記に記載したような files オプションの記述によりバンドルに入れ込みたいファイルのみを指定することができました
-
また、ビルドは vite build ⇒ electron-builder の順番で直列に実行する必要があります。以下のように2つのコマンドまとめた npm scripts を作成します
{
  // 色々省略
  "main": "dist-electron/main.js",
  "scripts": {
    "dev": "vite",
    "build": "vue-tsc --noEmit && vite build",
    "preview": "vite preview",
    "fmt": "prettier --write '**/*.{vue,ts,json,css,scss,md}'",
+    "compile": "npm run build && electron-builder --config electron-builder.local.yml"
  },
  // 色々省略
}
- npm run build(
vue-tsc --noEmit && vite build)とelectron-builderを直列で実行します -
electron-builderはローカルビルド用の設定ファイルを--configオプションで指定します
>npm run compile

> touhou-local-scoreboards@0.4.4 compile
> npm run build && electron-builder --config electron-builder.local.yml


> touhou-local-scoreboards@0.4.4 build
> vue-tsc --noEmit && vite build

vite v5.4.9 building for production...
✓ 806 modules transformed.
build/index.html                            0.46 kB │ gzip:   0.33 kB
build/assets/primeicons-C6QP2o4f.woff2     35.15 kB

~~~ vite build の assets は長いので省略 ~~~

build/assets/chunk-DHFAW6u8.js             21.03 kB │ gzip:   4.47 kB
build/assets/chunk-CRhzvdw5.js             21.17 kB │ gzip:   4.36 kB
build/assets/chunk-Cx2dOmLl.js             21.31 kB │ gzip:   4.61 kB
build/assets/main-DjrhQgGj.js           1,346.97 kB │ gzip: 465.66 kB

(!) Some chunks are larger than 500 kB after minification. Consider:
- Using dynamic import() to code-split the application
- Use build.rollupOptions.output.manualChunks to improve chunking: https://rollupjs.org/configuration-options/#output-manualchunks
- Adjust chunk size limit for this warning via build.chunkSizeWarningLimit.
✓ built in 12.89s
vite v5.4.9 building for production...
✓ 1 modules transformed.
dist-electron/main.js  0.63 kB │ gzip: 0.43 kB
✓ built in 29ms
  • electron-builder  version=25.1.8 os=10.0.22631
  • loaded configuration  file=C:\workspace_electron\touhou-local-scoreboards-desktop\electron-builder.local.yml
  • writing effective config  file=dist\builder-effective-config.yaml
  • executing @electron/rebuild  electronVersion=33.2.0 arch=x64 buildFromSource=false appDir=./
  • installing native dependencies  arch=x64
  • completed installing native dependencies
  • packaging       platform=win32 arch=x64 electron=33.2.0 appOutDir=dist\win-unpacked
  • updating asar integrity executable resource  executablePath=dist\win-unpacked\Touhou Local Scoreboards.exe
  • signing with signtool.exe  path=dist\win-unpacked\Touhou Local Scoreboards.exe
  • no signing info identified, signing is skipped  signHook=false cscInfo=null
  • building        target=nsis file=dist\Touhou Local Scoreboards Setup 0.4.4.exe archs=x64 oneClick=true perMachine=false
  • signing with signtool.exe  path=dist\win-unpacked\resources\elevate.exe
  • no signing info identified, signing is skipped  signHook=false cscInfo=null
  • signing with signtool.exe  path=dist\__uninstaller-nsis-touhou-local-scoreboards.exe
  • no signing info identified, signing is skipped  signHook=false cscInfo=null
  • signing with signtool.exe  path=dist\Touhou Local Scoreboards Setup 0.4.4.exe
  • no signing info identified, signing is skipped  signHook=false cscInfo=null
  • building block map  blockMapFile=dist\Touhou Local Scoreboards Setup 0.4.4.exe.blockmap
- vite build ⇒ vite-plugin-electron プラグインのビルド ⇒ electron-builder のような順番で直列に実行できていることがわかります
- electron-builder は実行中に色々重要そうな情報を出力してくれていますが、
dist/以下に exe ファイルが出来上がっていれば成功と見ていいかなと思います- 出来上がった実行ファイルはデスクトップアプリのインストーラです。実行することでユーザーフォルダ以下へのインストールやショートカット作成が行われます。また、完了後にはアプリケーションの起動も行われます
- なお、今回作成したアプリケーションではコード署名に関する一連の作業を飛ばしており、その辺の Warning も含まれています(具体的な方法も調べてられていません...
 )
) - その他、チャンクが 500KB を超えたことによるワーニングも放置中。。こちらは 2MB 程度に制限上げる方向で解決してしまっても良いかなぁと考えています

タグ作成をトリガーとした GitHub Actions のリリースワークフロー作成
ローカルでは Vite でビルドしたものをデスクトップアプリとしてバンドルする用途で electron-builder を利用しましたが、こちら publish というキーの設定を追加することで「リリースの作成とアーティファクトとして生成した実行ファイルをアップロード」できることがわかりました。
詳細は以下のドキュメント。
まず初めに、今回作成したワークフローは以下の通り。
name: Build and Release Electron App

on:
  push:
    tags:
      - 'v*'

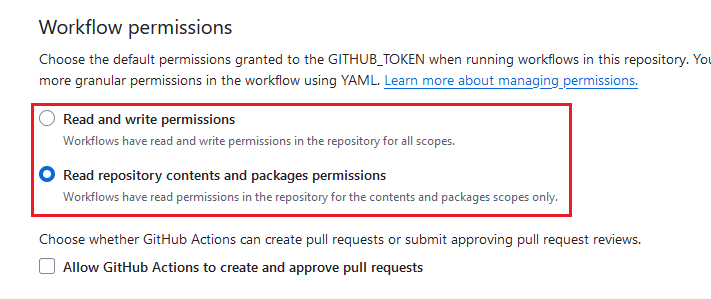
permissions:
  contents: write

jobs:
  build:
    runs-on: windows-latest

    steps:
      - name: Checkout Code
        uses: actions/checkout@v4
        with:
          submodules: recursive
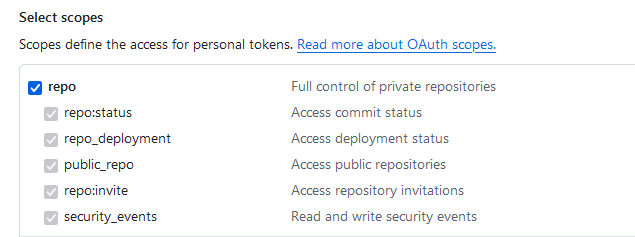
          token: ${{ secrets.RELEASE_TOKEN }}

      - name: Setup Node.js
        uses: actions/setup-node@v4
        with:
          node-version: '20.x'

      - name: Install Dependencies
        run: npm install

      - name: Build Vite App
        run: npm run build

      - name: Build Electron App
        env:
          GH_TOKEN: ${{ secrets.GITHUB_TOKEN }}
        run: npx electron-builder
- このワークフローは
on.push.tagsの設定によってv0.4.4のような vで始まるタグを作成したときに実行されます -
permissions.contents: writeを付けることでワークフローの中でリポジトリへの書き込み(リリース作成)が行えるようにしています -
runs-on: windows-latestと記述することで開発環境と同様のビルドを行うのに適切な Windows 環境でのワークフローの実行を行っています -
actions/checkoutアクションでは親リポジトリから子、孫サブモジュールを含むクローンを行います - サブモジュールを含むプロジェクトのクローンが行えた後は「Node.js 環境の用意」「Vite アプリのプロダクションビルド」「
electron-builderの実行」などを行っていきます。-
electron-builderはオプションを付けずにそのまま呼び出すことでローカルでのビルドとは異なる設定ファイル(デフォルトのelectron-builder.yml)を元にしたビルドを実行します
-
appId: com.imo-tikuwa.app

productName: 'Touhou Local Scoreboards'

files:
  - 'build/**/*'
  - 'dist-electron/main.js'

win:
  target:
    - nsis
  icon: 'src/assets/logo.ico'

publish:
  provider: github
  releaseType: release
- ローカルビルド用の
electron-builder.local.ymlとの違いは publish セクションの有無のみです - ドキュメントによると
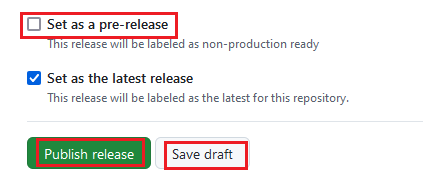
publish.releaseTypeは省略した場合、初期値の draft リリースとして扱われるようなので今回は "release" とすることでワークフロー完了時に公開までを済ませるようにしてみました
ワークフロー実行のためのタグ作成(のみの作成)は GitHub の GUI からはできなかった(と思う)ので、ローカルから以下のような操作によって行います。
> git tag v0.4.4
> git push origin v0.4.4
ローカルリポジトリの HEAD の位置に注意する
ワークフロー内の Build Electon App ステップの実際のログは以下の通り
Run npx electron-builder
  • electron-builder  version=25.1.8 os=10.0.20348
  • artifacts will be published  reason=tag is defined tag=v0.4.4
  • loaded configuration  file=D:\a\touhou-local-scoreboards-desktop\touhou-local-scoreboards-desktop\electron-builder.yml
  • executing @electron/rebuild  electronVersion=33.2.0 arch=x64 buildFromSource=false appDir=./
  • installing native dependencies  arch=x64
  • completed installing native dependencies
  • packaging       platform=win32 arch=x64 electron=33.2.0 appOutDir=dist\win-unpacked
  • downloading     url=https://github.com/electron/electron/releases/download/v33.2.0/electron-v33.2.0-win32-x64.zip size=115 MB parts=8
  • downloaded      url=https://github.com/electron/electron/releases/download/v33.2.0/electron-v33.2.0-win32-x64.zip duration=1.016s
  • updating asar integrity executable resource  executablePath=dist\win-unpacked\Touhou Local Scoreboards.exe
  • downloading     url=https://github.com/electron-userland/electron-builder-binaries/releases/download/winCodeSign-2.6.0/winCodeSign-2.6.0.7z size=5.6 MB parts=1
  • downloaded      url=https://github.com/electron-userland/electron-builder-binaries/releases/download/winCodeSign-2.6.0/winCodeSign-2.6.0.7z duration=853ms
  • signing with signtool.exe  path=dist\win-unpacked\Touhou Local Scoreboards.exe
  • no signing info identified, signing is skipped  signHook=false cscInfo=null
  • building        target=nsis file=dist\Touhou Local Scoreboards Setup 0.4.4.exe archs=x64 oneClick=true perMachine=false
  • downloading     url=https://github.com/electron-userland/electron-builder-binaries/releases/download/nsis-3.0.4.1/nsis-3.0.4.1.7z size=1.3 MB parts=1
  • downloaded      url=https://github.com/electron-userland/electron-builder-binaries/releases/download/nsis-3.0.4.1/nsis-3.0.4.1.7z duration=929ms
  • signing with signtool.exe  path=dist\win-unpacked\resources\elevate.exe
  • no signing info identified, signing is skipped  signHook=false cscInfo=null
  • downloading     url=https://github.com/electron-userland/electron-builder-binaries/releases/download/nsis-resources-3.4.1/nsis-resources-3.4.1.7z size=731 kB parts=1
  • downloaded      url=https://github.com/electron-userland/electron-builder-binaries/releases/download/nsis-resources-3.4.1/nsis-resources-3.4.1.7z duration=836ms
  • signing with signtool.exe  path=dist\__uninstaller-nsis-touhou-local-scoreboards.exe
  • no signing info identified, signing is skipped  signHook=false cscInfo=null
  • signing with signtool.exe  path=dist\Touhou Local Scoreboards Setup 0.4.4.exe
  • no signing info identified, signing is skipped  signHook=false cscInfo=null
  • building block map  blockMapFile=dist\Touhou Local Scoreboards Setup 0.4.4.exe.blockmap
  • publishing      publisher=Github (owner: imo-tikuwa, project: touhou-local-scoreboards-desktop, version: 0.4.4)
  • uploading       file=Touhou-Local-Scoreboards-Setup-0.4.4.exe.blockmap provider=github
  • uploading       file=Touhou-Local-Scoreboards-Setup-0.4.4.exe provider=github
  • creating GitHub release  reason=release doesn't exist tag=v0.4.4 version=0.4.4
- 末尾の方でローカルビルドしたときには見られなかった
• uploading file=~~のログが確認できました - 以下に添付する画像の通り Assets にビルドによって生成された実行ファイルなどが紐づいたリリースが作成できました。

その他(Docker を使った開発環境構築について)
Chrome 拡張機能版の方では Docker(node:20-slim イメージ)を使用したコンテナ環境を作って開発を進めていました。
electron 自体はパッケージマネージャからインストールできてしまうため、軽く考えて Docker コンテナで環境構築を進めていましたが、色々ライブラリが不足している風なエラーが頻発しました。。
幸いなことに、electron 実行時に何が不足しているかはログとして出るのでそれを1つずつ潰していったライブラリインストールの手順は以下の通り。
FROM node:20-slim
SHELL ["/bin/bash", "-oeux", "pipefail", "-c"]

ENV TZ=Asia/Tokyo

+RUN apt-get update && \
+    apt-get install -y --no-install-recommends \
+    libglib2.0-0 \
+    libnss3 \
+    libdbus-1-3 \
+    libatk1.0-0 \
+    libatk-bridge2.0-0 \
+    libcups2 \
+    libdrm2 \
+    libgtk-3.0 \
+    libgbm1 \
+    libasound2 && \
+    apt-get clean && \
+    rm -rf /var/lib/apt/lists/*

WORKDIR /app

USER node
services:
  app:
    build:
      context: ./
      dockerfile: ./.docker/app/Dockerfile
    volumes:
      - .:/app:cached
    ports:
      - "5173:5173"
    tty: true
ただし、この状態でも実際に実行しようとすると以下のようなエラーが3つほど出て Vite が即落ちしてしまいます。。
>docker compose exec app npm run dev

> touhou-local-scoreboards@0.4.4 dev
> vite


  VITE v5.4.9  ready in 5788 ms

  ➜  Local:   http://localhost:5173/
  ➜  Network: http://192.168.128.2:5173/
  ➜  press h + enter to show help
vite v5.4.9 building for development...

watching for file changes...

build started...
✓ 1 modules transformed.
dist-electron/main.js  0.80 kB │ gzip: 0.61 kB
built in 1913ms.
[195:1128/102637.154145:ERROR:bus.cc(407)] Failed to connect to the bus: Failed to connect to socket /run/dbus/system_bus_socket: No such file or directory
[195:1128/102639.812389:ERROR:ozone_platform_x11.cc(245)] Missing X server or $DISPLAY
[195:1128/102639.812446:ERROR:env.cc(258)] The platform failed to initialize.  Exiting.
こちらは調査中(進展あったら追記予定)
その他(electron-vite について)
今回は既存の Vite アプリの Electron 化だったため採用しませんでしたが、一から Electron を用いたデスクトップアプリを開発する場合は以下の OSS がよさそうに見えました。
開発者の方が別途公開しているテンプレートの中には Vue & TypeScript を用いたものが用意されているので、メインプロセス以外も含む複雑なアプリケーションを開発する際のボイラープレートになりそうな気がしました

