OpenVINO-tinyYolov3
OpenVINO-tinyYolov3+ NCS2 + Raspberry pi3 model B+(raspbian stretch)/NUC(Ubuntu18.04)/DesktopPC(Ubuntu16.04) + USBcamera + Python3
Inspired from https://github.com/PINTO0309/OpenVINO-YoloV3
初心者のため、かなり手こずってしまったので、私と同じ右も左もわからない初心者でとりあえず動かしてみたい方向けにメモを残します。
誠に勝手ながらPINTO様の記事をかなり参考にさせていただきました。ありがとうございます。
がんばって勉強中ですが、理解しきれていない所もあります。何か間違いなどお気づきになられましたら、是非とも教えていただきたいです。
Environment
DesktopPC(Ubuntu16.04)
NUC(Ubuntu18.04)
Raspberry pi3 model B+(raspbian stretch armv7l)
Python 3.6.9(DesktopPC)
Python 3.6.8(NUC)
Anaconda 4.7.11(DesktopPC)
Environment construction procedure
Work with DesktopPC(Ubuntu 16.04) & NUC(Ubuntu18.04)
Download the Intel® Distribution of OpenVINO™ toolkit package file from https://software.intel.com/en-us/openvino-toolkit/choose-download?elq_cid=5597297. Select the Intel® Distribution of OpenVINO™ toolkit for Linux package from the dropdown menu.
If you have a previous version of the Intel Distribution of OpenVINO toolkit installed, rename or delete these two directories:
/home/<user>/inference_engine_samples_build
/home/<user>/openvino_models
Open a command prompt terminal window and execute the following command.
$ cd ~/Downloads/
$ tar -xvzf l_openvino_toolkit_p_<version>.tgz
$ rm l_openvino_toolkit_p_<version>.tgz
$ cd l_openvino_toolkit_p_<version>
Install OpenVINO
Please proceed without any changes
$ sudo ./install_GUI.sh
To install the dependencies, execute the following command.
$ cd /opt/intel/openvino/install_dependencies/
$ sudo -E ./install_openvino_dependencies.sh
$ nano ~/.bashrc
# Add this line to the end of the file:
source /opt/intel/openvino/bin/setupvars.sh
$ source ~/.bashrc
# Successful if displayed as below
[setupvars.sh] OpenVINO environment initialized
$ cd /opt/intel/openvino/deployment_tools/model_optimizer/install_prerequisites/
$ sudo ./install_prerequisites.sh
To enable NCS2, execute the following command.
At this point, connect NCS2 to your PC.
$ sudo usermod -a -G users "$(whoami)"
$ cat <<EOF > 97-usbboot.rules
SUBSYSTEM=="usb", ATTRS{idProduct}=="2150", ATTRS{idVendor}=="03e7", GROUP="users", MODE="0666", ENV{ID_MM_DEVICE_IGNORE}="1"
SUBSYSTEM=="usb", ATTRS{idProduct}=="2485", ATTRS{idVendor}=="03e7", GROUP="users", MODE="0666", ENV{ID_MM_DEVICE_IGNORE}="1"
SUBSYSTEM=="usb", ATTRS{idProduct}=="f63b", ATTRS{idVendor}=="03e7", GROUP="users", MODE="0666", ENV{ID_MM_DEVICE_IGNORE}="1"
EOF

$ sudo cp 97-usbboot.rules /etc/udev/rules.d/
$ sudo udevadm control --reload-rules
$ sudo udevadm trigger
$ sudo ldconfig
$ rm 97-usbboot.rules
Work with RaspberryPi (Raspbian Stretch)
Download the Raspberry Pi version of openvino toolkit from the link above
$ sudo apt update
$ sudo apt upgrade
$ cd ~/Downloads/
$ sudo mkdir -p /opt/intel/openvino
$ sudo tar -xf l_openvino_toolkit_raspbi_p_<version>.tgz --strip 1 -C /opt/intel/openvino
$ sudo apt install cmake
$ source /opt/intel/openvino/bin/setupvars.sh
$ nano ~/.bashrc
# Add this line to the end of the file:
source /opt/intel/openvino/bin/setupvars.sh

$ source ~/.bashrc
### Successful if displayed as below
[setupvars.sh] OpenVINO environment initialized

$ sudo usermod -a -G users "$(whoami)"
$ sudo reboot

$ sh /opt/intel/openvino/install_dependencies/install_NCS_udev_rules.sh
Work with DesktopPC(Ubuntu 16.04)
Convert weight file(Darknet(.weights) -> Tensorflow(.pb) -> OpenVINO(.bin))
Execute the following command
$ cd ~
$ git clone https://github.com/PINTO0309/OpenVINO-YoloV3.git
$ cd OpenVINO-YoloV3.git
copy weights file from ~/darknet/yolov3-tiny.weights to ~/OpenVINO-YoloV3/weights
$ cp ~/darknet/yolov3-tiny.weights weights
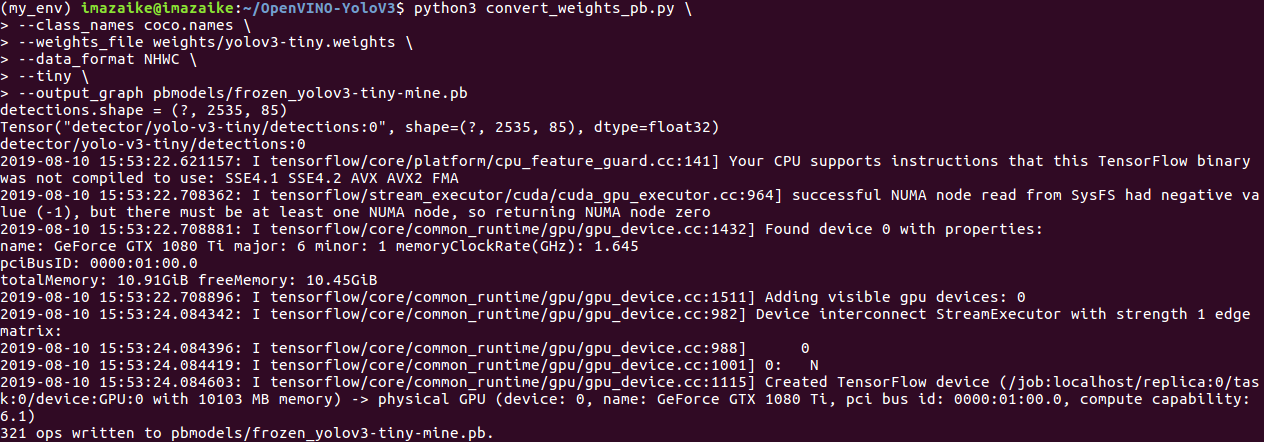
$ python3 convert_weights_pb.py \
--class_names coco.names \
--weights_file weights/yolov3-tiny.weights \
--data_format NHWC \
--tiny \
--output_graph pbmodels/frozen_yolov3-tiny-mine.pb
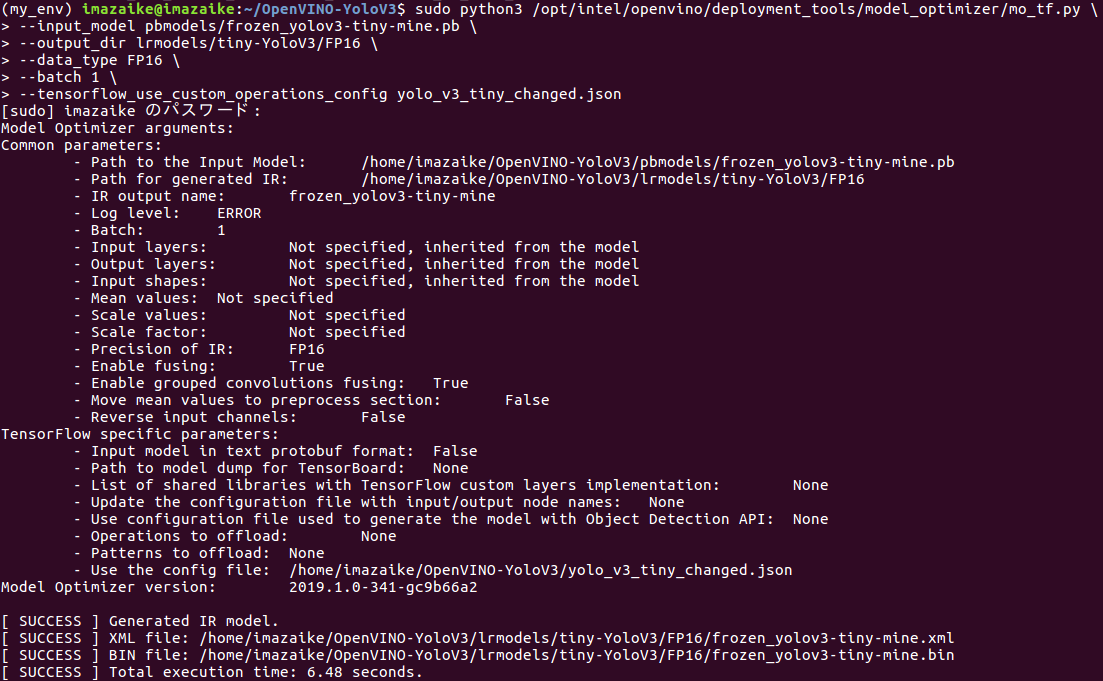
$ sudo python3 /opt/intel/openvino/deployment_tools/model_optimizer/mo_tf.py \
--input_model pbmodels/frozen_yolov3-tiny-mine.pb \
--output_dir lrmodels/tiny-YoloV3/FP16 \
--data_type FP16 \
--batch 1 \
--tensorflow_use_custom_operations_config yolo_v3_tiny_changed.json
Now, you got 3files!
/home/<username>/OpenVINO-YoloV3/lrmodels/tiny-YoloV3/FP16/frozen_yolov3-tiny-mine.bin
/home/<username>/OpenVINO-YoloV3/lrmodels/tiny-YoloV3/FP16/frozen_yolov3-tiny-mine.mapping
/home/<username>/OpenVINO-YoloV3/lrmodels/tiny-YoloV3/FP16/frozen_yolov3-tiny-mine.xml
Work with PC to run tiny-yolov3
Execute the following command
$ cd ~
$ git clone https://github.com/PINTO0309/OpenVINO-YoloV3.git
Copy 3files(.bin)(.mapping)(.xml) to /home/(username)/OpenVINO-YoloV3/lrmodels/tiny-YoloV3/FP16/
And, Edit the file(/OpenVINO-YoloV3/openvino_tiny-yolov3_MultiStick_test.py)
self.model_xml = "./lrmodels/tiny-YoloV3/FP16/frozen_tiny_yolo_v3.xml"
  =>  self.model_xml = "./lrmodels/tiny-YoloV3/FP16/frozen_yolov3-tiny-mine.xml"
self.model_bin = "./lrmodels/tiny-YoloV3/FP16/frozen_tiny_yolo_v3.bin"
  =>  self.model_xml = "./lrmodels/tiny-YoloV3/FP16/frozen_yolov3-tiny-mine.bin"
Then, connect USBcamera and NCS2 to PC and execute the following command
$ cd ~
$ cd OpenVINO-YoloV3
$ python3 openvino_tiny-yolov3_MultiStick_test.py -numncs 1
If the screen turns white, change the GL driver to Legacy
All processes are complete!
Thank you!

