無駄にハマったので、メモとして残しておきます。
目的
Firebaseの電話番号認証をExpoのローカル環境から行う。
環境設定
Expo側
expo init [プロジェクト名]
ちなみにexpoのnodeのバージョンは以下でしか動かないので注意
expo-cli supports following Node.js versions:
* >=8.9.0 <9.0.0 (Maintenance LTS)
* >=10.13.0 <11.0.0 (Active LTS)
* >=12.0.0 (Current Release)
expoはblankで選択します。(TypeScriptにするかはお好みでどうぞ)
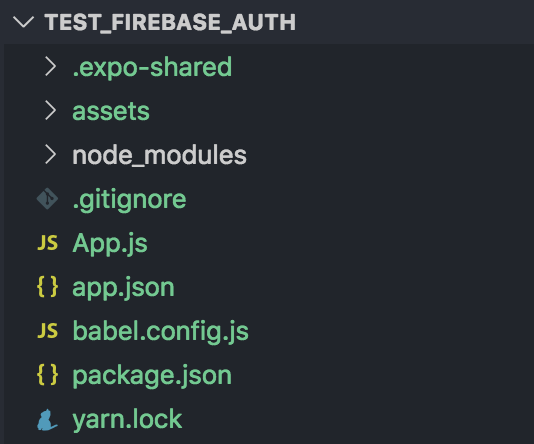
そうすると以下のようなディレクトリが成形されます。簡単。

expo start
これで、App.tsをいじっていけば動き出します。
Firebase側
- firebaseでプロジェクトを作成
- プロジェクト作成後、アプリを作成を選択しプラットフォームはウェブにする。
- 作成すると以下の情報が取得できるので、expo側に保存します。
(今回はsrcディレクトリを作ってその中にfirebaseディレクトリを立てています。)
  const firebaseConfig = {
    apiKey: xxxxx,
    authDomain: xxxxx,
    databaseURL: xxxxx,
    projectId: xxxxx,
    storageBucket: xxxxx,
    messagingSenderId: xxxxx,
    appId: xxxxx,
    measurementId: xxxx
  };

  export default firebaseConfig
以上の設定が終わったら、左タブからAuthenticationを選択して電話番号を有効にします。

Expo側からFirebaseと接続を行う
1.Expoにfirebaseをinstallする。
npm install --save firebase
これでexpoの中でfirebaseを扱えるようになりましたので、初期化させるtsファイルを作ります。
import firebaseConfig from './config'
import * as firebase from 'firebase'

const fC = {
  apiKey: firebaseConfig.apiKey,
  authDomain: firebaseConfig.authDomain,
  databaseURL: firebaseConfig.databaseURL,
  storageBucket: firebaseConfig.storageBucket,
  messagingSenderId: firebaseConfig.messagingSenderId
}

const firebaseApp = firebase.initializeApp(fC);
firebaseApp.auth().languageCode = 'JP';

export { firebaseApp }
これで準備はOKです。
ExpoのApp.tsに上記のファイルをimportします。
import { firebaseApp } from 'AppRoot/src/firebase'
電話番号認証を行う
さてこっからはあと一息です。
firebase公式ドキュメントを読むと、
電話番号ログインをアプリに追加する最も簡単な方法は、FirebaseUI を使用することです。このライブラリには、電話番号ログインのほか、パスワードに基づくログインやフェデレーション ログインのログインフローを実装するドロップイン式のログイン ウィジェットが含まれています。このドキュメントでは、Firebase SDK を使用して電話番号ログインフローを実装する方法について説明します。
firebaseUIを使えば一瞬や..!と思ったのですが、firebaseのgithubを探してもreact-native製は見つからず。
仕方ないので、UIと処理自体のコードは書くことにします。
電話番号を使ってユーザーをログインさせる前に、Firebase の reCAPTCHA ベリファイアを設定する必要があります。Firebase は不正行為を防ぐ手段として reCAPTCHA を使用します。これにより、たとえば電話番号の確認リクエストがアプリで許可されたドメインから発信されたものかどうかを確認できます。
色んなqiitaやスタックオーバーフローを読んでもreact-native上にreCAPTCHAを作ることはできないことが判明したのでWebで専用ページを別途作る必要があります。(もしreact-native内に書けそうであれば共有お願いします。)
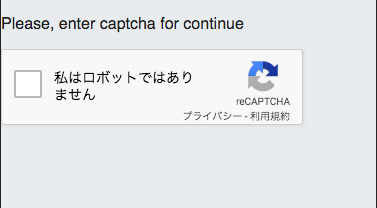
以下のようなキャプチャ用HTMLを書きます。
<!DOCTYPE html>
<html>
<head>
  <meta charset="utf-8">
  <meta name="viewport" content="width=device-width, initial-scale=1">
  <title>Entering captcha</title>

  <!-- update the version number as needed -->
  <script defer src="/__/firebase/7.2.2/firebase-app.js"></script>
  <!-- include only the Firebase features as you need -->
  <script defer src="/__/firebase/7.2.2/firebase-auth.js"></script>
  <script defer src="/__/firebase/7.2.2/firebase-database.js"></script>
  <script defer src="/__/firebase/7.2.2/firebase-messaging.js"></script>
  <script defer src="/__/firebase/7.2.2/firebase-storage.js"></script>
  <!-- initialize the SDK after all desired features are loaded -->
  <script defer src="/__/firebase/init.js"></script>

  <style media="screen">
    body { background: #ECEFF1; color: rgba(0,0,0,0.87); font-family: Roboto, Helvetica, Arial, sans-serif; margin: 0; padding: 0; }
  </style>
</head>
<body>
<p>Please, enter captcha for continue<p/>
<button id="continue-btn" style="display:none">Continue to app</button>
<script>
  function getToken(callback) {
    const containerId = 'captcha';
    const container = document.createElement('div');
    container.id = containerId;
    document.body.appendChild(container);
    var captcha = new firebase.auth.RecaptchaVerifier(containerId, {
      'size': 'normal',
      'callback': function(token) {
        callback(token);
      },
      'expired-callback': function() {
        callback('');
      }
    });
    captcha.render().then(function() {
      captcha.verify();
    });
  }

  function sendTokenToApp(token) {
    const baseUri = decodeURIComponent(location.search.replace(/^\?appurl\=/, ''));
    const finalUrl = location.href = baseUri + '/?token=' + encodeURIComponent(token);
    const continueBtn = document.querySelector('#continue-btn');
    continueBtn.onclick = function() {
      window.open(finalUrl, '_blank');
    };
    continueBtn.style.display = 'block';
  }

  document.addEventListener('DOMContentLoaded', function() {
    getToken(sendTokenToApp);
  });
</script>
</body>
</html>
これをfirebase上にホストします。
firebaseを操作できるパッケージをインストールして、初期化します。
npm install -g firebase-tools
firebase login
firebase init
hostingを選択して、指示通り進めていきdeployします。

これで準備は整ったので、Expo側からFirebaseへ呼び出し処理をします。
  import { Linking } from 'expo'
  import * as WebBrowser from 'expo-web-browser';
  import { CAPTCHA_URL_BASE } from './src/constants/Url'
  //
  sendPhoneNumber = () => {
    const { phoneNumber } = this.state

    const captchaUrl = `${CAPTCHA_URL_BASE}?appurl=${Linking.makeUrl('')}`;
    const listener = ({ url }) => {
      WebBrowser.dismissBrowser();
      const tokenEncoded = Linking.parse(url).queryParams['token'];
      if (tokenEncoded) {
        const token = decodeURIComponent(tokenEncoded);

        const captchaVerifier = {
          type: 'recaptcha',
          verify: () => Promise.resolve(token)
        };
        firebaseApp.auth().signInWithPhoneNumber(phoneNumber, captchaVerifier)
          .then(confirmResult => {
            console.log('confirmResult', confirmResult)
          }).catch(error => {
            console.log('error', error)
          });
      }
    };
    Linking.addEventListener('url', listener);
    WebBrowser.openBrowserAsync(captchaUrl).then(() => {
      Linking.removeEventListener('url', listener);
    });
  }
expoのWebBrowserを使用して、ウェブ上のhtmlを一度呼び出してトークンを取得します。
問題なく取得したあと、firebaseのsiginInWithPhoneNumber関数の第二引数に渡す流れです。
第一引数には、通知を届ける電話番号を渡します。
※ちなみに電話番号は国際コードを引き渡す必要があります。
(09012345678ではなく、+8109012345678のように)
これで上手くいくはずなんですが、何度やっても通知が来ない...
firebaseのエミュレーターを立ち上げるのか?とかいろいろ試したのですが原因はfirebaseの設定にありました。
承認済みドメインを正しく設定しよう
このQiitaで言いたいことはこれに付きます。
firebaseのAuthenticationに承認済みドメインがあるのですが、
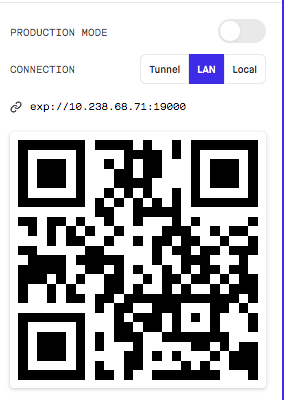
expoのドメインを正しく追加してあげないと通知は飛びません。
これに記載されているドメインを、firebaseの承認済みドメインに設定してあげると無事通知が飛ぶようになりました。
意外と盲点だったりするので、みなさまお気をつけて...
