個人的にスマホアプリを作成しようと思い、react nativeおよびexpoに入門中です。
そのための開発環境を整えるのがとても面倒なのですが、一気にやってしまうついでに忘備録として残そうというモチベーションです。
また、eslintの設定に flat config を利用しているものがなかったため、それを利用してみます。
※ react native 公式のlint設定ではflat configを利用していません。同じことができると思っていますが、動作等不安な場合は今までの形式を利用することをお勧めします。
参考(react native公 eslint config)
また、すべてのプラグインを一度に追加しても良いですが、何かあった時のため一つ追加できたらコミット、という形で進めていく形が私は好きです。
それでは開始です💪
追記
expoには様々なプラグインがあり、自分でインストールしなくとも設定ファイルを用意するだけで利用できる機能が多くあることに後々気づきました。
ドキュメントで調べると大抵利用したいものが出てくるので、そちらから試した方がよさそうです。
ex: tailwindcss
https://docs.expo.dev/versions/latest/config/metro/#tailwind
プロジェクト開始
プロジェクトを開始します。
expoやシミュレーター、Xcode等はインストールされている前提で進めていきます。
実行環境
expo 0.18.28
yarn 1.22.22
mac os (Apple M2チップ)
npx create-expo-app@latest
? What is your app named? › <project name>

~~ 諸々インストールログ ~~

✅ Your project is ready!

To run your project, navigate to the directory and run one of the following npm commands.

- cd test
- npm run android
- npm run ios
- npm run web
プロジェクト開始確認
yarn start
yarn run v1.22.22
warning package.json: "test" is also the name of a node core module
$ expo start
Starting project at /Users/<name>/Project/react_native/test
(node:54781) [DEP0040] DeprecationWarning: The `punycode` module is deprecated. Please use a userland alternative instead.
(Use `node --trace-deprecation ...` to show where the warning was created)
Starting Metro Bundler
(node:54781) Warning: To load an ES module, set "type": "module" in the package.json or use the .mjs extension.
(node:54781) Warning: To load an ES module, set "type": "module" in the package.json or use the .mjs extension.
▄▄▄▄▄▄▄▄▄▄▄▄▄▄▄▄▄▄▄▄▄▄▄▄▄▄▄
█ ▄▄▄▄▄ █   █▄ ▀▄██ ▄▄▄▄▄ █
█ █   █ █ ▀▄ █▀█▀▄█ █   █ █
█ █▄▄▄█ █▀██▀▀█▀▄██ █▄▄▄█ █
█▄▄▄▄▄▄▄█▄▀▄█ █▄█▄█▄▄▄▄▄▄▄█
█▄ █▀▄ ▄▀█▀▀▄▀█▄ ███ ▀▄▄ ▄█
█▀▀▀▄▀▄▄█▄█▀ ▄██  ▀ █▄  ▀██
█ █ ▄  ▄ ▀▀▄█▄▀▄▀▄▀▄▀▀▄ ▀██
███ ▄█▄▄█ ▀██▀██▄▄▄█▄▀ ▀███
█▄▄█▄▄█▄▄▀▄█▄▀█▄▄ ▄▄▄ ▀ ▄▄█
█ ▄▄▄▄▄ █▀   ▄██▀ █▄█ ▀▀█▀█
█ █   █ █▄▀ █▄▀▄█▄▄ ▄▄▀   █
█ █▄▄▄█ █▀▀ █▀█▀▄██▄▀█▀▀ ██
█▄▄▄▄▄▄▄█▄▄▄▄▄▄▄████▄▄▄▄▄▄█

› Metro waiting on exp://192.168.0.20:8081
› Scan the QR code above with Expo Go (Android) or the Camera app (iOS)

› Web is waiting on http://localhost:8081

› Using Expo Go
› Press s │ switch to development build

› Press a │ open Android
› Press i │ open iOS simulator
› Press w │ open web

› Press j │ open debugger
› Press r │ reload app
› Press m │ toggle menu
› Press o │ open project code in your editor

› Press ? │ show all commands
このようなログが出ていればOKです。
続けてiを押すとPC内でシミュレーターが起動 or expo go アプリをインストールしているios端末でQRコードを読み取ると手持ちの端末で確認ができます。
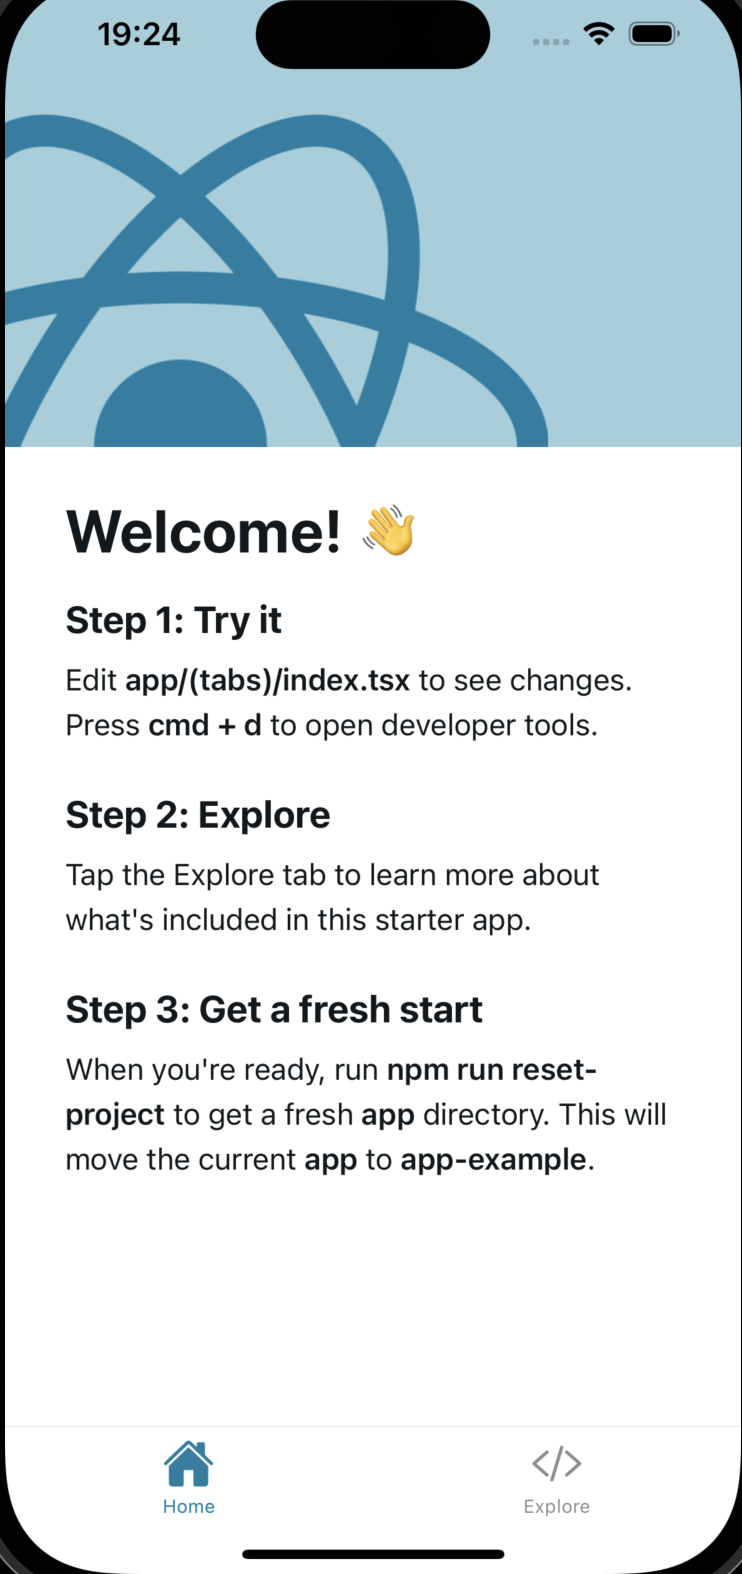
シミュレータ or スマホには以下のような画面が出ています。
tailwind導入
tailwind-rnなどもありますが、webアプリと同様className=''というように記載したいため、nativewindを利用します。
react nativeのアプリ起動が確認できたところで、早速環境の設定をしていきます。
1. 必要なパッケージのインストール
yarn add nativewind
yarn add --dev tailwindcss@3.3.2
yarn add --dev @types/react-native
2. 初期化 & 設定
initコマンドで設定ファイル等を作成します
npx tailwindcss init
設定ファイルを修正します。
/** @type {import('tailwindcss').Config} */
module.exports = {
  // 対象ファイルを追加
  content: [
    "./App.{js,jsx,ts,tsx}",
    "./app/**/*.{js,jsx,ts,tsx}",
  ],
  // 他、必要であれば下記に追加する
  theme: {
    extend: {},
  },
  plugins: [],
}
3. babel.config.jsの設定
pluginに追記していきます。
この設定をすることで、コンパイル時にtailwindのクラス名をreact nativeのスタイルに変更してくれるようです。
module.exports = function (api) {
  api.cache(true);
  return {
    presets: ['babel-preset-expo'],
    // pluginsに追記
    plugins: ['nativewind/babel'],
  };
};
4. app.d.tsファイルの追加
型定義ファイルをルートディレクトリに追加します。tailwindの型を各ファイルでimportするのは手間なので、グローバルに参照できるようにするためです。
ファイル名は --.d.tsという拡張子にすればOKです。
touch app.d.ts
/// <reference types="nativewind/types" />
これで普段のreactプロジェクトのようにtailwindが利用できるはずです。
5. 確認
最後にちゃんと機能するか確認します。
以下のように変更してみます。
<ThemedText type="title"'>Welcome!</ThemedText>
// classNameを追加 ↓
<ThemedText type="title" className='text-red-500'>Welcome!</ThemedText>
welcomeの文字が赤くなっていれば完了です。

eslint導入
続いてeslintをプロジェクトに追加します。
1. 必要なパッケージをインストール
yarn add --dev eslint prettier @react-native/eslint-config
2. initコマンドで初期設定を追加
yarn eslint --init
いくつか質問が表示されるので、答えていきます。
❯となっている方が選択したものです。
? How would you like to use ESLint? …
  To check syntax only
❯ To check syntax and find problems

? What type of modules does your project use? …
❯ JavaScript modules (import/export)
  CommonJS (require/exports)
  None of these

? Which framework does your project use? …
❯ React

? Does your project use TypeScript? …
  No
❯ Yes

? Where does your code run? …  (Press <space> to select, <a> to toggle all, <i> to invert selection)
✔ Browser

The config that you've selected requires the following dependencies:

eslint, globals, @eslint/js, typescript-eslint, eslint-plugin-react
? Would you like to install them now? › No / Yes (Yesを選択)

? Which package manager do you want to use? …
  npm
❯ yarn
  pnpm
  bun
3. 設定ファイルの編集
続いて、設定ファイルを修正していきます。初期状態は以下です。eslint9(?)以降は module.exportのような形になっていないものがデフォルトのようで、これからはこちらの形式に統一されていくようです。
ですので、flat configスタイルで今回は進めていきます。
import globals from "globals";
import pluginJs from "@eslint/js";
import tseslint from "typescript-eslint";
import pluginReact from "eslint-plugin-react";


export default [
  {files: ["**/*.{js,mjs,cjs,ts,jsx,tsx}"]},
  {languageOptions: { globals: globals.browser }},
  pluginJs.configs.recommended,
  ...tseslint.configs.recommended,
  pluginReact.configs.flat.recommended,
];
↓ 編集後(それぞれの項目追加理由等は記事の最後に記載します。)
import globals from "globals";
import pluginJs from "@eslint/js";
import tseslint from "typescript-eslint";
import pluginReact from "eslint-plugin-react";


export default [
  {files: ["**/*.{js,mjs,cjs,ts,jsx,tsx}"]},
  {languageOptions: { globals: {...globals.browser, ...globals.es2025} }},
  pluginJs.configs.recommended,
  ...tseslint.configs.recommended,
  {
    ...pluginReact.configs.flat.recommended,
    settings: {
      react: {
        version: 'detect'
      }
    }
  },
  { ignores:
    [
      'node_modules',
      'babel.config.js',
      'tailwind.config.js',
      'scripts/reset-project.js',
    ]
  },
  {
    rules: {
      'react/react-in-jsx-scope': 'off',
      '@typescript-eslint/no-require-imports': ['error', {
        allow: ['@/assets/images/*', '@/assets/fonts/*']
      }],
      "react/no-unescaped-entities": ["error", {"forbid": [">", "}"]}],
    },
  },
];
4. eslint拡張機能の追加
以下拡張機能を追加します。リアルタイムで設定に反する箇所を指摘してくれるようになります。
5. 動作確認 & lintで指摘されている箇所を修正
lintを実行するとともに、エラーが出ることでlintが働いているか確認します。
以下コマンドを実行します。
yarn eslint
正常に完了すれば良いですが、エラーの出る場合は修正します。
※あくまで記事作成時の状況で作成されたプロジェクトになります。ファイル内容等が変更されている可能性がありますのでご留意ください。
yarn run v1.22.22
$ /Your/App/Directory/node_modules/.bin/eslint

/Your/App/Directory/app/_layout.tsx
  20:16  error  A `require()` style import is forbidden  @typescript-eslint/no-require-imports

✖ 1 problem (1 error, 0 warnings)

error Command failed with exit code 1.
app/_layout.tsxでエラーが出ているので修正します。
- SpaceMono: require('../assets/fonts/SpaceMono-Regular.ttf'),
+ SpaceMono: require('@/assets/fonts/SpaceMono-Regular.ttf'),
requireの箇所を修正しています。
先ほど @typescript-eslint/no-require-imports でassets配下にあるものをrequireすることを許可しました。記載方法を@/...という形にしたため、そのように記載を変更します。
※imageのimportでは@/という記載だったため統一していますが、何か問題がある場合はお教えいただけますと幸いです。
他、エラーが出ている場合は適宜修正をします。
再度コマンドを実行し、何も出なくなれば完了です。
> yarn eslint
yarn run v1.22.22
$ /Users/<user-name>/Project/react_native/<app-name>/node_modules/.bin/eslint
✨  Done in 1.25s.
これでeslintまで導入完了しました!
Prettier
続いて、Prettierを追加します。
1. 必要なパッケージのインストール
prettierはeslint追加時にinstallしていますが念のため。
yarn add prettier eslint-config-prettier
2. prettierの設定ファイルを作成する
アプリケーションのルートディレクトリに.prettierrcファイルを作成
touch .prettierrc
.prettierrcにルールを記載していきます。
今回は以下を設定します。必要に応じて修正してください。内容の詳細は記事最後に備考として記載しております。
{
  "bracketSpacing": true,
  "printWidth": 80,
  "tabWidth": 2,
  "singleQuote": true,
  "trailingComma": "all",
  "semi": true
}
3. eslint の config ファイルに prettier の設定を記載
// import部に記載
import prettierConfig from 'eslint-config-prettier';

export default [
~~ 中略 ~~

  {
    rules: {
      'react/react-in-jsx-scope': 'off',
      '@typescript-eslint/no-require-imports': [
        'error',
        {
          allow: ['@/assets/images/*', '@/assets/fonts/*'],
        },
      ],
      'react/no-unescaped-entities': ['error', { forbid: ['>', '}'] }],
    },
  },
  // 最下部にprettierの設定を記載し、eslintと重なる設定がある場合はprettier側を優先させる
  prettierConfig,
];
この時点でeslint側の動作を確認しておきます。
yarn eslint
先ほど同様、Doneが出ることを確認します。
yarn run v1.22.22
✨  Done in 0.89s.
4. 動作確認
これで prettier も導入できているはずです。
コマンドからチェックしてみます。
npx prettier --check .
Checking formatting...
[warn] .prettierrc
[warn] app.json
[warn] app/_layout.tsx
[warn] app/(tabs)/_layout.tsx
[warn] app/(tabs)/explore.tsx
[warn] app/(tabs)/home.tsx
[warn] app/(tabs)/index.tsx
[warn] app/+html.tsx
[warn] components/__tests__/ThemedText-test.tsx
[warn] components/Collapsible.tsx
[warn] components/ExternalLink.tsx
[warn] components/HelloWave.tsx
[warn] components/navigation/TabBarIcon.tsx
[warn] components/ParallaxScrollView.tsx
[warn] components/ThemedView.tsx
[warn] eslint.config.mjs
[warn] hooks/useThemeColor.ts
[warn] tailwind.config.js
[warn] app.d.ts
[warn] tsconfig.json
[warn] Code style issues found in 20 files. Run Prettier with --write to fix.
上記のようなアラートが出れば機能しています。ついでにフォーマットも直してもらいましょう。
npx prettier --write .
gitの差分が多く出てきますが、prettierの設定通りにコードがフォーマットされていると思います。
念のためもう一度checkして差分がなければ完了です!
> npx prettier --check .
Checking formatting...
All matched files use Prettier code style!
5. 拡張機能追加
eslintと同様、prettierも拡張機能を追加しておきます。

6. vs code における自動フォーマット設定
上記まででprettierの導入自体はできているのですが、毎回コマンドで修正するのは面倒です。
よって、vs code でファイルを保存した際自動でフォーマッタが走るように設定します。
このプロジェクトのみで機能させたいので、.vscode/setting.jsonを追加・作成し、設定を記載していきます。
{
  "editor.defaultFormatter": "esbenp.prettier-vscode",
  "editor.formatOnSave": true
}
これで完了です。自動保存の場合でも、ctrl + s 等で保存すると自動でフォーマットされると思います。
huskyを導入する
最後に、huskyを導入してgit commit時、git push時に強制的にテストやフォーマッタが走るようにします。
公式ドキュメントに沿って進めていきます。(2024/08/24時点)
インストール
huskyをインストールします。
yarn add --dev husky
初期化
initコマンドで初期化します。
npx husky init
すると、アプリケーションのルートディレクトリに .huskyディレクトリが作成され、package.jsonには "prepare": "husky" という記載がscripts内に追加されると思います。
prepareにあるコマンドは、yarn installなどでパッケージインストールしたときに実行されます。今はあまり気にしなくて大丈夫です。
実行script & preコマンド 設定
最後に、huskyで実行したいコマンド(commitなどの際に走らせたいコマンド)を設定していきます。
今回は、pre-commitに先ほどまでで追加したlint, prettierを設定し、pre-pushにはjestによるtestを設定します。※jestは元々インストールされていましたが、もしなければ必要な時に設定で大丈夫です。
まずはpackage.jsonのscriptにprettierを追加していきましょう。lintはeslintコマンドで実行できるため今回は追加していません。
  "scripts": {
    ~~ 略 ~~
    // test に jestを設定
    // 元は以下がtestとして設定されていますが、watchモードだとtestが終了しないためtestaに変更しています
    "test": "jest",
    "testa": "jest --watchAll",
    // prettier用のスクリプトを記載
    "prt": "npx prettier --write .",
    "prepare": "husky"
  },
続いて、pre-commitの内容を変更していきます。
- npm
+ #!/usr/bin/env sh
+
+ yarn prt
+ yarn eslint
+
+ git add .
最後に、pre-pushファイルを追加しtestを設定します。
#!/usr/bin/env sh

yarn test
これでhuskyの設定が完了しました!
実際に動作するか確認します。以下のようなログが出れば完了です。
git add -A
git commit -m 'add husky'

yarn run v1.22.22
$ npx prettier --write .
.prettierrc 31ms (unchanged)
.vscode/settings.json 1ms (unchanged)
app.json 3ms (unchanged)
app/_layout.tsx 44ms (unchanged)
app/(tabs)/_layout.tsx 5ms (unchanged)
app/(tabs)/index.tsx 2ms (unchanged)
app/(tabs)/insights.tsx 1ms (unchanged)
app/+html.tsx 6ms (unchanged)
app/+not-found.tsx 2ms (unchanged)
babel.config.js 4ms (unchanged)
components/__tests__/ThemedText-test.tsx 2ms (unchanged)
components/Collapsible.tsx 8ms (unchanged)
components/ExternalLink.tsx 4ms (unchanged)
components/HelloWave.tsx 6ms (unchanged)
components/navigation/TabBarIcon.tsx 3ms (unchanged)
components/ParallaxScrollView.tsx 5ms (unchanged)
components/ThemedText.tsx 3ms (unchanged)
components/ThemedView.tsx 2ms (unchanged)
constants/Colors.ts 1ms (unchanged)
eslint.config.mjs 3ms (unchanged)
hooks/useColorScheme.ts 0ms (unchanged)
hooks/useColorScheme.web.ts 1ms (unchanged)
hooks/useThemeColor.ts 2ms (unchanged)
package-lock.json 108ms (unchanged)
package.json 2ms (unchanged)
README.md 20ms (unchanged)
scripts/reset-project.js 4ms (unchanged)
tailwind.config.js 1ms (unchanged)
time-manager.d.ts 1ms (unchanged)
tsconfig.json 0ms (unchanged)
✨  Done in 0.94s.
yarn run v1.22.22
✨  Done in 1.05s.
[feat/add_husky e6b317c] fix: script
 1 file changed, 2 insertions(+), 1 deletion(-)
git push origin <作業中のブランチ名>

yarn run v1.22.22
$ jest
 PASS  components/__tests__/ThemedText-test.tsx
  ✓ renders correctly (32 ms)

Test Suites: 1 passed, 1 total
Tests:       1 passed, 1 total
Snapshots:   1 passed, 1 total
Time:        0.417 s, estimated 1 s
Ran all test suites.
✨  Done in 1.27s.
Enumerating objects: 17, done.
Counting objects: 100% (17/17), done.
Delta compression using up to 8 threads
Compressing objects: 100% (11/11), done.
Writing objects: 100% (14/14), 1.36 KiB | 1.36 MiB/s, done.
Total 14 (delta 6), reused 0 (delta 0), pack-reused 0 (from 0)
remote: Resolving deltas: 100% (6/6), completed with 3 local objects.
remote:
remote: Create a pull request for 'feat/add_husky' on GitHub by visiting:
remote:      https://github.com/<git-name>/ <app-name>/pull/new/feat/add_husky
remote:
To https://github.com/<git-name>/ <app-name>.git
 * [new branch]      feat/add_husky -> feat/add_husky
まとめ
お疲れ様でした!
色々一気に進めてきましたが、基本的にはプラグインを入れる => 設定ファイルで適用する範囲・要素を指定するということが大まかな流れかなと思います。多分。
一気に進めてきたので大変だったと思いますが、何かの参考になればと思います。
備考
eslintで設定したもの
import globals from "globals";
import pluginJs from "@eslint/js";
import tseslint from "typescript-eslint";
import pluginReact from "eslint-plugin-react";


export default [
  // ファイルの形式(デフォルト値)
  {files: ["**/*.{js,mjs,cjs,ts,jsx,tsx}"]},
  // ...globals.es2025を追加
  // 最新のjavascript規格を入れておきたい気持ちから、新しいものを入れています。
  {languageOptions: { globals: {...globals.browser, ...globals.es2025} }},
  pluginJs.configs.recommended,
  ...tseslint.configs.recommended,
  // reactのバージョンを自動で検知するよう設定。(固定値でも良いです。)
  // これがないと、以下エラーが出てしまう。
  // Warning: React version not specified in eslint-plugin-react settings. See https://github.com/jsx-eslint/eslint-plugin-react#configuration .
  {
    ...pluginReact.configs.flat.recommended,
    settings: {
      react: {
        version: 'detect'
      }
    }
  },
  // eslintを適用しないファイルを設定
  { ignores:
    [
      'node_modules',
      'babel.config.js',
      'tailwind.config.js',
      'scripts/reset-project.js',
    ]
  },
  // ルールを少し修正
  // react/react-in-jsx-scopeは、import React を強制しますが、react 18以降であればなくても問題ないためoff
  // @typescript-eslint/no-require-importsでは、assets配下のものは動的に読み込むため、requireでの読み込みを許可
  // react/no-unescaped-entitiesは、エスケープするものを限定しています。
  // 具体的には'を対象から外しています。> や {} は誤って記載してしまうとtsxがうまく動作しなくなる可能性が高いですが、シングルクウォーテーションではそこまで壊れる危険性がないためです。
  {
    rules: {
      'react/react-in-jsx-scope': 'off',
      '@typescript-eslint/no-require-imports': ['error', {
        allow: ['@/assets/images/*', '@/assets/fonts/*']
      }],
      "react/no-unescaped-entities": ["error", {"forbid": [">", "}"]}],
    },
  },
];
prettierで設定していたもの
{
  "bracketSpacing": true, // オブジェクトの中括弧にスペースを入れる ex:{ foo: bar }
  "printWidth": 80, // 80文字以上の行は極力折り返す
  "tabWidth": 2, // tab文字のスペース
  "singleQuote": true, // 文字列はシングルクウォートで囲む
  "trailingComma": "all", // オブジェクト・配列の最後にも `,`をつけるかどうか
  "semi": true // 文末にセミコロンをつけるかどうか
}
参考
husky