ZOZOテクノロジーズその2 Advent Calendar 2018 の記事です。
ここでは、画像処理の代表的なアルゴリズムをGO言語で実装しながら復習したいと思います。
はじめに
今回実装するのは、画像処理の中でも基本的な__平滑化__に関するアルゴリズムです。
普段はノイズの除去等に使われていますが、実際どのような効果があるのか見ていきたいと思います。
OpenCVのインストール
by Renée French
Reference GoCV
自分がMacで行なったセットアップ方法と、その他のセットアップ方法です。
MacOSの場合
以下のコマンドをターミナルで実行
OpenCVのインストール
$ brew install opencv
※ インストールしたバージョンが低い場合は、
$ brew upgrade opencv
を実行。
パッケージを取得
$ go get -u -d gocv.io/x/gocv
その他OSの場合
https://github.com/hybridgroup/gocv
上記URL先のREADEMEを参照
補足
OpenCV4をインストールする場合は手法が変わってきます。
詳しくはこちらの方の記事が参考になります。
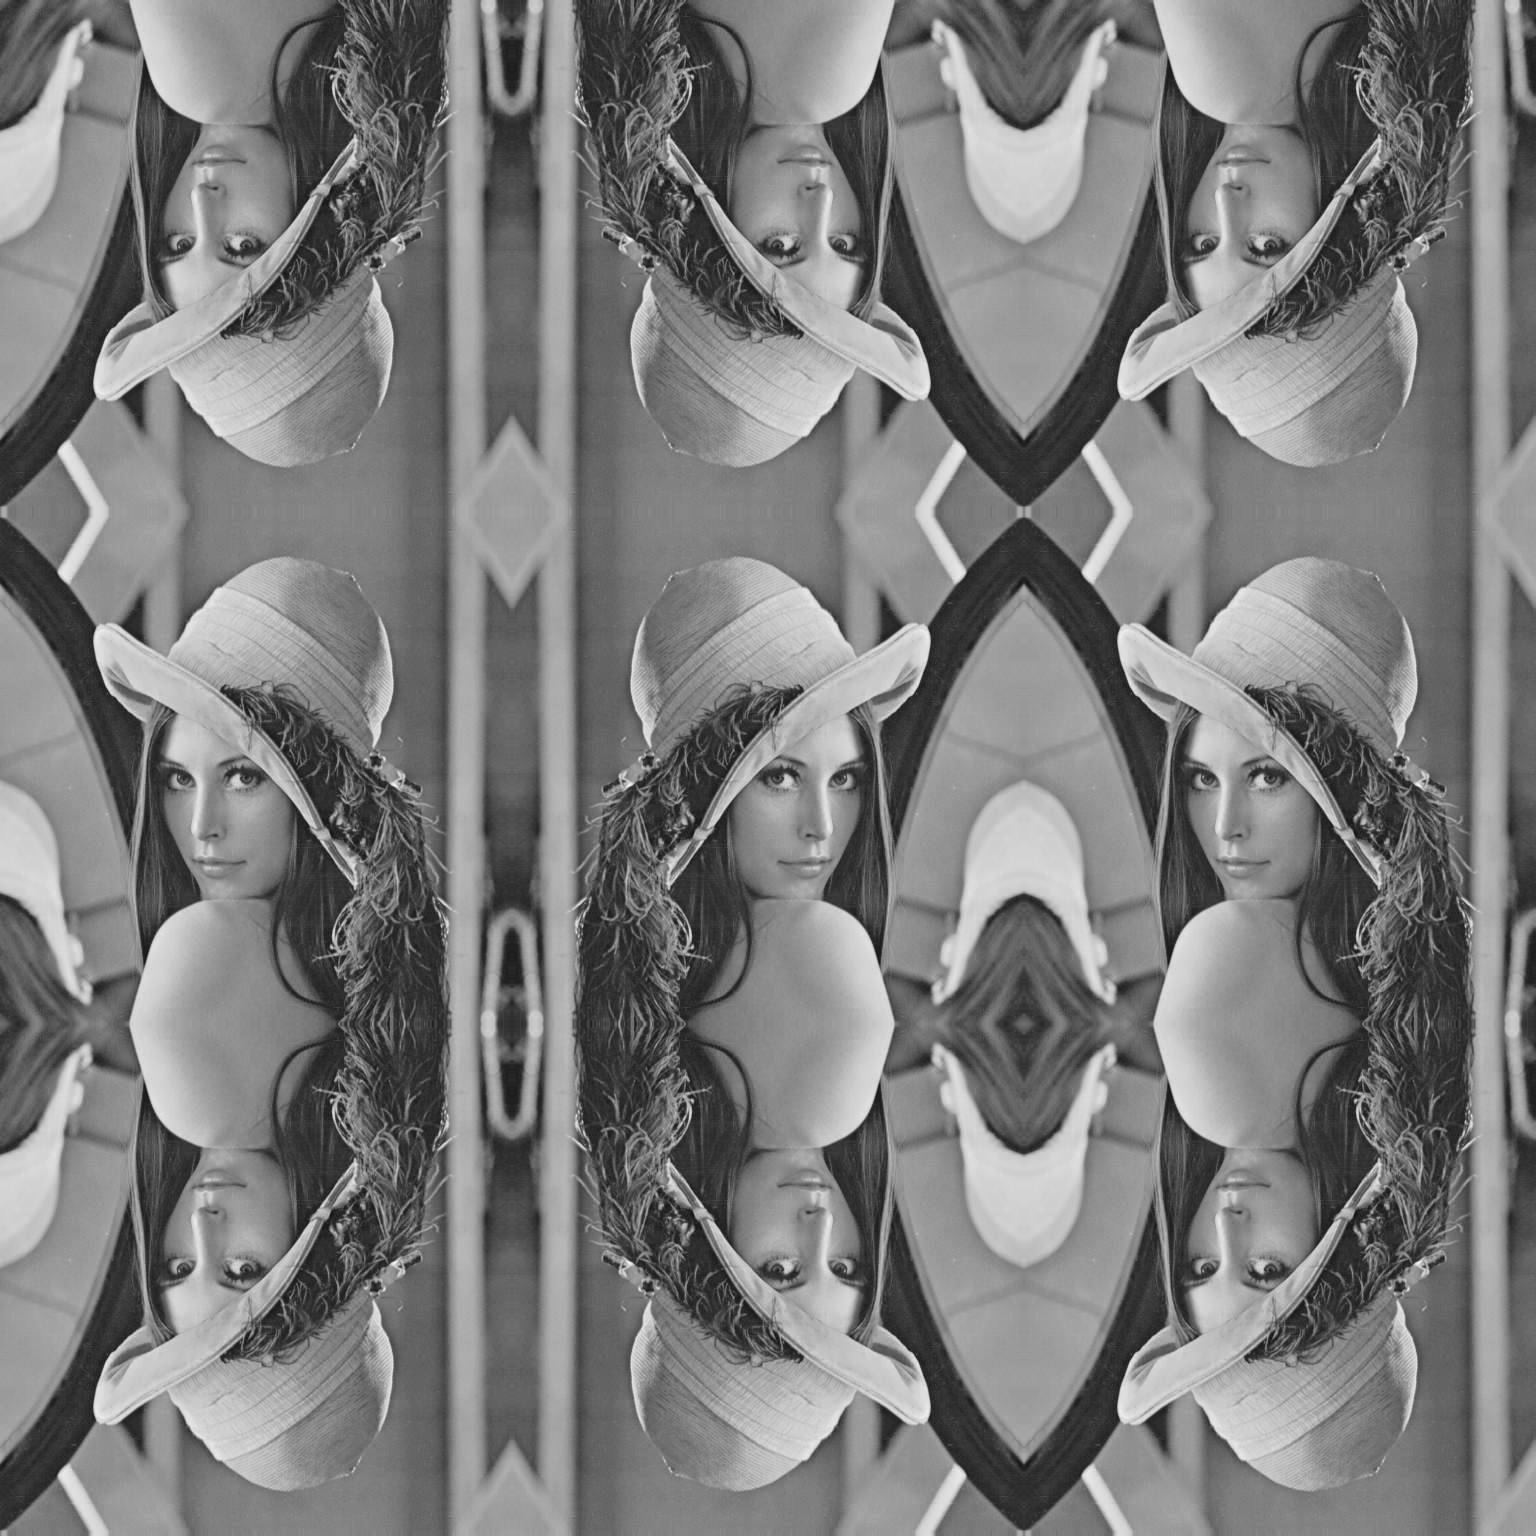
画像端の処理
フィルタ処理をコーディングするときに、まず考えるのが「画像の端ってどう処理するの?」だと思います。
画素が存在しない端を0で埋めて対応する場合もありますが、今回は自分が使っている手法を記載します。
ソースコード
package Preparation
import "gocv.io/x/gocv"
var ImgRows int32
var ImgCols int32
func Init() {
ImgRows = 0
ImgCols = 0
}
func Execution(mat gocv.Mat) gocv.Mat {
// 上下反転
centerImg := gocv.NewMat()
gocv.Flip(mat, ¢erImg, 0)
// 左右反転
sideImg := gocv.NewMat()
gocv.Flip(mat, &sideImg, 1)
// 左右上下反転
diagonalImg := gocv.NewMat()
gocv.Flip(mat, &diagonalImg, -1)
// 上結合
upImg := gocv.NewMat()
gocv.Hconcat(diagonalImg, centerImg, &upImg)
gocv.Hconcat(upImg, diagonalImg, &upImg)
// 真ん中結合
middleImg := gocv.NewMat()
gocv.Hconcat(sideImg, mat, &middleImg)
gocv.Hconcat(middleImg, sideImg, &middleImg)
// 下結合
downImg := gocv.NewMat()
gocv.Hconcat(diagonalImg, centerImg, &downImg)
gocv.Hconcat(downImg, diagonalImg, &downImg)
// 全結合
preparationImg := gocv.NewMat()
gocv.Vconcat(upImg, middleImg, &preparationImg)
gocv.Vconcat(preparationImg, downImg, &preparationImg)
return preparationImg
}
実行結果
元画像
実行後
以下に記載しているソースコードでは上記画像に変換してからフィルタ処理を行なっています。実際の処理の中では真ん中の画像のみを参照しています。
MSE / PSNR
かなり大雑把に説明すると、2枚の画像で、同じ位置のピクセルの輝度の差分の2乗を集計し、その平均を算出するのがMSE。これを更に人の目の感覚に近づけるように算出したのがPSNRです。PSNRは値が大きいほど画像の劣化が少ないといわれています。
今回は各フィルタ処理の違いを数値上で見る為に実装しました。
ソースコード
package PSNR

import (
	"gocv.io/x/gocv"
	"math"
)

const MAX float64 = 255

func Init(){

}


// MSE/PSNR
func Execution(firstImg gocv.Mat, secondImg gocv.Mat) bool {

	// 画像サイズが異なる場合
	if firstImg.Rows() != secondImg.Rows() || firstImg.Cols() != secondImg.Cols() {
		println("[ERROR] Different Size Img")
		return false
	}

	// 初期化
	mseSum := float64(0)

	// 画像の左上から順に画素を読み込む
	for imgRows := 0; imgRows < firstImg.Rows(); imgRows++ {
		for imgCols := 0; imgCols < firstImg.Cols(); imgCols++ {

			// 差分を算出
			distance := float64(firstImg.GetUCharAt(imgRows, imgCols)) - float64(secondImg.GetUCharAt(imgRows, imgCols))
			mseSum += math.Pow(distance,2)
		}
	}

	// MSEを算出
	temp := float64(firstImg.Rows() * firstImg.Cols())
	mse := mseSum / temp

	// PSNRを算出
	psnr := (20 * math.Log10(MAX)) - (10 * math.Log10(mse))

	// コンソール上に出力
	println("[MSE] value : ", mse, "[PSNR] value : ", psnr)

	return true
}
平滑化
作ったソースコードのメイン文を以下に記載します。
ソースコード
main.go
package main

import (
	"ImageFilter/Average"
	"ImageFilter/PSNR"
	"ImageFilter/Preparation"
	"fmt"
	"os"

	"gocv.io/x/gocv"
)


// main処理
func main() {

	// インプット先、アウトプット先が指定されていない場合
	if len(os.Args) < 2 {
		fmt.Println("Argument is missing [input path] [output path]")
		return
	}

	// 画像をインプット
	inputFileName := os.Args[1]
	inputImg := gocv.IMRead(inputFileName, gocv.IMReadGrayScale)

	// 画像がインプットできなかった場合
	if inputImg.Empty() {
		fmt.Println("Error reading image from: %v", inputFileName)
		return
	}

	// 画像の端の処理
	preImg := Preparation.Execution(inputImg)

	// アウトプット画像
	outputImg := Average.Execution(preImg, inputImg.Rows(), inputImg.Cols())
	//outputImg := Gaussian.Execution(preImg, inputImg.Rows(), inputImg.Cols())
	//outputImg := Median.Execution(preImg, inputImg.Rows(), inputImg.Cols())

	// 画像をアウトプット
	output := os.Args[2]
	gocv.IMWrite(output, outputImg)

	// PSNRを算出
	PSNR.Execution(inputImg, outputImg)

}
平均値フィルタ
平均値フィルタとは、画像をぼかしてノイズを除去するもので、注目画素の近くの画素値の平均から新しい画素を算出します。
ソースコード
Average.go
package Average

import "gocv.io/x/gocv"

var filterWeight = map[int]map[int]float64{}

// 重み値の合計
const weightSum int = 9

func Init() {

	// フィルタ処理で使用する重み値
	filterWeight[-1] = make(map[int]float64)
	filterWeight[0] = make(map[int]float64)
	filterWeight[1] = make(map[int]float64)
	filterWeight[-1][-1] = 1
	filterWeight[-1][0] = 1
	filterWeight[-1][1] = 1
	filterWeight[0][-1] = 1
	filterWeight[0][0] = 1
	filterWeight[0][1] = 1
	filterWeight[1][-1] = 1
	filterWeight[1][0] = 1
	filterWeight[1][1] = 1

}

// 平均値フィルタ処理
func Execution(preImg gocv.Mat, inputImageRows int, inputImageCols int) gocv.Mat {

	// 初期化
	Init()
	// アウトプット画像を定義
	outputImg := gocv.NewMatWithSize(inputImageRows, inputImageCols, gocv.IMReadGrayScale)

	// 画像のどこまで処理するか定義
	processRows := preImg.Rows() - inputImageRows
	processCols := preImg.Cols() - inputImageCols

	// 画像の左上から順に画素を読み込む
	for imgRows := inputImageRows; imgRows < processRows; imgRows++ {
		for imgCols := inputImageCols; imgCols < processCols; imgCols++ {

			attentionPixel := int(0)

			// 3 × 3の平滑化フィルタ
			for filterRows := -1; filterRows < 2; filterRows++ {
				for filterCols := -1; filterCols < 2; filterCols++ {

					// 注目画素からみた画素を取得
					inputPixel := float64(preImg.GetUCharAt(imgRows + filterRows, imgCols + filterCols))
					// 取得した画素に重み値を掛け、足し合わせる
					attentionPixel += int(inputPixel * filterWeight[filterRows][filterCols])
				}
			}

			// 重み値の合計分割る
			attentionPixel = attentionPixel / weightSum
			// 結果に画素を格納する
			outputImg.SetUCharAt(imgRows - inputImageRows, imgCols - inputImageCols, uint8(attentionPixel))
		}
	}

	return outputImg
}
実行結果
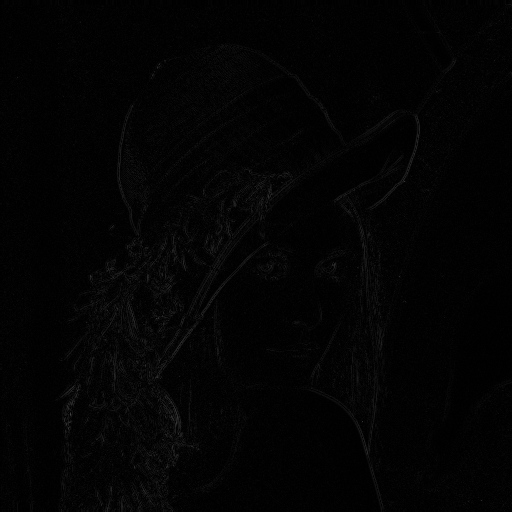
以下の結果より、画像が少しぼやけているのが分かります。
実行前
実行後
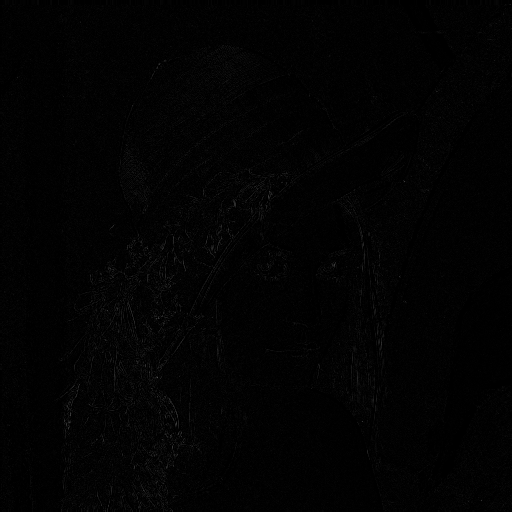
元画像と実行後画像の差分
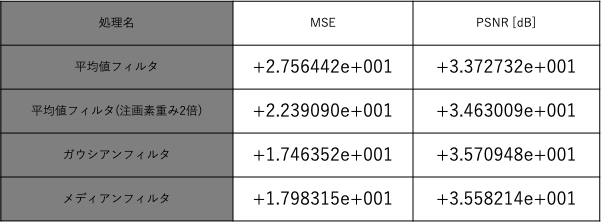
MSE/PSNR
[MSE] value:+2.756442e+001 [PSNR] value:+3.372732e+001
補足
注目画素の重み値のみ2倍にすることで、より自然な平滑化が行えます。
// 重み値の合計
const weightSum int = 10

func Init() {

	// フィルタ処理で使用する重み値
	filterWeight[-1] = make(map[int]float64)
	filterWeight[0] = make(map[int]float64)
	filterWeight[1] = make(map[int]float64)
	filterWeight[-1][-1] = 1
	filterWeight[-1][0] = 1
	filterWeight[-1][1] = 1
	filterWeight[0][-1] = 1
	filterWeight[0][0] = 2
	filterWeight[0][1] = 1
	filterWeight[1][-1] = 1
	filterWeight[1][0] = 1
	filterWeight[1][1] = 1

}
実行結果
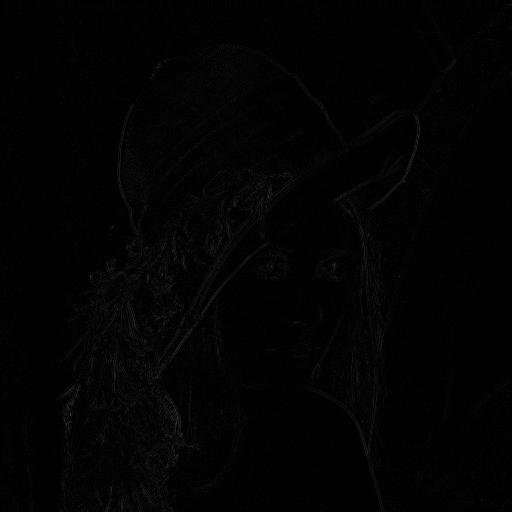
重み値が均一の平均値フィルタ処理よりもエッジ部分の差が少なく見えます。
実行前
実行後
元画像と実行後画像の差分
MSE/PSNR
[MSE] value:+2.239090e+001 [PSNR] value:+3.463009e+001
ガウシアンフィルタ
ガウシアンフィルタとは、注目画素からどれだけ離れてるかによって、重み値をつけるということを、ガウス分布を利用して行っています。
また、標準偏差の値が大きいほど平滑化の効果も大きくなります。
以下は標準偏差を1.3とした場合の実装です。
ソースコード
Gaussian.go
package Gaussian

import "gocv.io/x/gocv"

var filterWeight = map[int]map[int]float64{}

// 重み値の合計
const weightSum int = 16

func Init() {

	// フィルタ処理で使用する重み値
	filterWeight[-1] = make(map[int]float64)
	filterWeight[0] = make(map[int]float64)
	filterWeight[1] = make(map[int]float64)
	filterWeight[-1][-1] = 1
	filterWeight[-1][0] = 2
	filterWeight[-1][1] = 1
	filterWeight[0][-1] = 2
	filterWeight[0][0] = 4
	filterWeight[0][1] = 2
	filterWeight[1][-1] = 1
	filterWeight[1][0] = 2
	filterWeight[1][1] = 1

}

// ガウシアンフィルタ
func Execution(preImg gocv.Mat, inputImageRows int, inputImageCols int) gocv.Mat {

	// 初期化
	Init()
	// アウトプット画像を定義
	outputImg := gocv.NewMatWithSize(inputImageRows, inputImageCols, gocv.IMReadGrayScale)

	// 画像のどこまで処理するか定義
	processRows := preImg.Rows() - inputImageRows
	processCols := preImg.Cols() - inputImageCols

	// 画像の左上から順に画素を読み込む
	for imgRows := inputImageRows; imgRows < processRows; imgRows++ {
		for imgCols := inputImageCols; imgCols < processCols; imgCols++ {

			attentionPixel := int(0)

			// 3 × 3の平滑化フィルタ
			for filterRows := -1; filterRows < 2; filterRows++ {
				for filterCols := -1; filterCols < 2; filterCols++ {

					// 注目画素からみた画素を取得
					inputPixel := float64(preImg.GetUCharAt(imgRows + filterRows, imgCols + filterCols))
					// 取得した画素に重み値を掛け、足し合わせる
					attentionPixel += int(inputPixel * filterWeight[filterRows][filterCols])
				}
			}

			// 重み値の合計分割る
			attentionPixel = attentionPixel / weightSum
			// 結果画像に画素を格納する
			outputImg.SetUCharAt(imgRows - inputImageRows, imgCols - inputImageCols, uint8(attentionPixel))
		}
	}

	return outputImg
}
実行結果
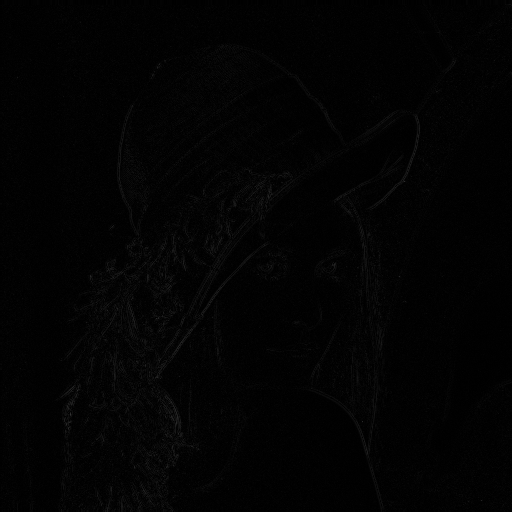
以下の結果より、平均値フィルタに比べてぼやけが自然に出ているように見えます。
実行前
実行後
元画像と実行後画像の差分
MSE/PSNR
[MSE] value:+1.746352e+001 [PSNR] value:+3.570948e+001
メディアンフィルタ
注目画素の近くの画素値を小さい順に並べて、真ん中の画素値を抽出し、注目画素の新しい画素値とする手法です。注目画像周辺の、ごま塩ノイズのような極端な値に左右されないという性質があります。
ソースコード
Median.go
package Median

import (
	"gocv.io/x/gocv"
	"sort"
)

var filterWeight = map[int]map[int]float64{}

// 重み値の合計
const weightSum int = 9

func Init() {

}

func Execution(preImg gocv.Mat, inputImageRows int, inputImageCols int) gocv.Mat {

	// 初期化
	Init()
	// アウトプット画像を定義
	outputImg := gocv.NewMatWithSize(inputImageRows, inputImageCols, gocv.IMReadGrayScale)

	// 画像のどこまで処理するか定義
	processRows := preImg.Rows() - inputImageRows
	processCols := preImg.Cols() - inputImageCols

	// 画像の左上から順に画素を読み込む
	for imgRows := inputImageRows; imgRows < processRows; imgRows++ {
		for imgCols := inputImageCols; imgCols < processCols; imgCols++ {

			var attentionPixel []int

			// 3 × 3の平滑化フィルタ
			for filterRows := -1; filterRows < 2; filterRows++ {
				for filterCols := -1; filterCols < 2; filterCols++ {

					// 注目画素からみた画素を取得
					inputPixel := int(preImg.GetUCharAt(imgRows + filterRows, imgCols + filterCols))
					attentionPixel = append(attentionPixel, inputPixel)
				}
			}

			// 昇順にソートし、真ん中の値を注目画素の値と入れ替える
			sort.Ints(attentionPixel)
			centerNumberPoint := int(len(attentionPixel)/2)
			// 結果に画素を格納する
			outputImg.SetUCharAt(imgRows - inputImageRows, imgCols - inputImageCols, uint8(attentionPixel[centerNumberPoint]))
		}
	}

	return outputImg
}
実行結果
以下の結果より、他のフィルタ処理に比べてぼやけていないように見えます。
ただ、黒と白が混在している部分ではぼやけが出ているようにも見えます。
実行前
実行後
元画像と実行後画像の差分
MSE/PSNR
[MSE] value:+1.798315e+001 [PSNR] value:+3.558214e+001
まとめ
同じ画像にそれぞれ違った平滑化を行うことで、同じノイズ除去のジャンルでも、それぞれの特徴や効果があることが改めて復習することが出来たと思います。
最後に、今回記事を書く中で、ボリュームが多くなってしまったこともあり、かなり基本的な技術しか記載することが出来ませんでした。
他のアルゴリズム等も、これから順にあげていけたらなと思っています!

