Google I/O 2018でNavigation Architecture Componentが追加されてからずっと気になっており、そろそろ試さねばと思って実装してみた。
シングルActivity+多Fragmentの遷移を作っていく。
環境
Android Studio 3.2 Beta 5
Build #AI-181.5281.24.32.4913314, built on July 26, 2018
JRE: 1.8.0_152-release-1136-b04 x86_64
JVM: OpenJDK 64-Bit Server VM by JetBrains s.r.o
macOS 10.12.6
compileSdkVersion 28
kotlin_version = '1.2.51'
Navigation導入
お手本にしたのはAndroid Developers
- Implement navigation with the Navigation Architecture Component | Android Developers https://developer.android.com/topic/libraries/architecture/navigation/navigation-implementing#kotlin
safeArgsの導入
classpath "android.arch.navigation:navigation-safe-args-gradle-plugin:1.0.0-alpha04"
Navigationの導入
apply plugin: "androidx.navigation.safeargs"

    def nav_version = "1.0.0-alpha04"
    implementation "android.arch.navigation:navigation-fragment:$nav_version" // use -ktx for Kotlin
    implementation "android.arch.navigation:navigation-ui:$nav_version" // use -ktx for Kotlin
AndroidXだとビルドエラーになるのでgradle.protertiesに以下を追加
android.enableJetifier=true
android.useAndroidX=true
resにNavigationファイルを作成
ここから本番
Android Developersによると以下の方法で説明されていた。
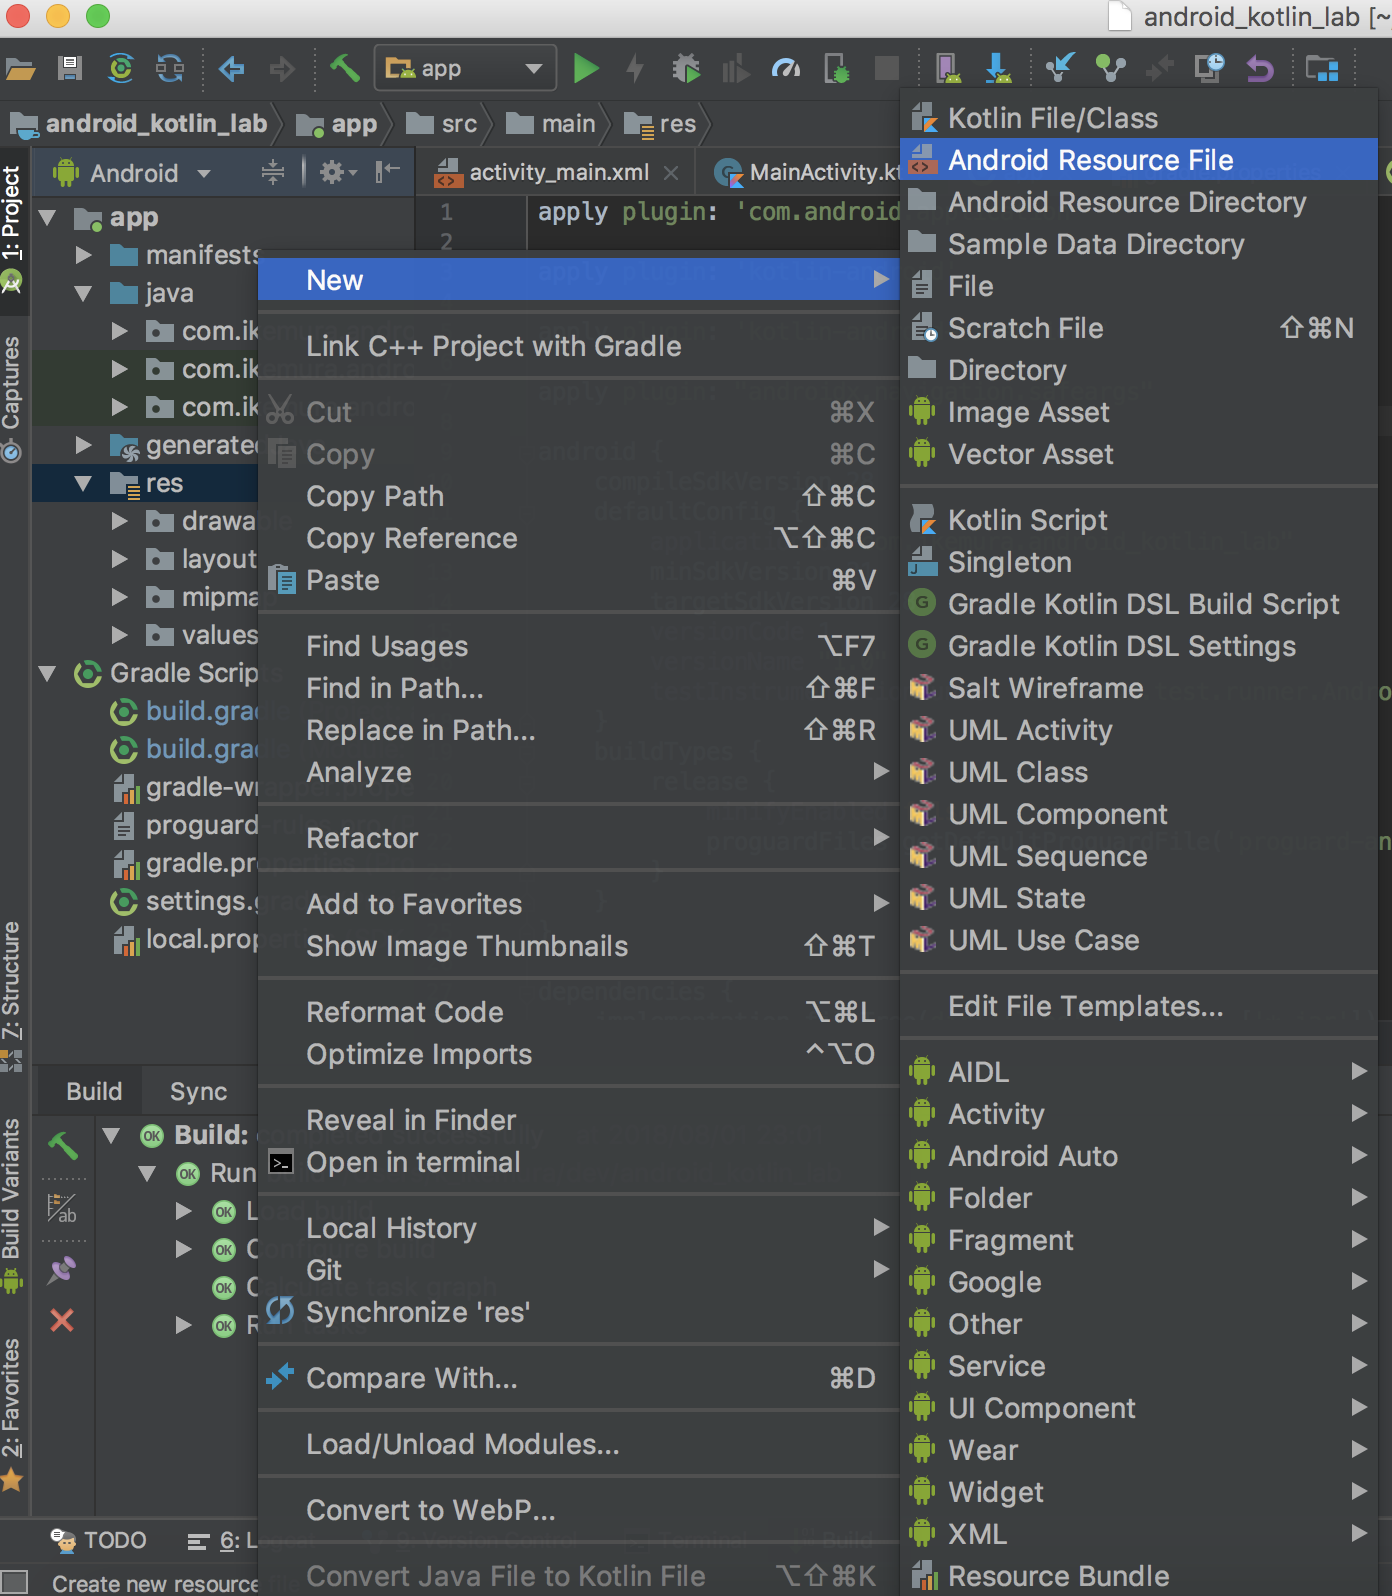
- プロジェクトウィンドウで、resディレクトリを右クリックし、New > Android Resource File を選択します。
- File nameに「nav_graph」などの名前を入力します。(名前は何でもいい)
- Resource typeドロップダウンリストからNavigationを選択します。
- OKをクリックします
スクショ撮ってきた
プロジェクトウィンドウのresディレクトリを右クリックし、New > Android Resource File を選択
File nameにnav_graphを入力、Resource typeにNavigationを選択

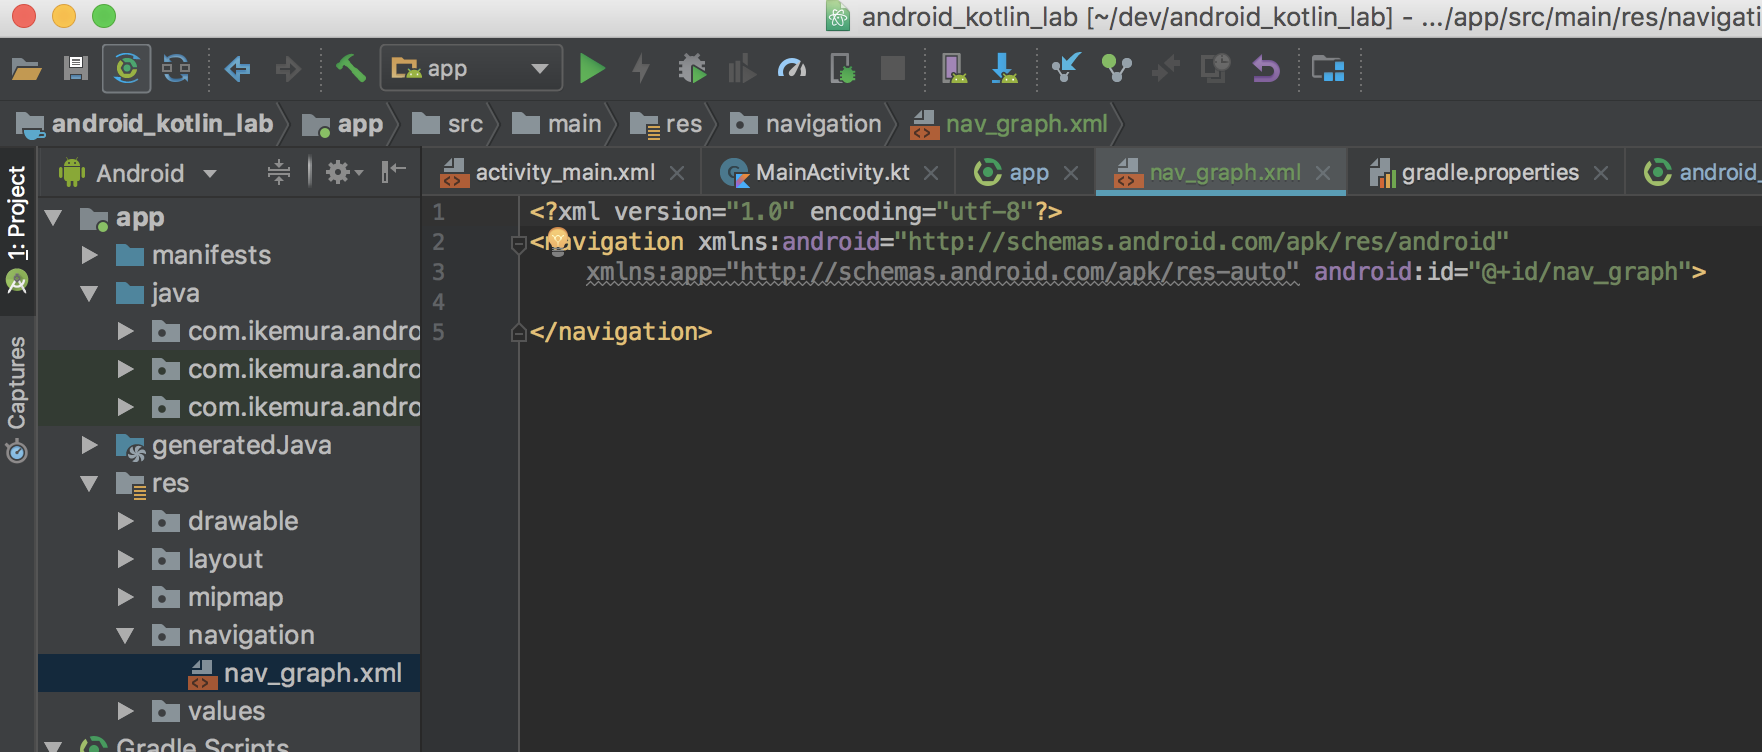
nav_graph.xmlが作成された
 ## Fragmentを作成
Fragmentは自分で作る必要がある
今回はプロジェクトウィンドウからNew > Fragment > Fragment(Brank)で2〜3個ほどFragmentを作った
- FirstFragment
- SecondFragment
- ItemFragment(リスト)
Navigationエディタで遷移を操作
さきほど作成したnav_graph.xmlを選択して下部のDesignタブを選択すると、Graphエディタなるものが使える
スクショ(遷移作成済み)
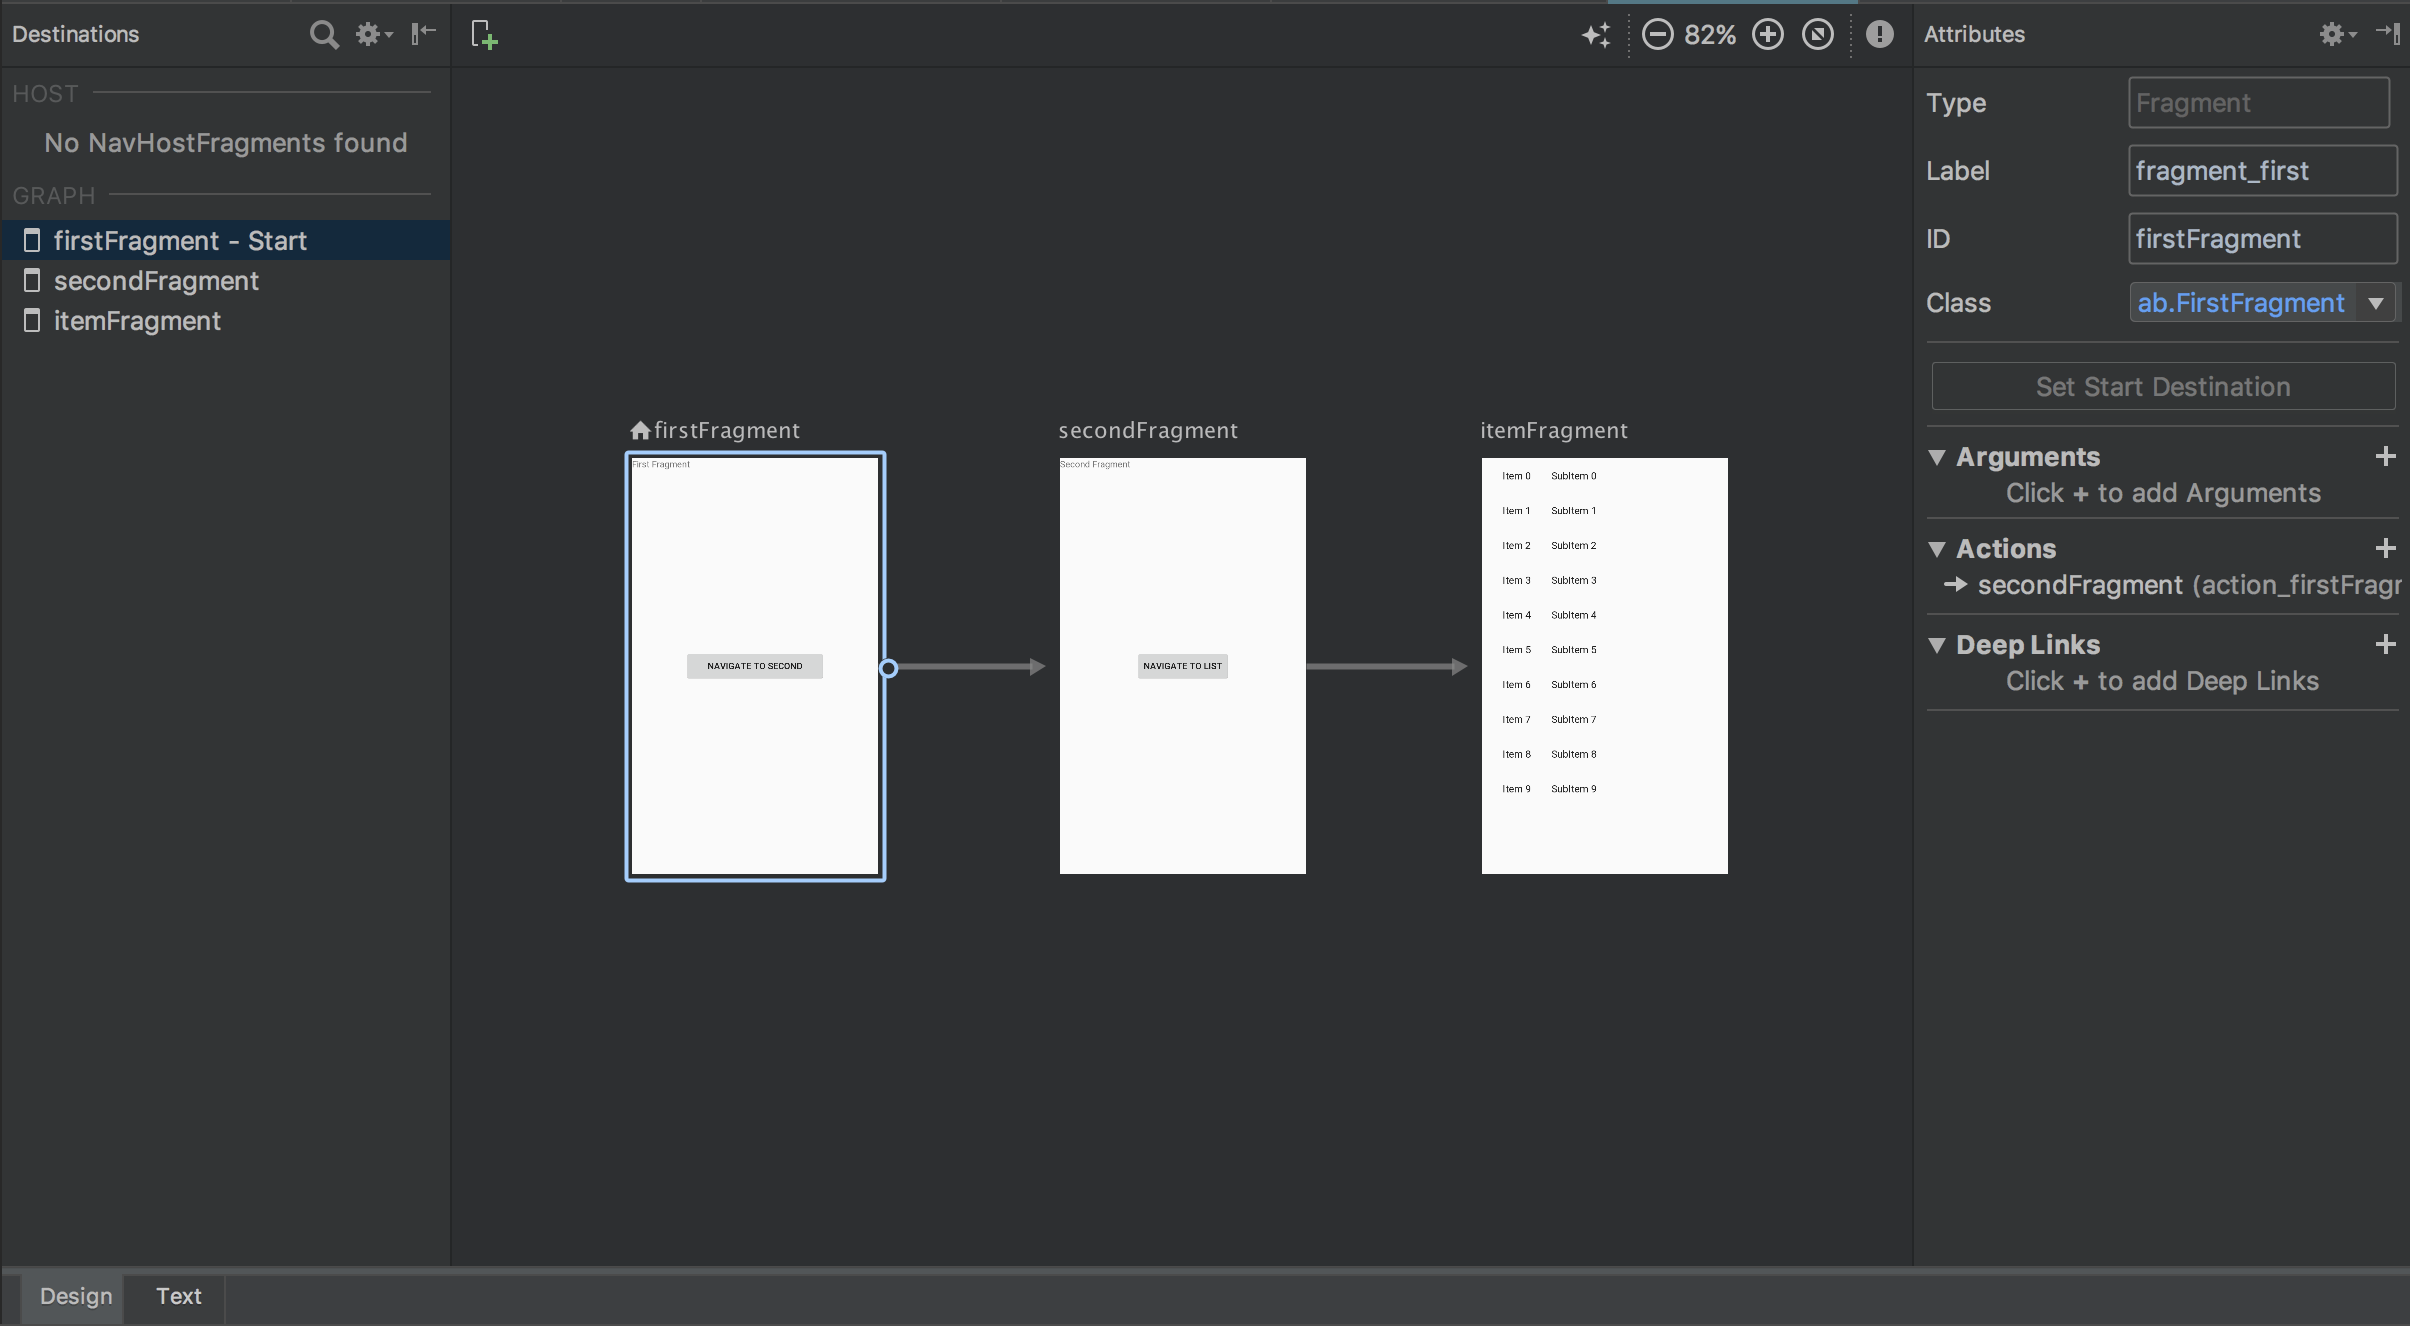
あとはここにFragmentを追加し、遷移先のFragmentを選ぶだけ。
xmlは一切書かずにエディタをポチポチすると、nav_graf.xmlには自動でタグが作成されていた
<?xml version="1.0" encoding="utf-8"?>
<navigation xmlns:android="http://schemas.android.com/apk/res/android"
    xmlns:app="http://schemas.android.com/apk/res-auto"
    xmlns:tools="http://schemas.android.com/tools"
    android:id="@+id/nav_graph"
    app:startDestination="@id/firstFragment">

    <fragment
        android:id="@+id/firstFragment"
        android:name="com.ikemura.android_kotlin_lab.FirstFragment"
        android:label="fragment_first"
        tools:layout="@layout/fragment_first">
        <action
            android:id="@+id/action_firstFragment_to_secondFragment"
            app:destination="@id/secondFragment" />
    </fragment>
    <fragment
        android:id="@+id/secondFragment"
        android:name="com.ikemura.android_kotlin_lab.SecondFragment"
        android:label="fragment_second"
        tools:layout="@layout/fragment_second">
        <action
            android:id="@+id/action_secondFragment_to_itemFragment"
            app:destination="@id/itemFragment" />
    </fragment>
    <fragment
        android:id="@+id/itemFragment"
        android:name="com.ikemura.android_kotlin_lab.ItemFragment"
        android:label="fragment_item_list"
        tools:layout="@layout/fragment_item_list" />
</navigation>
注意点
Navigation Editorを使うには設定が必要らしい
公式から引用
Note: The Navigation Editor is enabled by default only on Canary builds of Android Studio. To enable the Navigation Editor on Beta, Release Candidate, or Stable builds, click File > Settings (Android Studio > Preferences on Mac), select the Experimental category in the left pane, check Enable Navigation Editor, and then restart Android Studio.
- Navigation EditerはCanary buildsでのみ有効(ベータ版も含まれる)
- File > Settings (Android Studio > Preferences on Mac) > Experimental > Navigation Editorのチェックを有効にする
- Android Studioを再起動

遷移コードをFragmentに実装
まずはボタン押下で FirstFragment => SecondFragment の遷移
公式で一番最初に紹介されてたパターン
    override fun onCreateView(inflater: LayoutInflater, container: ViewGroup?,
                              savedInstanceState: Bundle?): View? {
        val view = inflater.inflate(R.layout.fragment_first, container, false)
        //ボタンクリック
        view.findViewById<Button>(R.id.fist_navigate_button).setOnClickListener {
        	 //SecondFragmentへの遷移開始
            Navigation.findNavController(it).navigate(R.id.secondFragment)
        }
        return view
これでSecondFragmentに遷移できるようになった
次に SecondFragment => ItemFragment の遷移
ここでは上と違う書き方で遷移コードを書いてみる
Navigationクラスの便利メソッドがあるらしいので、そちらを使ったパターン
        second_navigate_button.setOnClickListener(
                //遷移開始
                Navigation.createNavigateOnClickListener(R.id.itemFragment, null)
        )
nullとなってる箇所にはBundleをセットできるらしい
バックキーで戻る遷移
Activityにこのコードを追加するだけで、端末バックキーで簡単に前にFragmentに戻れる
override fun onSupportNavigateUp() = findNavController(this, R.id.my_nav_host_fragment).navigateUp()
これだけでシングルActivity+多Fragmentの遷移ができた
感想
ほとんどコードを書かずにFragment間を簡単に遷移できるのは素直にすごいと思った。
遷移する際にパラメータやアニメーションも指定できそうなので、シングルActivity+多Fragmentの作成が捗りそう。
Activity間の遷移にはあまり使い物にならない、とよく見るので、主にFragment間だけで使えそう。
DialogFragmentにも使えるんだろうか?Dialogは普通にコードで表示するんだろうか?
あとで調べてみよう。
今回使ったコードはこちら
ikemura23/Android-Kotlin-Lab at Navigation https://github.com/ikemura23/Android-Kotlin-Lab/tree/Navigation
SafeArgsも使ったけど長くなるので別記事にする。
参考リンク
- android-architecture-components/NavigationBasicSample at master · googlesamples/android-architecture-components https://github.com/googlesamples/android-architecture-components/tree/master/NavigationBasicSample
- 【Android】Google IO 2018で新発表された navigation についての詳細レポート - DMM inside https://inside.dmm.com/entry/2018/05/25/android-navigation
- Navigation Architecture Component メモ – Kenji Abe – Medium https://medium.com/@star_zero/navigation-architecture-component-%E3%83%A1%E3%83%A2-10f0acc3d4d9
- Implement navigation with the Navigation Architecture Component | Android Developers https://developer.android.com/topic/libraries/architecture/navigation/navigation-implementing#kotlin