amplify+AppSyncで拠点から拠点への距離順でソートしたい
という記事を書きました。
ここではamplify, AppSync, DynamoDB, ElasticSearchを使った距離順のソートを、AppSyncのコンソールでできるというところまでをやっています。
が、ElasticSearchはBonsaiという外部のサービスを使ったものでした。
やりたいこと
- amplify使う
- AppSyncはamplify cliから透過的に
- DynamoDBはamplify cliから透過的に
- ElasticSearchはamplify cliから透過的に
- キーワード検索をフロント(React)から実行できるように
- (余裕があれば)距離順の検索も
といった感じです。
環境
- win10 Home(surface go)
+ WSL2 + ubuntu18.04<- 結局PowerShell上でやりました - vscode 1.48.2
+ ms-vscode-remote.remote-wsl - node v12.18.3
- npm 6.14.6
Setup Amplify Backend
まずは初期設定。
使ったことないんだけど、気分転換にreact-nativeにしてみようかな。
かつ react-native-amp ってプロジェクトフォルダで進める。
最初はwsl2のubuntuで進めてたんだけど、androidの仮想デバイスの連携のあたりがややこしくなったので、普通にwindowsベースでやってます。
なおcliのインストールのあたりはこのへん
https://docs.amplify.aws/start/q/integration/react-native
>  npx react-native init reactNativeAmp --template react-native-template-type
script
> cd reactNativeAmp
> amplify init

Note: It is recommended to run this command from the root of your app directory
? Enter a name for the project reactNativeAmp
? Enter a name for the environment dev
? Choose your default editor: Visual Studio Code
? Choose the type of app that you're building javascript
Please tell us about your project
? What javascript framework are you using react-native
? Source Directory Path:  /
? Distribution Directory Path: /
? Build Command:  npm run-script build
? Start Command: npm run-script start

> npm install aws-amplify aws-amplify-react-native amazon-cognito-identity-js react-native-vector-icons @react-native-community/netinfo
> cd ios
> pod install
!注:このあたりからの試行錯誤はubuntuでやってました。単なる遠回り ↓↓↓
・・う~ん、、ios側のライブラリ管理にcocoapodsというのが使われているらしく、
そのためにrubyとrubygemsが必要っぽい。
めんどくさいぞ。気まぐれでreact-navive使うとか言わなければよかった。
iosをスルーして進めてしまおうか、っていう気持ちも5000㍉ぐらいありますが、やるだけやってみることとします。
なお、最初はrbenv経由でinstallを進めてたんだけど、installに時間がかかりすぎるのでapt installですましちゃうのに変更。
$ sudo apt install ruby2.5 libruby2.5 rubygems-integration ruby-dev
まあ間違いはないよね。
あらためてpod installから。
$ sudo gem install cocoapods
$ pod setup
$ pod install
したら、こんなエラーが。。
checking whether the C compiler works... no
/bin/bash: line 24: xcrun: command not found
/bin/bash: line 24: xcrun: command not found
xcrunってxcodeのtoolやないかな。
iosのライブラリとかないし、ビルド無理なんやないかな?
!注:↑↑↑試行錯誤ここまで
やってはみたけど・・これはつらそうだし一旦スルーしよう。androidで動けばいいか。
androidの仮想デバイス(AVD)を使いたかったのでandroid studioもsetupしましたがそのへんは割愛。
これ動作重いから嫌いなんだよなー。surface goだとかなりつらい。
そしてようやくadd apiして、初期設定は完了。
> amplify add api
? Please select from one of the below mentioned services: GraphQL
? Provide API name: reactnativeamp
? Choose the default authorization type for the API API key
? Enter a description for the API key: test
? After how many days from now the API key should expire (1-365): 1
? Do you want to configure advanced settings for the GraphQL API No, I am done.
? Do you have an annotated GraphQL schema? No
? Do you want a guided schema creation? Yes
? What best describes your project: Single object with fields (e.g., “Todo” with ID, name, description)
? Do you want to edit the schema now? Yes
Please edit the file in your editor: /mnt/c/Users/masra/reactNativeAmp/amplify/backend/api/reactnativeamp/schema.graphql
? Press enter to continue

> amplify push

? Do you want to generate code for your newly created GraphQL API Yes
? Choose the code generation language target typescript
? Enter the file name pattern of graphql queries, mutations and subscriptions src\graphql\**\*.ts
? Do you want to generate/update all possible GraphQL operations - queries, mutations and subscriptions Yes
? Enter maximum statement depth [increase from default if your schema is deeply nested] 2
? Enter the file name for the generated code src\API.ts
| Updating resources in the cloud. This may take a few minutes...
index.jsに下記を追記します。
import Amplify from 'aws-amplify'
import config from './aws-exports'
Amplify.configure(config)
動かしてみる。
> npm run android
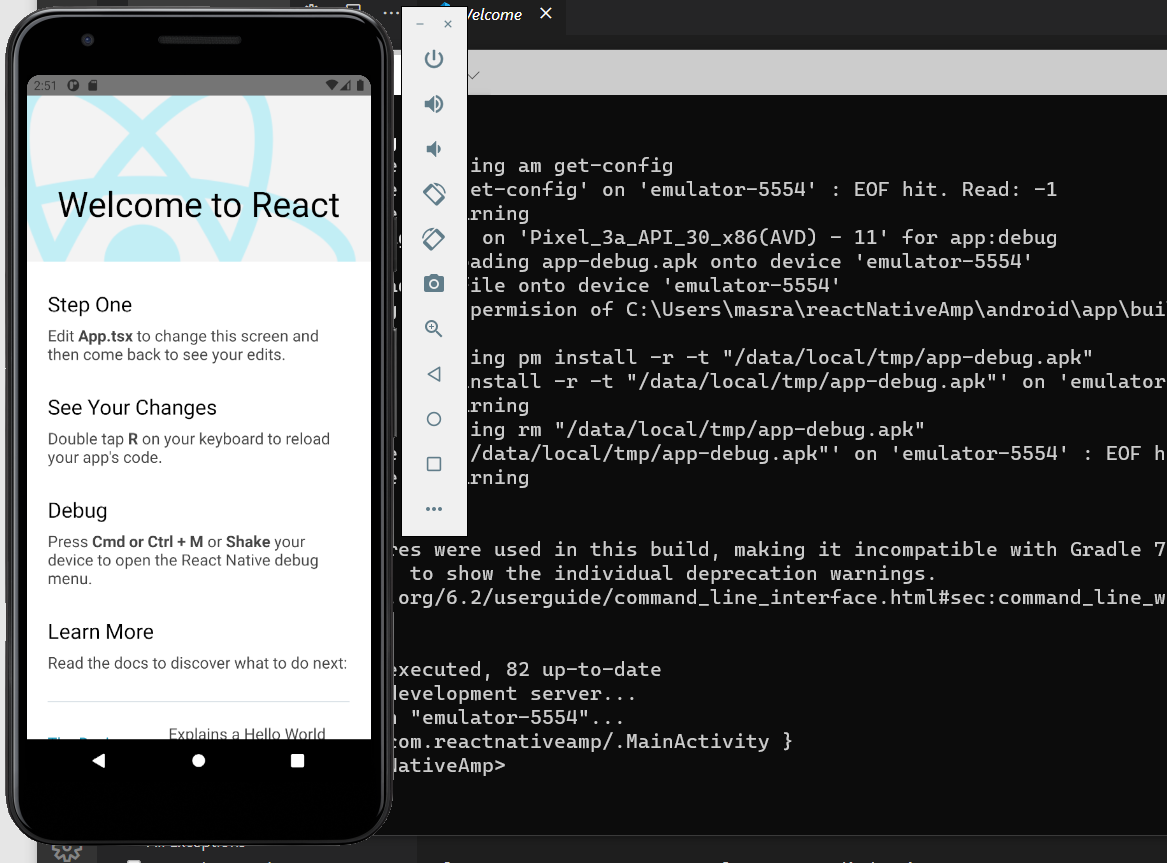
動いた。ようやく準備終わり。
キーワード検索 バックエンド編
とりあえず、amplifyのチュートリアル通りにTodoアプリ化

Todoの登録と表示はできた。
description を検索できるようにしてみたい。
type Todo @model
  @searchable {
  id: ID!
  name: String!
  description: String
}
searchableを付けただけ。
するとamplify status が updatedになるのでamplify pushします。
これでelastic searchのリソースが勝手にできるはずだけど果たしてどうか。
> amplify status

Current Environment: dev

| Category | Resource name  | Operation | Provider plugin   |
| -------- | -------------- | --------- | ----------------- |
| Api      | reactnativeamp | Update    | awscloudformation |

> amplify push
おー。なんか勝手にElasticSearchが作られてる。t2.smallかー。ほっといたら月5000円くらい取られる?
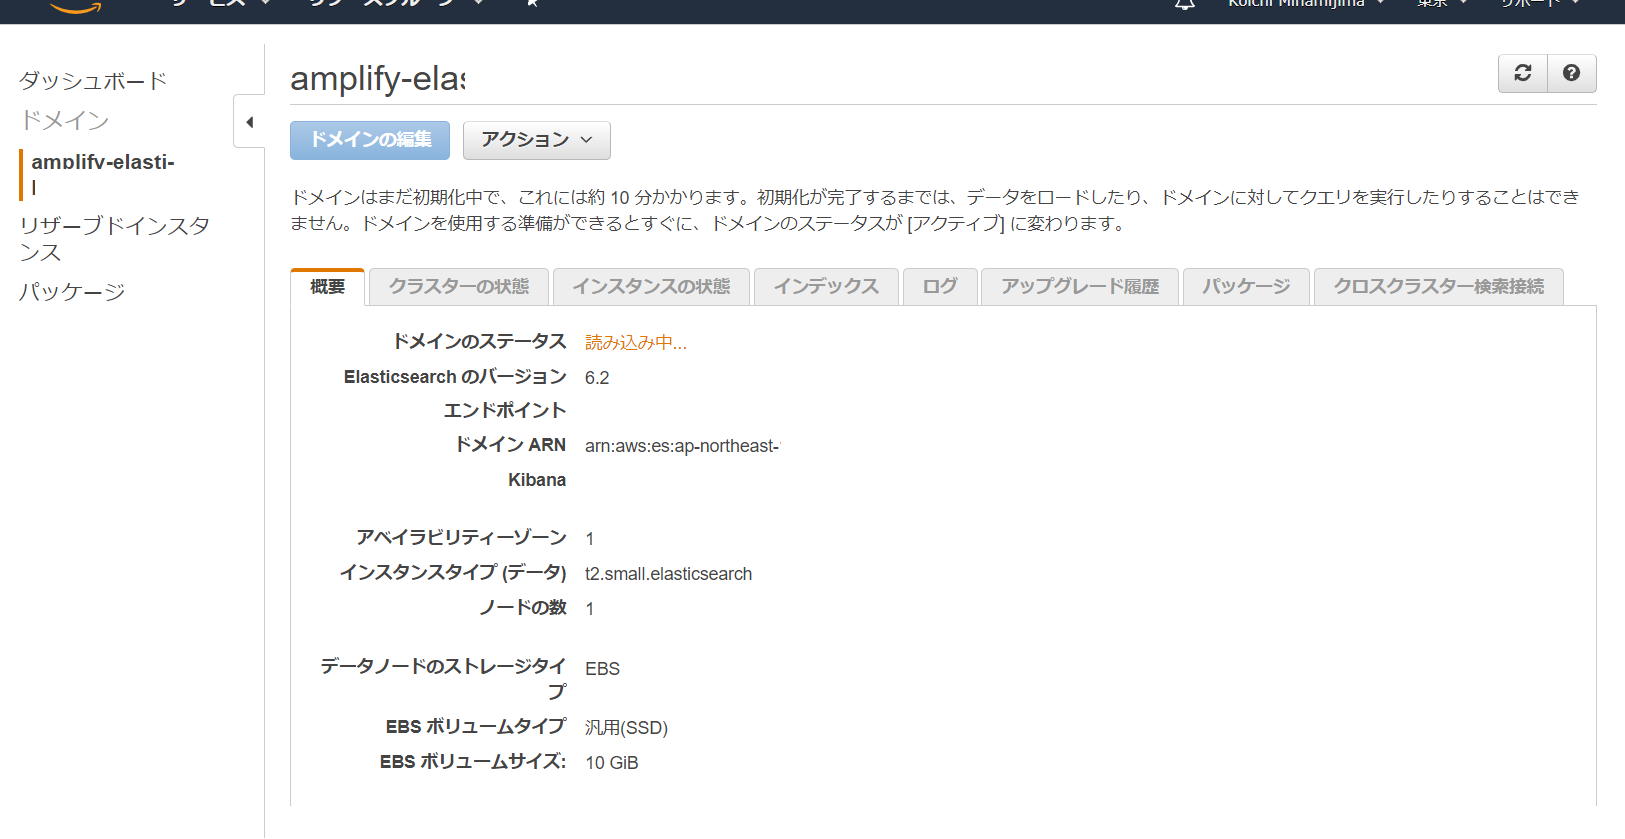
完了まではちょい時間がかかる。
終わるとsearchTodosっていうqueryが定義されてました。

やべえ、めっちゃ簡単なんじゃない?
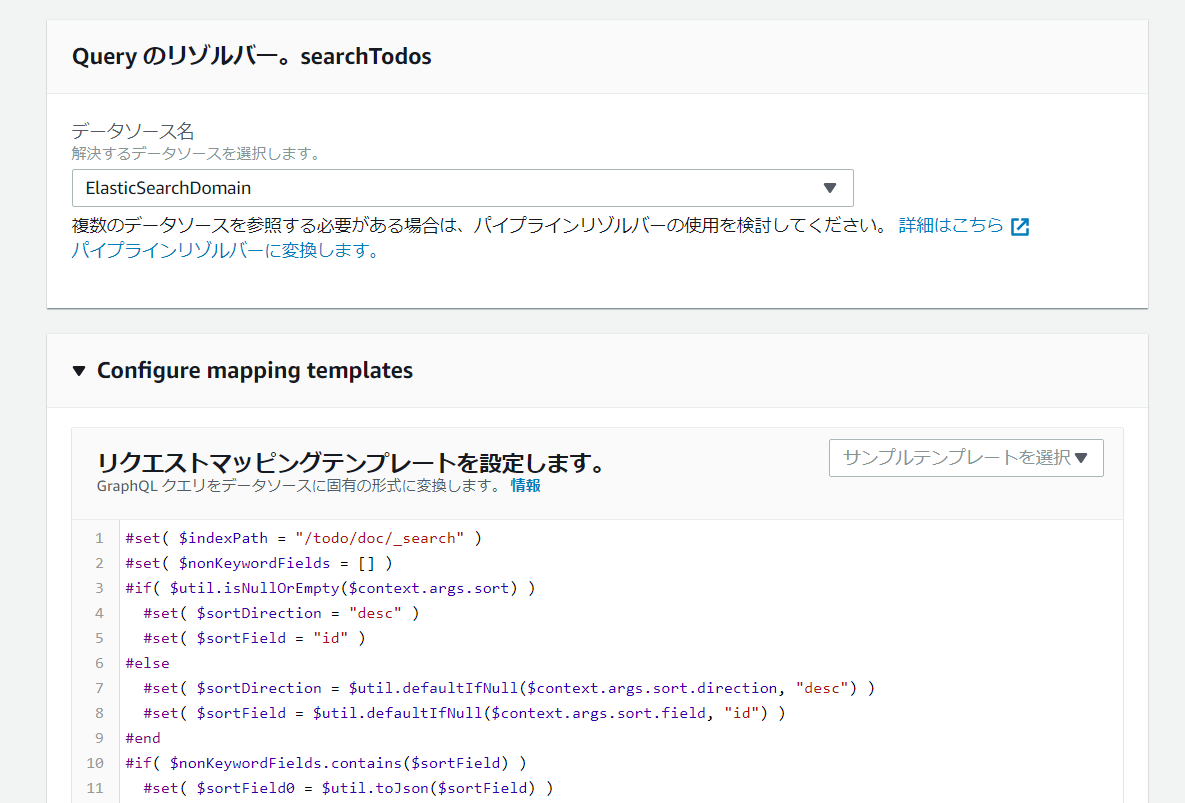
AppSyncのコンソールでResolverを確認
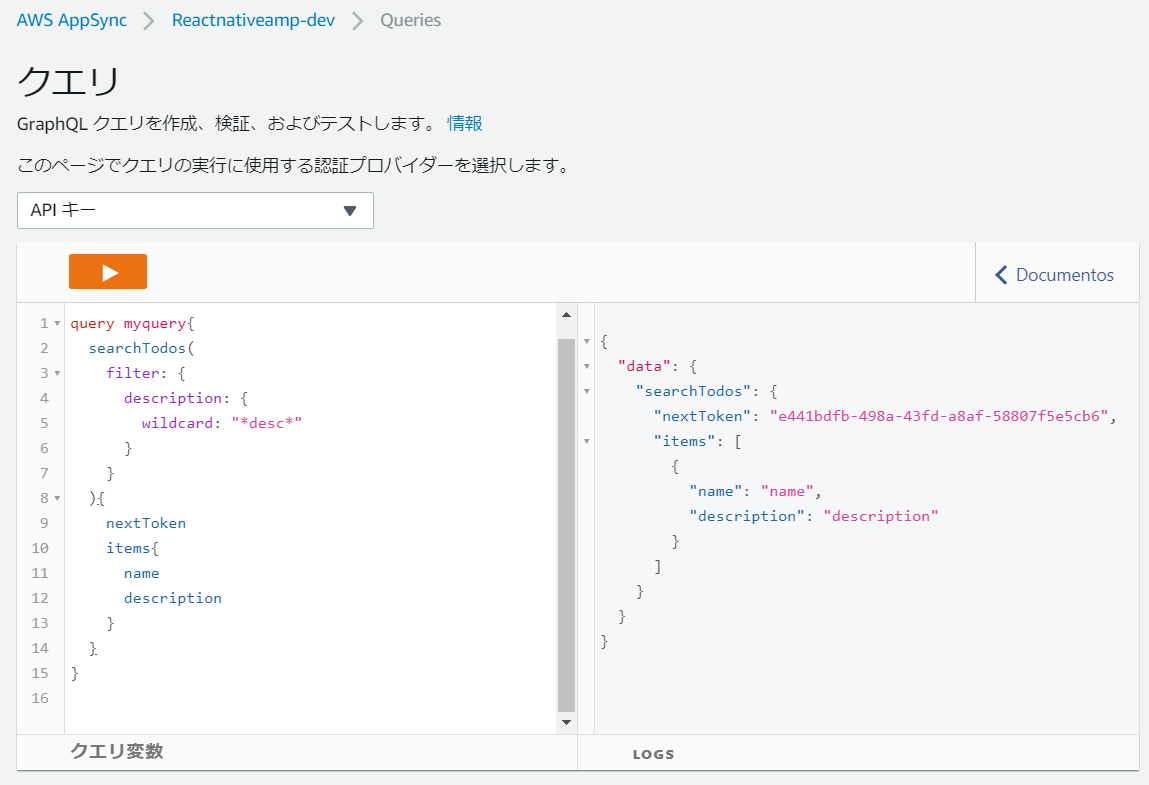
Queryを試してみる
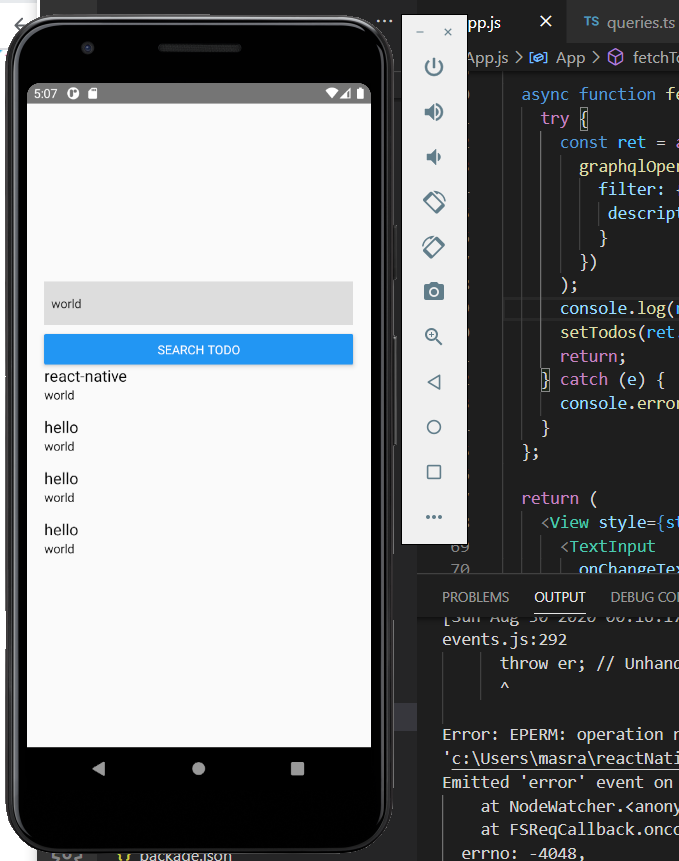
キーワード検索 フロントエンド編
あとはフロントのUIからクエリを実行してみるだけ
とりあえずでけた。
import React, {useEffect, useState} from 'react';
import {
  StyleSheet,
  View,
  Text,
  TextInput,
  Button
} from 'react-native';

//declare const global: {HermesInternal: null | {}};

import { API, graphqlOperation } from 'aws-amplify'
import { searchTodos } from './src/graphql/queries'
import { CreateTodoInput} from './src/API'

const initialState = { name: '', description: '' }

const App = () => {
  const [formState, setFormState] = useState(initialState)
  const [todos, setTodos] = useState([])

  useEffect(() => {
    fetchTodos()
  }, [])

  function setInput(key:any, value:any) {
    setFormState({ ...formState, [key]: value })
  }

  async function fetchTodos(){
    try {
      const ret:any = await API.graphql(
        graphqlOperation(searchTodos, {
          filter: {
           description: { wildcard: "*"+formState.description+"*" }
          }
        })
      );
      setTodos((ret.data as any).searchTodos.items);
      return;
    } catch (e) {
      console.error(e);
    }
  };

  return (
    <View style={styles.container}>
      <TextInput
        onChangeText={val => setInput('description', val)}
        style={styles.input}
        value={formState.description}
        placeholder="Description"
      />
      <Button title="Search Todo" onPress={fetchTodos} />

      {
        todos.map((todo: CreateTodoInput, index) => (
          <View key={todo.id ? todo.id : index} style={styles.todo}>
            <Text style={styles.todoName}>{todo.name}</Text>
            <Text>{todo.description}</Text>
          </View>
        ))
      }
    </View>
  )
}

const styles = StyleSheet.create({
  container: { flex: 1, justifyContent: 'center', padding: 20 },
  todo: {  marginBottom: 15 },
  input: { height: 50, backgroundColor: '#ddd', marginBottom: 10, padding: 8 },
  todoName: { fontSize: 18 }
})

export default App;
ついでに距離を扱うやつも・・と思ったけど長くなりそうなので別の記事にしよう。
そんなわけで検証終わり。
じゃっかん遠回りはしてしまったけど、amplifyだとreact-nativeにしてもあまり勝手が変わらないのがわかったのは良かった。
そして@searchableはめっちゃ楽だなー。