はじめに
Next.js v13 (not app dir) でsupabaseの認証機能を一通り試していきたいと思います。
要件は以下の通りです。
| path | 機能 | |
|---|---|---|
/ |
トップページ | ログイン済みの場合、マイページへのリンクを記載。 そうでない場合、認証画面へのリンクを記載 |
/auth |
認証画面 | ログインやユーザー作成を行う。 ログイン済みの場合はマイページにリダイレクト |
/mypage |
マイページ | ログイン中のメアドを表示 ログインしていない場合は認証画面へリダイレクト ログアウトボタンの設置(ログアウト後にトップへリダイレクト) |
/mypage/* |
個人の情報を参照したり変更したりするページ | ログインしていない場合は認証画面へリダイレクト |
環境
- node: v18.12.1
{
  "dependencies": {
    "@supabase/auth-helpers-nextjs": "^0.5.2",
    "@supabase/auth-helpers-react": "^0.3.1",
    "@supabase/auth-ui-react": "^0.2.6",
    "@supabase/supabase-js": "^2.2.1",
    "next": "13.0.7",
    "react": "18.2.0",
    "react-dom": "18.2.0"
  },
  "devDependencies": {
    "@types/node": "18.11.17",
    "@types/react": "18.0.26",
    "@types/react-dom": "18.0.9",
    "autoprefixer": "^10.4.13",
    "eslint": "8.30.0",
    "eslint-config-next": "13.0.7",
    "postcss": "^8.4.20",
    "tailwindcss": "^3.2.4",
    "typescript": "4.9.4"
  }
}
Supabase側の準備
SQL EditorにUser Management Starterというクイックスターターがあるので、そちらを選択します。
sessionProviderの追加
pages/_app.tsxを以下のように変更します。
import { AppProps } from "next/app";
import { useState } from "react";
import { createBrowserSupabaseClient } from "@supabase/auth-helpers-nextjs";
import { SessionContextProvider, Session } from "@supabase/auth-helpers-react";
import "styles/globals.css";

function MyApp({
  Component,
  pageProps,
}: AppProps<{
  initialSession: Session;
}>) {
  // Create a new supabase browser client on every first render.
  const [supabaseClient] = useState(() => createBrowserSupabaseClient());

  return (
    <SessionContextProvider
      supabaseClient={supabaseClient}
      initialSession={pageProps.initialSession}
    >
      <Component {...pageProps} />
    </SessionContextProvider>
  );
}

export default MyApp;
こうすることで、@supabase/auth-helpers-reactのuseUserが利用できるようになります。
useRouterは、認証情報を取得するために使用します。
認証用のコンポーネントを用意する
Supabaseは認証画面を表示する@supabase/auth-ui-reactというライブラリを用意してくれています。
手間をかけたくないので、今回はこちらを利用します。
import { createClient } from '@supabase/supabase-js'

const supabaseUrl= process.env.NEXT_PUBLIC_SUPABASE_URL
const supabaseAnonKey = process.env.NEXT_PUBLIC_SUPABASE_ANON_KEY

export const supabaseClient = createClient(supabaseUrl, supabaseAnonKey)
import {
  Auth as SupabaseAuthComponent,
  ThemeSupa,
} from "@supabase/auth-ui-react";
import { supabaseClient } from "lib/supabaseClient";
import styles from "components/Auth.module.css";

export const Auth = () => (
  <SupabaseAuthComponent
    supabaseClient={supabaseClient}
    appearance={{
      theme: ThemeSupa,
      className: {},
      style: {},
    }}
    providers={[]}
  />
);

export default Auth;
ひとまず、最低限の設定だけをしてみました。
これだけでどんな画面になるのか、試しに適当な/page配下でimportして使ってみましょう。
import { NextPage } from "next";
import { Auth } from "components/Auth";

const Hoge: NextPage = () => {
  return <Auth />;
};

export default Hoge;
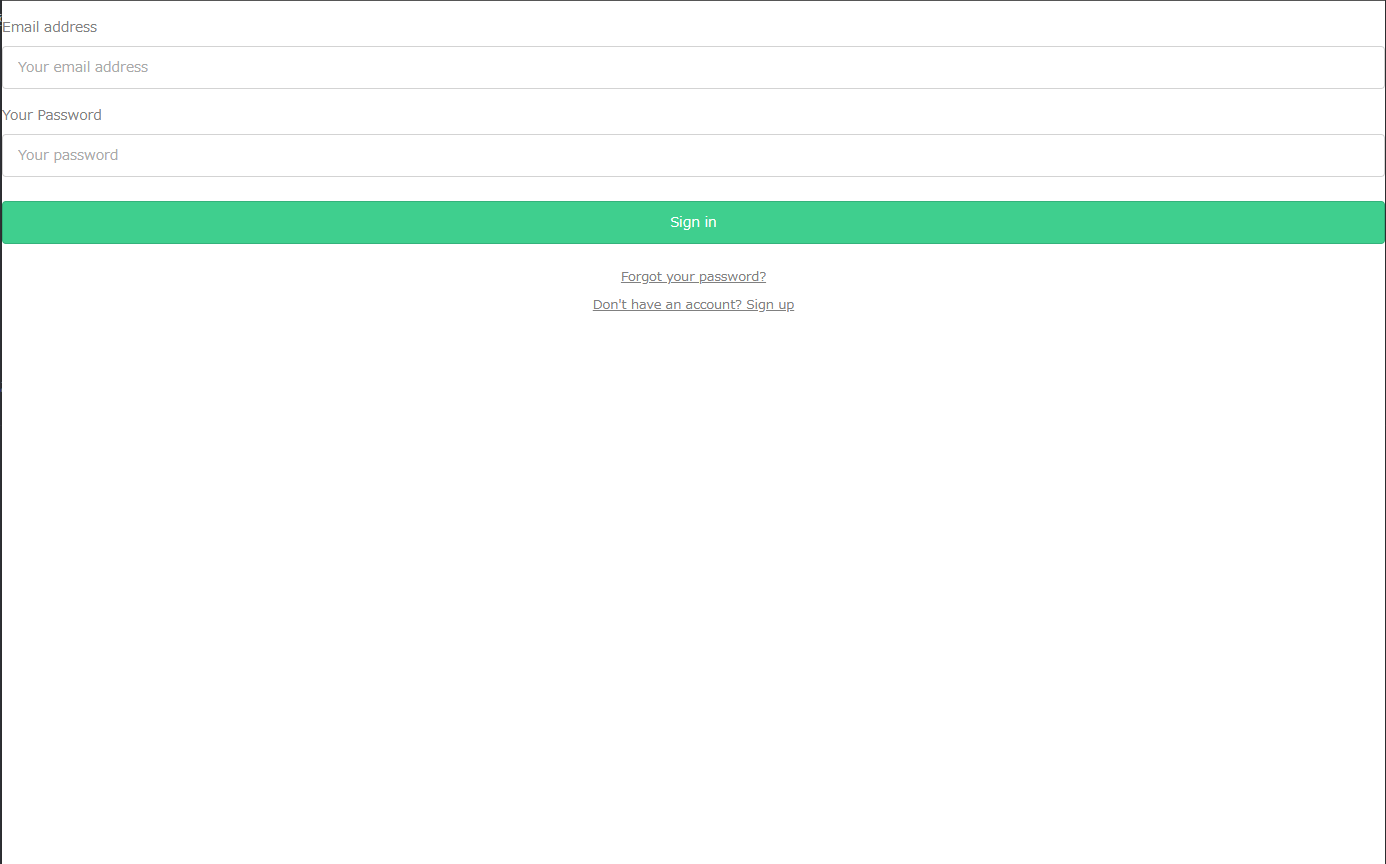
出力結果はこんな感じです。
GoogleやTwitterといったProviderを設定していないのでパスワード認証だけですが、いい感じに最低限ができています。
これをちょっと調整して、/authを作成します。
import { useSupabaseClient } from "@supabase/auth-helpers-react";
import {
  Auth as SupabaseAuthComponent,
  ThemeSupa,
} from "@supabase/auth-ui-react";

export const Auth = () => {
  const supabaseClient = useSupabaseClient();

  return (
    <SupabaseAuthComponent
      supabaseClient={supabaseClient}
      appearance={{
        theme: ThemeSupa,
        className: {
          container: "w-full max-w-sm md:max-w-md mx-auto",
        },
        style: {
          container: {
            marginRight: "auto",
            marginLeft: "auto",
          },
        },
      }}
      localization={{
        lang: "ja",
      }}
    />
  );
};

export default Auth;
import { NextPage } from "next";
import Auth from "components/Auth";

const AuthApp: NextPage = () => {
  return (
    <div className="h-full w-full min-h-screen place-content-center pt-32">
      <Auth />
    </div>
  );
};

export default AuthApp;
いい感じに描画できていますね。
ただ、これには一点問題があります。
ユーザー作成時にはこれで問題ないのですが、ユーザーログイン時に問題があるのです。
一般に、ユーザーがログインした際の挙動は、認証が通ったら適当なページにリダイレクトするという形かと思います。
しかし、上記までのコードではログインした段階ではリダイレクトを行いません。
そのため、_app.tsxで話に挙げたuseUserを利用してログインを検知し、適当なページにリダイレクトさせる必要があります。
import { NextPage } from "next";
import Auth from "components/Auth";
+ import { useUser } from "@supabase/auth-helpers-react";
+ import { useEffect } from "react";
+ import { useRouter } from "next/navigation";

const AuthApp: NextPage = () => {
+  const user = useUser();
+  const router = useRouter();

+  useEffect(() => {
+    if (user) router.replace("/mypage");
+  }, [user]);

  return (
    <div className="h-full w-full min-h-screen place-content-center pt-32">
      <Auth />
    </div>
  );
};

export default AuthApp;
useUser()は認証情報を追従してくれるので、useEffectを用いてそのタイミングに合わせてリダイレクトさせます。
これでログインは完了です。
ついでに、このままだとログイン状態で/authにアクセスするとリダイレクト前に一瞬画面が移ってダサいので、getServerSidePropsを使用してリダイレクトさせます。
import { GetServerSidePropsContext, NextPage } from "next";
import { createServerSupabaseClient } from "@supabase/auth-helpers-nextjs";
import Auth from "components/Auth";
import { useUser } from "@supabase/auth-helpers-react";
import { useEffect } from "react";
import { useRouter } from "next/navigation";

const AuthApp: NextPage = () => {
  const user = useUser();
  const router = useRouter();

  useEffect(() => {
    if (user) router.replace("/mypage");
  }, [user]);

  return (
    <div className="h-full w-full min-h-screen place-content-center pt-32">
      <Auth />
    </div>
  );
};

export const getServerSideProps = async (ctx: GetServerSidePropsContext) => {
  const supabase = createServerSupabaseClient(ctx);
  const {
    data: { session },
  } = await supabase.auth.getSession();
  if (session)
    return {
      redirect: {
        destination: "/mypage",
        permanent: false,
      },
    };
  return {
    props: {},
  };
};

export default AuthApp;
サーバーサイド側での認証情報へのアクセスは、createServerSupabaseClientを使用します。
トップページで表示を出しわける
これもクライアント側でもサーバーサイド側でもどうにかできますが、やはり一瞬異なる表示が出ることは避けたいのでサーバーサイド側で処理します。
理屈としては↑と同じで、異なるのはリダイレクトではなくPropsの中身が異なるということだけです。
import type {
  GetServerSidePropsContext,
  InferGetServerSidePropsType,
  NextPage,
} from "next";
import Link from "next/link";
import { createServerSupabaseClient } from "@supabase/auth-helpers-nextjs";

type Props = InferGetServerSidePropsType<typeof getServerSideProps>;

const Home: NextPage<Props> = ({ email }) => {
  return (
    <main className="p-8">
      {email ? (
        <>
          <p>Welcome {email}!</p>
          <Link href={"/mypage"}>Go to Mypage</Link>
        </>
      ) : (
        <>
          <p>please Login</p>
          <Link href={"/auth"}>Go to Auth</Link>
        </>
      )}
    </main>
  );
};

export const getServerSideProps = async (ctx: GetServerSidePropsContext) => {
  // Create authenticated Supabase Client
  const supabase = createServerSupabaseClient(ctx);
  // Check if we have a session
  const {
    data: { session },
  } = await supabase.auth.getSession();
  if (session) {
    return {
      props: {
        email: session.user?.email || "",
      },
    };
  }
  return {
    props: {
      email: "",
    },
  };
};

export default Home;
これでログインしているか否かによって表示が変化します。
特定のへのアクセスの場合一律でリダイレクトさせる
/mypage/*の場合一律でリダイレクトさせる必要があります。
これには、nextjsのmiddlewareを用います。
import { createMiddlewareSupabaseClient } from '@supabase/auth-helpers-nextjs'
import { NextResponse } from 'next/server'
import type { NextRequest } from 'next/server'

export async function middleware(req: NextRequest) {
  const res = NextResponse.next()
  const supabase = createMiddlewareSupabaseClient({ req, res })
  const {
    data: { session },
  } = await supabase.auth.getSession()

  if (session?.user.email) {
    return res
  }

  const redirectUrl = req.nextUrl.clone()
  redirectUrl.pathname = '/auth'
  return NextResponse.redirect(redirectUrl)
}

export const config = {
  matcher: '/mypage/:path*',
}
理屈的にはこれまでgetServerSidePropsで行ってきた処理をmiddlewareで行わせているだけです。
これで、認証情報を持っていない状態で/mypage/*へ来た場合は/authへリダイレクトされます。
ログアウト処理
残るはマイページでのログアウト機能の実装です。
ログアウトは、auth.signOut()関数が用意されているのでそちらを使用します。
import { NextPage } from "next";
import { useRouter } from "next/navigation";
import { useSupabaseClient, useUser } from "@supabase/auth-helpers-react";
import { useEffect } from "react";

export const Mypage: NextPage = () => {
  const router = useRouter();
  const user = useUser();
  const supabaseClient = useSupabaseClient();

  useEffect(() => {
    if (!user) router.push("/");
  }, [user]);

  return (
    <div>
      <p>{user?.email}</p>
      <button
        onClick={async () => {
          await supabaseClient.auth.signOut();
        }}
      >
        Logout
      </button>
    </div>
  );
};

export default Mypage;
なお、上記のコードではログアウト後の離脱処理をuseEffectで行っていますが、別にonClickの際の挙動としても良いです。
というか私が気にしいでuseEffectに持たせているだけなので、onClickの挙動に含んだ方がよりシンプル化と思います。
おわりに
とりあえずこれで最低限の認証の流れは済みました。
ドキュメント見る感じSMS認証とかもあるので、時間があるときにもっといろいろ試してみたいですね
余談: ダッシュボードからのアカウント削除
作成したアカウントを削除する場合は、supabaseのAuthenticationで削除操作をしても消すことはできません。
table Editorからprofilesの中にあるアカウントの情報を削除して、初めて削除できます。

