gRPCでAPIサーバを立てた場合に、APIへのアクセスに対して認証をかけたい。ユーザ管理や認証機能自体は自前実装は避けて、OSSのSSOツールのKeycloakを使って実施してみる方法を試してみます。
構成はこんな感じの非常にシンプルに試します。
なお、今回は各コンポーネントはすべてDockerコンテナとして立ち上げて試してみます。
Keycloakを設定
まずは認証サーバとなるKeycloakを設定します。
$ docker run -d -e KEYCLOAK_USER=admin -e KEYCLOAK_PASSWORD=password -p 8080:8080 jboss/keycloak
これで立ち上がります。
ブラウザからhttp://ホストIP:8080/にアクセスするとKeycloakの管理画面に入れます。
コンテナ起動時に環境変数で指定した初期ユーザの情報でログインできます。
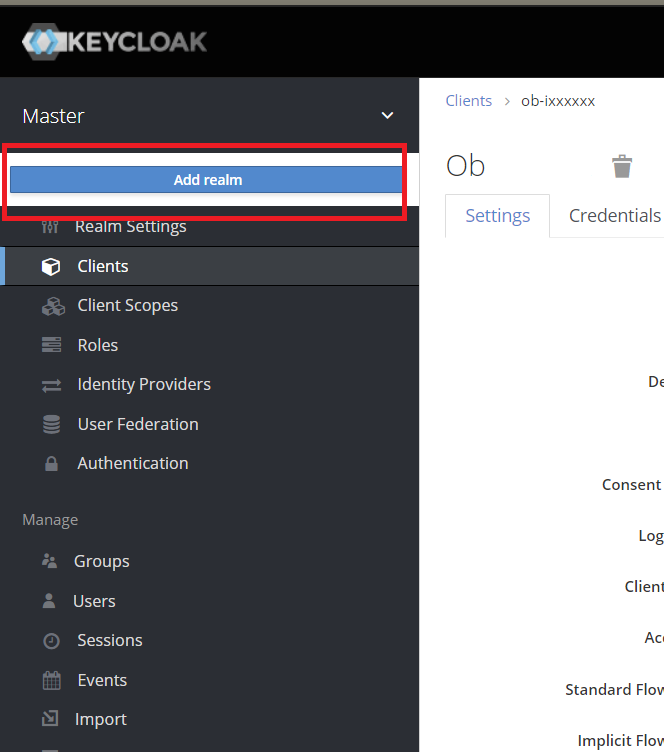
Keycloakでは、realmという形で管理領域が区分けがされ、デフォルトではmasterというのが作られています。
ユーザを区分けして管理したい場合等はこのrealmを作り分けることで論理的に分離されて複数のシステムのユーザ情報を統合管理可能になります。
今回、テスト用にtestというrealmを作成します。
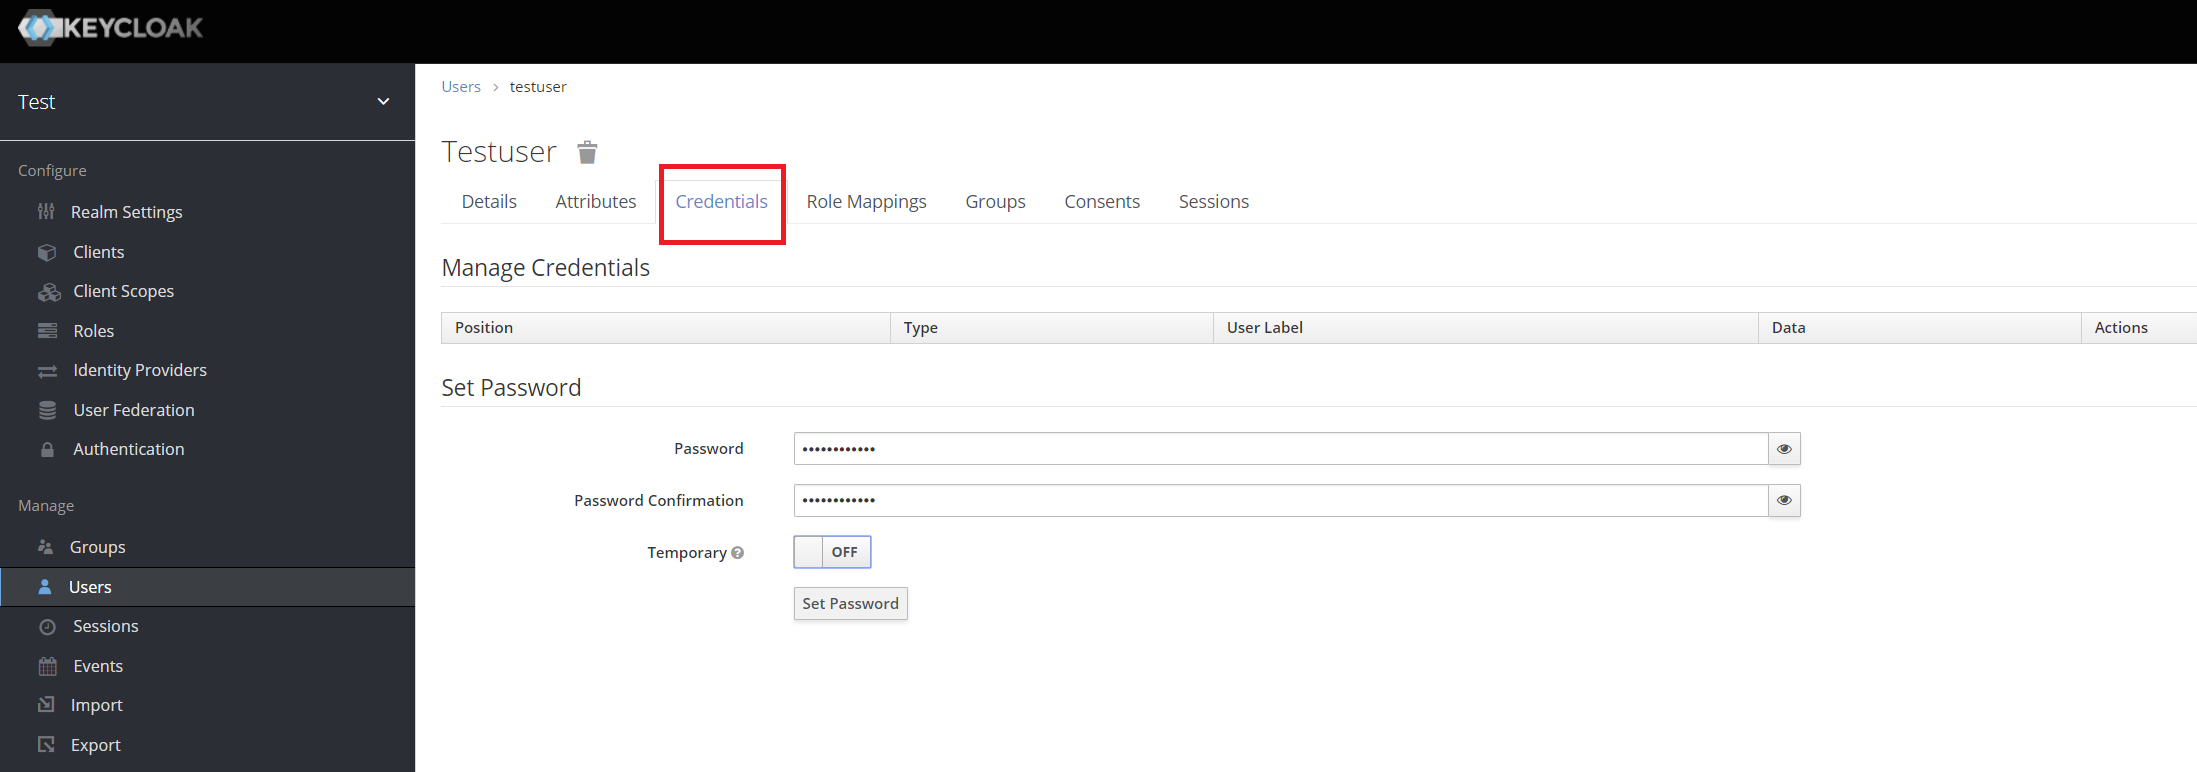
次にこのtestというrealm配下でtestuserという名称のユーザを作成します。
ユーザを作成し、Credentialsタブからこのユーザのパスワードを設定します。
これでユーザは完成です。
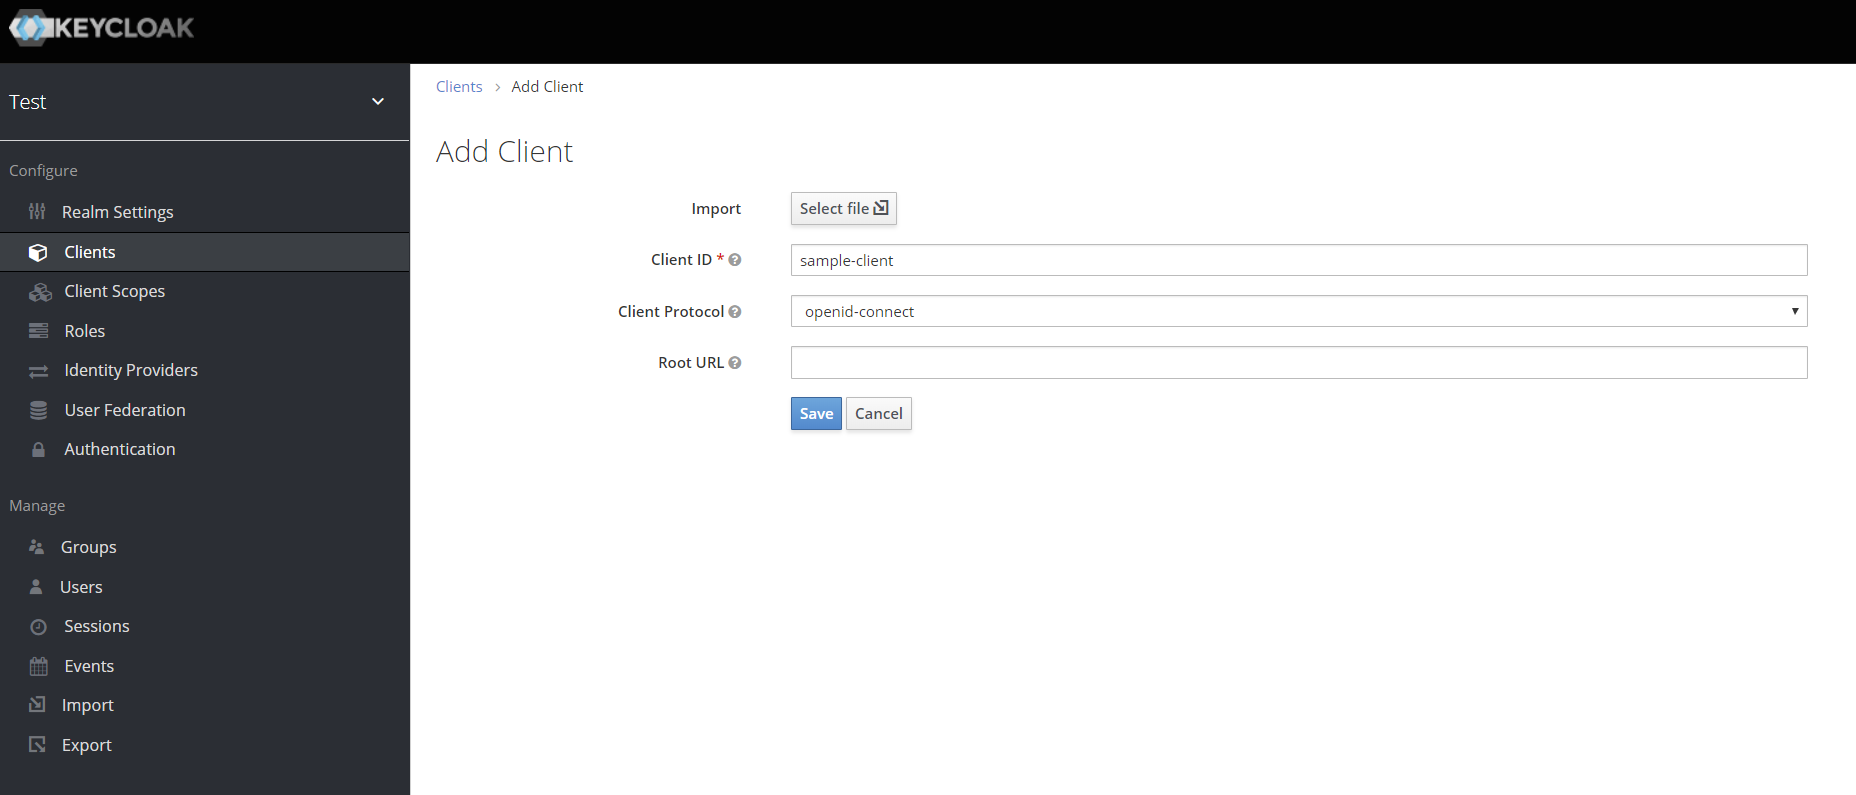
次に、呼び出し元となるClientの登録を行います。sample-clientという名前で新規作成します。
作成後、このclientの設定を行います。
ポイントは誰でも認証処理をさせないよう、「Access type」を「confidential」に設定し、クレデンシャル情報を登録したクライアントアプリケーションからしか呼べないようにします。
あとは、ユーザ認証を直接実施させるため「Direct Access Grants Enabled」を「On」に設定、「Service Accounts Enabled」を「On」に設定すると、認証してトークン発行する処理の中でユーザ名・パスワード指定せず、クライアントのクレデンシャル情報のみを使ってトークン発行できるようになります。Webフロントエンドからのログイン認証だけでなく、バックエンドの処理のためにclientのIDとシークレットキーを用いて認証通すときとかはこの設定をOnにしておくと良さそうです。
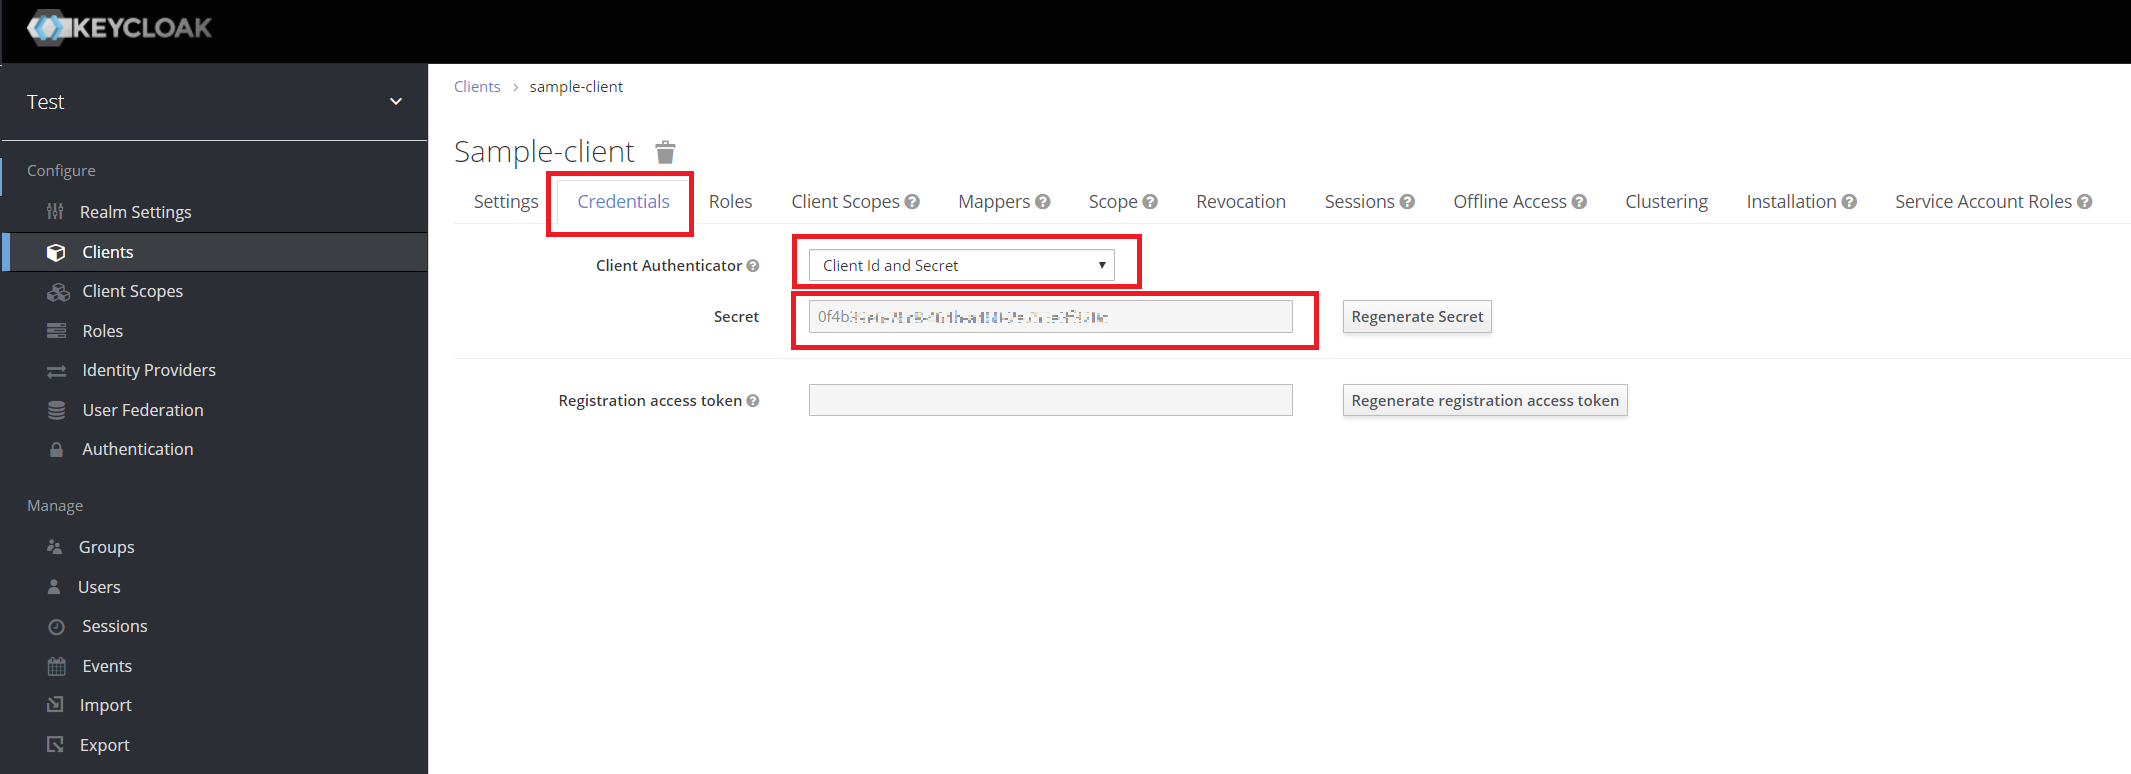
Access Typeをconfidentialにして保存すると、Client設定のタブ上にCredentialsが表示されます。
ここにアクセスすると、自動的にClientのシークレットキーが発行されていrのがわかります。このシークレットキー情報は後ほど認証処理時に利用するので控えておきます。
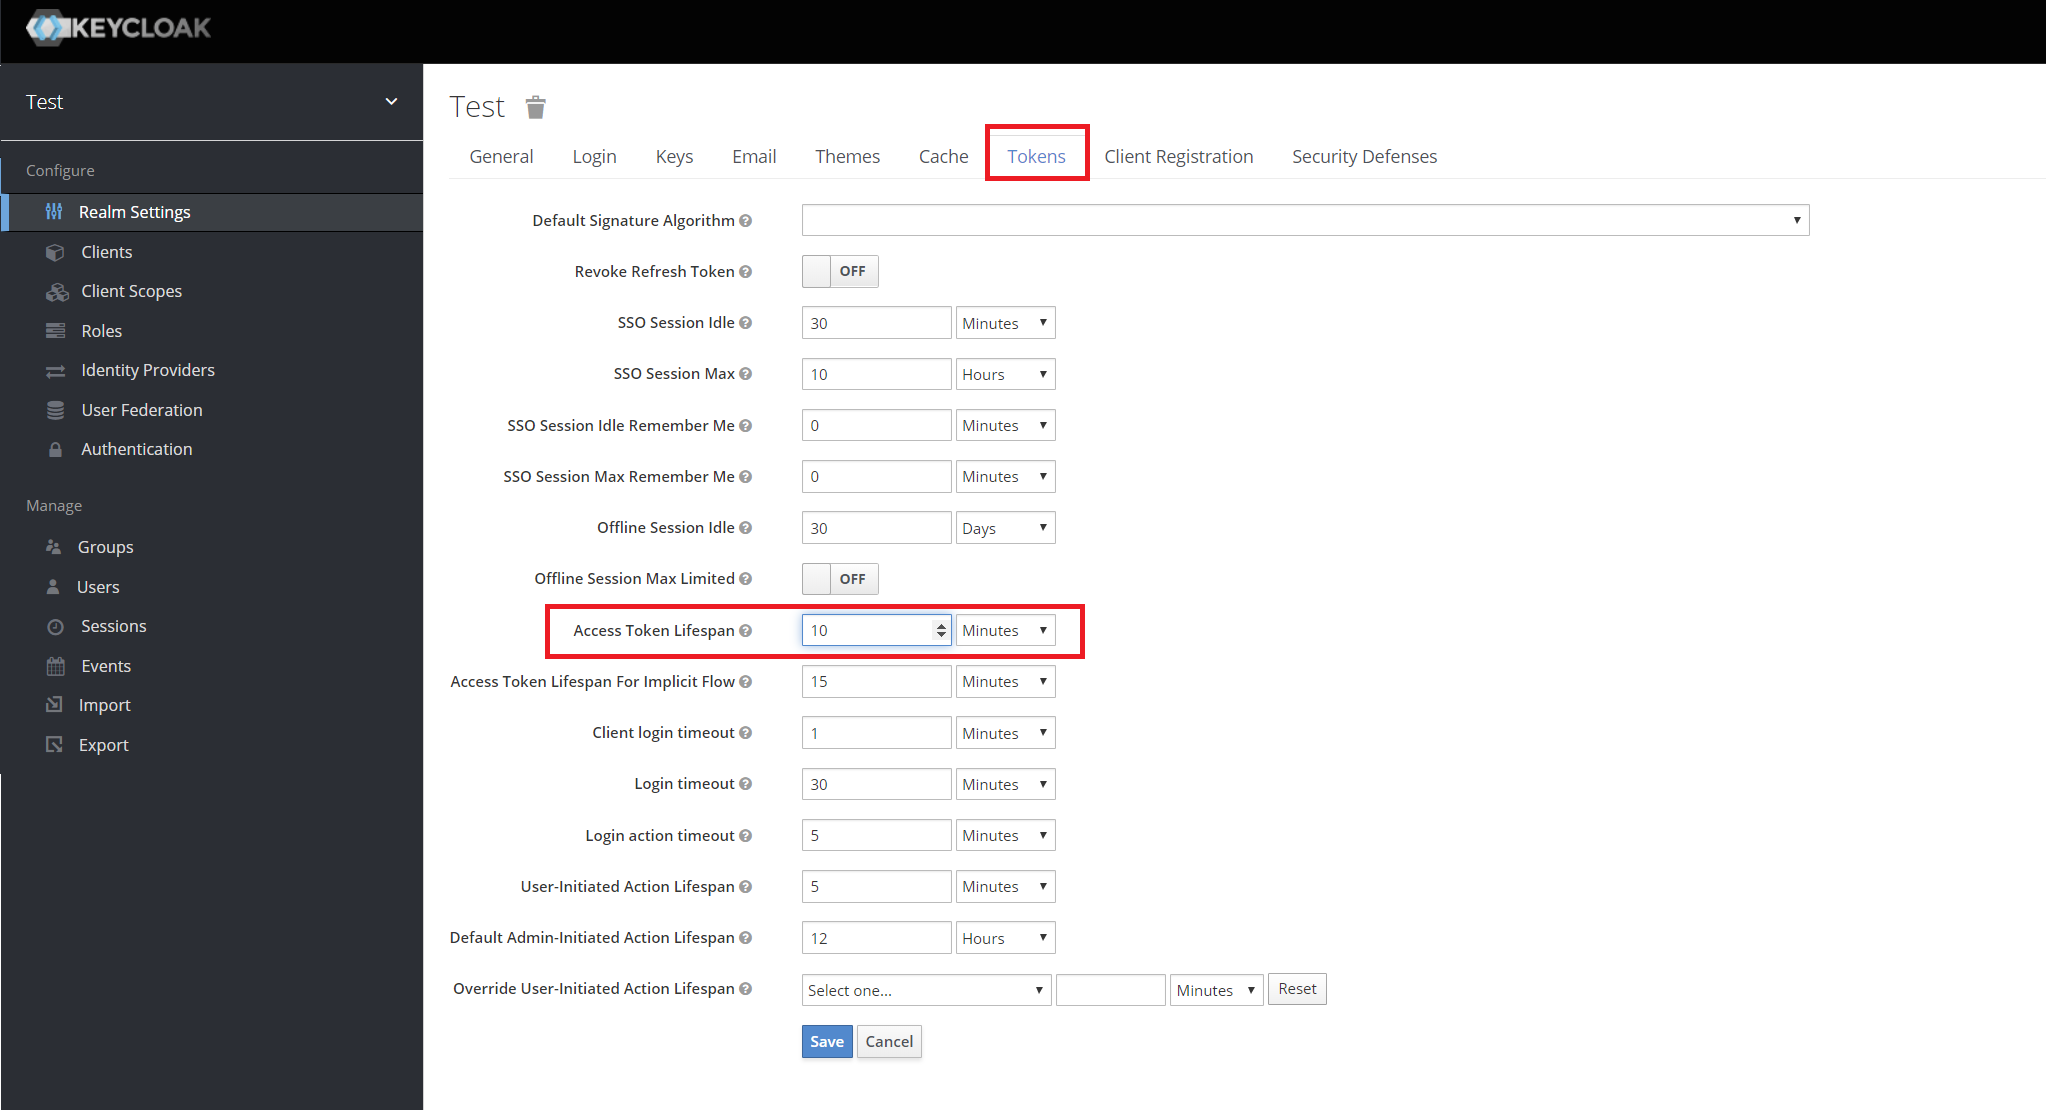
あとは、発行されるトークンの設定値についても確認しておきましょう。「Realm Settings」のページ内の「Tokens」のタブを開きます。
ここで、認証が通った後に発行されるトークンの仕様が設定できます。デフォルトだとAccess Tokenの有効期限が5分になっているので、少し長めにとって10分にしておきます。
この画面では、それ以外にも、Offline Session(リフレッシュトークン)の操作がなかったときの期限切れの時間(デフォルト30日)なども指定できます。必要に応じて変更しましょう。
これで、Keycloakの設定は一旦完了です。
PythonでgRPCのサーバを実装
gRPCのサーバをPythonで実装してみます。
今回、以下のような流れで実装してみました。
- Protocol Buffersの定義を作成
- Protocol Buffers定義からPythonコードを作成
- gRPCのAPIサーバを実装
- Inctereptorで認証機能を組み込み
0. 事前準備
PythonでgRPCサーバを実装するに辺り、必要なインストール作業等実施します。
pipで以下のようなパッケージをインストールします。
$ pip install grpcio grpcio-tools grpcio-reflection
grpcio-reflectionをインストールしているのは動作確認用途でgrpcurlを利用するためです。
grpcurlは実際の問い合わせの手間でreflectionを呼び出してチェックする流れが挟まるのでreflection対応できるようにするためです。
grpcurl(CURLのgRPC版みたいなツール)をインストールします。
https://github.com/fullstorydev/grpcurl/releases
ここから環境に合わせて必要なファイルをダウンロードして展開するだけで利用できるようになります。
1. Protocol Buffersの定義を作成
今回、Login認証用のAPIと、リクエストに応じてメッセージをリプライするReplyMessage APIという2つのAPIを簡単に実装してみます。
protoファイルは以下のように定義します。
packageはsample、サービス名はSampleServiceという形で定義しています。
syntax = "proto3";

package sample;

message SampleRequest{
  string input_message = 1;
}

message SampleResponse{
  string output_message = 1;
}

message LoginRequest{
  string username = 1;
  string password = 2;
}

message LoginResponse{
  int32 code = 1;
  string access_token = 2;
  string refresh_token = 3;
  string error = 4;
}

service SampleService{
  rpc ReplyMessage (SampleRequest) returns (SampleResponse) {}
  rpc Login (LoginRequest) returns (LoginResponse) {}
}
2. Protocol Buffers定義からPythonコードを作成
grpcio-toolsに入っているprotocを使ってprotoファイルからpythonのコードを自動生成します。
from grpc.tools import protoc
protoc.main(
    (
        '',
        '-I.',
        '--python_out=.',
        '--grpc_python_out=.',
        'sample.proto',
    )
)
引数に先程作成したsample.protoを指定しています。
以下のように実行すると作成が完了です。
$ python3 codegen.py
sample_pb2.pyとsample_pb2_grpc.pyという2ファイルが追加されているかと思います。
あとはこれを使ってサーバを実装すればOKです。
3. gRPCサーバを実装
ひとまず認証機能のない形で以下のように実装してみます。
import time
from concurrent import futures
import grpc
import sample_pb2
import sample_pb2_grpc
from grpc_reflection.v1alpha import reflection

class SampleServiceServicer(sample_pb2_grpc.SampleServiceServicer):

    def __init__(self):
        pass

    def ReplyMessage(self, request, context):
        print(f'Input: {request.input_message}')
        return sample_pb2.SampleResponse(output_message='Hello! {}'.format(request.input_message))
    def Login(self, request, context):
        return sample_pb2.LoginResponse(code=200, access_token='dummy', refresh_token='dummy')
        except Exception as e:
            print(e)
            return sample_pb2.LoginResponse(code=401, error='Authorization error')

def serve():
    server = grpc.server(futures.ThreadPoolExecutor(max_workers=10))
    sample_pb2_grpc.add_SampleServiceServicer_to_server(SampleServiceServicer(), server)
    SERVICE_NAMES = (
        sample_pb2.DESCRIPTOR.services_by_name['SampleService'].full_name,
        reflection.SERVICE_NAME,
    )
    reflection.enable_server_reflection(SERVICE_NAMES, server)
    server.add_insecure_port('[::]:50051')
    server.start()
    print('Starting gRPC sample server...')
    try:
        while True:
            time.sleep(3600)
    except KeyboardInterrupt:
        server.stop(0)

if __name__ == '__main__':
    serve()
これで以下のようにサーバを起動します。
$ python3 sample_server.py
Starting gRPC sample server...
50051ポートでサーバがリッスンします。
では、実際に応答が返ってくるかをgrpcurlを使って確認します。
$ ./grpcurl -plaintext -d '{"input_message": "ike-dai"}' localhost:50051 sample.SampleService/ReplyMessage
localhostの50051ポートで稼働しているAPIサーバに対して、sample.SampleServiceのReplyMessageを呼び出す。その際のリクエストbodyとして、ReplyMessageのリクエストパラメータとして定義されているinput_messageの情報を引き渡して実行する例です。
すると応答としては以下のようなJSONの結果が返ってきます。
{
  "output_message": "Hello! ike-dai"
}
4. Interceptorで認証機能を組み込み
次にInterceptorを使って、実際のReplyMessageの処理が呼ばれる手前に認証処理を挟み込んでみます。
実装する前に、Keycloakとの通信処理を実施してくれるPythonのライブラリをインストールしておきます。
$ pip install python-keycloak
では、認証処理のコードを作成します。
sample_server.pyの中に直接書いても良いですが、今回、認証用の処理はファイルとして別にしておきます。
import grpc
from keycloak import KeycloakOpenID

def unauthenticated_process(ignored_request, context):
    context.abort(grpc.StatusCode.UNAUTHENTICATED, 'Access token is wrong or expired.')

class AuthInterceptor(grpc.ServerInterceptor):
    def __init__(self, server_url, client_id, realm_name, client_secret_key):
        self._keycloak_openid = KeycloakOpenID(
            server_url=server_url,
            client_id=client_id,
            realm_name=realm_name,
            client_secret_key=client_secret_key,
            verify=True)

    def intercept_service(self, continuation, handler_call_details):
        metadata = dict(handler_call_details.invocation_metadata)

        if handler_call_details.method.endswith('ReflectionInfo'):
            return continuation(handler_call_details)
        if handler_call_details.method.endswith('Login'):
            return continuation(handler_call_details)
        if 'access-token' in metadata and self._token_check(metadata['access-token']):
            return continuation(handler_call_details)
        else:
            return grpc.unary_unary_rpc_method_handler(unauthenticated_process)

    def _token_check(self, access_token):
        try:
            token_info = self._keycloak_openid.introspect(access_token)
            if token_info['active']:
                return True
            else:
                return False
        except Exception as e:
            return False
grpcのPythonフレームワークに実装されているServerInterceptorを継承した独自のAuthInterceptorを作っています。
このAuthInterceptorクラスにintercept_serviceを実装することで、Interceptor処理を書くことができます。処理の結果、intercept_serviceの引数で渡ってくるcontinuationに引き渡せば後続の処理が流れます。後続に処理を行かせたくない場合にはここで別処理に流して上げればOKです。
上記の例の場合、呼び出しのメソッド名がReflectionInfoもしくは、Loginで終わる名称の場合は、トークンのチェックを行うことなく後続の処理に流し、それ以外(ReplyMessage)の場合には_token_checkの関数を呼び出し、kyecloakの認証サーバに対してAccess Tokenの確認処理を実行しています。その結果tokenがアクティブなら後続の処理を実行。そうでなければエラーを返すといった実装になっています。
このInterceptorを組み込むようサーバのコードを修正します。
import time
from concurrent import futures
import grpc
import sample_pb2
import sample_pb2_grpc
from grpc_reflection.v1alpha import reflection
from sample_auth_interceptor import AuthInterceptor
from keycloak import KeycloakOpenID

class SampleServiceServicer(sample_pb2_grpc.SampleServiceServicer):

    def __init__(self, server_url, client_id, realm_name, client_secret_key):
        self._keycloak_openid = KeycloakOpenID(
            server_url=server_url,
            client_id=client_id,
            realm_name=realm_name,
            client_secret_key=client_secret_key,
            verify=True)

    def ReplyMessage(self, request, context):
        print(f'Input: {request.input_message}')
        return sample_pb2.SampleResponse(output_message='Hello! {}'.format(request.input_message))
    def Login(self, request, context):
        try:
            token = self._keycloak_openid.token(username=request.username, password=request.password, grant_type='password')
            return sample_pb2.LoginResponse(code=200, access_token=token['access_token'], refresh_token=token['refresh_token'])
        except Exception as e:
            print(e)
            return sample_pb2.LoginResponse(code=401, error='Authorization error')

def serve():
    KEYCLOAK_SERVER_URL = 'http://<Keycloakサーバのアドレス:8080/auth/'
    KEYCLOAK_CLIENT_ID = 'sample-client'
    KEYCLOAK_REALM_NAME = 'test'
    KEYCLOAK_CLIENT_SECRET_KEY = '<先程clientのcredentialsのページにて控えておいたシークレット情報>'
    server = grpc.server(futures.ThreadPoolExecutor(max_workers=10),
        interceptors=[
            AuthInterceptor(
                server_url=KEYCLOAK_SERVER_URL,
                client_id=KEYCLOAK_CLIENT_ID,
                realm_name=KEYCLOAK_REALM_NAME,
                client_secret_key=KEYCLOAK_CLIENT_SECRET_KEY
            )])
    sample_pb2_grpc.add_SampleServiceServicer_to_server(SampleServiceServicer(KEYCLOAK_SERVER_URL, KEYCLOAK_CLIENT_ID, KEYCLOAK_REALM_NAME, KEYCLOAK_CLIENT_SECRET_KEY), server)
    SERVICE_NAMES = (
        sample_pb2.DESCRIPTOR.services_by_name['SampleService'].full_name,
        reflection.SERVICE_NAME,
    )
    reflection.enable_server_reflection(SERVICE_NAMES, server)
    server.add_insecure_port('[::]:50051')
    server.start()
    print('Starting gRPC sample server...')
    try:
        while True:
            time.sleep(3600)
    except KeyboardInterrupt:
        server.stop(0)

if __name__ == '__main__':
    serve()
これで、Loginのメソッド呼び出し時にはKeycloakに問い合わせてユーザ名パスワードを認証しトークンを返却。
ReplyMessageのメソッド呼び出し時には、リクエスト呼び出し時のaccess-tokenという名称のメタデータの値(Access Token)を評価して有効かどうかをInterceptorで評価し、Trueであればメッセージを返すという形になります。
grpcurlで試してみるとこんな感じになります。
$ ./grpcurl -plaintext -d '{"username": "testuser", "password": "testpassword"}' localhost:50051 sample.SampleService/Login
{
  "code": 200,
  "access_token": "eyJhb・・・省略・・・j8CU8P00-cg",
  "refresh_token": "eyJhbGc・・・省略・・・sryvimg"
}
Loginで取得したAccess Tokenをメタデータとして持たせてReplyMessageを呼び出し。
$ ./grpcurl -plaintext -d '{"input_message": "ike-dai"}' -rpc-header 'access-token: eyJhb・・・省略・・・j8CU8P00-cg' localhost:50051 sample.SampleService/ReplyMessage
{
  "output_message": "Hello! ike-dai"
}
正しく応答が返ってきます。
アクセスキーの一部が誤っていたり、Access Tokenの有効期限が切れたりすると以下のような感じでエラーになります。
ERROR:
  Code: Unauthenticated
  Message: Access token is wrong or expired.
認証が効いていることがわかります。
まとめ
Keycloakを使ってお手軽に認証ありのgRPCサーバの実装方法をご紹介しました。
この方法だと、gRPCのAPIサービス毎に処理を割り込ませる設定にしないといけないので、IstioとかEnvoyとかフロントにプロキシを立ててそちらで認証させるとかも可能かも?なので、今回のこの内容はあくまで参考程度に。


