これは ZOZO Advent Calendar 2022 カレンダー Vol.5 の 12日目の記事です
Java, Kotlin, Jetpack Composeのそれぞれで作られた画面で同じデザインのAlertDialogを使用したいケースがあったので、Jetpack ComposeのAlertDialogを使って汎用的に使いまわせるDialogFragmentを作成しました。
概要
- AndroidViewsとComposeで使用するAlretDialogを共通化する
- 呼び出し元からテキストやボタンタップ時の処理を設定できるようにする
Jetpack Compose内でのダイアログ
Compose内で呼び出すダイアログのコードは以下の通りです。
@Composable
fun SimpleAlertDialog(
    title: String?,
    messageText: String?,
    confirmButtonText: String,
    onClickConfirm: () -> Unit,
    dismissButtonText: String? = null,
    onClickDismiss: () -> Unit = {},
    isCancelable: Boolean = true,
) {
    AlertDialog(
        onDismissRequest = {
            if (isCancelable) {
                onClickDismiss()
            }
        },
        title = if (title != null) {
            { Text(text = title, fontWeight = FontWeight.Bold) }
        } else {
            null
        },
        text = if (messageText != null) {
            {
                Text(
                    text = messageText,
                    color = Color.Gray
                )
            }
        } else {
            null
        },
        confirmButton = {
            TextButton(
                onClick = onClickConfirm,
            ) {
                Text(
                    text = confirmButtonText,
                    color = Color.Blue,
                )
            }
        },
        dismissButton = if (dismissButtonText != null) {
            {
                TextButton(
                    onClick = onClickDismiss,
                ) {
                    Text(
                        text = dismissButtonText,
                        color = Color.Blue,
                    )
                }
            }
        } else {
            null
        },
    )
}
バックキーやダイアログの外をタップした時の制御
バックキーやダイアログの外をタップした時はAlretDialogのonDismissRequestに渡された処理が実行されます。そのため、ダイアログの外をタップしてダイアログを閉じさせたくない時はisCancelable = falseとすることで制御可能です。
AndroidViewsでのダイアログ
AndroidViewsやJavaの画面から呼び出すダイアログのコードは以下の通りです。
class SimpleAlertDialogFragment : DialogFragment() {

    companion object {
        private const val KEY_TITLE = "KeyTitle"
        private const val KEY_TITLE_ID = "KeyTitleId"
        private const val KEY_MESSAGE = "KeyMessage"
        private const val KEY_MESSAGE_ID = "KeyMessageId"
        private const val KEY_POSITIVE_TEXT = "KeyPositiveText"
        private const val KEY_POSITIVE_LISTENER = "KeyPositiveListener"
        private const val KEY_NEGATIVE_TEXT = "KeyNegativeText"
        private const val KEY_NEGATIVE_LISTENER = "KeyNegativeListener"
        private const val KEY_CANCELABLE = "KeyCancelable"
    }

    override fun onCreateView(inflater: LayoutInflater, container: ViewGroup?, savedInstanceState: Bundle?): View {
        val titleId = arguments?.getInt(KEY_TITLE_ID) ?: 0
        val title = if (titleId != 0) {
            getString(titleId)
        } else {
            arguments?.getString(KEY_TITLE)
        }

        val messageId = arguments?.getInt(KEY_MESSAGE_ID) ?: 0
        val message = if (messageId != 0) {
            getString(messageId)
        } else {
            arguments?.getString(KEY_MESSAGE)
        }

        return ComposeView(requireContext()).apply {
            setContent {
                SimpleAlertDialog(
                    title = title,
                    messageText = message,
                    confirmButtonText = checkNotNull(arguments?.getString(KEY_POSITIVE_TEXT)),
                    dismissButtonText = arguments?.getString(KEY_NEGATIVE_TEXT),
                    onClickConfirm = {
                        dismiss()
                        setFragmentResult(KEY_POSITIVE_LISTENER, bundleOf())
                    },
                    onClickDismiss = {
                        dismiss()
                        setFragmentResult(KEY_NEGATIVE_LISTENER, bundleOf())
                    },
                    isCancelable = arguments?.getBoolean(KEY_CANCELABLE, true) ?: true,
                )
            }
        }
    }

    class Builder(
        fragment: Fragment? = null,
        activity: AppCompatActivity? = null,
    ) {
        private val bundle = Bundle()

        private val fragmentManager: FragmentManager =
            fragment?.childFragmentManager ?: activity?.supportFragmentManager
            ?: throw IllegalStateException("Required value was null.")

        private val lifecycleOwner: LifecycleOwner =
            fragment?.viewLifecycleOwner ?: activity
            ?: throw IllegalStateException("Required value was null.")

        fun setTitle(title: String) = this.apply {
            bundle.putString(KEY_TITLE, title)
        }

        fun setTitle(@StringRes titleId: Int) = this.apply {
            bundle.putInt(KEY_TITLE_ID, titleId)
        }

        fun setMessage(message: String) = this.apply {
            bundle.putString(KEY_MESSAGE, message)
        }

        fun setMessage(@StringRes messageId: Int) = this.apply {
            bundle.putInt(KEY_MESSAGE_ID, messageId)
        }

        fun setPositiveButtonListener(
            buttonText: String,
            listener: (() -> Unit)? = null,
        ) = this.apply {
            bundle.putString(KEY_POSITIVE_TEXT, buttonText)
            fragmentManager.setFragmentResultListener(
                KEY_POSITIVE_LISTENER, lifecycleOwner,
            ) { _, _ -> listener?.invoke() }
        }

        fun setNegativeButtonListener(
            buttonText: String,
            listener: (() -> Unit)? = null,
        ) = this.apply {
            bundle.putString(KEY_NEGATIVE_TEXT, buttonText)
            fragmentManager.setFragmentResultListener(
                KEY_NEGATIVE_LISTENER, lifecycleOwner,
            ) { _, _ -> listener?.invoke() }
        }

        fun setCancelable(isCancelable: Boolean) = this.apply {
            bundle.putBoolean(KEY_CANCELABLE, isCancelable)
        }

        fun create() = SimpleAlertDialogFragment().apply {
            arguments = bundle
        }
    }
}
AndroidViewsにCompose UIを追加する
Fragment内でsetContent()を呼び出してSimpleAlertDialogのUIを追加しています。
https://developer.android.com/jetpack/compose/interop/interop-apis?hl=ja#compose-in-views
これによってComposeのダイアログのデザインが変更されたとしても、Fragmentにも反映されるようになっています。
文字列リソースとStringのどちらでも設定できるようにする
文字列リソースが設定されていない場合は文字列を設定し、文字列も設定されていない場合はnullとなり、そのパラメータは表示されないようにしています。
val title = if (titleId != 0) {
    getString(titleId)
   } else {
    arguments?.getString(KEY_TITLE)
   }
ボタンタップ時の動作を実装する
setFragmentResultListenerを用いてkeyとボタンタップ時の処理をラムダ式で渡しています。
https://developer.android.com/training/basics/fragments/pass-data-between?hl=ja
        fun setPositiveButtonListener(
            buttonText: String,
            listener: (() -> Unit)? = null,
        ) = this.apply {
            bundle.putString(KEY_POSITIVE_TEXT, buttonText)
            fragmentManager.setFragmentResultListener(
                KEY_POSITIVE_LISTENER, lifecycleOwner,
            ) { _, _ -> listener?.invoke() }
        }
setFragmentResultで同一のkeyを指定して受け取っています。
 onClickConfirm = {
    dismiss()
    setFragmentResult(KEY_POSITIVE_LISTENER, bundleOf())
},
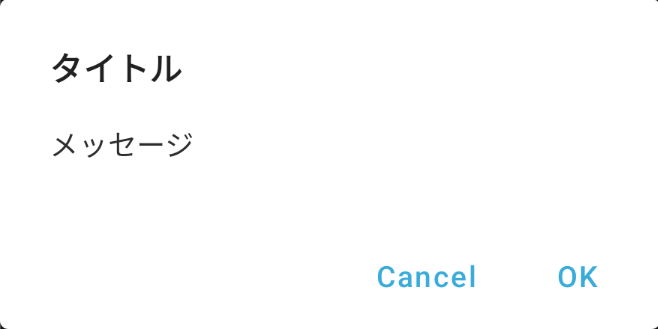
SimpleAlertDialogFragmentの呼び出し方
SimpleAlertDialogFragment.Builder(null, this)
                .setTitle("タイトル")
                .setMessage("メッセージ")
                .setPositiveButtonListener(getString(R.string.ok)) {
                    // okタップ時の処理をかく
                }
                .setNegativeButtonListener(getString(R.string.cancel))
                .create()
                .show(supportFragmentManager, "")
まとめ
この記事では、AndroidViewsとJetpack Composeで共通デザインのAlertDialogの実装手順を紹介しました。
ダイアログのデザインが変更になってもComposeのファイルのみ修正すれば良いので管理がしやすくなったかなと思います。
