Google Formsに添付した写真、入力した内容をGoogle Apps Script を使って、Twitterに投稿する
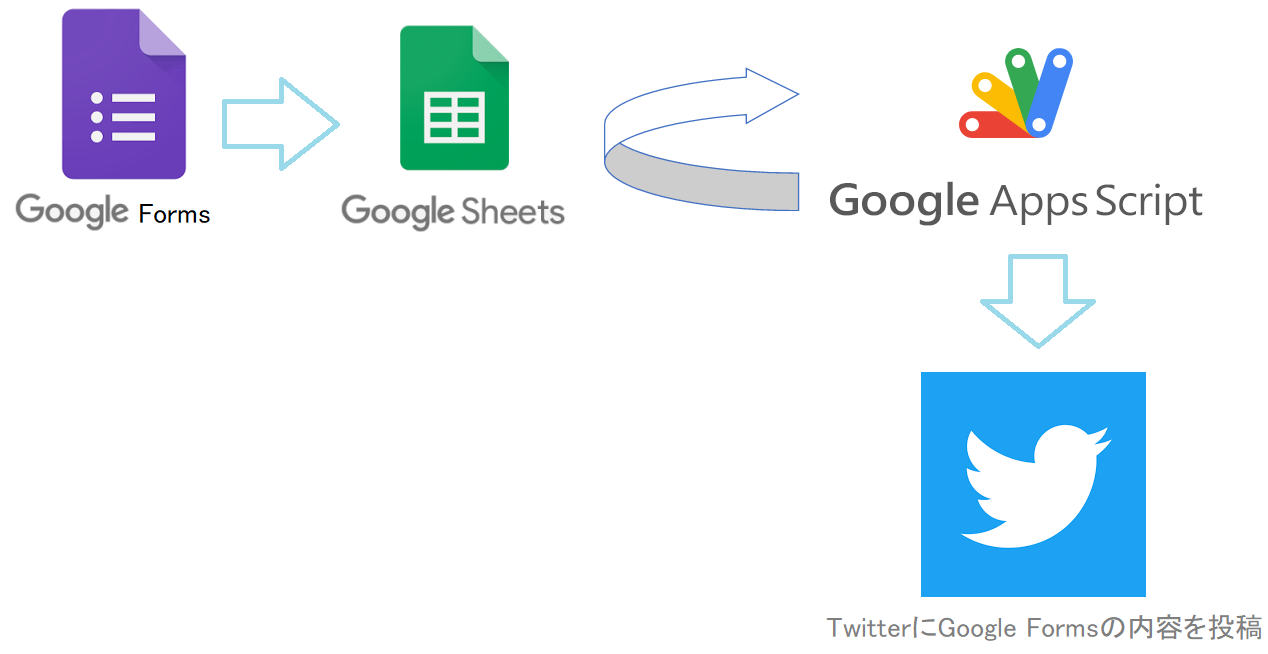
連携の最終形態イメージ
第1章 まずは、TwitterのAPI利用申請
事前に必要なもの
・電話番号認証済みのTwitterアカウント
注意事項
デベロッパーツールの登録・API申請はすべて英文になります。
APIの利用申請には英文が必要になります。
ちょっと長いですが、2020年4月時点の手順を記載しておきます。
-
APIを使うアカウントでTwitterにログインした状態にします。
-
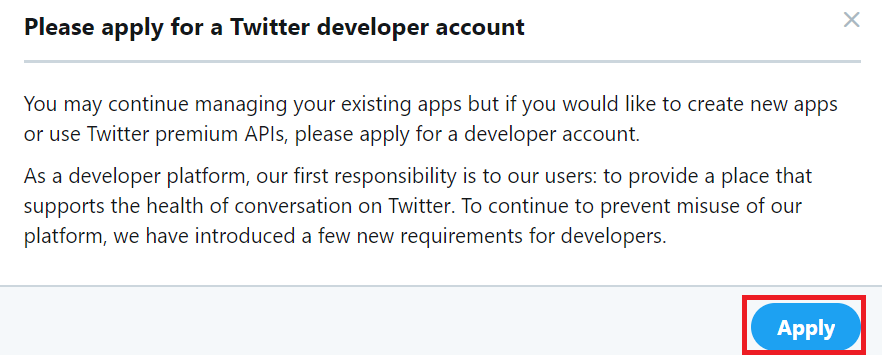
Twitter Developerサイトへアクセスします。
https://developer.twitter.com/en/apps/ -
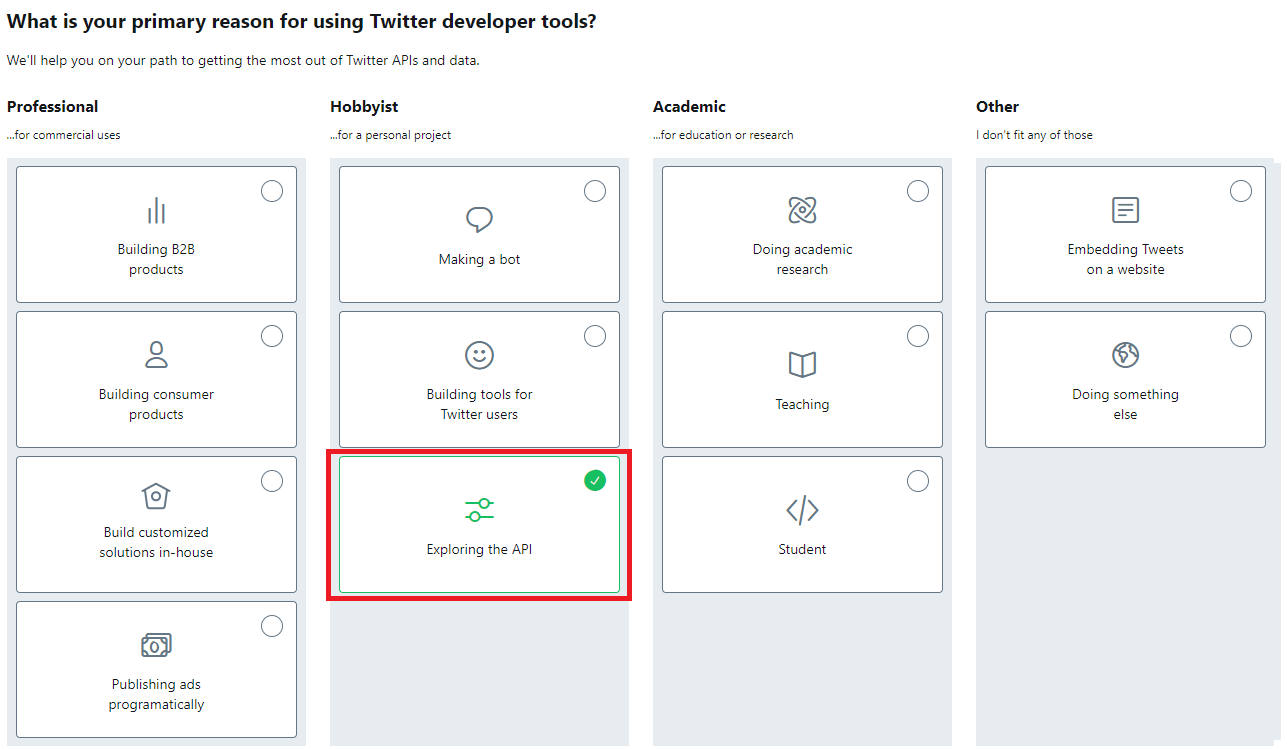
デベロッパーツールを使用する目的を選択します。
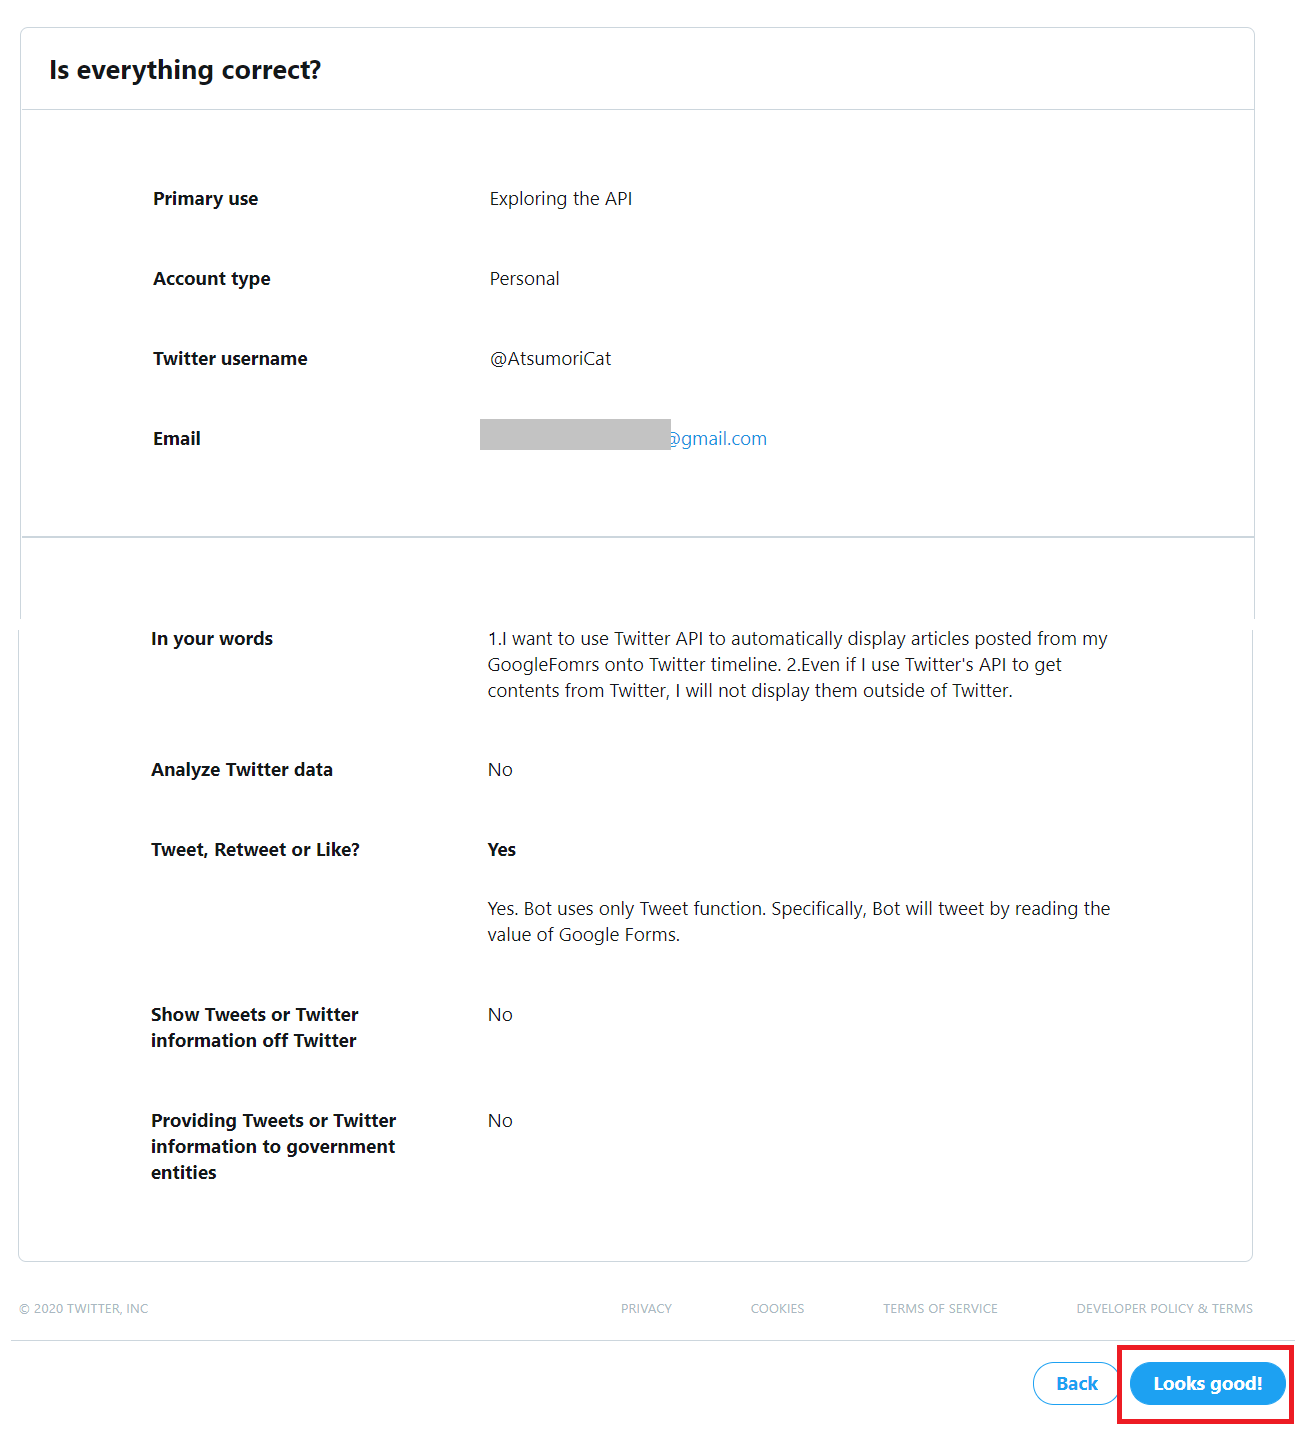
今回は、APIを使うので、Exploring the API を選択して、Nextボタンをクリック。
-
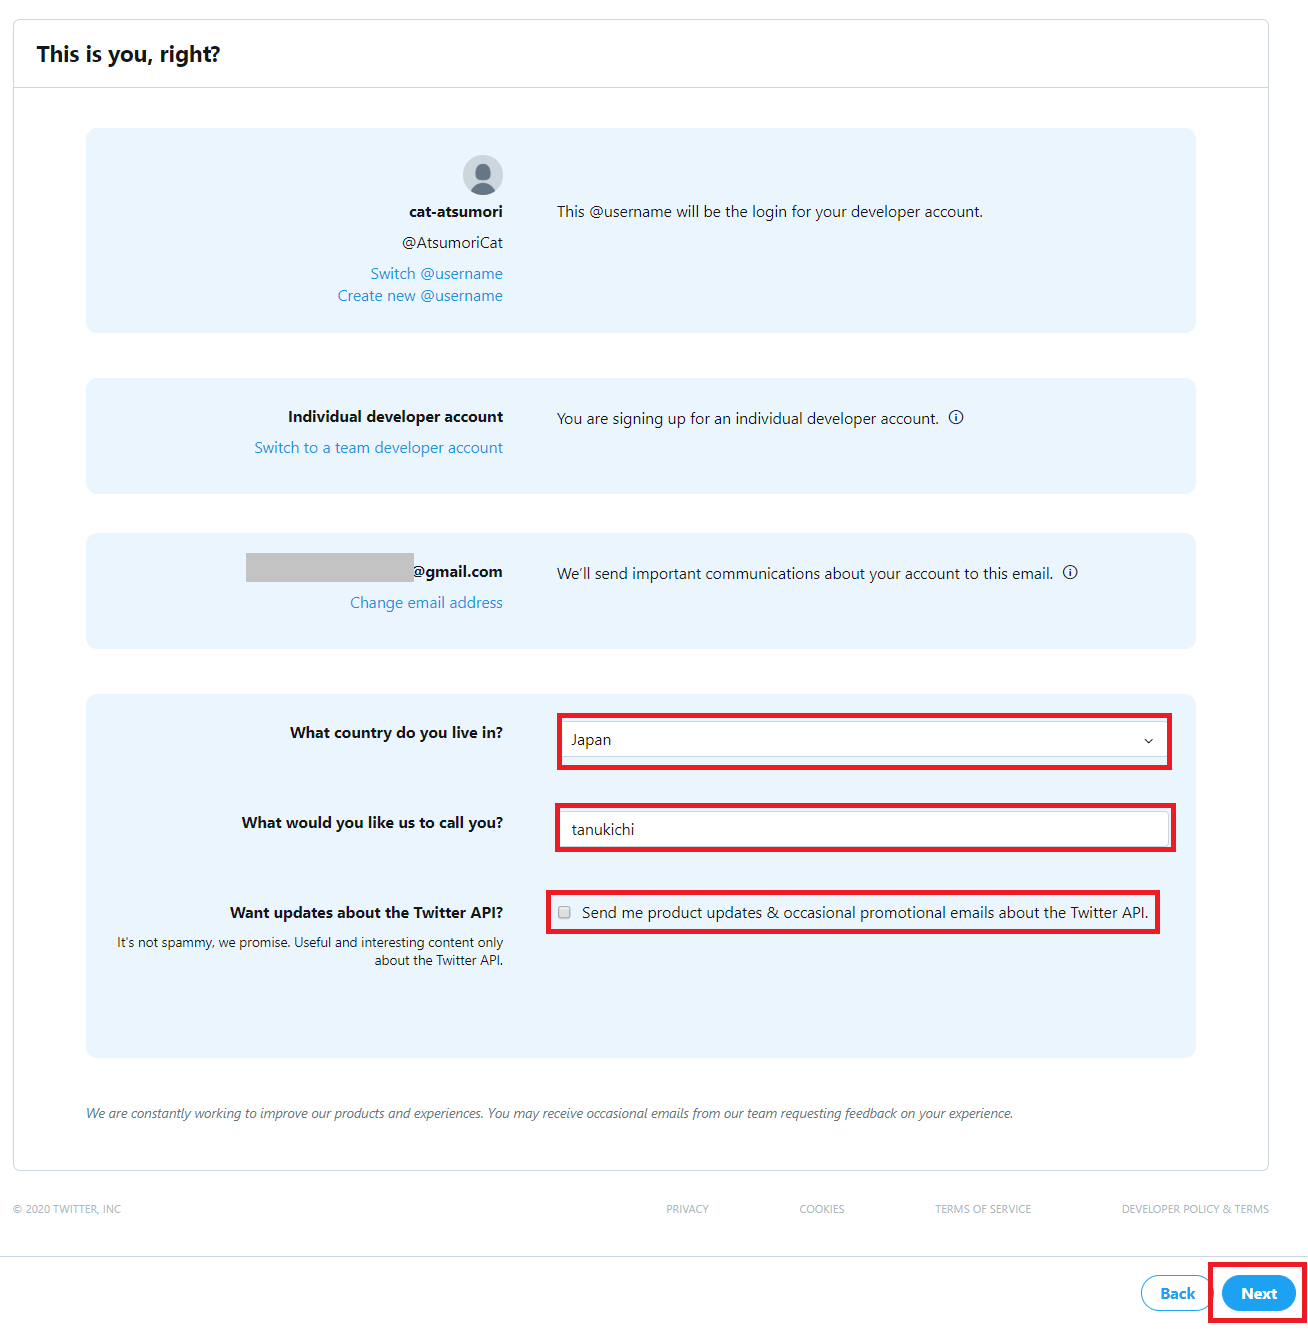
住んでいる国とニックネームを記入して、次へボタンをクリックします。
※ 電話番号による認証が済んでない場合は、ここで登録が必要になります。

APIに関する更新情報のメールで受信したい場合は、
Send me product updates & occasional promotional emails about the Twitter API.
にチェックを入れる。
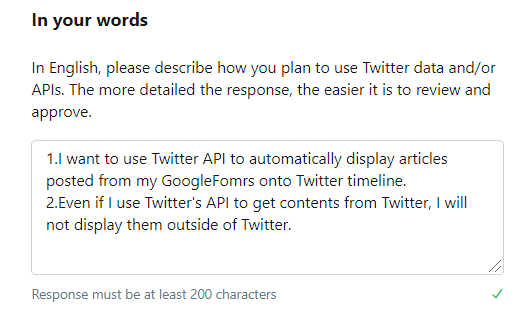
7. Twitter APIを使用する目的・理由を200文字以上の英文で回答します。
Q1
' 日本語訳
API、Twitterデータの利用方法を教えてください。

' 英文
In English, please describe how you plan to use Twitter data and/or APIs. The more detailed the response, the easier it is to review and approve.
A1
'日本語
1.私のGoogleFormsに投稿した記事をTwitterのAPIを利用して、Twitterのタイムラインにも自動的に表示されるようにしたい。
2.APIを利用しTwitterからのコンテンツを取得して、Twitter以外で表示させることはありません。

'英文
1.I want to use Twitter API to automatically display articles posted from my GoogleFomrs onto Twitter timeline.
2.Even if I use Twitter's API to get contents from Twitter, I will not display them outside of Twitter.
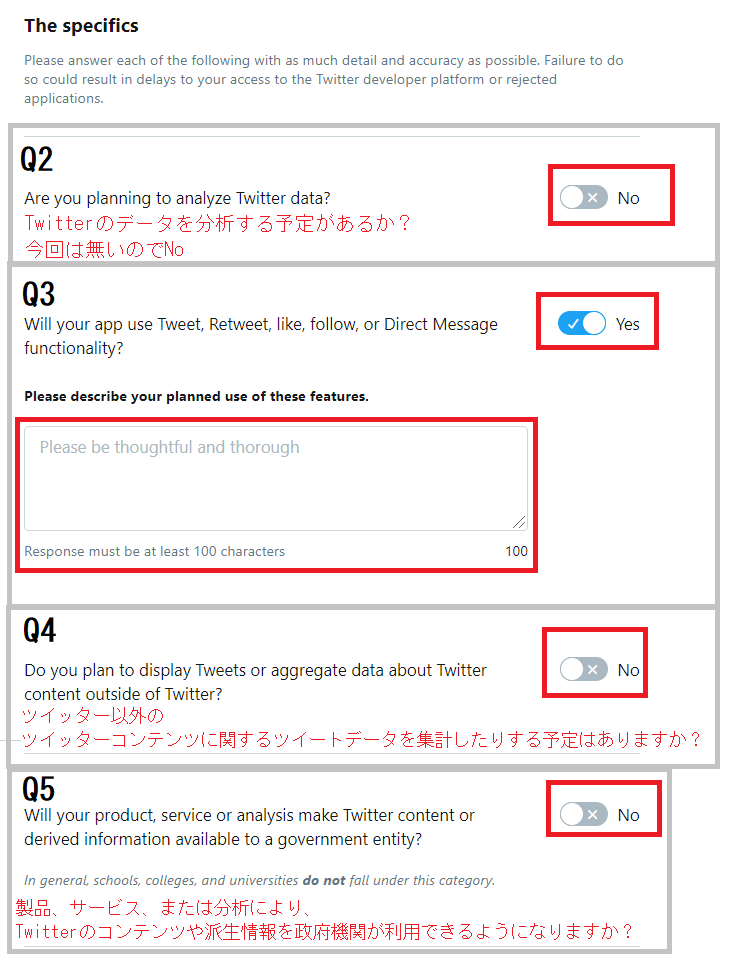
詳細な質問
Q2
分析しないのでNo
Q3
' 日本語訳
アプリはツイート、リツイート、いいね、フォロー、ダイレクトメッセージ機能を使用しますか?

' 英文
Will your app use Tweet, Retweet, like, follow, or Direct Message functionality?
A3
' 日本語訳
はい。
このBotはツイート機能のみを使用します。具体的には、BotはGoogleフォームの値を読み取ってツイートします。

' 英文
Yes.
Bot uses only Tweet function. Specifically, Bot will tweet by reading the value of Google Forms.
Q4、Q5
質問の内容がよくわからんけどNo で良いと思う…
問題なければLooks Good!をクリック
利用規約にチェックを入れてSubmit Applicationボタンをクリック
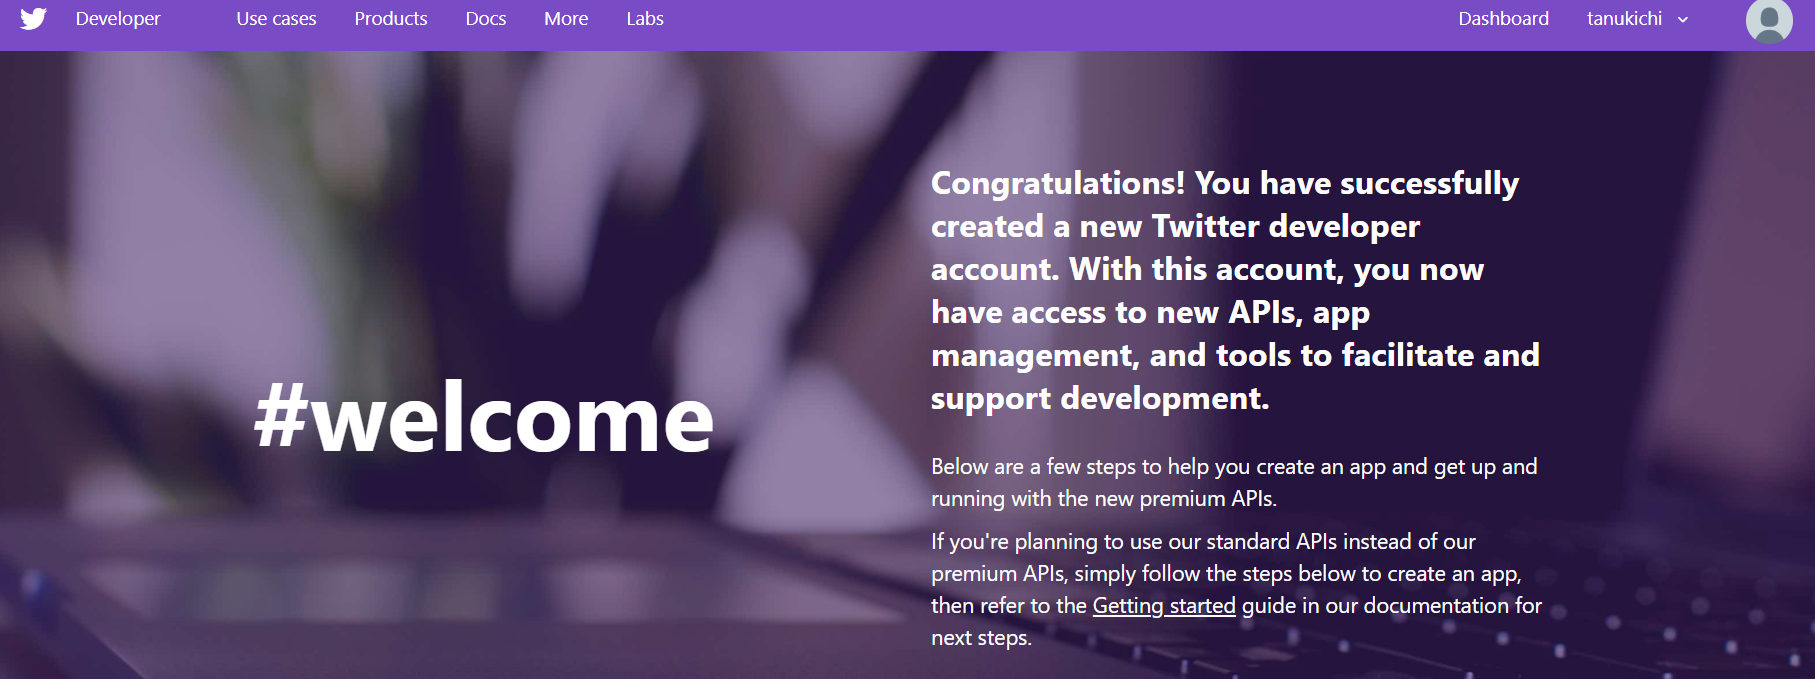
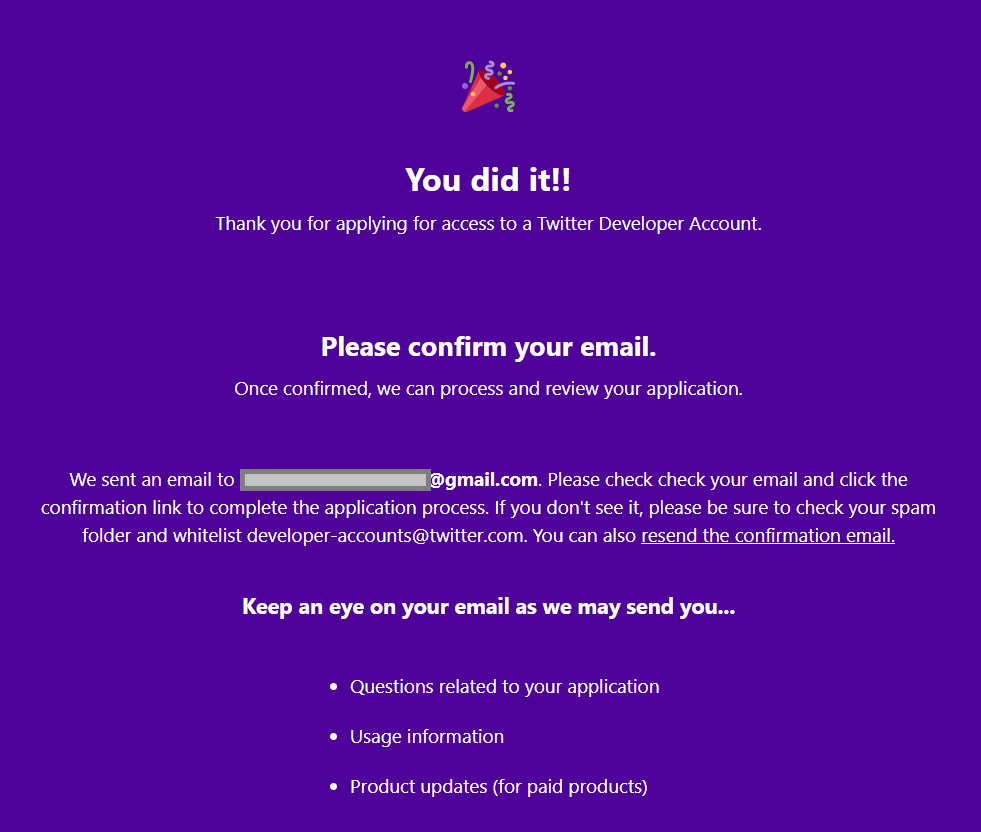
Twitter Developerアカウントの申請完了
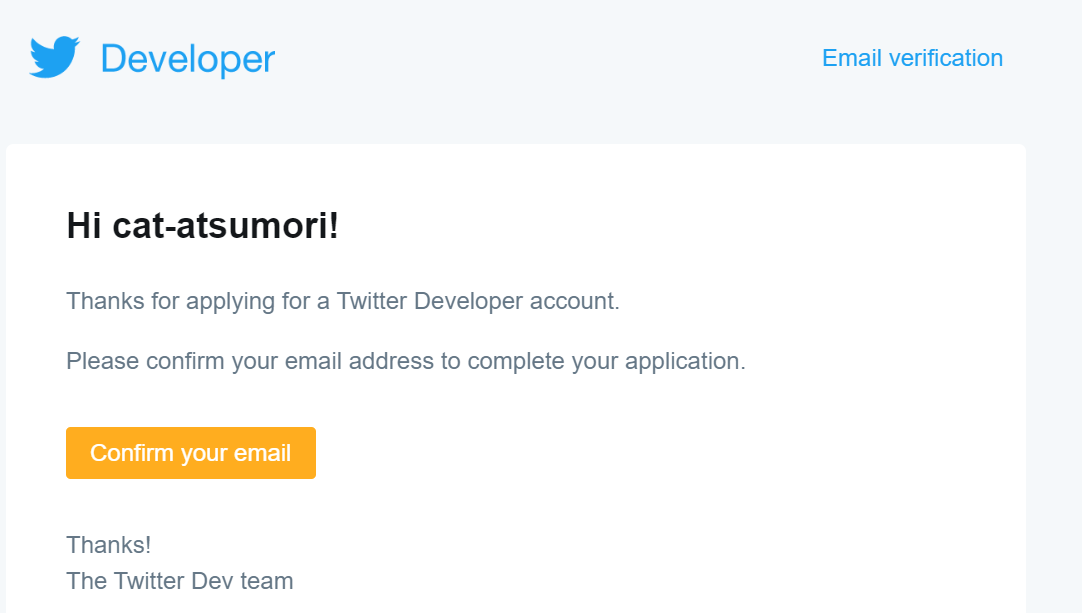
登録したメールアドレス宛てにDeveloperチームからメールが来ます。
Twitter Developerからのメール
Confirm your email をクリックしてDeveloperアカウントの登録完了です。
第2章 Twitterアプリケーションの登録
Create an appボタンをクリックして、アプリケーション登録を行います。
アプリケーション名(App name)
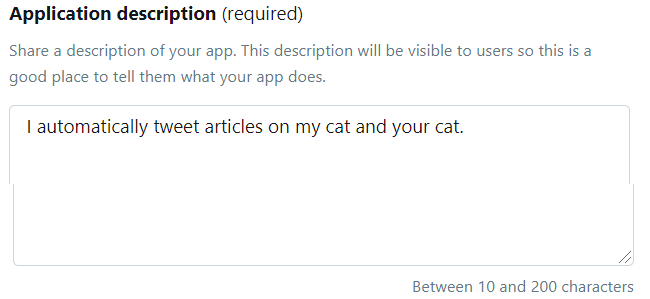
アプリケーションの説明(Application description)
私の猫とあなたの猫に関する記事を自動的にツイートします。
I automatically tweet articles on my cat and your cat.
WebサイトのURL(Website URL)
アプリの利用にはTwitterにサインインが必要か
(Allow this application to be used to sign in with Twitter)
チェックを入れる

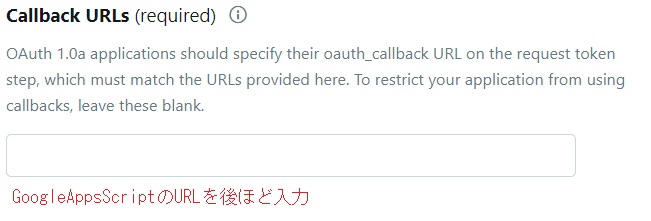
コールバックURL(Callback URLs)
※後ほど設定することになるため、ブランクにしておく。
適当なURLだとエラーになる。
下記の設定はすべてブランクでOK。
・利用規約のURL(Terms of Service URL)
・プライバシーポリシーのURL(Privacy policy URL)
・組織名(Organization name)
・組織のウェブサイトのURL(Organization website URL)
アプリの使用方法の説明
(Tell us how this app will be used)
※100文字以上必須になるため、ちょっと頑張る必要がある。
例:アプリはGoogle Appsスクリプトを使用して、動物の写真などのコンテンツをTwitterタイムラインに投稿します。
(The app uses Google Apps scripts to post content, including animal photos, to the Twitter timeline..)
すべて入力が完了したらCreateボタンをクリックします。
利用規約を確認してCreateボタンをクリックします。
これでTwitterアプリの登録は完了になります。
APIキーの取得
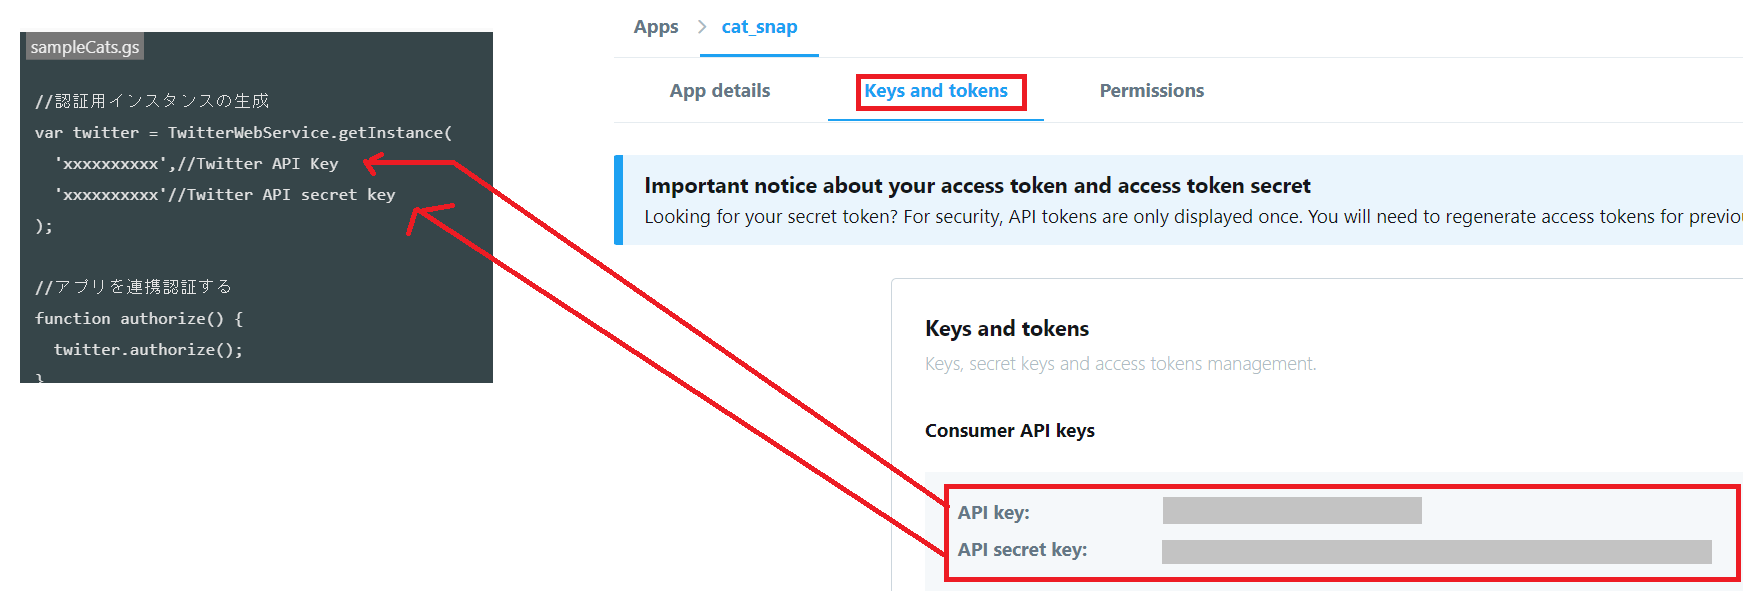
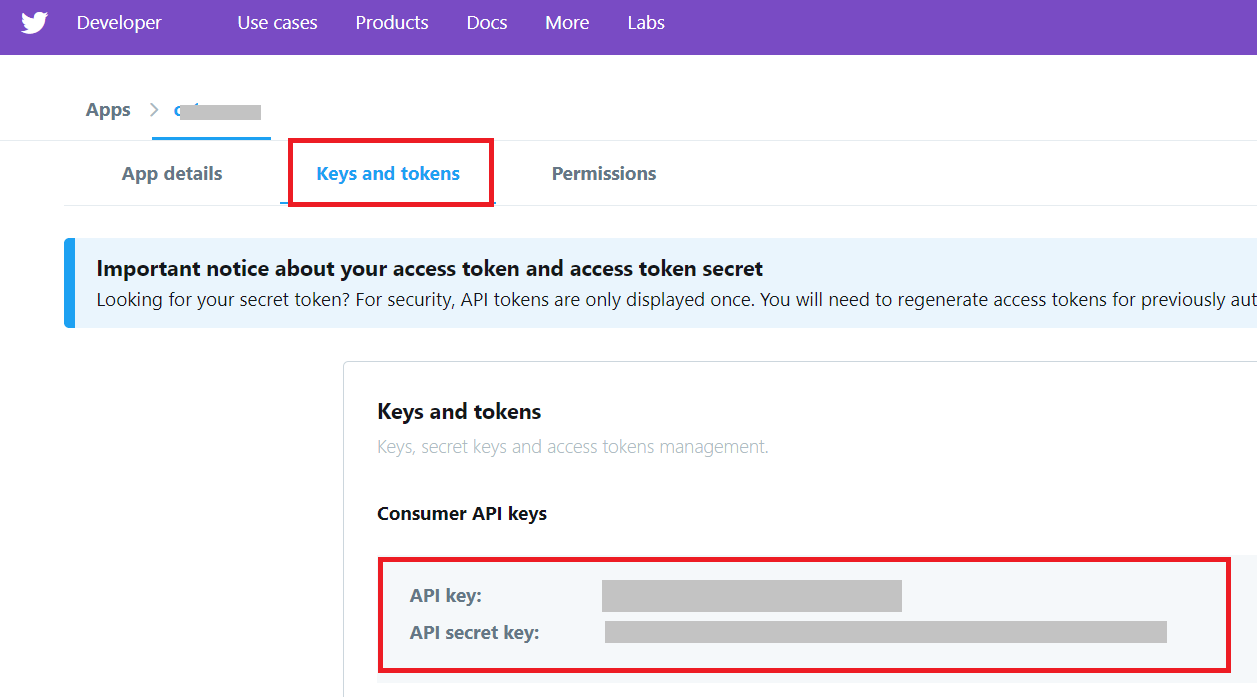
Keys and tokensタブをクリックするとAPIキーを確認することができます。
後ほど、Google Apps Script内に記載する必要があるため、どこかにメモしておきます。
第3章 Google Apps Scriptからツイートする
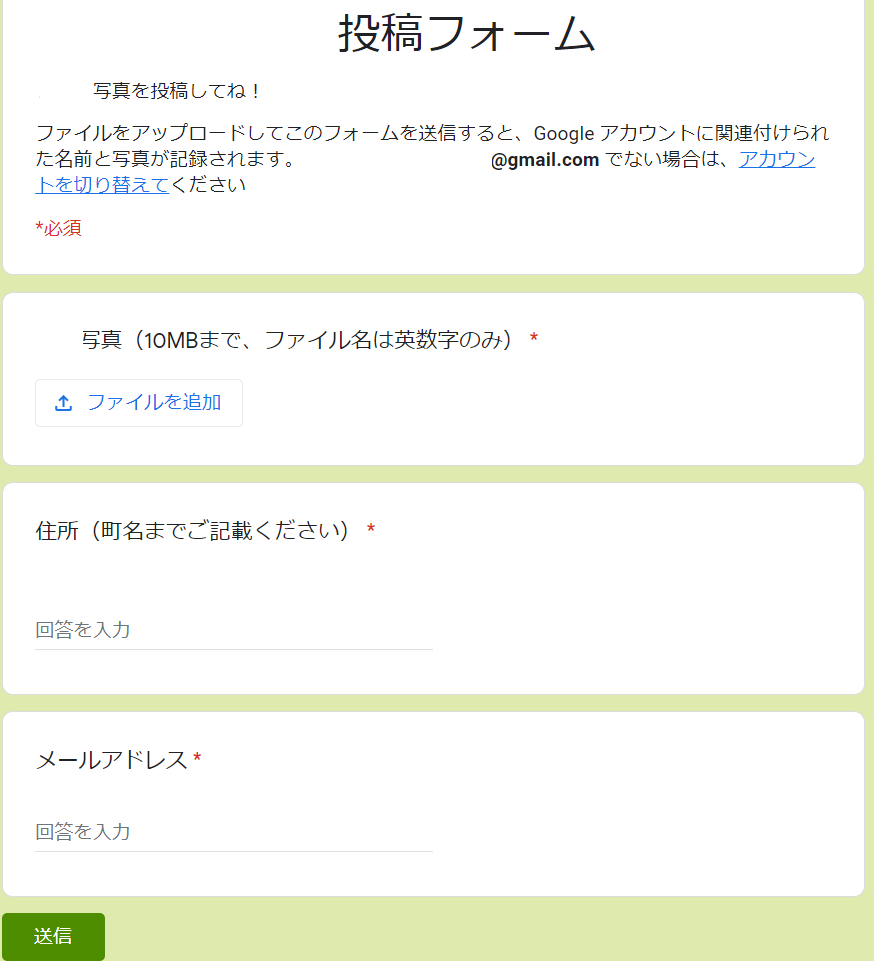
Formsにいくつかテストデータを投入し、結果のスプレッドシートを開く。
※GoogleFormsから作った場合は、項目順に列が並びます。
A列にタイムスタンプ、B列に写真のURLを入力し、B列のURLの写真をツイートするようにします。
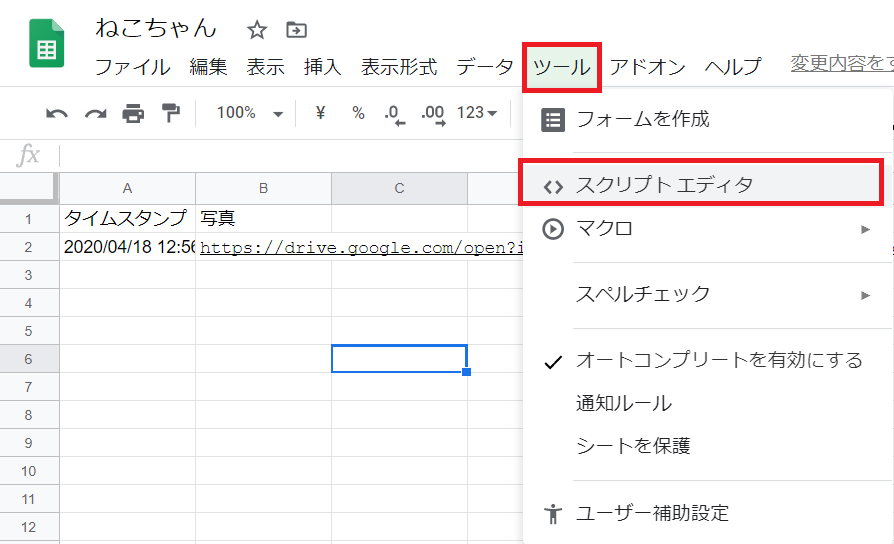
スプレッドシートのメニューからツール→スクリプトエディタを開きます。
※ここでは、GoogleAppsScriptのプロジェクト名はsampleCatsにしておきます。
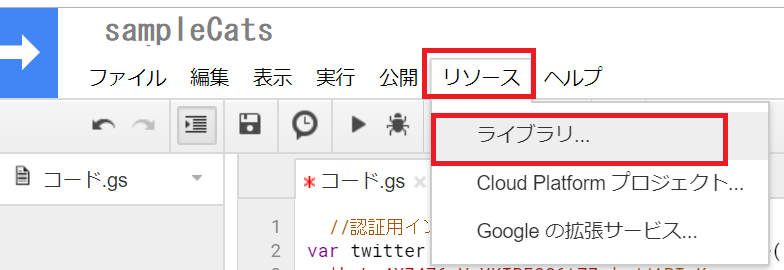
ライブラリの追加
-
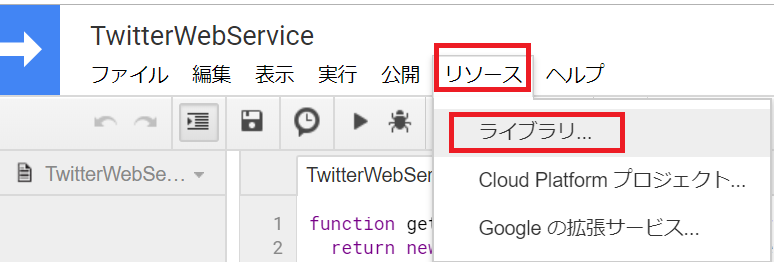
ライブラリに TwitterWebService の最新版を追加する必要があります。
-
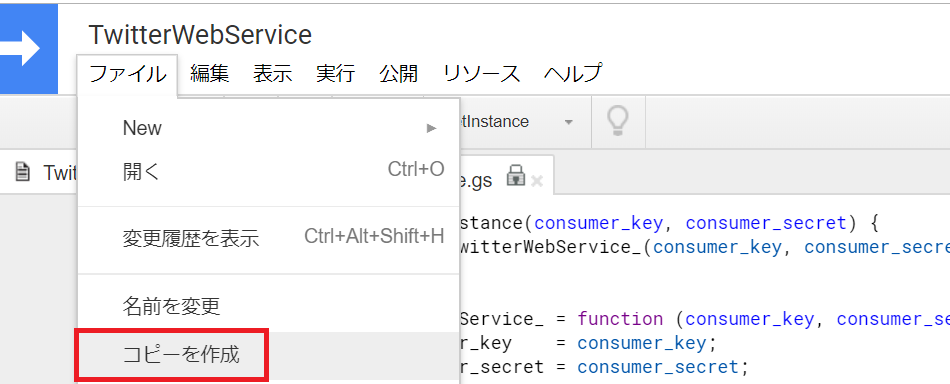
下記のリンクを開き、TwitterWebService の基ファイルを開きます。
https://script.google.com/d/1rgo8rXsxi1DxI_5Xgo_t3irTw1Y5cxl2mGSkbozKsSXf2E_KBBPC3xTF/edit
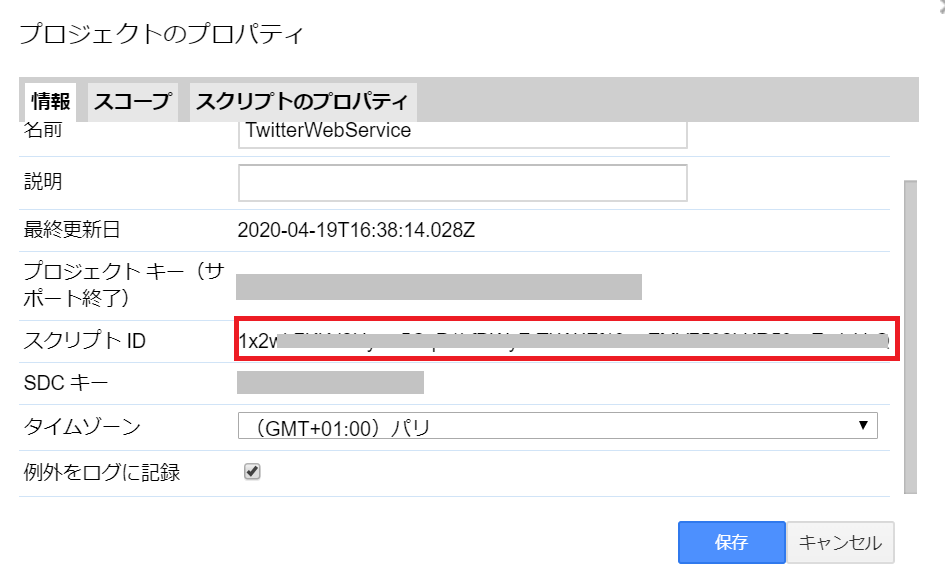
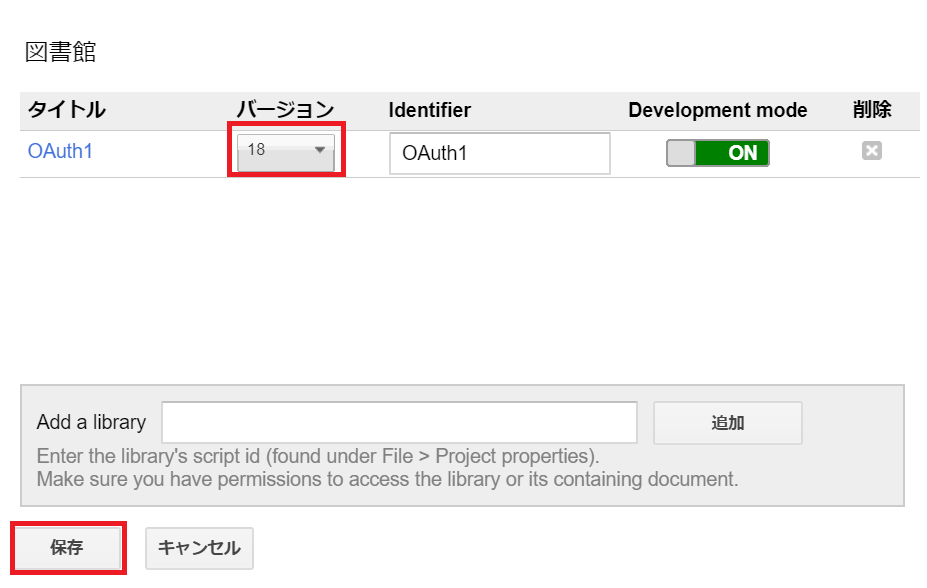
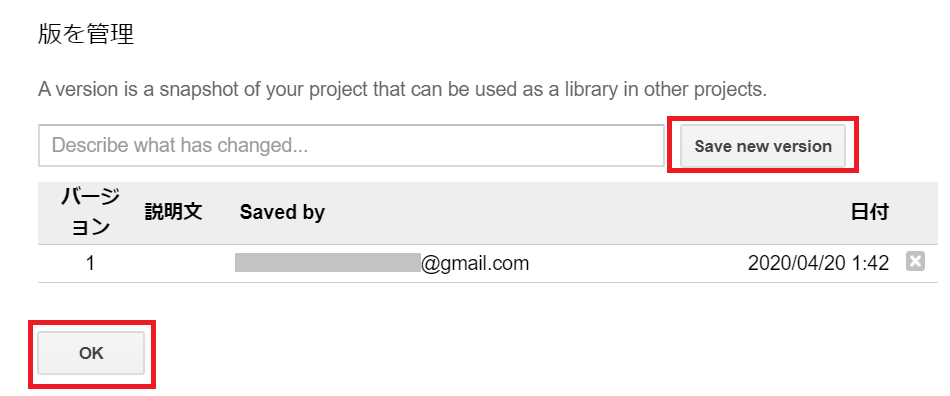
11. 手順 No1のsampleCatsプロジェクトのライブラリ追加画面からAdd a library 欄へコピーした「スクリプト ID」の値を貼り付け、追加して、バージョン1を選択、「無効」となっているスイッチをクリックして「ON」にして保存
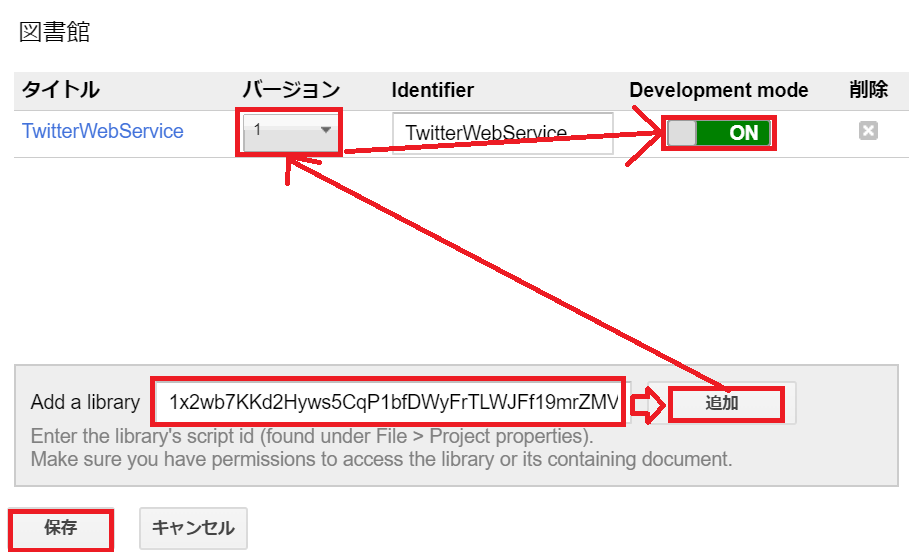
ライブラリの登録は以上です。
コールバックURLの登録
「Twitter側のログイン認証が終わったらこのURLに戻して」というURLをTwitterアプリ側に指定します。
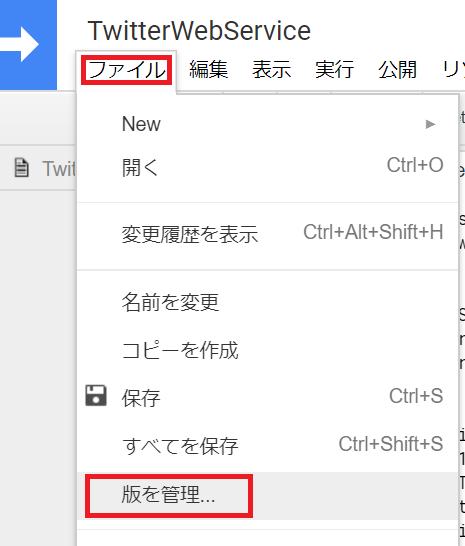
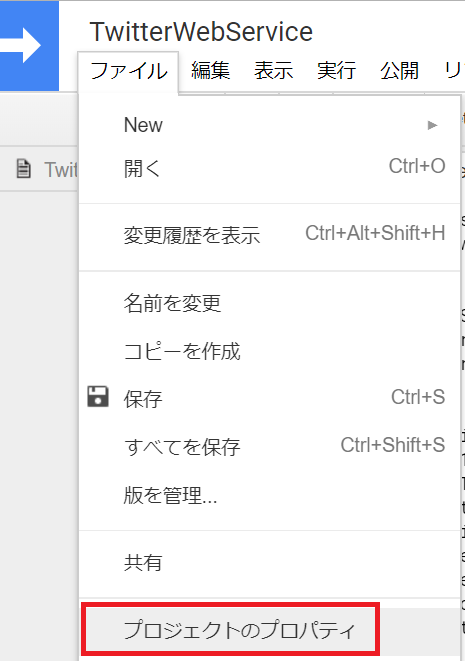
sampleCatsプロジェクトのスクリプトIDをメモしておきます。
上部メニュー → ファイル → プロジェクトのプロパティ
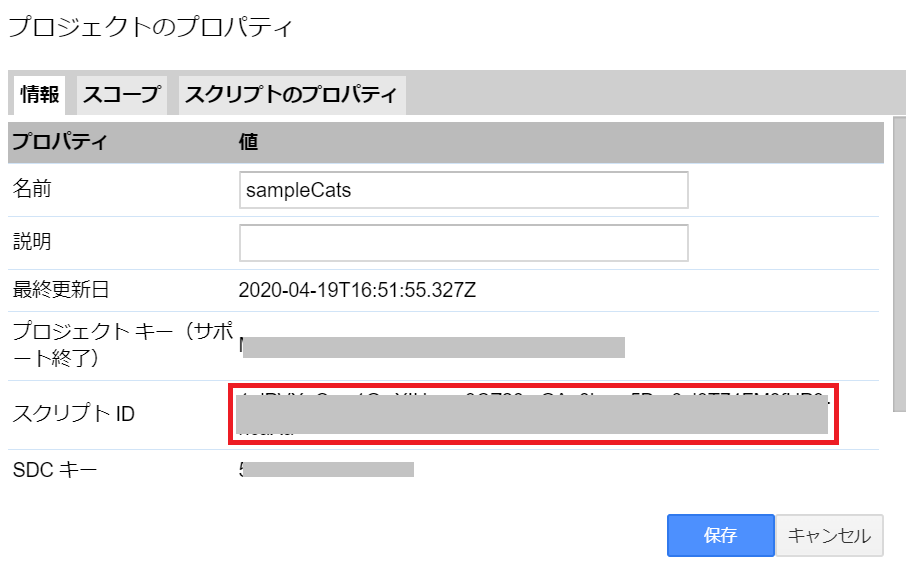
Twitter Developerサイトにアクセスし、作成済みのアプリを編集モードで開きます。
アプリ作成時にブランクだったコールバックURLsに下記のURLを指定します。
※sampleCatsプロジェクトのスクリプトIDをURL内に埋め込みます。
https://script.google.com/macros/d/スクリプトID/usercallback
連携認証の確認
sampleCatsプロジェクトの画面に下記のソースを貼り付けます。
//認証用インスタンスの生成
var twitter = TwitterWebService.getInstance(
  'xxxxxxxxxx',//Twitter API Key
  'xxxxxxxxxx'//Twitter API secret key
);

//アプリを連携認証する
function authorize() {
  twitter.authorize();
}

//認証を解除する
function reset() {
  twitter.reset();
}

//認証後のコールバック
function authCallback(request) {
  return twitter.authCallback(request);
}
Twitter API Key、Twitter API secret keyはDeveloperツールの作成済みアプリケーションの
Keys and tokensのタブから取得します。
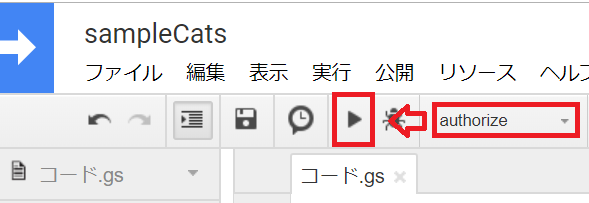
関数authorize()を実行して本人確認のURLが発行する
実行結果のログに本人認証用URLが表示されます。
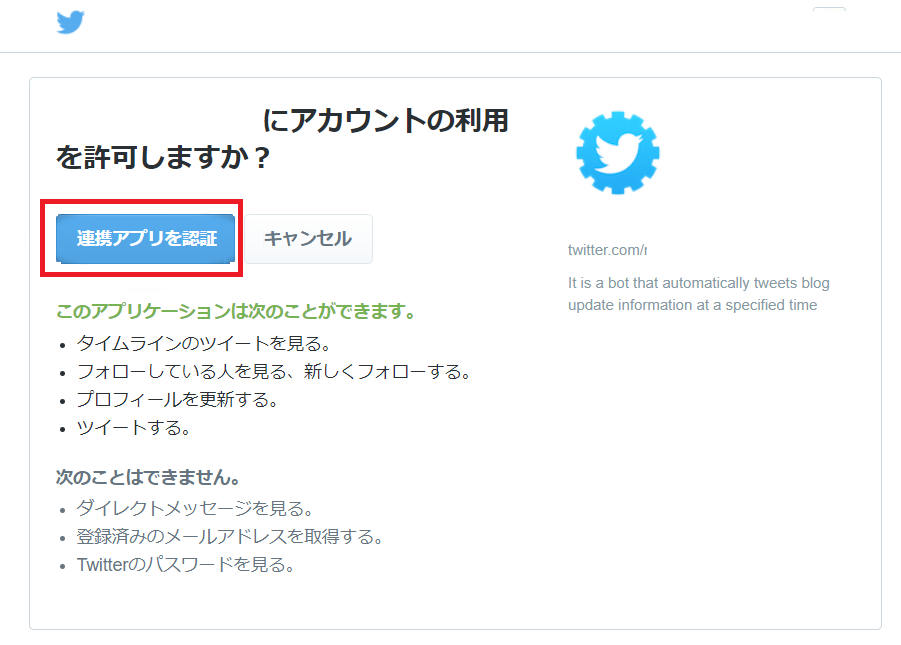
本人認証用URLにアクセスして、連携アプリを認証をクリックします。
ブラウザ上に Successが表示されると連携認証は完了になります。
//認証用インスタンスの生成
var twitter = TwitterWebService.getInstance(
  '################',//API Key
  '##############################'//API secret key
);

//アプリを連携認証する
function authorize() {
  twitter.authorize();
}

//認証を解除する
function reset() {
  twitter.reset();
}

//認証後のコールバック
function authCallback(request) {
  return twitter.authCallback(request);
}

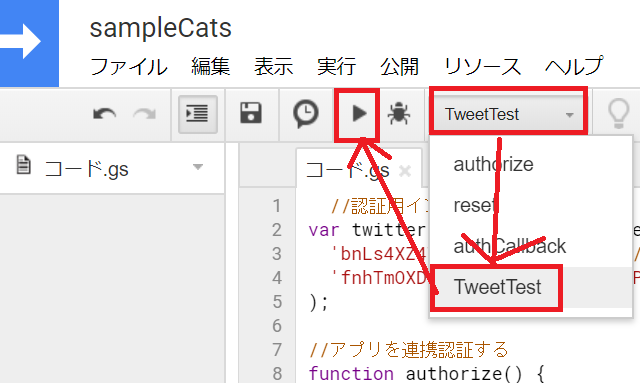
// 投稿テスト用
function TweetTest() {

  var service  = twitter.getService();
  var endPointUrl = 'https://api.twitter.com/1.1/statuses/update.json';
  var response = service.fetch(endPointUrl, {
    method: 'post',
    payload: {
      status: 'ねこをツイートするよ。#ねこ'
    }
  });
}
実行した結果がツイートされればOKです。
Googleスプレッドシートの値をツイートする
下記のサンプルコードでは、Googleスプレッドシートの値をGAS側で読み込みツイートを行います。
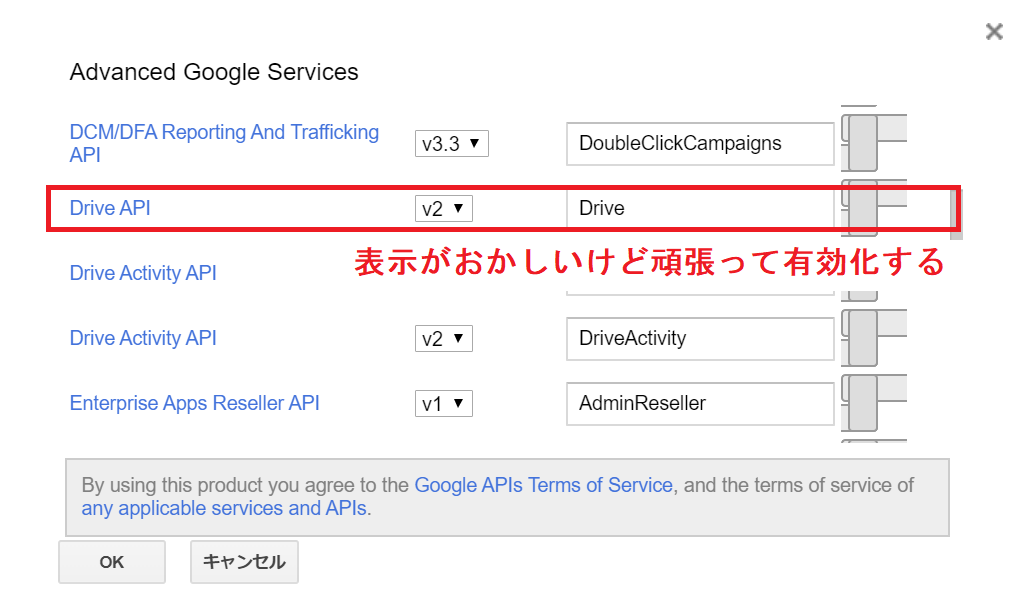
Google DriveAPIの有効化
Google Apps Scriptの上部メニューからリソース→Googleの拡張サービスを選択する。
Googleスプレッドシート連携のサンプルコード
  //認証用インスタンスの生成
var twitter = TwitterWebService.getInstance(
  '##########',//API Key
  '###########################'//API secret key
);

//アプリを連携認証する
function authorize() {
  twitter.authorize();
}

//認証を解除する
function reset() {
  twitter.reset();
}

//認証後のコールバック
function authCallback(request) {
  return twitter.authCallback(request);
}


// ツイートを投稿
function postTweet() {


  var service  = twitter.getService();
  var endPointUrl = 'https://api.twitter.com/1.1/statuses/update.json';
  var endPointMedia  = 'https://upload.twitter.com/1.1/media/upload.json';

  var sheet = SpreadsheetApp.getActiveSpreadsheet().getSheetByName('フォームの回答 1');
  var lastRow = sheet.getLastRow();

  //スプレッドシートの最終行の行番号をしているする
  var row = Math.ceil(lastRow);

  //スプレッドシートの最終行のタイトルとURLを取得
  var title = sheet.getRange(row, 1).getValue();
  var url = sheet.getRange(row, 2).getValue();
 var strID = url.slice(33);

  var imgUrl = "https://drive.google.com/uc?export=view&id=" + strID ;
  Logger.log(imgUrl);

  //GoogleDriveのURLから画像をBLOB形式に変換する
  var imgBlob = UrlFetchApp.fetch(imgUrl).getBlob();
  var img_64  = Utilities.base64Encode(imgBlob.getBytes());

  var img_option = {
    'method' : "POST",
    'payload': {
      'media_data': img_64
    }
  };

  //スプレッドシートの最終行の住所列を取得
  var address = sheet.getRange(row, 3).getValue() + 'の ねこ。';

  //今日の日付、曜日を取得
  var header = getDateInfo() ;

  //最後に固定のハッシュタグ
  var footer ='#てすとたぐ';

  var postMessage = header + '\n\n' + address+ '\n\n' + footer;


  var image_upload = JSON.parse(service.fetch(endPointMedia, img_option));

  var sendoption = {
    'status'   : postMessage,
    'media_ids': image_upload['media_id_string']
  };

  service.fetch(endPointUrl, {method: 'post', payload: sendoption});
}
Google Apps Scriptの実行トリガー
Google Apps Scriptのメニューから時計アイコンのメニューをクリックすると
Google Apps Scriptのトリガー設定が可能です。
Googleスプレッドシートに行が追加されたタイミング等で実行することも可能です。
以上が、TwitterとGoogle Apps Scriptとの連携手順になります。
