はじめに
はじめまして、Hridoy Chandra Das(リド)(@ihridoydas)です。Jetpack Compose で、Google Pay 特典のスクラッチ カードのようなスクラッチ カードを作成します。
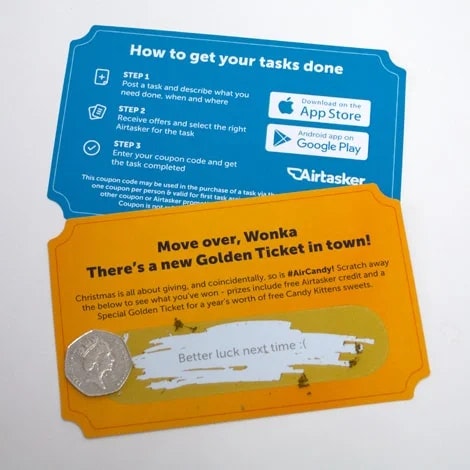
スクラッチカードは競技用に設計されたカードで、多くの場合、PIN を隠すために薄いカードストックまたはプラスチックで作られており、1 つまたは複数の領域に隠された情報が含まれており、不透明なカバーを剥がすことで明らかになります。
ユーザーはデバイスの画面上でカードを仮想的に「スクラッチ」「指で擦る」し、その下に隠されたコンテンツを明らかにすることができます。 このコンテンツは、クーポン コード、割引、その他の特典を紹介するためによく使用されます。
設定:
プロジェクトに使うデペンデンシーライブラリー:
build.gradle.kts
//...Jetpack composeの必要なデペンデンシーライブラリー
 .
 .
implementation "androidx.compose.foundation:foundation:1.5.4"
Compose Component Canvas を使用してviewを作成したい思います。
(Dragged Path) data クラスを作成
DraggedPath.kt
import androidx.compose.ui.graphics.Path

data class DraggedPath(
    val path: Path,
    val width: Float = 50f
)
キャンバスをスクラッチする (ScratchingCanvas)
特別な PointerInput Modifier (pointerInteropFilter) を使用すると、動き (マウス、ペン、指、トラックボール) イベントの報告に使用されるオブジェクトを処理できます。
ScratchingCanvas.kt
@ExperimentalComposeUiApi
@Composable
fun ScratchingCanvas(
    overlayImage: ImageBitmap,
    baseImage: ImageBitmap,
    modifier: Modifier = Modifier,
    movedOffset: Offset?,
    onMovedOffset: (Float, Float) -> Unit,
    currentPath: Path,
    currentPathThickness: Float,
) {
    Canvas(
        modifier = modifier
            .size(220.dp)
            .clipToBounds()
            .clip(RoundedCornerShape(size = 16.dp))
            .pointerInteropFilter {
                when (it.action) {
                    MotionEvent.ACTION_DOWN -> {
                        println("CurrentPath/ACTION_DOWN: (${it.x}, ${it.y})")
                        currentPath.moveTo(it.x, it.y)
                    }

                    MotionEvent.ACTION_MOVE -> {
                        println("MovedOffset/ACTION_MOVE: (${it.x}, ${it.y})")
                        onMovedOffset(it.x, it.y)
                    }
                }
                true
            }
    ) {
        val canvasWidth = size.width.toInt()
        val canvasHeight = size.height.toInt()
        val imageSize = IntSize(width = canvasWidth, height = canvasHeight)

        // Overlay Image to be scratched
        drawImage(
            image = overlayImage,
            dstSize = imageSize
        )

        movedOffset?.let {
            currentPath.addOval(oval = Rect(it, currentPathThickness))
        }

        clipPath(path = currentPath, clipOp = ClipOp.Intersect) {
            // Base Image after scratching
            drawImage(
                image = baseImage,
                dstSize = imageSize
            )
        }
    }
}
Compose Graphics の基礎の詳細
完全な作成ビュー(ScratchCardScreen)
https://gist.github.com/ihridoydas/652fbea7eabe645c60c46844239fc2ac
ScratchCardScreen.kt
@OptIn(ExperimentalMaterial3Api::class)
@ExperimentalComposeUiApi
@Composable
fun ScratchCardScreen(onBackPress: () -> Unit) {
    val overlayImage = ImageBitmap.imageResource(id = R.drawable.bg)
    val baseImage = ImageBitmap.imageResource(id = R.drawable.won)

    val currentPathState = remember { mutableStateOf(DraggedPath(path = Path())) }
    val movedOffsetState = remember { mutableStateOf<Offset?>(null) }

    Scaffold(
        topBar = {
            TopAppBar(
                colors = topAppBarColors(
                    Color.Black
                ),
                title = {
                    Text(
                        text = "Scratch Card Effect",
                        style = TextStyle(color = Color.White)
                    )
                },
                navigationIcon = {
                    IconButton(
                        onClick = {
                            onBackPress()
                        },
                        modifier = Modifier
                    ) {
                        Icon(
                            Icons.Filled.ArrowBack,
                            contentDescription = "Back",
                            tint = Color.White
                        )
                    }
                },
                actions = {
                    IconButton(onClick = {
                        movedOffsetState.value = null
                        currentPathState.value = DraggedPath(path = Path())
                    }) {
                        Icon(
                            imageVector = Icons.Default.Clear,
                            contentDescription = null,
                            tint = Color.White
                        )
                    }
                }
            )
        },
        content = {
            Column(
                modifier = Modifier
                    .padding(it)
                    .fillMaxSize(),
                horizontalAlignment = Alignment.CenterHorizontally,
                verticalArrangement = Arrangement.Center
            ) {
                Box(
                    modifier = Modifier
                        .fillMaxSize()
                        .background(Color.Black)
                ) {
                    // Scratch Card Implementation
                    ScratchingCanvas(
                        overlayImage = overlayImage,
                        baseImage = baseImage,
                        modifier = Modifier.align(Alignment.Center),
                        movedOffset = movedOffsetState.value,
                        onMovedOffset = { x, y ->
                            movedOffsetState.value = Offset(x, y)
                        },
                        currentPath = currentPathState.value.path,
                        currentPathThickness = currentPathState.value.width,
                    )
                }

            }
        }
    )
}
結果:
次、SwiftUIでスクラッチビューを作成する方法をご紹介したいと思います。
以上、最後までお読みいただきありがとうございました。
