更新情報
2021/01 に OS の取得情報を更新しました。
経緯
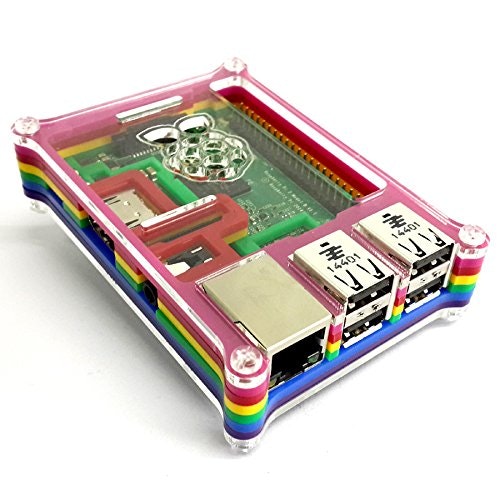
RASPBERRY PI 2 MODEL B をひょんなことから頂いたので、普通にサーバーとして設定していった時の作業記録です。
ちなみにカバーは下記を使用しています。 Raspberry Pi 2 Model B アクリル ケース 虹色 レインボー

MicroSD に Ubuntu をインストール
Raspberry Pi 2 Model B をインストールしてSSH接続できるようにしてみる や DD for Windows でOSを書き込むよ! を参考に SD カードの準備をします。
上記の URL は Windows を使用していますが、Mac のコマンドラインでも勿論可能です。
今回使用したのは、 Ubuntu 14.04 です。
ubuntu wiki より、Ubuntu 14.04 LTS です
【2021.01 追記】
Raspberry Pi のバージョンよってインストール出来る Ubuntu のイメージが変わります(Ubuntu 自体のバージョンは LTS 及び、最新のバージョンがありそうです)
Install Ubuntu on a Raspberry Pi 2, 3 or 4
ログイン情報
- 上記のimgのログインユーザ/パスワードは下記のよう
| Login username | ubuntu |
|---|---|
| password | ubuntu |
Raspberry に MicroSD カードを入れた後に起動し、上記のユーザ/パスワードでログイン。
DHCP 設定があらかじめ出来ているので軽くインターネットに疎通できているか確認後、パッケージの更新をしていきます。
- 疎通確認
$ ping 8.8.8.8
- パッケージの更新
$ sudo apt-get update   # アップデートのためのリストを取得
$ sudo apt-get upgrade  # アップデートを実際に行う
- 確認コマンド
$ cat /etc/lsb-release  # Ubuntuのバージョン確認
$ uname -a              # アーキテクチャの確認コマンド
リモート接続出来るように設定
- SSH 接続出来るようにパッケージのインストールします
$ sudo apt-get install openssh-server
- Ubuntu の IP アドレスを確認後、同ネットワーク内から SSH 接続します
$ ifconfig
$ ssh ubuntu@192.168.101.92
ubuntu@192.168.101.92's password:
Welcome to Ubuntu 14.04.3 LTS (GNU/Linux 3.18.0-20-rpi2 armv7l)

 * Documentation:  https://help.ubuntu.com/
Last login: Sun Sep 27 06:56:17 2015 from 192.168.101.91
ubuntu@ubuntu:~$
Ubuntu Server としてさらに設定
- git コマンドのインストール
$ sudo apt-get install git #  パッケージでインストール


$ git --version    # 確認
git version 1.9.1
- サーバーとして最低限必要そうなものをインストールします。
- ここは必要なパッケージのみで良いです
sudo apt-get install \
    wget \
    tree \
    telnet \
    nkf \
    mlocate \
    expect \
    ntp \
    dstat \
    vim \
    htop \
    iftop \
    traceroute \
    git \
    tig
- デフォルトのエディタを nano から vim へ変更します。
$ sudo update-alternatives --config editor   # エディタの設定コマンド

There are 4 choices for the alternative editor (providing /usr/bin/editor).

  Selection    Path                Priority   Status
------------------------------------------------------------
* 0            /bin/nano            40        auto mode
  1            /bin/ed             -100       manual mode
  2            /bin/nano            40        manual mode
  3            /usr/bin/vim.basic   30        manual mode
  4            /usr/bin/vim.tiny    10        manual mode

Press enter to keep the current choice[*], or type selection number: 3
update-alternatives: using /usr/bin/vim.basic to provide /usr/bin/editor (editor) in manual mode
ここまでで基本の設定はだいたい完了です。
あとはこれをベースにサーバーとしてアレンジしていきます。
日本語設定
/etc/default/locale
これが言語関連のファイルらしいです。
こちらに情報がないと、日本語の文字化けが発生します。
# locale
LANG=
LANGUAGE=
LC_CTYPE="POSIX"
…
…
なので、上記の設定ファイルに
LANG="en_US.UTF-8"をいれておきます。
$ cat /etc/default/locale
LANG="en_US.UTF-8"
あとは、再ログインすれば反映されています。
参考URL
第2回 Ubuntu 14.04 の Raspberry Pi 2 へのインストール
ubuntuのパッケージ管理システムapt-getの使い方Add Star
Ubuntuのバージョン確認とアーキテクチャ確認コマンド
Ubuntuでデフォルトのエディタをnanoからvimに変更
Ubuntu Server 14.04 で日本語環境設定がうまくいかないとき
Windows環境でtar.xzを解凍(展開)する方法
wiki.ubuntu.com/ARM/RaspberryPi