はじめに
前回の続きです。
oscarでカスタマイズを繰り返せば、私が開発したOriginallyTeeのような、C2CのECサイトを作ることも夢ではありません。
それでは今回はダッシュボードからの商品の追加と、カスタマイズの基礎を説明します。
設定の変更
商品追加前にsettings.pyとurls.pyの修正をします。html,css,js,画像ファイルの配置等に関する部分で、Djangoの初期設定でよく行われる変更です。
import osの追加
TEMPLATESの"DIRS"修正
MEDIA,STATICまわりの追加
$ mkdir static でディレクトリ作成
import os #追加

#...

TEMPLATES = [
    {
        "BACKEND": "django.template.backends.django.DjangoTemplates",
        "DIRS": [
            os.path.join(BASE_DIR, "templates"), #変更
        ],
        "APP_DIRS": True,
        "OPTIONS": {
            "context_processors": [
                "django.template.context_processors.debug",
                "django.template.context_processors.request",
                "django.contrib.auth.context_processors.auth",
                "django.contrib.messages.context_processors.messages",
                # 以下追加
                "oscar.apps.search.context_processors.search_form",
                "oscar.apps.checkout.context_processors.checkout",
                "oscar.apps.communication.notifications.context_processors.notifications",
                "oscar.core.context_processors.metadata",
            ],
        },
    },
]
#...

#以下追加
MEDIA_URL = "/media/"
MEDIA_ROOT = os.path.join(BASE_DIR, "media")

STATIC_URL = "/static/"
STATIC_ROOT = "staticfiles"
STATICFILES_DIRS = [os.path.join(BASE_DIR, "static")]
from django.apps import apps
from django.urls import include, path
from django.contrib import admin

# 以下追加
from django.contrib.staticfiles.urls import static
from django.conf import settings

urlpatterns = [
    path('i18n/', include('django.conf.urls.i18n')),

    # The Django admin is not officially supported; expect breakage.
    # Nonetheless, it's often useful for debugging.

    path('admin/', admin.site.urls),

    path('', include(apps.get_app_config('oscar').urls[0])),
]

# 開発環境用に以下追加
if settings.DEBUG:
    urlpatterns += static(settings.MEDIA_URL, document_root=settings.MEDIA_ROOT)
また日本の環境に合わせてsettings.pyを変更します。これによりメールを実際に送信する代わりにコンソールへ表示します。また日本語・日本時間・日本円で設定されます。
# コンソールに送信
EMAIL_BACKEND = 'django.core.mail.backends.console.EmailBackend'

#LANGUAGE_CODE = "en-us"
LANGUAGE_CODE = "ja"

#TIME_ZONE = "UTC"
TIME_ZONE = "Asia/Tokyo"

USE_I18N = True

USE_L10N = True

USE_TZ = True

#以下追加
OSCAR_DEFAULT_CURRENCY = "JPY"
OSCAR_CURRENCY_FORMAT = "¤#,##0"
商品の追加
ECサイトらしくするため商品を1件追加します。
以下の手順で、サイト管理者を作成してダッシュボードにログインします。
-
$ python manage.py createsuperuserでUsername、Email address、Passwordを入力して管理者を作成 -
python manage.py runserverで表示されたURLの後ろにdashboardを付けてアクセス (例 http://127.0.0.1:8000/dashboard) -
先ほど入力したUsername,Passwordでログイン
商品の作成の前に商品クラス、カテゴリ、取引業者の設定が必要なので、先にこちらを作成します。
後から変更も可能なので、入力は適当で大丈夫です。
商品クラスを作成
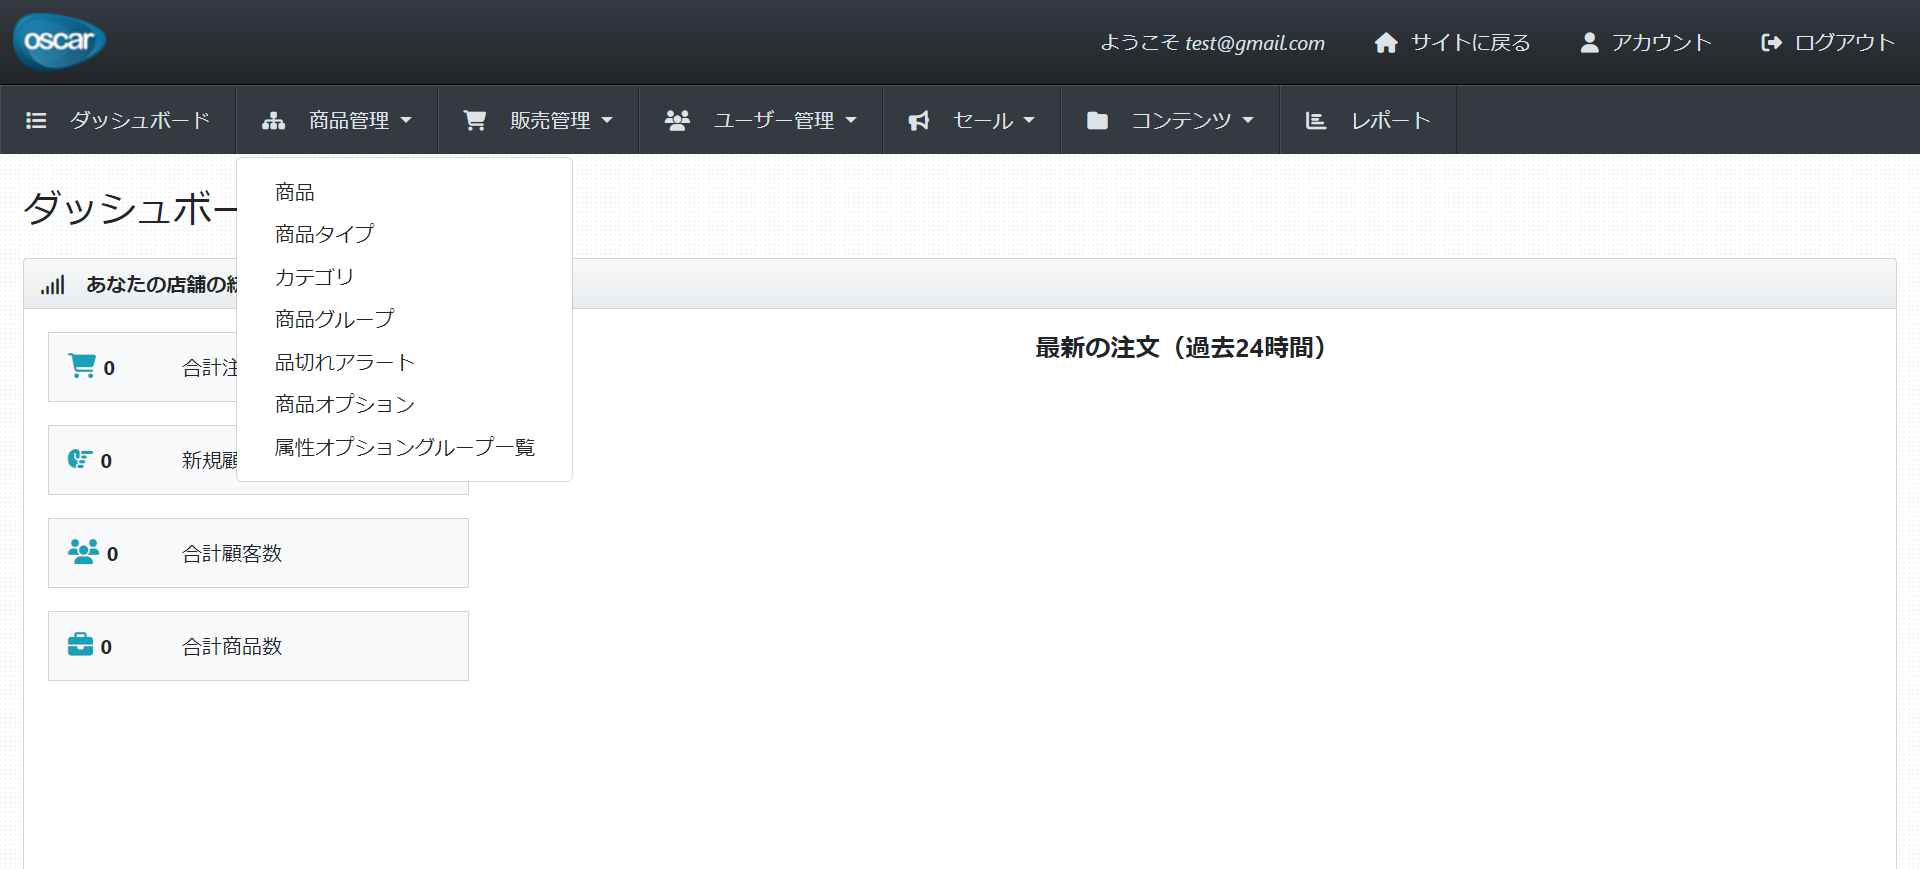
- 商品管理 > 商品タイプをクリック
- 新規商品タイプ作成をクリック
- 名称を入力(他は初期設定でOK)して保存
カテゴリを作成
- 商品管理 > カテゴリをクリック
- 新規カテゴリ作成をクリック
- 名称、Positionを入力(他は初期設定でOK)して保存
取引業者を作成
- 販売管理 > 取引業者をクリック
- 新規取引業者作成をクリック
- 取引業者名を入力(他は初期設定でOK)して保存
ここまでで準備ができました
商品を作成
- 商品管理 > 商品をクリック
- 新商品追加から 作成したクラスを選択してクリック
3. 商品名、説明、カテゴリ、商品画像、取引業者、SKU,在庫数、価格を入力して保存
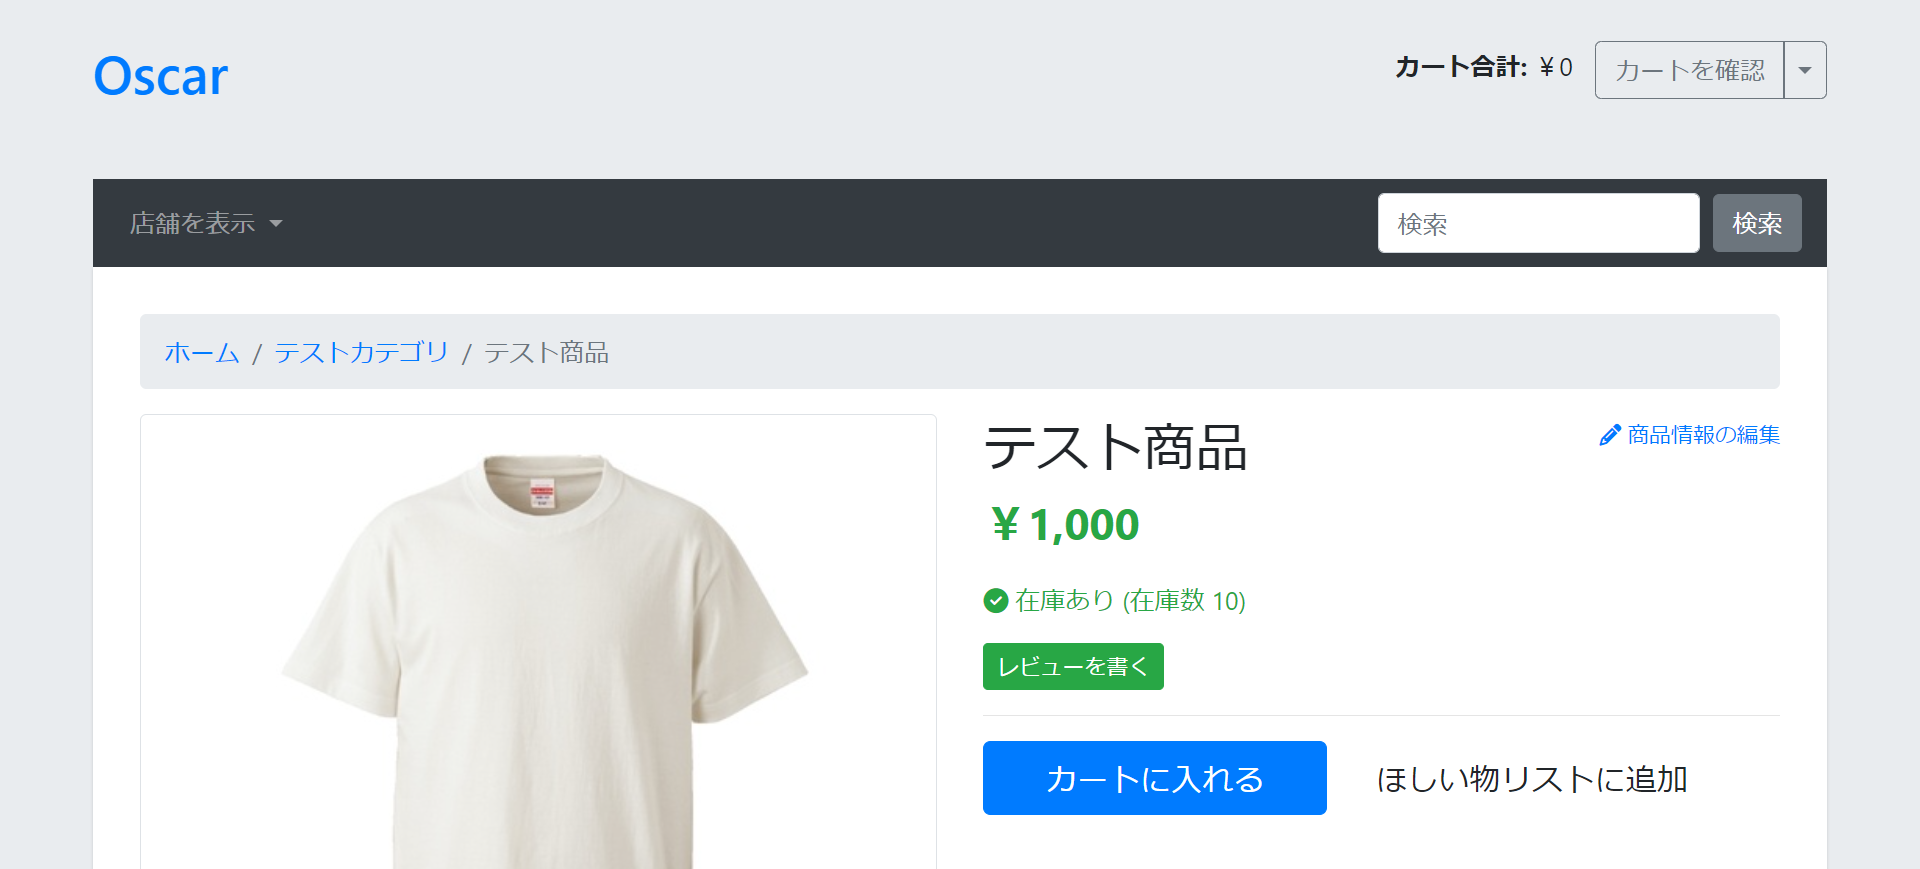
サイトを確認をクリックして、商品ページが表示されれば成功です。

ECサイトをカスタマイズする
商品を作成することで、ECサイトらしくなってきました。ここからは自分の好みにカスタマイズする方法をドキュメントに沿って説明します。
前回の説明通り、oscarはcatalogueやbasketなどの、機能ごとのアプリに分割されています。
カスタマイズするには、カスタマイズしたい部分を含むアプリを開発環境にフォークして、それを上書きすることになります。
(なのでデフォルトの機能をそのまま使うアプリに関してはフォークしなくても問題ありません)
まずアプリをフォークして配置するためのディレクトリをルート直下に作成します。ここではyourappsfolderとしています。
$ mkdir yourappsfolder
$ touch yourappsfolder/__init__.py
今回はorderアプリをフォークします
$ python manage.py oscar_fork_app order yourappsfolder
Creating package yourappsfolder\order
Creating admin.py
Creating app config
Creating models.py
Creating migrations folder
Replace the entry 'oscar.apps.order.apps.OrderConfig' with 'yourappsfolder.order.apps.OrderConfig' in INSTALLED_APPS
yourappsfolder直下にorderアプリがフォークされているはずです。
上の Replace the entry 'oscar.apps.order.apps.OrderConfig' with 'yourappsfolder.order.apps.OrderConfig' in INSTALLED_APPS のコメント通りsettings.py のINSTALLED_APPSを修正します。
INSTALLED_APPS = [

#...

# 'oscar.apps.order.apps.OrderConfig',
'yourappsfolder.order.apps.OrderConfig', #追加
カスタマイズの仕組み
このフォークによってyourappsfolder.order.apps.OrderConfig内で修正した部分は上書きして実行します。また何も記載しなかった部分はoscar.apps.order.apps.OrderConfig内、つまり元のフレームワークのコードをそのまま実行します。
この仕組みがoscarのカスタマイズの仕組みとなります。これさえおさえておけば、元のフレームワークのコードと見比べることで、自分でカスタマイズできるようになります。
例1 注文番号の表示方法のカスタマイズ
注文番号を123456のような表示からSHOP-123456と変更したいケース考えます。
まず、この部分のコードがある場所を探します。前回の機能一覧から辺りをつけて、フレームワークのコードを読み解きましょう。
読み解いた結果、仮想環境名PracticeOscar以下の
PracticeOscar\Lib\site-packages\oscar\apps\order\utils.py
OrderNumberGeneratorクラスにあることを発見しました。
#フレームワーク側で見付けたコード
# こちら側には手を加えない

class OrderNumberGenerator(object):
    """
    Simple object for generating order numbers.

    We need this as the order number is often required for payment
    which takes place before the order model has been created.
    """

    def order_number(self, basket):
        """
        Return an order number for a given basket
        """
        return 100000 + basket.id
utils.pyを作成して、クラス継承を行えばコードの上書きができます。ここは通常のpythonの処理ですね。
$ touch yourappsfolder\order\utils.py
# 元のコードをインポート
from oscar.apps.order.utils import OrderNumberGenerator as CoreOrderNumberGenerator

# クラス継承
class OrderNumberGenerator(CoreOrderNumberGenerator):

    def order_number(self, basket=None):
        num = super().order_number(basket)
        return "SHOP-%s" % num
商品の決済を進めると、注文番号の表示が変更されているのが分かると思います。
単純なカスタマイズであれば、上書きはPythonのクラス継承で行えるので簡単です。なのでカスタマイズしたい部分のコードを素早く見つけられるかが重要となります。
今回はここまでとします。お疲れさまでした。
次回予定
より複雑なカスタマイズを行う予定です。
便利なWebサイト
github
https://github.com/django-oscar/django-oscar
ドキュメント 最初のうちはここを見ることが一番多いと思います
https://django-oscar.readthedocs.io/en/latest/
フォーラム 過去の質問を見ることもできます
https://groups.google.com/g/django-oscar
https://app.slack.com/client/T1QSP0999/C1QUF61T3
oscarはdjangoで作られているので、開発時はこちらも参照します
https://github.com/django/django
https://docs.djangoproject.com/en/5.0/

