はじめに
PHP5系でCodeIgniter 2.0.xで開発されたシステムをPHP7系に移植する作業を依頼されました。
腕のいい開発者さんが作ったのでしょう。シンプルな中にも質実剛健のような作りで、見ていて気持ちがいいです。
ですが、この世に産み落とされてから早x年。
時代は、CodeIgniterからLaravelに移り、開発者さん自身もメンテナンスを放棄されてしまったようで、私のところへの依頼となりました。
さて、CodeIgniterの2.0.xから2.2までは問題なくアップデートができたのですが、3系へのアップグレード時に、使われていたSmartyが使えなくなりました。
そこで、CodeIgniter3系でSmartyのインストール方法を探しましたが、ロストテクノロジーなので、メチャメチャ苦労しました。
そのため、ここで導入方法を記録しておきます。
驚いたことに、Smartyの導入さえできれば、開発されたコードは、そのまま使えましたので、まだまだ現役稼働ができる見込みが立ちました。
システムのリフォーム? リストア? 蘇ると嬉しいですね。
今回のサンプルコードをGitHubにあげています。もし、参考になったのでしたら、スターをつけていただくとモチベーションがあがります
https://github.com/idani/CodeIgniter3.1-Smarty3.1-Smaple
環境
- php 7.3(5.4)
- 移行絡みでしたので、5系、7系の両方を用意して対応してます。
- CodeIgniter 3.1.10
- Smarty 3.1.33
CodeIgniterの特徴
さて、私、CodeIgniterって今回、所見でした。なので、自分用のメモとして触った感じをメモ。
applicationとsystemディレクトリに分かれています。
systemの機能を拡張したい場合でも、applicaitonディレクトリの方で、継承、上書きなどを行って独自にカスタマイズできることが可能です。
また、この構成のおかげで、Systemのバージョンアップをする場合にも、systemディレクトリを最新バージョンで上書きするだけで動くという、すっごい楽なメンテナンス性がよいですね。
開発環境構築
まずは、CodeIgniterを動作させるためのPHPの実行・開発環境を用意します。
https://github.com/idani/CodeIgniter3.1-Smarty3.1-Smaple
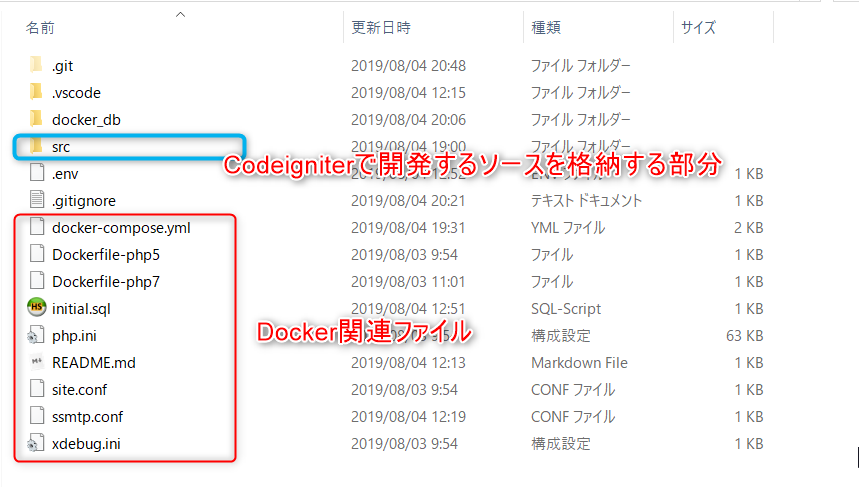
ディレクトリ構成は、このようになっています。
基本的にSRCの部分を差し替えて、いろいろのPHPの開発で使いまわしています。
このあたり、Dockerの部分がわからない場合は、以下のサンプルコードと記事を見てもらえれば理解できます。
今回は、SRCに、「codeignter-3.1.10」を展開からスタートしました。
smartyのインストール
docker-compose.ymlの最後の部分でComposerイメージを使ってインストールします。
まずは、以下のようにdocker-compose.ymlを書き換えます。
  composer:
    image: composer
    volumes:
      - ./src/application:/app
    command: composer require smarty/smarty
その上で、docker-composeを実行して、インストールを行います。
Smartyのダウンロードを行いますので、終了するまでネットワーク環境によりますが、2,3分かかります。
$ docker-compose up composer
Creating network "codeigniter31-smarty31-smaple_default" with the default driver
Creating codeigniter31-smarty31-smaple_composer_1 ... done
Attaching to codeigniter31-smarty31-smaple_composer_1
Gracefully stopping... (press Ctrl+C again to force)
Stopping codeigniter31-smarty31-smaple_composer_1 ... done
CodeIgniterでのComposerの読み込み設定
「application/config/config.php」で「composer_autoload」をTrusにする。

config.phpに書いてありますが、
「application/vendor/autoload.php」を読み込む場合は、先のように「$config['composer_autoload'] = TRUE;」にするだけでOKです。
CodeIgniterのインストールしたディレクトリを変更する場合は、「$config['composer_autoload'] = '/path/to/vendor/autoload.php';」と設定します。
ディレクトリの作成
Smarty用のテンプレートディレクトリとテンプレートキャッシュ用のディレクトリを作成します。
application/views/templates
application/views/templates_c
の2つのディレクトリをchmod 777で作成しておきます。
Smarty用のライブラリ作成
参考文献記載のライブラリを作成して、CodeIgniterとSmartyの橋渡しをします。
ここで、CodeIgniter側の制限ですが、ファイル名とクラス名は合わせる必要があり、また、すでにSmartyクラスはあるので、「Smartie」としています。
ここは気持ち悪いのですが、後ほど、ライブラリの読み込み時に「Smarty」に補正をかけます。
<?php  if (!defined('BASEPATH')) exit('No direct script access allowed');

/**
 * Smartie Class
 *
 * @package        CodeIgniter
 * @subpackage     Libraries
 * @category       Smarty
 * @author         Kepler Gelotte
 * @link           http://www.coolphptools.com/codeigniter-smarty
 */

class Smartie extends Smarty {

    var $debug = false;

    function __construct()
    {
        parent::__construct();

        $this->setTemplateDir(APPPATH . "views/templates");
        $this->setCompileDir(APPPATH . "views/templates_c");
        if ( ! is_writable( $this->compile_dir ) )
        {
            // make sure the compile directory can be written to
            @chmod( $this->compile_dir, 0777 );
        }

        // Uncomment these 2 lines to change Smarty's delimiters
        // $this->left_delimiter = '{{';
        // $this->right_delimiter = '}}';

        $this->assign( 'FCPATH', FCPATH );     // path to website
        $this->assign( 'APPPATH', APPPATH );   // path to application directory
        $this->assign( 'BASEPATH', BASEPATH ); // path to system directory

        log_message('debug', "Smarty Class Initialized");
    }

    function setDebug( $debug=true )
    {
        $this->debug = $debug;
    }

    /**
     *  Parse a template using the Smarty engine
     *
     * This is a convenience method that combines assign() and
     * display() into one step.
     *
     * Values to assign are passed in an associative array of
     * name => value pairs.
     *
     * If the output is to be returned as a string to the caller
     * instead of being output, pass true as the third parameter.
     *
     * @access    public
     * @param    string
     * @param    array
     * @param    bool
     * @return    string
     */
    function view($template, $data = array(), $return = FALSE)
    {
        if ( ! $this->debug )
        {
            $this->error_reporting = false;
        }
        $this->error_unassigned = false;

        foreach ($data as $key => $val)
        {
            $this->assign($key, $val);
        }

        if ($return == FALSE)
        {
            $CI =& get_instance();
            if (method_exists( $CI->output, 'set_output' ))
            {
                $CI->output->set_output( $this->fetch($template) );
            }
            else
            {
                $CI->output->final_output = $this->fetch($template);
            }
            return;
        }
        else
        {
            return $this->fetch($template);
        }
    }
}
// END Smartie Class
ライブラリを読み込む
「application/config/autoload.php」の「libraries」の項目を以下のように修正します。
先程の「smartie」という部分を「smarty」に読み替えてロードしています。
/*
| -------------------------------------------------------------------
|  Auto-load Libraries
| -------------------------------------------------------------------
| These are the classes located in system/libraries/ or your
| application/libraries/ directory, with the addition of the
| 'database' library, which is somewhat of a special case.
|
| Prototype:
|
|	$autoload['libraries'] = array('database', 'email', 'session');
|
| You can also supply an alternative library name to be assigned
| in the controller:
|
|	$autoload['libraries'] = array('user_agent' => 'ua');
*/
$autoload['libraries'] = array('smartie'=>'smarty');
動作確認
デバッグメッセージを出力させるために、Configをいじります。
今回は「4:All Messages」を設定します。
/*
|--------------------------------------------------------------------------
| Error Logging Threshold
|--------------------------------------------------------------------------
|
| You can enable error logging by setting a threshold over zero. The
| threshold determines what gets logged. Threshold options are:
|
|	0 = Disables logging, Error logging TURNED OFF
|	1 = Error Messages (including PHP errors)
|	2 = Debug Messages
|	3 = Informational Messages
|	4 = All Messages
|
| You can also pass an array with threshold levels to show individual error types
|
| 	array(2) = Debug Messages, without Error Messages
|
| For a live site you'll usually only enable Errors (1) to be logged otherwise
| your log files will fill up very fast.
|
*/
$config['log_threshold'] = 4;
ブラウザで「 http://127.0.0.1:8000/ 」を表示させます。
正常に動作したなら、以下のデフォルトのページが表示されます。
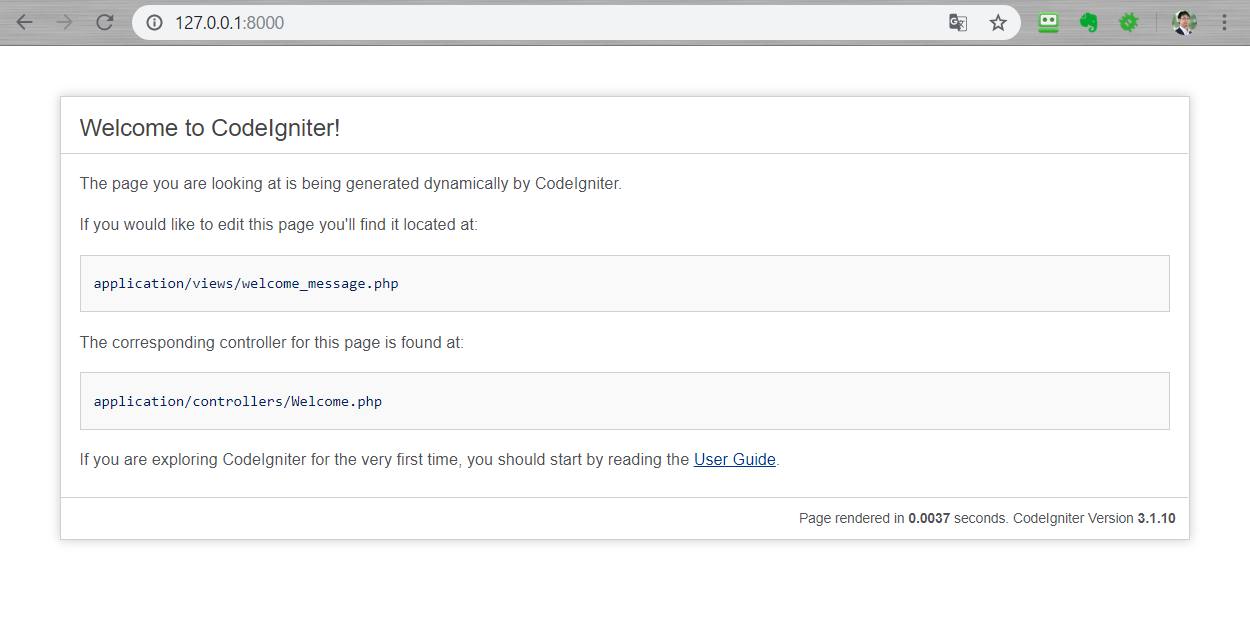
そして、ログにもSmartyライブラリの初期化完了のログ「Smarty Class Initialized」が出力されます。
・・・
INFO - 2019-08-04 20:07:34 --> Loader Class Initialized
DEBUG - 2019-08-04 20:07:34 --> Smarty Class Initialized
INFO - 2019-08-04 20:07:34 --> Controller Class Initialized
INFO - 2019-08-04 20:07:34 --> File loaded: /src/application/views/welcome_message.php
INFO - 2019-08-04 20:07:34 --> Final output sent to browser
DEBUG - 2019-08-04 20:07:34 --> Total execution time: 0.0578
サンプルを作成する
CodeIgniterが初見なので、サンプルを書いてみます。
<?php
defined('BASEPATH') OR exit('No direct script access allowed');

class HelloWorld extends CI_Controller {

	public function index() {
        $data = [
            'title' => 'Hello World!',
        ];
		$this->smarty->view('HelloWorld.tpl',$data);
	}
}
{$title}
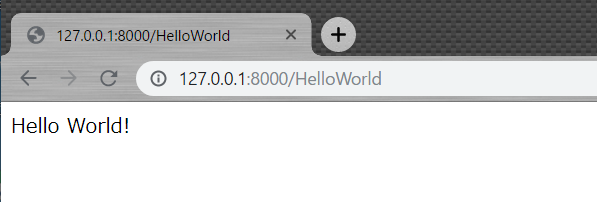
ブラウザで、「 http://127.0.0.1:8000/HelloWorld 」にアクセスをすると、以下のように表示されます。
「HelloWorld.php」の$data['title']を変更して、動的に表示が変更されることを確認してみてください。
以上の構築した環境を、以下のGitHubで公開をしています。スターを付けていただけると、誰かの役に立ったんだとわかって、モチベーションがあがります。よろしくお願い致します。