devcontainer の Java の事前定義済みコンテナ構成では、Microsoft Build of OpenJDK が利用されています。
Amazon Corretto と Localstack を利用したかったので、devcontainer の設定を変えて開発環境をつくってみました。
動作確認としては Amazon SQS を Localstack 上に構成して、送受信を行いました。
前提とする環境
- WSL2 および Docker がインストール済み
動作確認用プロジェクトの作成
Spring Initializrを利用してプロジェクトを作成します。
画面からも作成することができますが、今回は curl から作成しました(パラメータはcurl https://start.spring.ioから確認することができます)。
$ curl -OL https://start.spring.io/starter.tgz \
  -d javaVersion=17 \
  -d bootVersion=2.7.2 \
  -d type=maven-project \
  -d groupId=org.ichiwork \
  -d name=spring-boot-sample \
  -d version=0.0.1-SNAPSHOT \
  -d dependencies=web \
  -d baseDir=spring-boot-sample \
  -d packageName=org.ichiwork.spring.sample
$ tar xvfz starter.tgz
VSCode
VSCode がインストールされていなければインストールしておきます。
> winget install -q vscode --scope machine
また、拡張機能のDev Containersをインストールします。
事前定義済みのコンテナ構成の利用
事前定義済みのコンテナ構成を利用する場合、コマンドパレットからぽちぽち選択していけばよい。
- 動作確認用プロジェクトを VSCode で開く
- コマンドパレットで Dev Containers: Add Dev Container Configuration Files...を選択する

- 選択していくと、プロジェクトフォルダ直下に
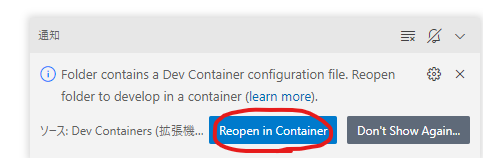
.devcontainerが作成される - コンテナで開き直すかどうかを聞かれるので、開き直す
- しばらくすると、
.devcontainerの設定に基づき Docker Container が作成され、そこで開発が行えるようになる
amazoncorretto:17 を元にしたコンテナの利用
microsoft/vscode-dev-containersを参考に.devcontainerを作成しました。
|--.devcontainer
|  |--devcontainer.json
|  |--docker-compose.yml
|  |--Dockerfile
作成したファイルは以下の通りで、コンテナで開き直せば準備完了です。
devcontainer.json
// For format details, see https://aka.ms/devcontainer.json. For config options, see the README at:
// https://github.com/microsoft/vscode-dev-containers/tree/v0.245.2/containers/java
{
  "name": "Java & LocalStack",
  "dockerComposeFile": "docker-compose.yml",
  "service": "app",
  "workspaceFolder": "/workspace",

  // Configure tool-specific properties.
  "customizations": {
    // Configure properties specific to VS Code.
    "vscode": {
      // Set *default* container specific settings.json values on container create.
      "settings": {},

      // Add the IDs of extensions you want installed when the container is created.
      "extensions": ["vscjava.vscode-java-pack"]
    }
  },

  // Use 'forwardPorts' to make a list of ports inside the container available locally.
  // "forwardPorts": [],

  // Use 'postCreateCommand' to run commands after the container is created.
  // "postCreateCommand": "java -version",

  // Comment out to connect as root instead. More info: https://aka.ms/vscode-remote/containers/non-root.
  "remoteUser": "vscode",
  "features": {}
}
docker-compose.yml
version: "3.8"

services:
  app:
    container_name: javadev
    build:
      context: .
      dockerfile: Dockerfile
      args:
        JAVA_VERSION: 17

    volumes:
      - ..:/workspace:cached

    # Overrides default command so things don't shut down after the process ends.
    command: sleep infinity

    # Runs app on the same network as the aws container, allows "forwardPorts" in devcontainer.json function.
    network_mode: service:aws

    # Uncomment the next line to use a non-root user for all processes.
    # user: vscode

    # Use "forwardPorts" in **devcontainer.json** to forward an app port locally.
    # (Adding the "ports" property to this file will not forward from a Codespace.)

  aws:
    container_name: localstack
    image: localstack/localstack
    ports:
      - "4583:4583"
Dockerfile
non-root で動作させたかったので、Creating a non-root userを参考に vscode ユーザを追加しました。
なお、amazoncorretto の base イメージにはgroupadd、 useraddがないので shadow-utils を追加しています。
リソースの作成は Terraform で行えるようにイメージに追加しています。
ARG JAVA_VERSION="17"
FROM amazoncorretto:${JAVA_VERSION}

ARG USERNAME=vscode
ARG USER_UID=1000
ARG USER_GID=$USER_UID

# Create the user
RUN yum install -y shadow-utils tar
RUN groupadd --gid $USER_GID $USERNAME \
    && useradd --uid $USER_UID --gid $USER_GID -m $USERNAME \
    #
    # [Optional] Add sudo support. Omit if you don't need to install software after connecting.
    && yum update -y \
    && yum install -y sudo \
    && echo $USERNAME ALL=\(root\) NOPASSWD:ALL > /etc/sudoers.d/$USERNAME \
    && chmod 0440 /etc/sudoers.d/$USERNAME

# ********************************************************
# * Anything else you want to do like clean up goes here *
# ********************************************************
# Add IaC Tools
RUN yum install -y yum-utils \
    && yum-config-manager --add-repo https://rpm.releases.hashicorp.com/AmazonLinux/hashicorp.repo \
    && yum -y install terraform

RUN yum install -y python3 \
    && pip3 install awscli --upgrade

# [Optional] Set the default user. Omit if you want to keep the default as root.
USER $USERNAME
動作確認の準備
Amazon SQS のキューを作成する
Terraform でリソースを作成するにあたって、バージョンを確認しておきます。
$ terraform version
Terraform v1.3.3
on linux_amd64
リソース定義ファイルは以下のように用意して、init->applyしてキューを作成します(required_version は Terraform のバージョンとあわせます)。
terraform {
  required_version = "1.3.3"

  required_providers {
    aws = {
      source  = "hashicorp/aws"
      version = "4.36.0"
    }
  }
}

provider "aws" {
  access_key                  = "dummy"
  secret_key                  = "dummy"
  region                      = "ap-northeast-1"
  skip_credentials_validation = true
  skip_metadata_api_check     = true
  skip_requesting_account_id  = true

  endpoints {
    sqs = "http://localstack:4566"
  }
}

resource "aws_sqs_queue" "queue" {
  name                        = "my-queue"
}

output "queue_url" {
  value = aws_sqs_queue.queue.url
}
作成されたら、URL を利用するのでメモしておきます。
aws_sqs_queue.queue: Creation complete after 25s [id=http://localstack:4566/000000000000/my-queue]

Apply complete! Resources: 1 added, 0 changed, 0 destroyed.

Outputs:

queue_url = "http://localstack:4566/000000000000/my-queue"
動作確認用アプリケーションの準備
Amazon SQS メッセージの送信、受信、削除を参考に、AWS SDK for Java からメッセージの送信、受信、削除を実装します。
依存関係
aws/aws-sdk-Java-v2を参考に依存関係をpom.xmlに追加します。
	<dependencyManagement>
		<dependencies>
			<dependency>
			<groupId>software.amazon.awssdk</groupId>
			<artifactId>bom</artifactId>
			<version>2.18.1</version>
			<type>pom</type>
			<scope>import</scope>
			</dependency>
		</dependencies>
	</dependencyManagement>
  ・
  ・
  ・
		<dependency>
			<groupId>software.amazon.awssdk</groupId>
			<artifactId>sqs</artifactId>
		</dependency>
SqsClient の設定
Amazon SQS のキューを作成すると設定にあわせて Bean を定義しておきます。
@Configuration
public class AwsConfig {
    @Bean
    public SqsClient sqsClient() {
        AwsCredentials awsCredentials =
                AwsBasicCredentials.create("dummy", "dummy");

        SqsClient sqsClient =
                SqsClient
                        .builder()
                        .defaultsMode(DefaultsMode.AUTO)
                        .credentialsProvider(StaticCredentialsProvider.create(awsCredentials))
                        .region(Region.AP_NORTHEAST_1)
                        .endpointOverride(URI.create("http://localstack:4566"))
                        .build();

        return sqsClient;
    }
}
送信、受信、削除
適当な RestController を実装します。
@RestController
@RequestMapping("/")
public class SampleController {
    SqsClient sqsClient;

    ObjectMapper objectMapper;

    private static final String QUEUE_URL = "http://localstack:4566/000000000000/my-queue";

    public SampleController(SqsClient sqsClient, ObjectMapper objectMapper) {
        this.sqsClient = sqsClient;
        this.objectMapper = objectMapper;
    }

    @PostMapping(value = "send", consumes = "application/json")
    public void send(@RequestBody Map<String, Object> message) throws JsonProcessingException {
        String messageAsString = objectMapper.writeValueAsString(message);

        SendMessageRequest request =
                SendMessageRequest
                        .builder()
                        .queueUrl(QUEUE_URL)
                        .messageBody(messageAsString)
                        .delaySeconds(5)
                        .build();

        sqsClient.sendMessage(request);
    }

    @GetMapping(value = "receive")
    public void receive() throws JsonProcessingException {
        ReceiveMessageRequest receiveMessageRequest =
        ReceiveMessageRequest.builder()
          .queueUrl(QUEUE_URL)
          .build();
        List<Message> messages= sqsClient.receiveMessage(receiveMessageRequest).messages();
        messages.forEach(m -> {
            System.out.println(m.body());
            DeleteMessageRequest deleteMessageRequest =
            DeleteMessageRequest.builder()
                .queueUrl(QUEUE_URL)
                .receiptHandle(m.receiptHandle())
                .build();
            sqsClient.deleteMessage(deleteMessageRequest);
        });
    }
}
動作確認
- アプリケーションを起動させる
bash ./mvnw spring-boot:run - アプリケーションを起動させて、送信してみます
bash curl -XPOST -H "Content-Type: application/json" localhost:8080/send -d "{\"messsage\": \"Hello Sqs\"}" - 受信してみます
bash curl localhost:8080/receive - 標準出力に受信した結果が出力されます
