注釈とは、テキスト注釈と画像注釈の2種類があり、常にレポートとかに応用され、読者にデータをよりよく理解させるために、役立つ追加情報を注釈を付けるという形式で使用されています。では、注釈を追加する方法といえば? Microsoft Excelには、コメントを挿入する組み込み関数が用意されているため、セルにコメントを簡単に追加できます。非常にちょろい方法ですからここは紹介しません。この記事の主な目的は、C#プログラミングを使用してこの機能を実現する方法を紹介することです。そのために、ここは無料のコンポーネントFree Spire.XLSを使用しよう。これは独立した.NET Excelコンポーネントであり、実行するのにMicrosoft Officeに依存せず、操作するのも簡単です。
下準備
1.無料のSpire.XLSをダウンロードしてインストールします
2. C#コンソールプロジェクトを作成し、Spire.XLS.dllへの参照を追加します
コード一覧
以下の名前空間を使用する:
using System.Drawing;
using Spire.Xls;
ステップ1、Excelドキュメントをロードする
Workbook workbook = new Workbook();
Worksheet sheet = workbook.Worksheets[0];
ステップ2、テキスト注釈を追加する
ExcelFont font1 = workbook.CreateFont();
font1.FontName = "Calibri";
font1.Color = Color.Firebrick;
font1.IsBold = true;
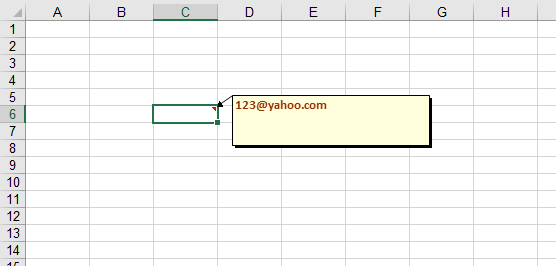
sheet.Range["C6"].Comment.RichText.Text = "evanece@hotmail.com";
sheet.Range["C6"].Comment.Width = 200;
sheet.Range["C6"].Comment.Height = 50;
sheet.Range["C6"].Comment.RichText.SetFont(0, 18, font1);
ステップ3、画像注釈を追加する
Image image = Image.FromFile(@"C:\Users\Administrator\Desktop\Logo.png");
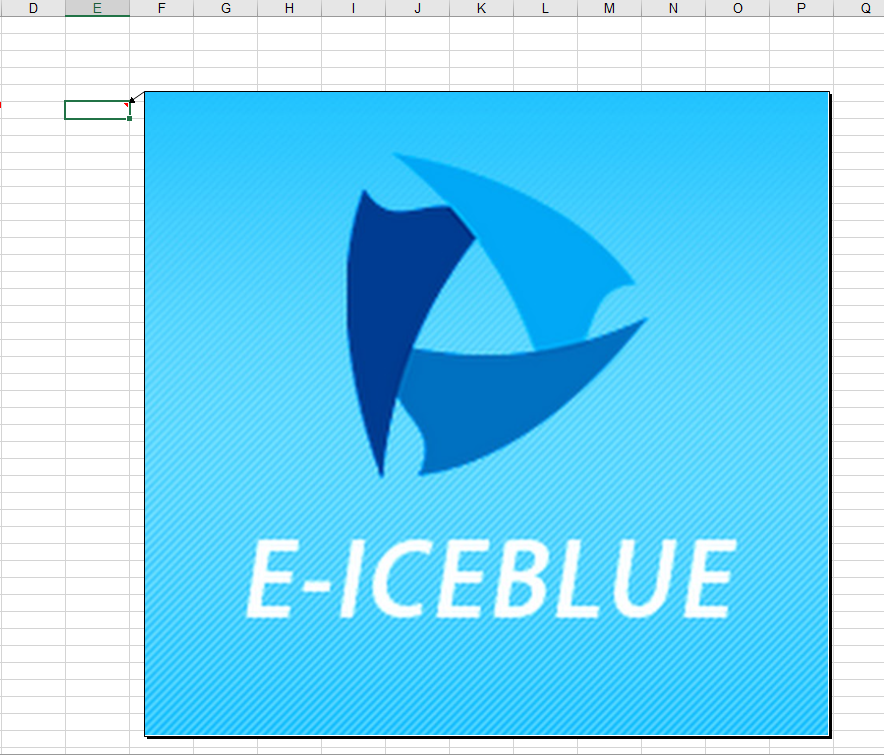
sheet.Range["E6"].Comment.Fill.CustomPicture(image, "Logo.png");
sheet.Range["E6"].Comment.Height = image.Height;
sheet.Range["E6"].Comment.Width = image.Width;
ステップ4、ドキュメントを保存する
workbook.SaveToFile("result.xls", ExcelVersion.Version97to2003);
追加した結果:
テキストコメント:
画像コメント:
完全なるコード
using System.Drawing;
using Spire.Xls;

namespace ExcelComment
{
    class Program
    {
        static void Main(string[] args)
        {
            Workbook workbook = new Workbook();
            Worksheet sheet = workbook.Worksheets[0];

            ExcelFont font1 = workbook.CreateFont();
            font1.FontName = "Calibri";
            font1.Color = Color.Firebrick;
            font1.IsBold = true;
            sheet.Range["C6"].Comment.RichText.Text = "123@yahoo.com";
            sheet.Range["C6"].Comment.Width = 200;
            sheet.Range["C6"].Comment.Height = 50;
            sheet.Range["C6"].Comment.RichText.SetFont(0, 18, font1);

            Image image = Image.FromFile(@"C:\Users\Administrator\Desktop\Logo.png");
            sheet.Range["E6"].Comment.Fill.CustomPicture(image, "Logo.png");
            sheet.Range["E6"].Comment.Height = image.Height;
            sheet.Range["E6"].Comment.Width = image.Width;

            workbook.SaveToFile("result.xls", ExcelVersion.Version97to2003);
        }
    }
}
今回のExcelセルにテキストと画像のコメントを追加する方法は以上でした、最後まで読んでいただきありがとうございました。