Pythonを活用してWord文書内の画像を動的に管理することで、画像の挿入位置の指定、条件付きの置換、不要な要素の削除を正確に実行できます。これは、定期的に標準化されたWord文書を生成する必要がある場合に特に有効です。この自動化手法により、手作業によるフォーマットの崩れやバージョン管理の混乱といったリスクを大幅に低減できるだけでなく、APIを介してデータベースや画像処理システムとシームレスに統合することが可能になります。この記事では、Pythonを使用してWord文書に画像を追加、置換、削除する方法を紹介します。
本記事で紹介する方法では、無料のFree Spire.Doc for Pythonを使用します。PyPIからインストールできます:pip install spire.doc。
PythonでWord文書に画像を挿入する
Spire.DocのParagraph.AppendPicture(string: fileName)メソッドを使用すると、指定したパスの画像をWord文書の特定の段落に挿入できます。また、DocPictureクラスのプロパティを使用して、画像のサイズ、位置、テキストの回り込みスタイルなどを設定できます。
操作手順
- 必要なモジュールをインポートする。
-
Documentオブジェクトを作成し、新しいWord文書を作成する。 -
Document.AddSection()メソッドで文書にセクションを追加し、フォーマットを設定する。 -
Section.AddParagraph()メソッドで段落を追加し、Paragraph.AppendText()メソッドでテキストを追加してフォーマットを設定する。 -
Paragraph.AppendPicture()メソッドで画像を挿入する。 -
DocPictureクラスのプロパティで画像の属性を設定する:-
WidthおよびHeightプロパティで画像サイズを指定。 -
HorizontalPositionおよびVerticalPositionプロパティで画像の位置を指定。 -
TextWrappingStyleプロパティでテキストの回り込みスタイルを指定。
-
-
Document.SaveToFile()メソッドで文書を保存する。 - リソースを解放する。
コード例:
from spire.doc import Document, TextWrappingStyle, FileFormat

# Documentオブジェクトを作成し、新しいWord文書を作成します
doc = Document()

# 文書にセクションを追加し、余白を設定します
section = doc.AddSection()
section.PageSetup.Margins.All = 72

# セクションに段落を追加し、テキストを挿入します
para = section.AddParagraph()
textRange = para.AppendText("Document Introduction")
textRange.CharacterFormat.FontName = "Arial"
textRange.CharacterFormat.FontSize = 16
textRange.CharacterFormat.Bold = True

# 段落を追加し、画像を挿入します
para1 = section.AddParagraph()
pic = para1.AppendPicture("Word.png")

# 画像のサイズを設定します
pic.Width = 64
pic.Height = 64

# 画像の位置を設定します(オプション)
pic.HorizontalPosition = 360
pic.VerticalPosition = 10

# 画像のテキスト折り返しスタイルを設定します
pic.TextWrappingStyle = TextWrappingStyle.Square

# テキストを追加し、フォーマットを設定します
textRange2 = para1.AppendText("This document serves as a structured repository of critical information, designed to facilitate clear communication, collaborative workflows, and long-term knowledge retention. Its architecture prioritizes accessibility, with a navigable hierarchy of headings, cross-referenced sections, and embedded metadata to streamline information retrieval.")
textRange2.CharacterFormat.FontName = "Arial"
textRange2.CharacterFormat.FontSize = 12

# 文書を保存します
doc.SaveToFile("output/AddPicToWord.docx", FileFormat.Docx2019)
doc.Dispose()
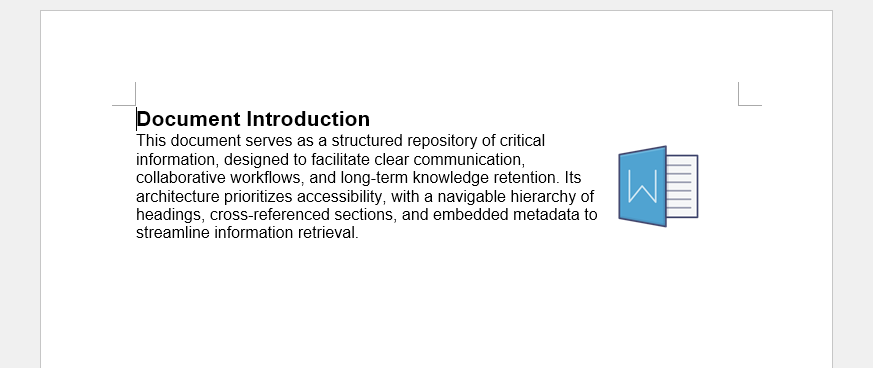
結果文書
PythonでWord文書の画像を新しい画像に置換する
文書内のすべての画像を見つけるには、段落の子オブジェクトのDocumentObjectTypeプロパティがDocumentObjectType.Pictureであるかを判定します。その後、該当する画像オブジェクトをDocPictureにキャストし、DocPicture.LoadImage()メソッドを使用して新しい画像に置換できます。新しい画像は元の画像の位置や回り込みスタイルを維持し、サイズも調整可能です。
操作手順
- 必要なモジュールをインポートする。
-
Documentオブジェクトを作成し、Document.LoadFromFile()メソッドでWord文書を読み込む。 - 文書内のセクション、セクション内の段落、段落内の子オブジェクトを順に走査し、
DocumentObjectType.Pictureであるものをリストに追加する。 -
DocPicture.LoadImage()メソッドで新しい画像に置換する。 -
Document.SaveToFile()メソッドで文書を保存する。 - リソースを解放する。
コード例:
from spire.doc import Document, DocumentObjectType, DocPicture

# Documentオブジェクトを作成します
doc = Document()

# Word文書を読み込みます
doc.LoadFromFile("output/AddPicToWord.docx")

# 画像を保存するリストを作成します
pictures = []

# 文書内のすべてのセクションを走査します
for i in range(doc.Sections.Count):
    sec = doc.Sections.get_Item(i)

    # 各セクション内のすべての段落を走査します
    for j in range(sec.Paragraphs.Count):
        para = sec.Paragraphs.get_Item(j)

        # 各段落内のすべての子オブジェクトを走査します
        for k in range(para.ChildObjects.Count):
            docObj = para.ChildObjects.get_Item(k)

            # 画像を検索し、リストに追加します
            if docObj.DocumentObjectType == DocumentObjectType.Picture:
                pictures.append(docObj)

# リスト内の最初の画像を新しい画像に置き換えます
picture = DocPicture(pictures[0])
width = picture.Width
height = picture.Height
picture.LoadImage("NewWord.png")

# 画像のサイズを変更せずに保持します
picture.Width = width
picture.Height = height

# 変更を保存します
doc.SaveToFile("output/ReplaceWordImage.docx")
doc.Close()
結果文書

PythonでWord文書の画像をテキストに置換する
画像をテキストに置き換えるには、まず画像オブジェクトを特定し、その位置にParagraph.ChildObjects.Insert(Index, TextRange)メソッドを使用してテキストを挿入し、Paragraph.ChildObjects.Remove()メソッドで画像オブジェクトを削除します。
操作手順
- 必要なモジュールをインポートする。
-
Documentオブジェクトを作成し、Document.LoadFromFile()メソッドでWord文書を読み込む。 - 文書内のセクション、セクション内の段落、段落内の子オブジェクトを順に走査し、
DocumentObjectType.Pictureであるものをリストに追加する。 -
TextRangeオブジェクトを作成し、テキストとフォーマットを設定する。 -
Paragraph.ChildObjects.IndexOf()メソッドで画像の位置を取得する。 -
Paragraph.ChildObjects.Insert()メソッドで該当位置にテキストを挿入する。 -
Paragraph.ChildObjects.Remove()メソッドで画像オブジェクトを削除する。 -
Document.SaveToFile()メソッドで文書を保存する。 - リソースを解放する。
コード例:
from spire.doc import Document, DocumentObjectType, TextRange, Color

# Documentオブジェクトを作成します
doc = Document()

# Word文書を読み込みます
doc.LoadFromFile("output/AddPicToWord.docx")

# 文書内のすべてのセクションを走査します
for k in range(doc.Sections.Count):
    sec = doc.Sections.get_Item(k)

    # 各セクション内のすべての段落を走査します
    for m in range(sec.Paragraphs.Count):
        para = sec.Paragraphs.get_Item(m)

        # 画像を保存するリストを作成します
        pictures = []

        # 画像を検索し、リストに追加します
        for x in range(para.ChildObjects.Count):
            docObj = para.ChildObjects.get_Item(x)
            if docObj.DocumentObjectType == DocumentObjectType.Picture:
                pictures.append(docObj)

        # リスト内のすべての画像をテキストに置き換えます
        for pic in pictures:
            # 画像のインデックス位置を取得します
            index = para.ChildObjects.IndexOf(pic)

            # TextRangeオブジェクトを作成します
            textRange = TextRange(doc)
            textRange.Text = "Word Document "
            textRange.CharacterFormat.FontName = "Arial"
            textRange.CharacterFormat.FontSize = 20
            textRange.CharacterFormat.TextColor = Color.get_Red()

            # 段落内にテキストを挿入します
            para.ChildObjects.Insert(index, textRange)

            # 画像を削除します
            para.ChildObjects.Remove(pic)

# 変更を保存します
doc.SaveToFile("output/ReplaceWordImageWithText.docx")
doc.Close()
結果文書

PythonでWord文書の画像を削除する
文書内の画像オブジェクトを特定した後、Paragraph.ChildObjects.Remove()メソッドを使用して直接削除できます。
操作手順
- 必要なモジュールをインポートする。
-
Documentオブジェクトを作成し、Document.LoadFromFile()メソッドでWord文書を読み込む。 - 文書内のセクション、セクション内の段落、段落内の子オブジェクトを順に走査し、
DocumentObjectType.Pictureであるものをリストに追加する。 -
Paragraph.ChildObjects.IndexOf()メソッドで画像の位置を取得する。 -
Paragraph.ChildObjects.Remove()メソッドで画像オブジェクトを削除する。 -
Document.SaveToFile()メソッドで文書を保存する。 - リソースを解放する。
コード例:
from spire.doc import Document, DocumentObjectType

# Documentオブジェクトを作成します
doc = Document()

# Word文書を読み込みます
doc.LoadFromFile("output/AddPicToWord.docx")

# 文書内のすべてのセクションを走査します
for k in range(doc.Sections.Count):
    sec = doc.Sections.get_Item(k)

    # 各セクション内のすべての段落を走査します
    for m in range(sec.Paragraphs.Count):
        para = sec.Paragraphs.get_Item(m)

        # 画像を保存するリストを作成します
        pictures = []

        # 画像を検索し、リストに追加します
        for x in range(para.ChildObjects.Count):
            docObj = para.ChildObjects.get_Item(x)
            if docObj.DocumentObjectType == DocumentObjectType.Picture:
                pictures.append(docObj)

        # リスト内のすべての画像を削除します
        for pic in pictures:
            para.ChildObjects.Remove(pic)

# 変更を保存します
doc.SaveToFile("output/RemoveWordImage.docx")
doc.Close()
結果文書

まとめ
本記事では、Pythonを使用してWord文書に画像を追加、置換、削除する方法について、具体的な手順とコード例を紹介しました。この手法を活用することで、Word文書の画像を効率的に管理し、自動化による生産性向上を実現できます。